Brother DCP-J100, DCP-J105 - Printer Setup Manual
- User manual (91 pages) ,
- Quick start manual (25 pages) ,
- Product safety manual (18 pages)
Advertisement
- 1 Symbols used in this guide
- 2 Unpack the machine
- 3 Connect the power cord
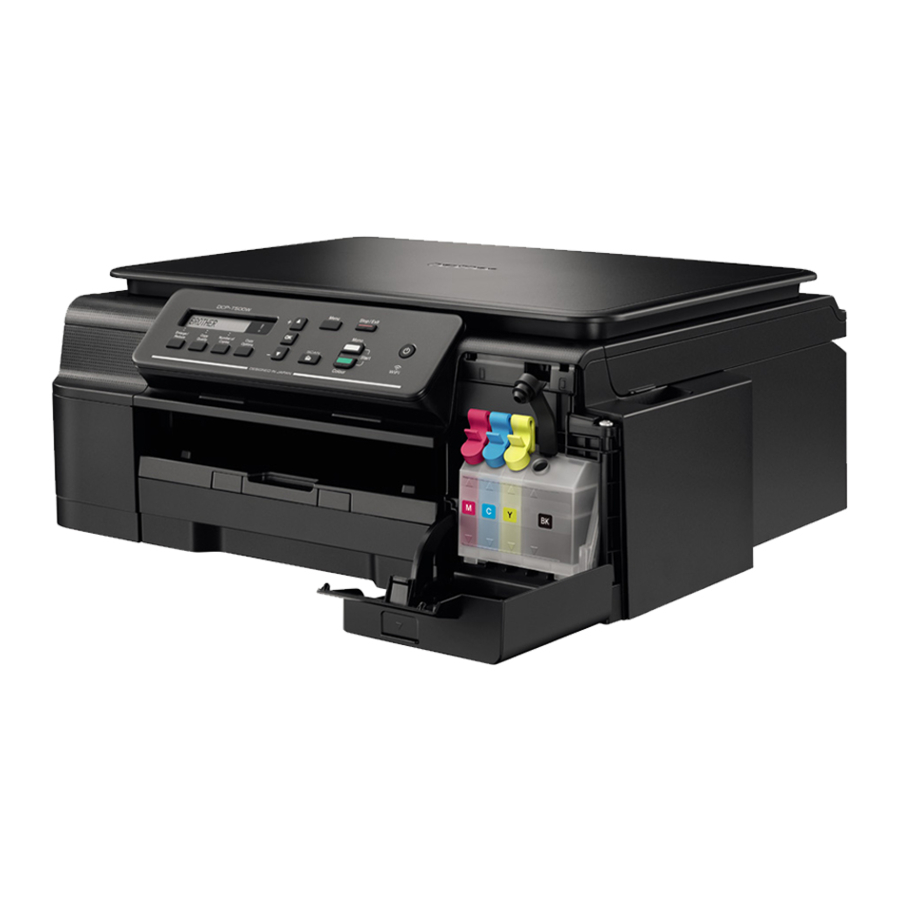
- 4 Install the ink cartridges
- 5 Load plain A4 paper
- 6 Check the print quality
- 7 Set the date and time
- 8 Wireless setup (DCP-J105 only) (if needed)
- 9 Choose your connection type
- 10 USB Windows
- 11 USB Macintosh
- 12 For Wireless Network Users
- 13 Wireless Network Windows
- 14 Wireless Network Macintosh
- 15 Install Optional Applications Windows
- 16 For Network Users
- 17 Other Information
- 18 Documents / Resources
Symbols used in this guide
Please read the Product Safety Guide first before you set up your machine. Then, please read this Quick Setup Guide for the correct setup and installation.
User's Guides for this model are available on the enclosed CD-ROM.
 | WARNING indicates a potentially hazardous situation which, if not avoided, could result in death or serious injuries. |
 | CAUTION indicates a potentially hazardous situation which, if not avoided, may result in minor or moderate injuries. |
| IMPORTANT | IMPORTANT indicates a potentially hazardous situation which, if not avoided, may result in damage to property or loss of product functionality. |
| NOTE | Notes tell you how to respond to a situation that may arise or give tips about how the operation works with other features. |
NOTE
- Most of the illustrations in this Quick Setup Guide show the DCP-J105.
- If your computer does not have a CD-ROM drive, the supplied CD-ROM does not contain drivers for your operating system, or if you want to download manuals and utilities, visit your model's page at http://solutions.brother.com/.
Unpack the machine

- Plastic bags are used in the packing of your machine. To avoid the danger of suffocation, keep these plastic bags away from babies and children. Plastic bags are not toys.
- To ensure safe operation the supplied plug must be inserted only into a standard power outlet that is properly grounded through the standard electrical wiring. Non grounded equipment may cause an electrical shock hazard, and may cause excessive electrical noise radiation.
- Remove the protective tape and film covering the machine, and also from the LCD.
Connect the power cord
The machine must be fitted with an earthed plug.
NOTE
DO NOT connect the USB cable yet (if you are using a USB cable).
- Connect the power cord.
NOTE
- The Warning LED on the control panel will stay on until you have installed the ink cartridges.
- To prolong the life of the print head, provide the best ink cartridge economy and maintain print quality, we do not recommend unplugging the machine frequently and/or leaving the machine unplugged for extended periods of time. Each time you plug the machine in, it automatically cleans the print head, which uses some of your ink. We recommend using
![]() to power down the machine. Using
to power down the machine. Using ![]() allows minimal power to the machine, resulting in periodic, but less frequent, cleaning of the print head.
allows minimal power to the machine, resulting in periodic, but less frequent, cleaning of the print head.
 to power down the machine. Using
 Install the ink cartridges
If ink gets in your eyes, wash it out with water at once and call a doctor if you are concerned.
NOTE
Make sure you install the Starter Ink Cartridges included with your machine first.
- Make sure that the power is turned on.
- Open the ink cartridge cover
![]() .
.
![]()
- Remove the orange protective part.
- Unpack the ink cartridge. Turn the green release lever on the orange protective packing
![]() counterclockwise until it clicks to release the vacuum seal. Then remove the orange protective packing
counterclockwise until it clicks to release the vacuum seal. Then remove the orange protective packing ![]() as shown.
as shown.
IMPORTANT
DO NOT shake the ink cartridges. If ink stains your skin or clothing, wash with soap or detergent at once.
![]()
- Take care to match the sticker color with the cartridge color. Install each ink cartridge in the direction of the arrow on the label.
- Gently push the back of the ink cartridge marked "PUSH" until the cartridge lever lifts. After all the ink cartridges are installed, close the ink cartridge cover.
 .
.

IMPORTANT
After initial installation of the ink cartridges, the machine will start cleaning the ink tube system. This cleaning process will last approximately four minutes. DO NOT unplug the machine from the power outlet or attempt to stop the cleaning process. Interruption of cleaning process may cause undesired print quality problems.
IMPORTANT
- DO NOT take out ink cartridges if you do not need to replace them. If you do so, it may reduce the ink quantity and the machine will not know the quantity of ink left in the cartridge.
- DO NOT repeatedly insert and remove the cartridges. If you do so, ink may seep out of the cartridge.
- Once you open an ink cartridge, install it in the machine and use it up within six months of installation. Use unopened ink cartridges by the expiration date written on the cartridge package.
- DO NOT dismantle or tamper with the ink cartridge, this can cause the ink to leak out of the cartridge.
- Brother multifunction machines are designed to work with ink of a particular specification and will work to a level of optimum performance when used with genuine Brother branded ink cartridges. Brother cannot guarantee this optimum performance if ink or ink cartridges of other specifications are used. Brother does not therefore recommend the use of cartridges other than genuine Brother branded cartridges with this machine or the refilling of empty cartridges with ink from other sources. If damage is caused to the print head or other parts of this machine as a result of using incompatible products with this machine, any repairs required as a result may not be covered by the warranty.
Load plain A4 paper

- Pull the paper tray completely out of the machine.
- Open the output paper tray cover.
- Gently press and slide the paper width guides
![]() and then the paper length guide
and then the paper length guide ![]() to fit the paper size.
to fit the paper size.
Make sure that the triangular marks![]() on the paper width guides
on the paper width guides ![]() and paper length guide
and paper length guide ![]() line up with the mark for the paper size you are using.
line up with the mark for the paper size you are using. - Fan the stack of paper well to avoid paper jams and misfeeds.
NOTE Always make sure that the paper is not curled or wrinkled.
![]()
- Gently put the paper into the paper tray print side down and top edge first. Check that the paper is flat in the tray.
IMPORTANT Be careful that you do not push the paper in too far; it may lift at the back of the tray and cause paper feed problems.

- Gently adjust the paper width guides to the paper with both hands. Make sure that the paper width guides touch the edges of the paper.
- Close the output paper tray cover.
- Slowly push the paper tray completely into the machine.
- While holding the paper tray in place, pull out the paper support until it clicks, and then unfold the paper support flap.
 to fit the paper size.
 on the paper width guides

Check the print quality
- When the preparation process has finished, the LCD shows this message
![]()
Press Colour Start. - Check the quality of the four color blocks on the sheet. (black/yellow/cyan/magenta)
- If all lines are clear and visible, press
![]() (Yes) to finish the quality check and go to the next step.
(Yes) to finish the quality check and go to the next step.
If lines are missing, press![]() (No) and follow the steps on the LCD.
(No) and follow the steps on the LCD.

Set the date and time
Setting the date and time allows the machine to clean the print head regularly and maintain optimum print quality.
- When the LCD shows this message, press OK.
![]()
- Press
![]() or
or ![]() to enter the last two digits of the year, and then press OK.
to enter the last two digits of the year, and then press OK. - Repeat for the Month and Day, and then Hours and Minutes in 24-hour format.

NOTE
You can change the date and time if needed. For more information >> Basic User's Guide: Setting the date and time
Wireless setup (DCP-J105 only) (if needed)
Setup Wi-Fi? message appears on the LCD.
For wireless setup using a mobile device, go to a.
For Windows® and Macintosh users, go to b.
- Press
![]() to choose Yes.
to choose Yes.
Go to step 9 to continue with the wireless setup. - Press
![]() to choose No.
to choose No.
Wireless setup instructions for Windows® and Macintosh users will be covered later.
Choose your connection type
These installation instructions are for Windows® XP Home, XP Professional, XP Professional x64 Edition, Windows Vista®, Windows® 7, Windows® 8, and Mac OS X v10.6.8, 10.7.x, 10.8.x.
NOTE
If your computer does not have a CD-ROM drive, the supplied CD-ROM does not contain drivers for your operating system, or if you want to download manuals and utilities, visit your model's page at http://solutions.brother.com/. Some software applications included on the CD-ROM may not be available as a download.
USB Windows ®
For Windows® USB interface users
(Windows® XP Home/XP Professional/Windows Vista®/Windows® 7/Windows® 8)
Before you install
Make sure that your computer is ON and you are logged on with Administrator rights.
Install MFL-Pro Suite
- Put the CD-ROM into your CD-ROM drive. If the model name screen appears, choose your machine. If the language screen appears, choose your language.
NOTE
If the Brother screen does not appear automatically, go to Computer (My Computer).
(For Windows ® 8: click the![]() (File Explorer) icon on the taskbar, and then go to Computer.)
(File Explorer) icon on the taskbar, and then go to Computer.)
Double-click the CD-ROM icon, and then double-click start.exe. - Click Install MFL-Pro Suite and click Yes if you accept the license agreements.
- (DCP-J105) Choose Local Connection (USB), and then click Next.
(DCP-J100) Choose Standard, and then click Next. - Follow the on-screen instructions until the Plug in the USB cable screen appears.
![]()
 (File Explorer) icon on the taskbar, and then go to Computer.)
Connect the USB cable

IMPORTANT
Make sure that the cable does not restrict the cover from closing, or an error may occur.

Be careful not to pinch your fingers when the scanner cover closes.
- The installation will continue automatically. The installation screens appear one after another.
- If the Environmental Advice for Imaging Equipment screen appears, click Next.
- When the On-Line Registration screen appears, follow the on-screen instructions. Click Next.
- If you do not want to set your machine as the default printer, uncheck Set as Default Printer, and then click Next. i When the Setup is Complete window appears, confirm the settings, and then click Next.
Finish and restart
- Click Finish to restart your computer. After restarting the computer, you must log on with Administrator rights.
NOTE
If an error message appears during the software installation, do one of the following:
- Windows ® XP, Windows Vista ® and Windows ® 7 users: Run the Installation Diagnostics located in
![]() (Start) > All Programs > Brother > DCP-XXXX (where XXXX is your model name).
(Start) > All Programs > Brother > DCP-XXXX (where XXXX is your model name). - Windows ® 8 users: To run the Installation Diagnostics, double-click
![]() (Brother Utilities) on the desktop, and then click the drop-down list and select your model name (if not already selected). Click Tools in the left navigation bar.
(Brother Utilities) on the desktop, and then click the drop-down list and select your model name (if not already selected). Click Tools in the left navigation bar.
 (Start) > All Programs > Brother > DCP-XXXX (where XXXX is your model name).
 (Brother Utilities) on the desktop, and then click the drop-down list and select your model name (if not already selected). Click Tools in the left navigation bar.
- The following screens will appear.
- When the Software Update Setting screen appears, choose the software update setting you want and click OK.
- When the Brother Product Research and Support Program screen appears, select your preference and follow the on-screen instructions.
NOTE
- Internet access is required for the software update and the Brother Product Research and Support Program.
- When you install MFL-Pro Suite, Brother Help will also be installed automatically. Brother Help allows you to access the Brother Solutions Center when you click in the task tray.
The installation is now complete.
To install optional applications:
NOTE
Windows ® 8 users: If the Brother manuals included on the CD-ROM are in PDF format, use Adobe ® Reader ® to open them. If Adobe ® Reader ® is installed on your computer but you cannot open the files in Adobe ® Reader ®, change the file association for PDF (see How to open a PDF file in Adobe ® Reader ® (Windows ® 8).
USB Macintosh
For Macintosh USB interface users (Mac OS X v10.6.8, 10.7.x, 10.8.x)
Before you install
Make sure your machine is connected to the power and your Macintosh is ON. You must be logged on with Administrator rights.
NOTE
For Mac OS X v10.6.0 to 10.6.7 users, upgrade to Mac OS X v10.6.8 - 10.8.x.
Connect the USB cable
NOTE
- DO NOT connect the machine to a USB port on a keyboard or a non-powered USB hub.
- Connect the machine directly to your Macintosh.


IMPORTANT
Make sure that the cable does not restrict the cover from closing, or an error may occur.

Be careful not to pinch your fingers when the scanner cover closes.
Install MFL-Pro Suite
- Put the CD-ROM into your CD-ROM drive.
- Double-click the Start Here OSX icon to install. If the model name screen appears, choose your machine.
- (DCP-J105 only)
Choose Local Connection (USB), and then click Next. Follow the on-screen instructions. - After the installation, the Brother software will search for the Brother device. This will take a few moments to complete.
- Choose your machine from the list, and then click Next.
- When the Add Printer screen appears, click Add Printer.
- Choose your machine from the list. Click Add and then click Next.
When the support screen appears, click Next.
![]()
- When this screen appears, click Close.
![]()


The installation is now complete.
For Wireless Network Users
For wireless network interface users (DCP-J105 only)
Before you begin
NOTE
If you have previously configured the wireless settings of the machine, you must reset the network settings before you can configure the wireless settings again.
On your machine, press Menu.
Press  or
or  to choose 3.Network. Press OK.
Press or to choose 0.Network Reset. Press OK.
Press twice to accept the change.
NOTE
To set up your machine in Ad-hoc mode (connected to a wireless-capable computer without an access point/router), see instructions in the Software and Network User's Guide on the CD-ROM.
To view the Software and Network User's Guide:
- Turn on your computer. Insert the CD-ROM into your CD-ROM drive. For Windows ®:
- Choose your model and the language. The CD-ROM top menu will appear.
- Click User's Guides, and then click PDF/HTML documents.
- Click Software and Network User's Guide.
For Macintosh:
- Double-click User's Guides. Choose your model and the language.
- Click User's Guides, and then click Software and Network User's Guide.
Choose your wireless setup method
The following instructions will offer three methods for setting up your Brother machine on a wireless network. If you began the wireless setup from step 7, go to method b or c. For all other users, choose the method you prefer for your environment. Method a is the recommended way to connect (Windows ® or Macintosh).
- Setup using the CD-ROM (Windows ® and Macintosh)
- We recommend using a computer wirelessly connected to your network for this method.
- A USB cable might be needed in some cases.
- Manual setup from the control panel using the Setup Wizard (Windows ®, Macintosh and mobile devices)
If your wireless access point/router does not support WPS (Wi-Fi Protected Setup™) or AOSS™, write down the wireless network settings of your wireless access point/router in the area below.
If you need assistance during setup and want to contact Brother customer service, make sure you have your SSID (Network Name) and Network Key ready. We cannot assist you in locating this information.Item Record the current wireless network settings SSID (Network Name) Network Key* * The Network Key may also be described as the Password, Security Key or Encryption Key.
NOTE
If you do not know this information (SSID and Network Key), you cannot continue the wireless setup. How can I find this information?
- Check the documentation provided with your wireless access point/router.
- The initial SSID could be the manufacturer's name or the model name.
- If you do not know the security information, please consult the router manufacturer, your system administrator, or your Internet provider.
- One-push setup using WPS or AOSS™ (Windows ®, Macintosh and mobile devices)
Use this method if your wireless access point/router supports automatic wireless (one-push) setup (WPS or AOSS™).
![]()

Setup using the CD-ROM (Windows ® and Macintosh)
For Macintosh Users:
Put the CD-ROM into your CD-ROM drive and double-click Start Here OSX. Select Wireless installation and follow the Wireless Device Setup instructions on your computer screen. When setup is complete, go to step 13-e.
For Windows ® Users:
- Put the CD-ROM into your CD-ROM drive. If the model name screen appears, choose your machine. If the language screen appears, choose your language.
NOTE
If the Brother screen does not appear automatically, go to Computer (My Computer).
(For Windows ® 8: click the![]() (File Explorer) icon on the taskbar, and then go to Computer.)
(File Explorer) icon on the taskbar, and then go to Computer.)
Double-click the CD-ROM icon, and then double-click start.exe. - Click Install MFL-Pro Suite and click Yes if you accept the license agreements.
- Choose Wireless Network Connection, and then click Next.
- When the Firewall/AntiVirus detected screen appears, choose Change the Firewall port settings to enable network connection and continue with the installation. (Recommended), and then click Next.
If you are not using the Windows ® Firewall, see the instructions provided with your firewall software for information on how to add the following network ports.- For network scanning, add UDP port 54925.
- If you still have trouble with your network connection, add UDP ports 137 and 161.
- Follow the on-screen instructions to set up the Brother machine.
- Your machine will now try to connect to your wireless network. It may take a few minutes.
 (File Explorer) icon on the taskbar, and then go to Computer.)
Wireless setup is now complete.
Manual setup from the control panel using the Setup Wizard (Windows ®, Macintosh and mobile devices)
- If you began the wireless setup from step 7, press
![]() or
or ![]() to choose 1. Setup Wizard and press OK. Then go to c. All other users go to b.
to choose 1. Setup Wizard and press OK. Then go to c. All other users go to b. - On your machine, press Menu. Press
![]() or
or ![]() to choose 3.Network. Press OK. Press
to choose 3.Network. Press OK. Press ![]() or
or ![]() to choose 3.Setup Wizard. Press OK.
to choose 3.Setup Wizard. Press OK. - When WLAN Enable? is displayed, press
![]() (Yes) to accept. This will start the wireless setup wizard. To cancel, press Stop/Exit.
(Yes) to accept. This will start the wireless setup wizard. To cancel, press Stop/Exit. - The machine will search for available SSIDs. It will take several seconds to display a list of available SSIDs. If a list of SSIDs is displayed, press
![]() or
or ![]() to choose the SSID you wrote down in step 10-b. Press OK.
to choose the SSID you wrote down in step 10-b. Press OK.
If the machine asks you to enter a Network Key, go to e. Otherwise, go to f.
NOTE
- If the list is blank, check that the wireless access point/router has power and is broadcasting the SSID. Move your machine closer to the wireless access point/router and try starting from b again.
- If your access point is set to not broadcast the SSID, you will have to manually add the SSID name. For more information, see the Software and Network User's Guide.
- Enter the Network Key you wrote down in step 10-b using the
![]() ,
,![]() keys to choose each letter or number.
keys to choose each letter or number.
Use the Enlarge/Reduce or Number of Copies key to move the cursor left or right.
For example, to enter the letter a, press the![]() key once. To enter the number 3, hold down the
key once. To enter the number 3, hold down the ![]() key until it appears.
key until it appears.
![]()

NOTE
The letters appear in this order: lower case, upper case, numbers and then special letters. (For more information, see Entering Text for Wireless Settings)
- Press OK when you have entered all the characters, then press
![]() (Yes) to apply your settings. Your machine will now try to connect to your wireless network. It may take a few minutes. When Press OK Key appears on the LCD, press OK.
(Yes) to apply your settings. Your machine will now try to connect to your wireless network. It may take a few minutes. When Press OK Key appears on the LCD, press OK.
Wireless setup is now complete.
NOTE
For mobile device users:
- Connect your mobile device to a wireless access point/router using a Wi-Fi connection.
- Download and install Brother iPrint&Scan (Android™/iOS/Windows ® Phone) from your mobile device's application download site. You can also use AirPrint (iOS) with this machine.
- To download the User's Guide for the application you are using (Brother iPrint&Scan/AirPrint), visit the Brother Solutions Center at http://solutions.brother.com/ and click Manuals on your model's page.
One-push setup using WPS or AOSS™ (Windows ®, Macintosh and mobile devices)
- Confirm your wireless access point/router has the WPS or AOSS™ symbol as shown below.
![]()
- Place the Brother machine within range of your WPS or AOSS™ access point/router. The range may differ depending on your environment. Refer to the instructions provided with your access point/router.
If you began the configuration from step 7, go to d. All other users go to c. - On your machine, press Menu. Press
![]() or
or ![]() to choose 3.Network. Press OK.
to choose 3.Network. Press OK. - Press
![]() or
or ![]() to choose 4.WPS/AOSS. Press OK. When WLAN Enable? is displayed, press
to choose 4.WPS/AOSS. Press OK. When WLAN Enable? is displayed, press ![]() (Yes) to accept. This will start the wireless setup wizard.
(Yes) to accept. This will start the wireless setup wizard.
NOTE
If your wireless access point/router supports WPS, you can also configure your machine using the PIN (Personal Identification Number) Method.
>> Software and Network User's Guide - Press the WPS or AOSS™ button on your wireless access point/router (for more information, see the instructions provided with your wireless access point/router).
This feature will automatically detect which mode (WPS or AOSS™) your wireless access point/router uses to configure your machine.
When Press OK Key appears on the LCD, press OK.
![]()


Wireless setup is now complete.
NOTE
For mobile device users:
- Connect your mobile device to a wireless access point/router using a Wi-Fi connection.
- Download and install Brother iPrint&Scan (Android™/iOS/Windows ® Phone) from your mobile device's application download site. You can also use AirPrint (iOS) with this machine.
- To download the User's Guide for the application you are using (Brother iPrint&Scan/AirPrint), visit the Brother Solutions Center at http://solutions.brother.com/ and click Manuals on your model's page.
To install MFL-Pro Suite, continue to step 12.
Wireless Network Windows®
Install the drivers and software (Windows ® XP Home/XP Professional/Windows Vista ® /Windows ® 7/Windows ®8
Before you install
Make sure that your computer is ON and you are logged on with Administrator rights.
Install MFL-Pro Suite
- Put the CD-ROM into your CD-ROM drive. If the model name screen appears, choose your machine. If the language screen appears, choose your language.
NOTE
If the Brother screen does not appear automatically, go to Computer (My Computer).
(For Windows ® 8: click the![]() (File Explorer) icon on the taskbar, and then go to Computer.)
(File Explorer) icon on the taskbar, and then go to Computer.)
Double-click the CD-ROM icon, and then double-click start.exe. - Click Install MFL-Pro Suite and click Yes if you accept the license agreements.
- Choose Wireless Network Connection, and then click Next.
- When the Firewall/AntiVirus detected screen appears, choose Change the Firewall port settings to enable network connection and continue with the installation. (Recommended), and then click Next.
If you are not using the Windows ® Firewall, see the instructions provided with your firewall software for information on how to add the following network ports.- For network scanning, add UDP port 54925.
- If you still have trouble with your network connection, add UDP ports 137 and 161.
- Choose your machine from the list, and then click Next.
NOTE
 (File Explorer) icon on the taskbar, and then go to Computer.)
- If your machine is not found over the network, confirm your settings by following the on-screen instructions. If you encounter this failure, go to step 10-b and set up the wireless connection again.
- If you are using WEP and the LCD displays Connected but your machine is not found on the network, make sure you entered the WEP key correctly. The WEP key is case-sensitive.
- The installation of the Brother drivers will automatically start. The installation screens appear one after another.
- If the Environmental Advice for Imaging Equipment screen appears, click Next.
- When the On-Line Registration screen appears, follow the on-screen instructions. Click Next.
- If you do not want to set your machine as the default printer, uncheck Set as Default Printer, and then click Next.
- When the Setup is Complete window appears, confirm the settings, and then click Next.
Finish and restart
- Click Finish to restart your computer. After restarting the computer, you must log on with Administrator rights.
NOTE
If an error message appears during the software installation, do one of the following:
- Windows ® XP, Windows Vista ® and Windows ® 7 users: Run the Installation Diagnostics located in
![]() (Start) > All Programs > Brother > DCP-XXXX LAN (where XXXX is your model name).
(Start) > All Programs > Brother > DCP-XXXX LAN (where XXXX is your model name). - Windows ® 8 users: To run the Installation Diagnostics, double-click
![]() (Brother Utilities) on the desktop, and then click the drop-down list and select your model name (if not already selected). Click Tools in the left navigation bar.
(Brother Utilities) on the desktop, and then click the drop-down list and select your model name (if not already selected). Click Tools in the left navigation bar.
 (Start) > All Programs > Brother > DCP-XXXX LAN (where XXXX is your model name).
 (Brother Utilities) on the desktop, and then click the drop-down list and select your model name (if not already selected). Click Tools in the left navigation bar.
- The following screens will appear.
- When the Software Update Setting screen appears, choose the software update setting you want and click OK.
- When the Brother Product Research and Support Program screen appears, select your preference and follow the on-screen instructions.
NOTE
- Internet access is required for the software update and the Brother Product Research and Support Program.
- When you install MFL-Pro Suite, Brother Help will also be installed automatically. Brother Help allows you to access the Brother Solutions Center when you click
![]() in the task tray.
in the task tray.
 in the task tray.
Finish The installation is now complete.
NOTE
Windows ® 8 users: If the Brother manuals included on the CD-ROM are in PDF format, use Adobe ® Reader ® to open them. If Adobe ® Reader ® is installed on your computer but cannot open the files in Adobe ® Reader ®, change the file association for PDF (see How to open a PDF file in Adobe ® Reader ® (Windows ®8).
Wireless Network Macintosh
Install the drivers and software (Mac OS X v10.6.8, 10.7.x, 10.8.x)
Before you install
Make sure your machine is connected to the power and your Macintosh is ON. You must be logged on with Administrator rights.
Install MFL-Pro Suite
- Put the CD-ROM into your CD-ROM drive.
- Double-click the Start Here OSX icon to install. If the model name screen appears, choose your machine.
- Choose Wireless Network Connection, and then click Next.
- After the installation, the Brother software will search for the Brother device. This will take a few moments to complete.
- Choose your machine from the list, and then click Next.
NOTE
If your wireless settings fail, the Wireless Device Setup Wizard screen appears. Follow the on-screen instructions to complete the wireless configuration. - The installation of the Brother drivers will automatically start. Please wait for the software to install.
- When the Add Printer screen appears, click Add Printer.
- Choose your machine from the list. Click Add and then click Next.
NOTE
(OS X v10.8.x) Select Brother DCP-XXXX CUPS (where XXXX is your model name) driver from the Use pop-up menu.
![]()
- When the support screen appears, click Next. When this screen appears, click Close.
![]()


The installation is now complete.
Install Optional Applications Windows®
Install optional applications
You can install the following applications.
BookScan&Whiteboard Suite supported by Reallusion, Inc
Homepage Print 2* supported by CORPUS
* This application supports Microsoft ® Internet Explorer ® 7.0/8.0 and Firefox ® 3
NOTE
- The machine must be ON and connected to the computer.
- Some applications require Internet access.
- Make sure you are logged on with Administrator rights.
- This application is not available for Windows Server ® 2003/2008/2012 series.
- Open the top menu again by ejecting and then reinserting the CD-ROM or by double-clicking the start.exe program from the root folder. If the language screen appears, choose your language.
- The CD-ROM Top Menu will appear. Click Additional Applications.
- Click the button for the application you want to install.
- When installation is complete, click the button for the next application you want to install.
To exit, click Exit.
NOTE
To start BookScan&Whiteboard Suite, double-click the shortcut icon on your desktop.
To start Homepage Print 2, click  (Start) >All Programs > Homepage Print 2 > Homepage Print 2.
Windows ® 8: Move your mouse to the lower right corner of your desktop. When the menu bar appears, click Start > Homepage Print 2.
For Network Users
Reset the network settings to factory default
To restore all network settings of the internal Print/Scan server to the factory default, please follow the steps below:
- Make sure the machine is idle.
- Press Menu.
- Press
![]() or
or ![]() to choose 3.Network. Press OK.
to choose 3.Network. Press OK. - Press
![]() or
or ![]() to choose 0.Network Reset. Press OK.
to choose 0.Network Reset. Press OK. - Press
![]() to choose Reset.
to choose Reset. - Press
![]() to choose Yes.
to choose Yes. - The machine will restart, and the reset is complete.
Entering Text for Wireless Settings
Press or repeatedly to select a character from the list below: abcdefghijklmnopqrstuvwxyzABCDEFGHIJKLMNOPQRSTUVWXYZ0123456789 (space)!"#$%&'() +,-./:;<=>?@[\]^_'{|}~
Press Enlarge/Reduce or Number of Copies to move the cursor left or right.
NOTE
Making corrections
If you entered an incorrect letter and want to change it, press Enlarge/Reduce or Number of Copies to position the cursor under the incorrect letter. Use and to change to the correct letter, then press Number of Copies repeatedly to move the cursor back to the end of the text. If you press Stop/Exit, all letters above and to the right of the cursor will be deleted.
Other Information
How to open a PDF file in Adobe Reader ® (Windows ®8)
- Move your mouse to the lower right corner of your desktop. When the menu bar appears, click Settings, and then click Control Panel.
- Click Programs, click Default Programs, and then click Associate a file type or protocol with a program.
- Select.pdf, and then click the Change program... button.
- Click Adobe Reader. The icon next to.pdf changes to the 'Adobe Reader' icon. Adobe ® Reader ® is now the default application for reading.pdf files until you change this file association.
Brother CreativeCentre

Get inspired. If you're using Windows ®, double-click the Brother CreativeCentre icon  on your desktop to access our FREE website with many ideas and resources for personal and professional use. Mac users can access Brother CreativeCentre at http://www.brother.com/creativecenter/
Documents / Resources
References
Brother Solutions Center
Free Printable and Customizable Templates | Creative Center
![www.brotherearth.com]() Brother Group SDGs Special Site: Brother SDGs story
Brother Group SDGs Special Site: Brother SDGs story
Download manual
Here you can download full pdf version of manual, it may contain additional safety instructions, warranty information, FCC rules, etc.
Advertisement


Need help?
Do you have a question about the DCP-J100 and is the answer not in the manual?
Questions and answers