Table of Contents
Advertisement
Available languages
Available languages
Quick Links
Advertisement
Table of Contents

Subscribe to Our Youtube Channel
Related Manuals for ROBLIN QUARTZ 609


Summary of Contents for ROBLIN QUARTZ 609
- Page 1 QUARTZ 609 / 610 & 909 / 910 NOTICE D’INSTALLATION ET D’UTILISATION INSTRUCTIONS FOR INSTALLATION AND DIRECTIONS FOR USE MONTAGE- UND GEBRAUCHSANWEISUNG LIBRETTO DI ISTRUZIONI INSTRUCCIONES DE INSTALACION E UTILIZACION MONTAGE- EN GEBRUIKSHANDLEIDING...
- Page 2 QUARTZ 609 / 610...
- Page 3 QUARTZ 909 / 910...
-
Page 4: Table Of Contents
SOMMAIRE CONTENTS RACCORDEMENT ÉLECTRIQUE ELECTRICAL WIRING CONSEILS D’INSTALLATIONS INSTALLATION ADVICE POSE DE L’APPAREIL FITTING THE APPLIANCE FONCTIONNEMENT OPERATION CONSEILS D’UTILISATIONS USEFUL HINTS ENTRETIEN MAINTENANCE GARANTIE ET SERVICE APRÈS-VENTE GUARANTEE AND AFTER-SALES-SERVICES REMARQUES REMARKS INHALT SOMMARIO NETZANSCHLUSS COLLEGAMENTO ELETTRICO MONTAGEHILFEN CONSIGLI PER L' INSTALLAZIONE MONTAGE DES GERÄTES POSA DELL’... -
Page 5: Raccordement Électrique
Nous vous remercions de la confiance que vous nous avez accordée en choisissant un appareil de la gamme ROBLIN. Celui-ci a fait l’objet de toute notre attention dans sa conception et sa réalisation. Afin qu’il vous donne entière satisfaction, nous vous recommandons de lire avec attention cette notice qui vous expliquera comment l’installer, l’utiliser et l’entretenir dans les meilleures conditions. -
Page 6: Pose De L'appareil
Les enfants doivent être surveillés pour s’assurer qu’ils ne jouent pas avec l’appareil. POSE DE L’APPAREIL. Montage et raccordement doivent être réalisés par un installateur* qualifié. (*) Le non-respect de cette condition entraîne la suppression de la garantie du constructeur et tout recours en cas d’accident. -
Page 7: Fonctionnement
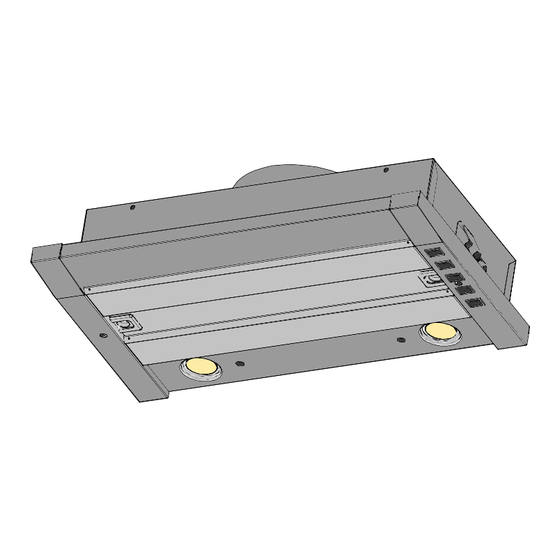
FONCTIONNEMENT tableau de commande Touche vitesse 1 Touche vitesse 2 Touche vitesse 3 Touche vitesse intensive Touche lumière CONSEILS D’UTILISATION. • Pour obtenir une efficacité maximum d’absorption des fumées ou des vapeurs, faire fonctionner l’appareil 5 minutes environ avant et après la cuisson des aliments; La première vitesse est conseillée pour les cuissons à... - Page 8 que par un atelier de réparation reconnu par le fabricant, car des outils spéciaux sont nécessaires. • Débrancher complètement l’appareil. • Exigez toujours l’utilisation de pièces de rechange d’origine. La non observation de cette prescription peut compromettre la sécurité de l’appareil. •...
- Page 9 Thank you for buying a ROBLIN product which has been manufactured to the highest quality standards to meet your requirements. We recommend you carefully read this booklet in which you will find instructions for installation, hints for use and maintenance.
- Page 10 green / yellow : earth blue : neutral brown : live As the colours of the wires in the mains lead of this appliance may not correspond with the coloured markings identifying the terminals in your plug, proceed as follows. The wire which is coloured green and yellow must be connected to the terminal in the plug which is marked with the letter E or by the earth symbol or coloured green or green and yellow.
- Page 11 3.Insert the extractor in the aperture in the kitchen cabinet and turning the screws clockwise secure theassembly to the kitchen cabinet (fig 6). 4.Insert the grommets into the screws holes (fig 7). 5.Connect the ducting onto the round outlet on the top of the Quartz extractor. 6.Connect both appliances together (fig 8) and connect them to the mains supply (See ELECTRICAL WIRING chapter).
- Page 12 To remove and replace the metal grease filters • Remove the metal grease filters one at a time by releasing the catches on the filters; the filters can now be removed. • The metal grease filters should be washed, by hand, in mild soapy water or in a dishwasher. •...
-
Page 13: Montagehilfen
Wir danken Ihnen für Ihre Kaufentscheidung und das Vertrauen, welches Sie mit dem Kauf dieses RO- BLIN-Produktes bewiesen haben. D i e s e s G e r ä t w u r d e m i t e i n e m h o h e n M a ß a n K r e a t i v i t ä t e n t w i c k e l t u n d m i t größter Sorgfalt gefertigt. -
Page 14: Betrieb Des Gerätes
Achtung ! Bitte beachten Sie bei der Montage das Gewicht der kompletten Dunstesse. Die Tragfä- higkeit der Decke oder alternativ der Trägerplatte für diese Zugbelastung muss vor der Montage geprüft und gegebenenfalls durch die Anbringung von geeigneten Befestigungs-oder Stabilisie- rungselementen hergestellt werden. Kann eine hinreichende Tragfähigkeit nicht sichergestellt werden, ist von einer Montage abzusehen. -
Page 15: Nutzung
Taste : Geschwindikeit 2 Taste : Geschwindikeit 3 Taste : Intensiv Geswindikeit Taste : Beleuchtung NUTZUNG • Um ein optimales Absaugen der Kochschwaden zu erzielen, wird empfohlen, das Gerät vor dem Kochen einzuschalten und nach dem Kochen noch einige Zeit nachlaufen zu lassen. Für die Speisen, die wenig Dampf entwickeln, verwenden Sie vorzugsweise die kleine Geschwindigkeit. - Page 16 GARANTIE UND KUNDENDIEST • Bei Versagen des Gerätes benachrichtigen Sie Ihren Installateur, der das Gerät und seine Instal- lation überprüfen wird. • Wenn die Geräte-Zuleitung beschädigt wurde, darf diese nur von einer Reparaturwerkstatt ersetzt werden, die vom Hersteller anerkannt ist, weil Sonderwerkzeuge nötig sind. Haube komplett abschal- ten.
-
Page 17: Collegamento Elettrico
La ringraziamo per la fiducia accordataci nell’aver scelto un prodotto della gamma ROBLIN. Questo apparecchio è stato studiato e realizzato con la massima cura, secondo i più alti criteri di qualità. Le raccomandiamo di leggere attentamente questo opuscolo, nel quale troverà le istruzioni per installare, utilizzare e conservare al meglio il suo apparecchio ed ottenere dal suo acquisto il massimo dei benefici. -
Page 18: Funzionamento
dovuta alla perforazione ed al fissaggio. Gruppo QUARTZ + Motore CONFORT PRO La posa dell’apparecchio QUARTZ puo’ essere effettuata in due modi differenti : •Integrando il motore al gruppo od al mobile •Posizionando il motore a distanza, al fine di ridurre la rumorosità. Gruppo QUARTZ + Motore MISTRAL 800 L’apparecchio QUARTZ viene installato da solo ed il motore MISTRAL viene fissato ad un muro esterno. -
Page 19: Consigli Di Utilizzo
Taste : Velocità Intensiva Taste : Illuminazione CONSIGLI DI UTILIZZO • Per ottenere il massimo dell’efficacia per quanto riguarda l’assorbimento dei fumi o del vapore, mettere in funzione l’apparecchio prima e dopo la cottura degli alimenti ; per le preparazioni che producono poco vapore, utilizzare di preferenza le velocità... - Page 20 In quanto sono considerati come materiali di consumo. NOTE Quest’apparecchio é conforme alla norma europea sulla bassa tensione 2006/95/CE relativaalla sicurezza elettrica e alle norme europee: 2004/108/CE relativa alla compatibilità elettromagnetica e C.E.E. 93/68 relativa alla marcatura CE. Quando ad un prodotto è attaccato il simbolo del bidone con le ruote segnato da una croce, significa che il prodotto è...
- Page 21 Le agradecemos la confiancia que nos participan ustedes elegiendo un aparato de la gama ROBLIN quien fue el objeto de toda nuestra atención en su concepción y realisación. Para que les de entera satisfacción, les aconsejamos ustedes leer con atención esta noticia que les explicara ustedes como instalarle, utilisarle y mantenerle en las mejores condiciones.
- Page 22 sensoriales o mentales estan reducidas, ni por personas que no tienen la experiencia o el conocimiento de este tipo de aparatos a menos de estar bajo el control y la formación de personas responsables de ella securidad. Las niños deben ser cuidados para asegurarse que no juegan con el aparato. INSTALACION DEL APARATO La instalación y conexión debe ser realizada por un instalador autorizado *.
- Page 23 FUNCIONAMIENTO • Tablero de mandos Tecla : Velocidad 1 Tecla : Velocidad 2 Tecla : Velocidad 3 Tecla : Velocidad Intensiva Tecla : Illuminación CONSEJOS DE UTILIZACIÓN • Para obtener una eficacia máxima de aspiración de humos o vapores, ponga en marcha la campana 5 minutos antes y después de la cocción de los alimentos.
- Page 24 Antes de cualquier intervención en la campana, ponga el interruptor de encendido de luces en posición apagado. No superar la potencia indicada y no cambiar el tipo de lámpara. GARANTIA Y ASISTENCIA TECNICA • En caso de anomalías en su funcionamiento, avisar a su instalador el cual deberá verificar el aparato y su instalación.
- Page 25 Wij danken U voor de goede keuze en het vertrouwen dat U ons, ROBLIN specialist op het gebied van afzuigkappen geeft, om in de toekomst met een afzuigkap uit het gamma ROBLIN te werken. Wij raden U aan om alvorens U de ROBLIN afzuigkap in werking zet deze handleiding aandachtig te lezen.
- Page 26 (*) Het niet respecteren van deze voorwaarde houd in dat de garantie en de verantwoordelijkheid van de fabrikant vervalt. Let op! Zorg dat u pluggen gebruikt die geschikt zijn voor het type wand. Vraag advies aan de fabrikant. Indien nodig vastmetselen. Wij zijn niet aansprakelijk in geval van defecte bevestiging veroorzaakt door de in de muur gemaakte boorgaten en de gebruikte pluggen.
-
Page 27: Onderhoud
BEDIENIEG • Bedieningspaneel Toets : stand 1 Toets : stand 2 Toets : stand 3 Toets : hoogste stand Toets : licht GEBRUIKSADVIES • Om een optimale afzuiging van de kookdampen te realiseren is het aan te bevelen om het apparaat voor het koken in te schakelen en enige tijd aan te laten nadat het eten bereid is. - Page 28 lichtschakelaar te worden uitgeschakeld. Gebruik geen sterkere lampen en verander niet van type. AFTER SALES SERVICE • In het geval dat de afzuigkap niet goed functioneert, dient u uw installateur te raadplegen. Deze kan de aansluitingen van het apparaat controleren. •...
- Page 31 QUARTZ 610 A = 514 mm B = 255 mm QUARTZ 910 A = 814 mm B = 255 mm...
- Page 36 Halogen spotlight 2 x 50 W - 230 V Blue Blue Brown Grey White AZUR - AZUR - AZUR BLAU BLACK - NOIR- SCHWARZ BLUE - BLEU - BLAU BROWN - BRUN - BRAUN GREEN YELLOW - VERT JAUNE - GRÜN GELB GREY - GRIS - GRAU LIGHT BLUE - BLEU CLAIR - HELL BLAU PINK - ROSE - ROSA...
- Page 37 Halogen spotlight 3 x 50 W - 230 V Blue Blue Brown Grey White AZUR - AZUR - AZUR BLAU BLACK - NOIR- SCHWARZ BLUE - BLEU - BLAU BROWN - BRUN - BRAUN GREEN YELLOW - VERT JAUNE - GRÜN GELB GREY - GRIS - GRAU LIGHT BLUE - BLEU CLAIR - HELL BLAU PINK - ROSE - ROSA...
- Page 38 The wires in this mains ELECTRICAL CONNECTION lead are coloured in ELECTRICAL REQUIREMENTS accordance with the Any permanent electrical installation must comply following code: with the latest I.E.E. Regulations and local Electricity Green-yellow Earth Board regulations. For your own safety this should be Blue Neutral undertaken by a qualified electrician e.g.
- Page 39 Plaque Signalétique de la hotte Rating plate of the cookerhood Typenschild im Inneren der Dunstesse Etichetta all'interno della cappa Etiqueta de la campana Typeplaatje van de afzuigkap Modèle Model Modell Modello Modelo Model Numéro de série Serial number Seriennummer Numero di serie Numero de serie Serienummer...
- Page 40 50800 VILLEDIEU-LES-POËLES - France Tél. 02 33 91 26 50 - Fax 02 33 51 54 79 - e-mail : com.france@roblin.fr For outside France : Tel. +33 (0)2 33 91 26 57 - Fax. : +33 (0)2 33 51 54 79 e-mail : com.export@roblin.fr...
Need help?
Do you have a question about the QUARTZ 609 and is the answer not in the manual?
Questions and answers