
Related Manuals for Daikin ARXF20F5V1B


Summary of Contents for Daikin ARXF20F5V1B
- Page 1 Installation manual R32 split series ARXF20F5V1B ARXF25F5V1B Installation manual ARXF35F5V1B English R32 split series ARXF42F5V1B...
- Page 2 4P720306-12B...
-
Page 3: Table Of Contents
Checklist before commissioning ..........11 Daikin website (publicly accessible). Checklist during commissioning ..........12 ▪ The full set of the latest technical data is available on the Daikin To perform a test run ..............12 Business Portal (authentication required). Starting up the outdoor unit ............12 10 Troubleshooting 10.1... - Page 4 2 Specific installer safety instructions Installation site (see "4.1 Preparing the installation site" [ 4 6]) DANGER: RISK OF EXPLOSION Do NOT open the stop valves before the vacuum drying is CAUTION finished. ▪ Check if the installation location can support the unit's weight.
-
Page 5: About The Box
3 About the box Commissioning (see "9 Commissioning" [ 4 11]) WARNING ▪ If the power supply has a missing or wrong N-phase, DANGER: RISK OF ELECTROCUTION equipment might break down. ▪ Establish proper earthing. Do NOT earth the unit to a DANGER: RISK OF BURNING/SCALDING utility pipe, surge absorber, or telephone earth. -
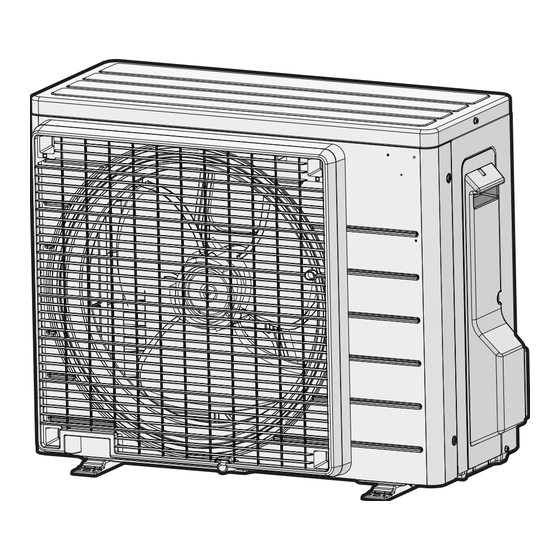
Page 6: To Remove The Accessories From The Outdoor Unit
It is recommended to install the outdoor unit with the air inlet facing the wall and NOT directly exposed to the wind. WARNING Make sure installation, servicing, maintenance and repair comply with instructions from Daikin and with applicable legislation (for example national gas regulation) and are executed ONLY by authorised persons. 3.1.2... -
Page 7: Mounting The Outdoor Unit
4 Unit installation In any case, provide at least 300 mm of free space below the unit. 4.2.3 To provide drainage Additionally, make sure the unit is positioned at least 100 mm above the maximum expected level of snow. See "4.2 Mounting the NOTICE unit" [ 4 7] for more details. -
Page 8: Piping Installation
5 Piping installation ▪ Connecting the refrigerant piping to the outdoor unit Piping installation ▪ Insulating the refrigerant piping ▪ Keeping in mind the guidelines for: Preparing refrigerant piping ▪ Pipe bending ▪ Flaring pipe ends 5.1.1 Refrigerant piping requirements ▪... -
Page 9: To Perform Vacuum Drying
6 Charging refrigerant Charging additional refrigerant NOTICE Before charging additional refrigerant, make sure the outdoor unit's ALWAYS use a recommended bubble test solution from external refrigerant piping is checked (leak test, vacuum drying). your wholesaler. NEVER use soap water: INFORMATION ▪... -
Page 10: To Determine The Additional Refrigerant Amount
7 Electrical installation WARNING To fix the fluorinated greenhouse The appliance shall be stored in a room without gases label continuously operating ignition sources (example: open flames, an operating gas appliance or an operating electric 1 Fill in the label as follows: heater). -
Page 11: Specifications Of Standard Wiring Components
8 Finishing the outdoor unit installation WARNING ▪ Do NOT use locally purchased electrical parts inside the product. ▪ Do NOT branch the power supply for the drain pump, etc. from the terminal block. This could result in 3× electrical shock or fire. WARNING Keep the interconnection wiring away from copper pipes 4 Tighten the terminal screws securely. -
Page 12: Checklist During Commissioning
10 Troubleshooting 3 Power up the unit. Starting up the outdoor unit The indoor unit is properly mounted. See the indoor unit installation manual for configuration and commissioning of the system. The outdoor unit is properly mounted. The system is properly earthed and the earth terminals Troubleshooting are tightened. -
Page 13: Technical Data
▪ A subset of the latest technical data is available on the regional monitor green) Daikin website (publicly accessible). HIGH VOLTAGE High voltage ▪ The full set of the latest technical data is available on the Daikin Intelligent eye sensor Business Portal (authentication required). IPM* Intelligent power module... - Page 14 12 Technical data Symbol Meaning Terminal strip (block) Electronic expansion valve coil Y*R, Y*S Reversing solenoid valve coil Ferrite core ZF, Z*F Noise filter Installation manual ARXF20~42F5V1B R32 split series 3P748643-16H – 2024.07...
-
Page 15: Piping Diagram
12 Technical data 12.2 Piping diagram 12.2.1 Piping diagram: Outdoor unit RXF20F, RXF25F, RXF35F, ARXF20F, ARXF25F, ARXF35F 7.0CuT 9.5CuT 7.0CuT 6.4CuT 6.4CuT 7.0CuT Propeller fan 9.5CuT (6.4CuT) 9.5CuT 9.5CuT 9.5CuT (9.5CuT) RXF42F, ARXF42F 7.0CuT 9.5CuT 7.0CuT 4.8CuT 6.4CuT 6.4CuT 4.8CuT 9.5CuT (6.4CuT) 9.5CuT... - Page 16 DAIKIN ISITMA VE SOĞUTMA SİSTEMLERİ SAN.TİC. A.Ş. Gülsuyu Mahallesi, Fevzi Çakmak Caddesi, Burçak Sokak, No:20, 34848 Maltepe İSTANBUL / TÜRKİYE Tel: 0216 453 27 00 Faks: 0216 671 06 00 Çağrı Merkezi: 444 999 0 Web: www.daikin.com.tr 3P748643-16H 2024.07...
Need help?
Do you have a question about the ARXF20F5V1B and is the answer not in the manual?
Questions and answers