Advertisement
Quick Links
BODY COMPOSITION ANALYZER
Separate Version
<Usage Conditions>
Temperature Range
: 41 to 95°F/5 to 35°C
: 30 to 80%
Relative Humidity Range
(without condensation)
: 6,500ft ASL/2,000m ASL
Maximum Altitude
Atmospheric Pressure Range : 86 to106kPa
Please read this Instruction Manual carefully and keep it handy for future reference.
MC-780U plus
Instruction Manual
<Storage/Transport Conditions>
Temperature Range
Relative Humidity Range
Atmospheric Pressure Range
To avoid malfunctions, avoid storing the equipment in a location that is
subject to direct sunlight, significant temperature changes, dampness, large
amount of dust, the risk of vibration or impact, or near naked flames.
Column Mounted Version
: 14 to 122°F/-10 to 50°C
: 10 to 90% (without condensation)
: 70 to 106kPa
Advertisement

Related Manuals for Tanita MC-780U plus


Summary of Contents for Tanita MC-780U plus
- Page 1 BODY COMPOSITION ANALYZER MC-780U plus Instruction Manual Separate Version Column Mounted Version <Usage Conditions> <Storage/Transport Conditions> Temperature Range : 41 to 95°F/5 to 35°C Temperature Range : 14 to 122°F/-10 to 50°C : 30 to 80% : 10 to 90% (without condensation)
- Page 2 (ASM), using BIA (Bioelectrical Impedance Analysis). MC-780U plus is indicated for use for healthy children 5‒17 years old and healthy adults with active, moderately active, to inactive lifestyles. For subjects 17 years old and younger, only fat % is displayed.
- Page 3 Contents Before Use For Your Safety Part Names Preparation Printer Connection Power Supply Settings How to Use Taking a Measurement Body Composition Mode Measurement Results Scale Mode Weight Lock Mode Output and Storage of Measurement Results Data Storage of Measurement Results Reading Stored Measurement Result Data Outputting Measurement Results via the USB or RS Printing Measurement Results...
- Page 4 For Your Safety This section explains precautionary measures to be taken to avoid injury to the patients and operators of this product, and to prevent damage to property. Please familiarize yourself with this information to ensure safe operation of this product. Contraindication This product must not be used on subjects with pacemakers or other mechanical implants.
- Page 5 Caution Keep away from water. Avoid using on subjects with allergies to metals. Allergic reactions may be caused by the stainless steel used in the electrodes of this product. Do not jump on the product. Do not use this product near other products that emit electromagnetic waves. Do not insert fingers into gaps and holes.
- Page 6 For Your Safety (continued) For Accurate Measurements Avoid measuring after intense exercise. May result in measurement errors. Please take measurements after sufficient rest. Avoid measuring after over-eating or over-drinking, and when severely dehydrated. May result in measurement errors. For greater accuracy, avoid using directly after waking up. Use at the same time on each occasion, at least three hours after eating.
- Page 7 Scheduled Maintenance TANITA recommends that each facility conduct periodic checks of each unit. 1. Check the following at least daily: •The unit is on a stable and level surface i.e. on a firm flooring, not on a thick carpet 2. Visually inspect the following at least weekly: •The display for any damage or contamination...
- Page 8 Part Names Symbols and Their Meanings CE marking Direct current Type BF applied part Alternating current - Grips and platform WEEE - Waste Electrical Input, Output and Electronic Equipment Directives Grip Caution For indoor use only Refer to the attached Control Box notes.
- Page 9 Display and Keys Meanings of the LED Indicators and Keys Display Body Fat (percentage and mass) Turn ON/OFF the power *Not measured value but calculated value Display Body Muscle (percentage and mass) *Not measured value but calculated value Printout result Display Body Water (percentage and mass) *Not measured value but calculated value Display Visceral...
- Page 10 Preparation Setting up the main unit: column mounted version Platform/Control Box/Accessories Control box Platform Column Cable cover Slit cover Screw (2 items) Base slit cover Screw driver Control box cover AC cord AC Adapter Assembly Guide...
- Page 11 Assembly...
- Page 12 Preparation Setting up the main unit: column mounted version...
- Page 14 Preparation Setting up the main unit: column mounted version Advanced Guide for Controller: column mounted version Standard position Wide range position On the desk Reverse position...
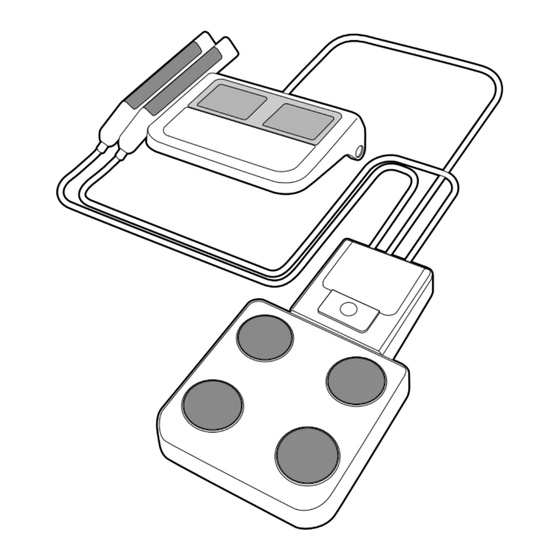
- Page 15 Preparation Setting up the main unit: separate version Platform/Control Box/Accessories Control Box Grip holder Portability Guide Grips Platform AC power cable AC power adapter Cover for grip holder Used when the control box is removed. P.18 Cover Correct Installation...
- Page 16 Preparation Setting up the main unit: separate version How to Carry: separate version Hook the display into the platform. Hang the cables from the hooks located on both sides of the grip holders. Use the fastening bands to secure both grips to the device. Coil the display cable and fasten it with the clip provided.
- Page 17 Place the cables above the grip holders. 1) Place the rings on the bottom of the cover onto the adjustable feet of the platform. 2) Pass the handle of the platform through the handle hole of the cover. Handle hole Handle Hold the device by the handle when carrying.
- Page 18 Preparation Setting up the main unit: separate version Advanced Guide for Controller: separate version The display can be removed Remove the display by unscrewing the two screws located underneath the grip holder. The grip holder cover is used when the display has been removed from the grip holder.
- Page 19 Printer Connection Printer Connection Turn off the power to the unit before connecting the USB cable to the printer. Caution Connect the printer only to the USB A (Printer connection) port. To print measured results, turn on the power to the printer, confirm that the correctly sized paper is set, and check ink levels. Note Connection via WiFi is not available for this unit.
- Page 20 Power Supply Turning the Main Power ON/OFF Turning the main power ON. Press the to turn on the power. The initial screen is displayed. Turning the main power OFF. Press the to turn the power off. Emergency Shut Down Keep the area around the plug socket clear during operation of the equipment in case of an emergency.
- Page 21 Settings Press the to change the mode. The setting screen is displayed. Note The cannot be used when the scale is measuring weight or impedance. Select the setting item from the list below. Enter numerical values and Press the . Save changes and return ...
- Page 22 Select the Measurement Mode Select the measurement mode by pressing the . Body Composition Mode The measurement mode is switched in the following order when the is pressed. "Body Composition" "Scale" "Scale (Weight Lock Mode)" Scale Mode The " " mark is displayed when the scale mode is selected.
- Page 23 Taking a Measurement Body Composition Mode (Two step flow Measure body weight first) Enter the preset tare value (clothes weight) and press Turn the power on, and check that the " " mark is displayed. Enter the preset tare value (clothes weight) The tare value range is 0.0–20.0lb (0.0–10.0kg) Measure body weight Step onto the scale after "...
- Page 24 Body Composition Mode (Two step flow Measure body weight first) Select gender and press Enter age Standard Athletic The age range: 5–99 Male Female 5 - 99 Setting Height 90.0 - 249.9cm Enter Enter height and press Standard Athletic The height range: Male...
- Page 25 Measurement Results (Body Composition Mode) Output measurement results The measurement results are displayed on the LCD after measurement is completed. The results are output to the PC immediately after measurement is completed. Press the to select the measurement display. The measurement display is switched in the following order by pressing the ...
- Page 26 Measurement Results (Body Composition Mode) Body Water Body weight (kg) Body water % Body water (kg) Body water icon Visceral Fat Rating Body weight (kg) Visceral fat rating Visceral fat rating VFR icon Basal Metabolic Rate Body weight (kg) BMR (kJ) BMR (kcal) BMR rating BMR icon...
- Page 27 Scale Mode The " " icon is displayed when the scale mode is selected. Enter the ID number If the ID number function is set to OFF, the scale starts measuring weight immediately. Enter the ID number. The ID number range is from 0 to 9999999999999999. Press ...
- Page 28 Weight Lock Mode " are displayed when the weight lock mode is selected. The " " icon and " Enter the preset tare value (clothes weight) and press . The " " is displayed after the scale mode is selected. Enter the preset tare value (clothes weight) The tare value range is 0.0–20.0lb (0.0–10.0kg).
- Page 29 Output and Storage of Measurement Results Data Storage of Measurement Results The results are saved to the SD card immediately after measurement is completed. The icon is displayed when a valid SD card is installed. A new file is created on the SD card for each day. The file is created using the measurement date and time as the file name, as shown below.
- Page 30 You must install the necessary driver onto your PC, SD Memory card slot RS-232C USB B USB A available download from https://www.tanita.com/en/ (PC Connection) (Printer Connection) Note The RS-232C port and USB B port cannot be used simultaneously. USB cable is not included with this product.
- Page 31 ・People who are professional athletes. Target Body Fat A target body fat % should be set by a professional only. TANITA is not responsible for setting the appropriate target body fat % for specific individuals. Attention Posture when measuring ・Stand with both feet parallel on the electrodes.
- Page 32 Body Water and Extracellular Water Body water can be broadly classified into extracellular water and intracellular water. The percentage of this water accounted for by extracellular water is known as the extracellular water ratio. In medical textbooks, this is defined as: Extracellular Water (ECW): Intracellular Water (ICW) = 1:2 (i.e.
- Page 33 Troubleshooting Please check the following before requesting repair. Problem Solution ・ Hold the handgrips and electrodes firmly with fingers and palms. ・ Stand barefoot on the platform for measurement. Error with impedance ・ measurement If the soles of the feet are dry, use a dropper to apply about 0.5 mL of water before measurement.
- Page 34 Specifications Model Number MC-780U plus Power Source 100 to 240V AC Electric Current Range 18VA Measurement System Multi-Frequency 8 Electrode 5kHz/50kHz/250kHz Measurement Frequency 90µA or less Measurement Current Impedance Feet: Stainless steel/Handgrips: plated Electrode Materials Measurement Whole body/Right arm/Left arm/Right leg/Left leg...
- Page 35 Clothes Weight 0.0 to 20.0lb(0.2lb increments)/0.0 to 10.0kg (0.1kg increments) Serial No. Up to 16 digits Gender Female/Male Input Body Type Standard/Athletic Items 5 to 99 years old Height 3'0.0" to 7'11.5" (0.5inch increments)/90.0 to 249.9cm (0.1cm increment) 4 to 55% (1% increment) Target Body Fat % 16 digits Female/Male...
- Page 36 The FCC requires the user to be notified that any changes or modifications made to this of this. device that are not expressly approved by TANITA Corporation may void the user’s authority to operate the equipment. ・The product design and specifications may be changed at any time without prior notice.
Need help?
Do you have a question about the MC-780U plus and is the answer not in the manual?
Questions and answers