Advertisement
Available languages
Available languages
Quick Links
Date Code Label
EN
Here
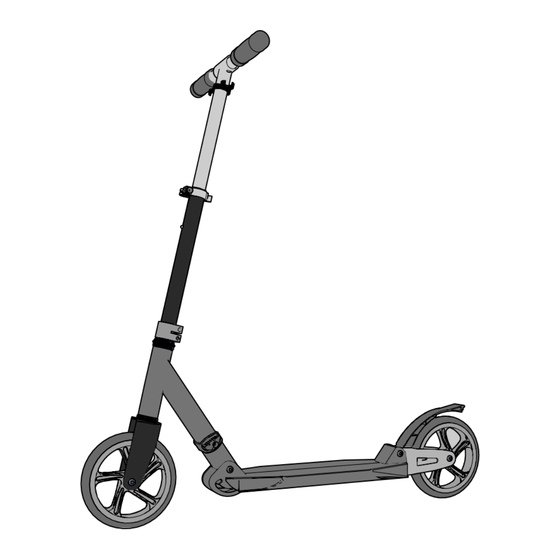
In-Line Scooters
Owner's Manual
(200-250 mm)
This manual contains important safety, assembly, operation
and maintenance information.
Please read and fully understand this manual before
operation.
Save this manual for future reference .
Always wear approved helmet and safety equipment when
using this product .
See back page for Customer Service Information
Advertisement

Related Manuals for Huffy In-Line


Summary of Contents for Huffy In-Line
- Page 1 Date Code Label Here In-Line Scooters Owner’s Manual (200-250 mm) This manual contains important safety, assembly, operation and maintenance information. Please read and fully understand this manual before operation. Save this manual for future reference . Always wear approved helmet and safety equipment when using this product .
- Page 2 SCOOTER MANUAL INFORMATION Start ....pg 2 Begin ..pg 45 Começar ..pg 87 Inisio .
- Page 3 Part Assembly - Not all models - Lock style may vary Description Description Grip Handle (x2) Fork Handlebar Wheel (x2) 10 Head Tube Frame Clamp 11 Fold Lock Holder 12 Deck Frame Steering Tube 13 Fender/Brake Clamp 14 Rear Shock Bearing Set See Torque Chart for Recommended Fastener Torque...
- Page 4 Safety and Warning Information This product, like all wheeled vehicles, will provide safe, enjoyable transportation and recreation when used and maintained properly . Like bicycling, skateboarding, and in-line skating, riding this product can be dangerous even under the best of circumstances . We do not want you to get hurt .
- Page 5 Safety and Warning Information - continued • Do not push or pull a child riding on the product . • Use with caution, since skill is required to avoid falls or collisions causing injury to the user or third parties . •...
- Page 6 Warnings and Safety If you have any questions regarding the operation of this product, please refer to this owners manual or call Customer Service - see Consumer Service contact info. ALWAYS WEAR YOUR HELMET WHEN RIDING THIS PRODUCT! Always read the user manual that comes with your helmet to make sure it is fi tted and attached properly to the wearer’s head according to the fi tting instructions described in the user manual .
- Page 7 Models with unassembled front Wheel and/or Fender: 1 . Position Fender up into Fork as shown (some models) . • Install Four Screws (2 front, 2 back) evenly and securely . 2 . Remove Axle Shoulder Screws if pre- installed in Wheel/Fork . 3 .
- Page 8 PUSH BUTTON Folding System THIS SCOOTER IS SHIPPED PRE-ASSEMBLED. Follow the instructions below to setup the scooter . Open/Loosen Quick Release Lock Press the Release Button and unfold steering head UP until it locks into the verti- cal position CLOSE Quick Release Lever fully and securely - Tightening Nut as needed .
- Page 9 LEVER Folding System To UN-fold Scooter, open Quick Release Lever • Push DOWN on Lock Lever while unfolding Scooter . Release Lock Lever and SNAP Scooter in upright, LOCKED position . CLOSE Quick Release Lever fully and securely - Tightening Nut as needed .
- Page 10 Foot Lock Release (various models) STEPS: Push DOWN on Lock Release Unfold Front Assembly until it SNAPS into upright LOCKED position Test by trying to fold Front Assembly back . It should not move . TO FOLD: Pull the Steer Tube FORWARD while pushing DOWN on the Lock Release With the Lock Release pushed down, push the...
- Page 11 Assembly And Adjustment Instructions Insert the handgrips into the handlebar . Ensure the lock buttons on each handgrip are fully engaged with the Locking Hole Stops in each side of the handlebar . Release Quick Release Lock Slide handlebars up to a comfortable height, making sure the Lock Button locks into one of the Locking Hole Stops Tighten the Quick Release Lock...
- Page 12 Operating and Braking RIDING: The scooter is operated by placing one foot on the deck and pushing with the other foot . BRAKING: On some models the rear fender is hinged for use as a brake . With heel of foot, push down on rear fender to slow and stop scooter .
- Page 13 Maintenance and Service WARNING: • As with all mechanical components, the bicycle is subjected to wear and high stresses . Diff erent materials and components might react to wear or stress fatigue in diff erent ways . If the design life of a component has been exceeded, it may suddenly fail, possibly causing injuries to the rider .
- Page 14 Limited Warranty - EN General: • Modifi ed with the addition of a motor . • Ridden by more than one person at a time . Part or model specifi cations are subject to change • Exceeds weight limit . without notice .
- Page 15 Limited Warranty (Australia) General: • Exceeds weight limit . Part or model specifi cations are subject to change • Rented, sold, or given away . without notice . • Used in a manner contrary to the instructions This Limited Warranty is the only warranty for the and warnings in this Owner’s Manual .
- Page 17 Scooter (Monopatín) Plegable Manual del Usuario (200-250 mm) Este manual contiene información importante de seguridad, ensamblado, funcionamiento y mantenimiento. Lea y comprenda este manual por completo antes de usar el producto. Guarde este manual para referencia futura . Use siempre casco y equipo de seguridad aprobados al usar este producto .
- Page 18 ESPAÑOL • Montaje de piezas . . . . . . . . . . . . . . . . . . . . . . . . . . . . . . . . . . . . . . . . . . . . . . . 19 •...
- Page 19 Ensamblado de partes - No todos los modelos - Estilo de bloqueo varía Descripción Désignation Los Mangos (x2) Horquilla de dirección Manillar Rueda (x2) 10 Tubo de cabeza Abrazadera 11 Bloqueo de plegado Soporte 12 Bastidor de cubierta Tubo de dirección 13 Freno/guardabarros Abrazadera 14 Muelle trasero...
- Page 20 Información sobre seguridad y advertencias Este producto, al igual que todos los vehículos con ruedas, puede proporcionar un medio de transporte y recreativo seguro y placentero si se usa y mantiene correctamente . Al igual que al usar bicicletas, patinetas y patines en línea, conducir este producto puede ser peligroso incluso en las mejores circunstancias .
- Page 21 Información sobre seguridad y advertencias - continuación • Evite calles y superfi cies con agua, arena, grava, suciedad, hojas y otros desechos . Los climas lluviosos afectan negativamente la tracción, el frenado y la visibilidad . • No permita que el niño conduzca cuando está anocheciendo, de noche, ni cuando las condiciones de visibilidad sean limitadas .
- Page 22 Modelos con la rueda delantera y/o la salpicadera sin montar: Español - Modelos con la rueda delantera y/o la salpicadera sin montar: 1 . Coloque la salpicadera en la tijera como se muestra (algunos modelos) . • Instale los cuatro tornillos delanteros, 2 traseros) de manera uniforme y segura .
- Page 23 Sistema De Plegado Con Botones ESTE PATÍN DEL DIABLO SE ENTREGA PRE- VIAMENTE ENSAMBLADO. Para preparar el patín del diablo, siga las instruc- ciones que se indican a continuación . Afl oje el seguro de desconexión rápida de la dirección Presione el botón del seguro y despliegue la cabeza de la dirección hasta que encaje en...
- Page 24 Sistema de plegado de la PALANCA Para DESPLEGAR el patinete, abra la palanca de liberación rápida • Empuje hacia abajo la palanca de blo- queo mientras despliega el patinete . Suelte la palanca de bloqueo y ponga el patinete en posición vertical, BLOQUEADO . CIERRE completamente y de forma segura la palanca de liberación rápida - Aprie-...
- Page 25 Liberación de bloqueo (en algunos modelos) PASOS: Presione hacia abajo para soltar el bloqueo Despliegue conjunto frontal hasta encaje en su posición vertical bloqueada Prueba por intentar plegar conjunto delantero hacia atrás . No debe moverse . PARA DOBLAR EL SCOOTER: Tire del tubo de dirección hacia adelante mientras se empuja hacia abajo el bloqueo de...
- Page 26 Instrucciones De Ensamblado Y Ajuste Inserte los puños en el manubrio . Asegúrese de que los botones de cierre en cada puño estén completamente enganchados con los topes del orifi cio del seguro cada lado del manubrio . Libere el seguro de desconexión rápida Deslice el manubrio a una altura cómoda, asegurándose de que el botón del seguro entre en uno de los topes del orifi cio del seguro Apriete bien el seguro de desconexión rápida...
- Page 27 Funcionamiento Del Patín Del Scooter EQUITACIÓN: Para usar el patín del Scooter, coloque un pie sobre la tabla y empuje con el otro pie . FRENADO: En algunos modelos, la salpicadera trasera tiene bisagras para ser usado como freno . Con el talón del pie, empuje hacia abajo la salpicadera trasera para reducir la velocidad y detener el patín del diablo .
- Page 28 Mantenimiento y servicio técnico ADVERTENCIA: • Como todos los componentes mecánicos, la bicicleta está sometida a desgaste y a grandes esfuerzos . Diferentes materiales y componentes pueden reaccionar al desgaste o a la fatiga por tensión de diferentes maneras . Si se ha sobrepasado la vida útil de un componente, éste puede fallar repentinamente, pudiendo causar lesiones al ciclista .
- Page 29 Garantía limitada - SP General: Esta Garantía limitada quedará anulada si alguna vez el producto: Las especifi caciones de las partes o modelos están sujetas a cambio sin previo aviso . • Se usa en competencias deportivas Esta Garantía limitada es la única garantía para •...
- Page 31 en ligne pliage Trottinette Manuel du propriétaire (200-250 mm) Ce manuel contient d’importantes informations relatives à la sécurité, au montage, au fonctionnement et à l’entretien. Lire et s’assurer d’avoir bien compris ce manuel avant toute utilisation du produit. Conserver ce manuel pour référence ultérieure . Toujours porter un casque homologué...
- Page 32 FRANÇAIS • Montage des pièces . . . . . . . . . . . . . . . . . . . . . . . . . . . . . . . . . . . . . . . . . . . . . 33 •...
- Page 33 Pièces de montage - Pas tous les modèles - Verrouiller style varie Désignation Désignation Poignée de maintien (x2) Chape de direction Guidon Rouler (x2) 10 Tube du châssis Collier de serrage 11 Verrou de pliage Support de tube 12 Bâti de pont Tube de direction 13 L’aile/du frein Collier de direction...
- Page 34 Consignes de sécurité et mises en garde Ce produit, comme tous les véhicules à roues, procure un transport et un divertissement sûr et agréable quand il est utilisé et entretenu correctement . Comme la bicyclette, la planche à roulettes et le patinage en ligne, la conduite de ce produit peut être dangereuse même dans les meilleures circonstances .
- Page 35 Consignes de sécurité et mises en garde - suite • Ne pas laisser un enfant conduire à la tombée de la nuit, la nuit ou quand la visibilité est insuffi sante . • Bien comprendre toutes les procédures de fonctionnement avant l’emploi . •...
- Page 36 Modèles avec roue avant ou garde-boue non assemblés : Français - Modèles avec roue avant ou garde-boue non assemblés : 1 . Positionner le garde-boue dans la fourche comme indiqué sur le schéma (certains modèles) . • Installer fermement quatre vis (2 à...
- Page 37 Système De Pliage À Bouton-Poussoir CETTE PATINETTE EST LIVRÉE PRÉ-ASSEM- BLÉE. Suivre les instructions ci-après pour préparer la patinette à l’emploi . Desserrer le cliquet à ouverture rapide de la direction Appuyer sur le cliquet à ouverture rapide et déplier la tête de la colonne de direction jusqu’à...
- Page 38 SYSTÈME DE PLIAGE À LEVIER Pour déplier la patinette, ouvrir le levier d’ouverture à déclenchement rapide • Pousser le levier de verrouillage VERS LE en dépliant la patinette . Desserrer le levier de verrouillage et ENCLENCHER la patinette en position verticale VERROUILLÉE .
- Page 39 Frein de stationnement (sur certains modèles) ÉTAPES : Pousser VERS LE BAS le frein de stationnement Déplier ensemble avant jusqu’à ce qu’elle s’enclenche en position verrouillée verticale Test en essayant de plier ensemble avant vers l’arrière . Il ne doit pas bouger . POUR PLIER LE SCOOTER: Tirez le tube de direction de l’avant tout en...
- Page 40 Instructions D’assemblage Et De Réglage Insérer les poignées dans le guidon . Vérifi er que les boutons de verrouillage de chaque poignée sont complètement insérés dans les trous de freinage de chaque côté du guidon . Desserrer le cliquet à ouverture rapide Faire glisser le guidon vers le haut, jusqu’à...
- Page 41 Utilisation De La Patinette CIRCONSCRIPTION : La patinette s’utilise en plaçant un pied sur la planche et en poussant avec l’autre pied . FREINAGE : Sur certains modèles, le garde-boue arrière est monté sur charnière pour servir de frein . Avec le talon d’un pied, appuyer sur le garde-boue arrière afi n de ralentir et d’arrêter la patinette .
- Page 42 Entretien et maintenance AVERTISSEMENT : • Comme tous les composants mécaniques, le vélo est soumis à l’usure et à de fortes contraintes . Diff érents matériaux et composants peuvent réagir diff éremment à l’usure ou à la faiblesse due aux contraintes . Si la durée de vie d’un composant a été dépassée, il peut soudainement tomber en panne, pouvant causer des blessures au cycliste .
- Page 43 Garantie limitée - FR Généralités : utilisation inappropriés ou incorrects du produit . Cette garantie limitée ne s’étend pas à la future Les caractéristiques techniques des pièces ou des performance de l’article . modèles peuvent faire l’objet de modifi cations Cette garantie est annulée si l’article est : sans préavis .
- Page 45 In-Line Steppen (200-250 mm) Gebruikershandleiding Deze handleiding bevat belangrijke informatie over veiligheid, montage, bediening en onderhoud. Zorg dat u deze handleiding leest en helemaal begrijpt voordat u het product gebruikt. Bewaar deze handleiding, zodat u deze later kunt raadplegen .
- Page 46 INFORMATIE OVER DE HANDLEIDING VOOR DE STEP Inhoud NEDERLANDS • Onderdelenlijst . . . . . . . . . . . . . . . . . . . . . . . . . . . . . . . . . . . . . . . . . . . . . . . . . . . . . . . . . .47 •...
- Page 47 Onderdelen – Niet alle modellen – Het type vergrendeling kan variëren Nr. Omschrijving Nr. Omschrijving Handgreep stuur (2x) Vork Stuur Wiel (2x) 10 Frame balhoofdbuis Klem Handgreepklemmen 11 Vergrendeling voor in-/uitklappen step Stuurkolom 12 Voetplaat Klem 13 Spatbord/rem Lagerset 14 Schokbreker achter...
- Page 48 Veiligheidsinformatie en waarschuwingen Bij correct gebruik en onderhoud biedt het product, net als andere voertuigen op wielen, een veilige, prettige vorm van vervoer en recreatie . Maar zelfs onder de beste omstandigheden kan het berijden van dit product – of een fiets, skateboard of skeelers – gevaarlijk zijn . We willen uiteraard niet dat de gebruiker zich bezeert .
- Page 49 Veiligheidsinformatie en waarschuwingen – vervolg • Zorg dat u een kind dat op dit product rijdt, niet duwt of trekt . • Dit product moet voorzichtig worden gebruikt, aangezien er vaardigheid nodig is om valpartijen of botsingen te voorkomen die de gebruiker of derden kunnen verwonden . •...
- Page 50 Waarschuwingen en veiligheid Als u vragen hebt over het gebruik van dit product, raadpleeg dan deze gebruikershandleiding of neem contact op met de klantenservice – zie contactgegevens Klantenservice. DRAAG ALTIJD EEN HELM WANNEER JE OP DIT PRODUCT RIJDT! Lees altijd de gebruiksaanwijzing voor de helm om te controleren of deze goed past en goed aan het hoofd van de drager is bevestigd volgens de aanwijzingen voor het aanpassen van de helm .
- Page 51 Modellen met een ongemonteerd voorwiel en/of spatbord: 1 . Plaats het spatbord zoals weergegeven in de vork (sommige modellen) . • Monteer vier schroeven (2 voor, 2 achter) en draai ze gelijkmatig en stevig vast . 2 . Verwijder de passchroeven van de as , als deze al in het wiel en de vork zijn gemonteerd .
- Page 52 In- en uitklapsysteem met DRUKKNOP DEZE STEP WORDT VOORGEMONTEERD GELEVERD. Volg de onderstaande aanwijzingen voor het rijklaar maken van de step . Open de snelspanner Druk op de ontgrendelknop en klap de stuurinrichting OMHOOG tot deze in verticale stand is vergrendeld . Zet de snelspanner stevig en helemaal VAST .
- Page 53 In- en uitklapsysteem met HENDEL Open de snelspanner om de step UIT te klappen . • Duw de vergrendelingshendel NAAR BENEDEN terwijl u de step uitklapt . Laat de vergrendelingshendel los en zorg dat de step rechtop VASTKLIKT . Zet de snelspanner stevig helemaal VAST .
- Page 54 Voetvergrendeling (meerdere modellen) STAPPEN: de vergrendeling OMLAAG . Klap de stuurinrichting uit tot deze rechtop staat en VASTKLIKT Probeer de stuurinrichting in te klappen om te controleren of hij goed vastzit . De stuurinrichting mag niet bewegen . INKLAPPEN: Trek de stuurkolom NAAR VOREN en druk de vergrendeling tegelijkertijd OMLAAG .
- Page 55 Aanwijzingen voor montage en afstelling Plaats de handgrepen in het stuur . Zorg dat de vergrendelingsknoppen elke handgreep helemaal in de blokkeergaatjes in elke kant van het stuur zitten . Maak de snelspanner los . Schuif het stuur omhoog tot op een comfortabele hoogte en zorg dat de vergrende- lingsknop in een van de blokkeergaatjes klikt .
- Page 56 Bedienen en remmen RIJDEN: Zet een voet op de voetplaat en zet met de andere voet af om te steppen . REMMEN: Sommige modellen zijn voorzien van een scharnierend achterspatbord dat als rem functioneert . Trap met de hiel van je voet op het achterspatbord om de step af te remmen en te stoppen .
- Page 57 Onderhoud en service WAARSCHUWING: • De fi ets is, net als andere mechanische onderdelen, onderhevig aan slijtage en grote krachten . Verschillende materialen en onderdelen kunnen op uiteenlopende manieren op slijtage en moeheid door belasting reageren . Een onderdeel kan na het einde van zijn levensduur plotseling falen, wat letsel bij de fi etser kan veroorzaken .
- Page 58 Beperkte garantie - NL Algemeen: artikelen voor onderhoud, en schade, Specificaties van een onderdeel of model defecten of verlies als gevolg van onjuist(e) kunnen zonder kennisgeving worden montage, onderhoud, afstelling, opslag of gewijzigd . gebruik van het product . Deze beperkte Deze beperkte garantie is de enige garantie geldt niet voor toekomstige garantie voor het product .
- Page 59 Inline-Scooter (200–250 mm) Bedienungsanleitung Diese Anleitung enthält wichtige Informationen für Zusammenbau, Betrieb und Wartung dieses Produkts und zur Sicherheit. Diese Anleitung ist vor Inbetriebnahme dieses Produkts sorgfältig und vollständig durchzulesen. Bewahren Sie diese Anleitung zum späteren Nachschlagen auf . Beim Gebrauch dieses Produkts sind stets ein zugelassener Helm und die entsprechende Sicherheitsausrüstung zu tragen .
- Page 60 HINWEISE ZU DIESER BEDIENUNGSANLEITUNG Index DEUTSCH • Zusammenbau der Teile . . . . . . . . . . . . . . . . . . . . . . . . . . . . . . . . . . . . . . . . . . . . . . . . . .61 •...
- Page 61 Zusammenbau der Teile - Nicht alle Modelle - Die Schlossausführungen sind ggf . von Modell zu Modell verschieden . Nr. Beschreibung Nr. Beschreibung Lenkstangengriff (x2) Gabel Lenkstange Rad (x2) 10 Steuerrohrrahmen Klemmschelle 11 Klappschloss Halterung 12 Trittbrett Lenkrohr 13 Schutzblech/Bremse Klemmschelle 14 Hinterer Stoßdämpfer Lagersatz...
- Page 62 Sicherheits- und Warnhinweise Dieses Produkt bietet wie alle Radfahrzeuge eine sichere Transportmethode und macht darüber hinaus eine Menge Spaß, wenn es ordnungsgemäß verwendet und gewartet wird . Wie beim Fahrradfahren, Skateboarding und Inline-Skating kann das Fahren auf diesem Produkt selbst unter den günstigsten Umständen gefährlich sein .
- Page 63 Sicherheits- und Warnhinweise – Forts. • Ein Kind, das auf dem Produkt fährt, nicht schieben oder ziehen . • Bei der Benutzung des Produkts muss vorsichtig vorgegangen werden, da Geschick erforderlich ist, um Stürze oder Zusammenstöße zu vermeiden, bei denen sich der Bediener oder Dritte verletzen könnten .
- Page 64 Warn- und Sicherheitshinweise Falls Sie in Bezug auf die Bedienung dieses Produkts Fragen haben, lesen Sie diese Bedienungsanleitung oder kontaktieren Sie den Kundendienst – siehe die entsprechenden Kontaktdaten. BEIM FAHREN DIESES PRODUKTS IMMER EINEN HELM TRAGEN! Lesen Sie immer die Bedienungsanleitung, die im Lieferumfang Ihres Helms enthalten ist, um sicherzustellen, dass er richtig passt und gemäß...
- Page 65 Modell mit nicht zusammengebautem Vorderrad und/oder Schutzblech: 1 . Schieben Sie das Schutzblech gezeigt in der Gabel nach oben (bestimmte Modelle) . • Drehen Sie die vier Schrauben (2 vorne, 2 hinten) fest und gleichmäßig ein . 2 . Entfernen Sie die Achsansatzschrauben , falls diese werkseitig bereits in Rad/ Gabel eingesetzt wurden .
- Page 66 DRUCKTASTEN-Klappsystem DIESER SCOOTER WIRD IM WERK ZUSAMMENGEBAUT UND VERSANDT. Beachten Sie die folgende Anleitung zum Einrichten des Scooters . Öffnen/lockern Sie das Schnellspannschloss Drücken Sie die Freigabetaste klappen Sie den Lenkkopf HOCH, um ihn in seiner senkrechten Position zu arretieren SCHLIESSEN Sie den Schnellspannhebel fest und vollständig und ziehen Sie die Mutter nach Bedarf an .
- Page 67 HEBEL-Klappsystem Öffnen Sie zum Ausklappen des Scooters den Schnellspannhebel • Drücken Sie den Verriegelungshebel nach UNTEN und klappen Sie gleichzeitig den Scooter aus . Geben Sie den Verriegelungshebel frei und lassen Sie den Scooter in seiner auf rechten, ARRETIERTEN Position EINRASTEN . SCHLIESSEN Sie den Schnellspannhebel fest und vollständig und ziehen Sie die Mutter...
- Page 68 Lösen der Verriegelung durch Fußbetätigung (verschiedene Modelle) SCHRITTE: Drücken Sie den Verriegelungs- Freigabemechanismus nach UNTEN Klappen Sie die Vorderradbaugruppe aus, bis diese in ihrer aufrechten VERRIEGELTEN Position EINRASTET Testen Sie die Verriegelung, indem Sie versuchen, die Vorderradbaugruppe wieder einzuklappen . Sie sollte sich nicht bewegen lassen .
- Page 69 Anleitung für Zusammenbau und Einstellung Setzen Sie die Handgriffe in den Lenker ein . Stellen Sie sicher, dass die Verriegelungsstifte an jedem Handgriff ganz in den Verriegelungslöchern jeder Seite des Lenkers einrasten . Geben Sie das Schnellspannschloss frei . Schieben Sie den Lenker bis zu einer für den Fahrer bequemen Höhe nach oben . Achten Sie darauf, dass der Verriegelungsstift ganz in einem der Verriegelungslöcher einrastet .
- Page 70 Bedienung und Bremsen FAHREN: Man fährt mit dem Scooter, indem man einen Fuß auf das Trittbrett stellt und sich mit dem anderen Fuß abstößt . BREMSEN: Bei manchen Modellen ist das hintere Schutzblech mit einem Scharnier ausgestattet, sodass es als Bremse verwendet werden kann .
- Page 71 Onderhoud en service WAARSCHUWING: • De fi ets is, net als andere mechanische onderdelen, onderhevig aan slijtage en grote krachten . Verschillende materialen en onderdelen kunnen op uiteenlopende manieren op slijtage en moeheid door belasting reageren . Een onderdeel kan na het einde van zijn levensduur plotseling falen, wat letsel bij de fi etser kan veroorzaken .
- Page 72 Eingeschränkte Garantie - DE Allgemeines: Was wird durch diese eingeschränkte Garantie nicht abgedeckt? Die technischen Daten einzelner Teile oder Dieses Produkt wurde nur für den Freizeit- des ganzen Modells können unangekündigt gebrauch entwickelt . Diese eingeschränkte geändert werden . Garantie deckt keine normale Abnutzung, Diese eingeschränkte Garantie ist die normalen Wartungsteile oder Schäden, einzige Garantie für dieses Produkt .
- Page 73 Monopattini (200 - 250 mm) Manuale del proprietario Il presente manuale contiene informazioni importanti riguardanti la sicurezza, il montaggio, l’uso e la manutenzione. Leggerlo attentamente prima dell’uso. Conservarlo nel caso occorra consultarlo . Indossare sempre un casco e un equipaggiamento di sicurezza quando si usa questo prodotto .
- Page 74 INFORMAZIONI SUL MANUALE DEL MONOPATTINO Indice ITALIANO • Elenco dei componenti . . . . . . . . . . . . . . . . . . . . . . . . . . . . . . . . . . . . . . . . . . . . . . . . . . .75 •...
- Page 75 Elenco dei componenti - Non in tutti i modelli - Il sistema di chiusura può variare da un modello all’altro N. Denominazione N. Denominazione Manopole (2) Forcella Piega e attacco manubrio Ruote (2) Morsetto 10 Telaio del tubo di sterzo Supporto 11 Sistema di chiusura del monopattino 12 Pedana...
- Page 76 Avvertenze e informazioni sulla sicurezza Questo monopattino, come tutti i mezzi con ruote, consente attività di trasporto e ricreative in comodità e sicurezza se viene impiegato correttamente e sottoposto all’appropriata manutenzione . Analogamente a usare i pattini in linea, andare in bicicletta e praticare lo skateboard, l’uso di questo monopattino può...
- Page 77 Avvertenze e informazioni sulla sicurezza (segue) • Non spingere o tirare il monopattino se c’è un bambino sulla pedana . • Usare il monopattino con cautela perché sono necessarie determinate capacità per evitare cadute o scontri che causerebbero lesioni all’utilizzatore o ad altre persone . •...
- Page 78 Avvertenze e sicurezza Per eventuali domande sull’uso di questo prodotto, consultare il presente manuale o chiamare il servizio clienti usando i numeri forniti. INDOSSARE SEMPRE UN CASCO QUANDO SI USA QUESTO MONOPATTINO. Leggere sempre il manuale d’uso accluso al casco per accertarsi che il casco si adatti bene alla testa di chi lo indosserà, seguendo le indicazioni fornite .
- Page 79 Modelli con ruota anteriore e/o parafango non montati 1 . Posizionare il parafango nella forcella come illustrato (alcuni modelli) . • Inserire quattro viti (due sulla parte anteriore e due su quella posteriore) serrandole bene e in modo uniforme . 2 .
- Page 80 Sistema di apertura/chiusura A PULSANTE QUESTO MONOPATTINO VIENE SPEDITO GIÀ MONTATO. Attenersi alle istruzioni seguenti per predisporre il monopattino . Aprire/allentare la leva a sgancio rapido Premere il pulsante di sbloccaggio aprire il tubo di sterzo IN SU finché non si blocca nella posizione verticale CHIUDERE bene la leva a sgancio rapido serrando il dado...
- Page 81 Sistema di apertura/chiusura A LEVA Per aprire il monopattino, aprire la leva a sgancio rapido • Spingere IN GIÙ sulla leva di bloccaggio mentre si apre il monopattino . Rilasciare la leva di bloccaggio e sollevare in alto la parte verticale del monopattino finché...
- Page 82 Apertura/chiusura del monopattino con il piede (vari modelli) PASSAGGI Spingere IN GIÙ sul dispositivo di sbloccaggio Aprire la parte anteriore finché non SI BLOCCA CON UNO SCATTO nella posizione verticale Verificare che sia bloccata cercando di ripiegarla; non deve muoversi . CHIUSURA Tirare IN AVANTI il tubo di sterzo mentre...
- Page 83 Istruzioni per il montaggio e le regolazioni Inserire le manopole nella piega manubrio . Accertarsi che i pulsanti di bloccaggio su ciascuna manopola siano completamente inseriti negli appositi fori presenti su entrambi i lati della piega manubrio . Aprire la leva a sgancio rapido Fare scorrere in su l’attacco manubrio sino a un’altezza comoda, accertandosi che il pulsante di bloccaggio si inserisca in uno degli appositi fori...
- Page 84 Uso del monopattino e frenatura USO DEL MONOPATTINO – Per conferire movimento al monopattino, si spinge con uno dei piedi a terra mentre l’altro poggia sulla pedana . FRENATURA – In alcuni modelli il parafango posteriore è incernierato per funzionare da freno . Per rallentare e arrestare il monopattino, esercitare con il tallone pressione sul parafango posteriore .
- Page 85 Manutenzione e riparazioni AVVERTENZA • Ispezionare spesso il prodotto . La mancata ispezione del prodotto ed esecuzione di riparazioni o regolazioni, come necessario, può causare lesioni all’utilizzatore e ad altre persone . Accertarsi che tutti i componenti siano montati correttamente e regolati come descritto nel presente manuale e in eventuali “Istruzioni speciali”...
- Page 86 Garanzia limitata - IT Informazioni generali da modalità improprie di montaggio, Le specifiche del modello o dei componenti manutenzione, regolazione, conservazione sono soggette a modifiche senza preavviso . o uso del prodotto . La presente garanzia La presente garanzia limitata è l’unica limitata non si estende a prestazioni future .
- Page 87 Trotinetes em linha (200-250 mm) Manual do Utilizador Este manual contém informações importantes sobre segurança, montagem, operação e manutenção. Por favor, leia e compreenda totalmente este manual antes de utilizar o veículo. Guarde este manual para consultas futuras . Use sempre capacete e equipamentos de segurança aprovados quando utilizar este produto .
- Page 88 MANUAL DE INFORMAÇÃO PARA A TROTINETE Índice PORTUGUÊS • Conjunto de peças . . . . . . . . . . . . . . . . . . . . . . . . . . . . . . . . . . . . . . . . . . . . . . . . . . . . . . .89 •...
- Page 89 Conjunto de peças - Não em todos os modelos - Os estilo do bloqueio pode variar Descrição Descrição Punho do guiador (x2) Forquilha Guiador Roda (x2) Abraçadeira 10 Tubo da cabeça Suporte 11 Trinco da articulação 12 Suporte da plataforma Tubo da direção 13 Guarda-lamas/Travão Abraçadeira...
- Page 90 . Como a bicicleta, skate e patins in-line, pode ser perigoso andar neste produto mesmo nas melhores circunstâncias . Não queremos que se machuque . Siga estas normas de segurança . Após a montagem, descarte de acordo com as práticas e requisitos locais .
- Page 91 Informações de segurança e aviso - continuação • Não empurre ou puxe uma criança que esteja montada no produto . • Use com cautela, pois é necessária alguma habilidade para evitar quedas ou colisões que podem causar lesões ao utilizador ou a terceiros . •...
- Page 92 Avisos e segurança Se tiver alguma dúvida sobre o funcionamento deste produto, por favor consulte este manual do utilizador ou contacte o serviço de atendimento ao cliente - ver Informação de contacto do atendimento ao cliente. USE SEMPRE O SEU CAPACETE QUANDO ANDAR NESTA BICICLETA! Leia sempre o manual do utilizador que vem com o seu capacete para se certificar de que...
- Page 93 Modelos com roda e/ou guarda-lamas dianteiros não montados: 1 . Posicione o guarda-lamas na forquilha como mostrado (alguns modelos) . • Instale quatro parafusos (2 dianteiros, 2 traseiros) e aperte de forma uniforme e segura . 2 . Remova os parafusos com cabeça cilíndrica do eixo se estiverem pré-instalados na roda/forquilha .
- Page 94 Sistema de dobragem COM BOTÃO ESTA TROTINETE É ENVIADA PRÉ-MONTADA. Siga as instruções abaixo para ajustar a trotinete . Abra/desaperte o trinco de bloqueio rápido Pressione o botão de libertação desdobre a cabeça da direção para CIMA até que encaixe na posição vertical FECHE totalmente e aperte a alavanca de libertação rápida - aperte a porca...
- Page 95 Sistema de dobragem COM ALAVANCA Para DESdobrar a trotinete, abra a alavanca de libertação rápida • Empurre para BAIXO alavanca de bloqueio enquanto desdobra a trotinete . Liberte a alavanca de bloqueio e encaixe a trotinete na posição vertical e BLOQUEADA . FECHE totalmente e aperte a alavanca de libertação rápida - aperte a porca...
- Page 96 Botão de libertação (vários modelos) PASSOS: Empurre para BAIXO o botão de libertação Desdobre o conjunto frontal até que ENCAIXE na posição vertical BLOQUEADO Faça um teste tentando dobrar o conjunto dianteiro para trás . Não se deve mover . PARA DOBRAR: Puxe o tubo da direção PARA A FRENTE...
- Page 97 Instruções para montagem e ajuste Insira os punhos no guiador . Certifique-se de que os botões de bloqueio em cada punho estão totalmente encaixados nos orifícios de bloqueio de cada lado do guiador . Liberte o trinco de libertação rápida Deslise o guiador para uma altura confortável, certificando-se de que o botão de bloqueio fica bloqueado num dos orifícios de bloqueio Aperte bem o trinco de libertação rápida...
- Page 98 Operação e travagem CONDUÇÃO: A trotinete é operada colocando um pé na plataforma e empurrando com o outro pé . TRAVÕES: Em alguns modelos, o guarda-lama traseiro é articulado para ser utilizado como travão . Com o calcanhar, empurre para baixo o guarda-lamas traseiro para abrandar e parar a trotinete .
- Page 99 Manutenção e serviço ADVERTÊNCIA: • Inspecione o produto frequentemente . Não fazer a inspeção do produto e não fazer reparações ou ajustes, conforme necessário, pode resultar em lesões para o ciclista ou para outras pessoas . Certifique-se de que todas as peças estão corretamente montadas e ajustadas, tal como escrito neste manual e em quaisquer "Instruções Especiais"...
- Page 100 Garantia limitada - PT Generalidades: armazenamento ou utilização inadequada As especificações das peças ou do modelo para a trotinete . Esta Garantia Limitada não estão sujeitas a alterações sem aviso prévio . se estende ao desempenho futuro . Esta Garantia Limitada será nula se o Esta Garantia Limitada é...
- Page 102 For ASSEMBLY Help: Please REGISTER your Product: Para la ayuda en el MONTAJE REGISTRE su producto Pour toute aide relative au MONTAGE ENREGISTRER le produit Voor hulp bij de MONTAGE REGISTREER uw product Zur Hilfe beim ZUSAMMENBAU Bitte REGISTRIEREN Sie Ihr Produkt Per assistenza durante il MONTAGGIO Si prega di REGISTRARE il prodotto Para OBTER AJUDA para a montagem...
Need help?
Do you have a question about the In-Line and is the answer not in the manual?
Questions and answers