Advertisement
Available languages
Available languages
Quick Links
FOR SERVICING(Only in U.S.A)
TO OUR VALUED CUSTOMER
THANK YOU FOR PURCHASING THIS JVC PRODUCT.
WE WANT TO HELP YOU ACHINEVE A PERFECT EXPERINCE.
NEED HELP ON HOW TO HOOK UP?
NEED ASSISTANCE ON HOW TO OPERATE?
NEED TO LOCATE A JVC SERVICE CENTER?
LIKE TO PURCHACE ACCESSORIES?
IS HERE TO HELP!
TOLL FREE: 1(800)252-5722
http://www.jvc.com
Remember to retain your Bill of Sale for Warranty Service.
DO not attempt to service the product yourself
Caution
To prevent electrical shock,do not open the cabinet.
There are no user serviceable parts inside.
Please refer to qualified service personnel for repairs.
© 2009 Victor Company of Japan, Limited
D-ILA PROJECTOR
PROJECTEUR D-ILA
PROYECTOR D-ILA
DLA-HD950/DLA-HD990
For Customer use :
Enter below the serial No. which is
located on the side of the cabinet.
Retain this information for future
reference.
Model No.
Serial No.
0809TTH-AO-AO
ENGLISH
FRANÇAIS
MANUEL D'INSTRUCTIONS
MANUAL DE INSTRUCCIONES
Pour utilisation par le client :
Entrer ci-dessous le N° de série qui
est situé sous le boîtier. Garder
cette information comme référence
pour le futur.
DLA-HD950
N° de modèle DLA-HD950
DLA-HD990
DLA-HD990
N° de série
ESPAÑOL/CASTELLANO
INSTRUCTIONS
Instrucción para el cliente :
Introduzca a continuación el nº de
serie que aparece en la parte
inferior lateral de la caja. Conserve
esta información como referencia
para uso ulterior.
DLA-HD950
Modelo Nº
DLA-HD990
Nº de serie
PC007182399-1
Advertisement

Related Manuals for JVC DLA-HD950BE


Summary of Contents for JVC DLA-HD950BE
- Page 1 PROJECTEUR D-ILA PROYECTOR D-ILA DLA-HD950/DLA-HD990 TO OUR VALUED CUSTOMER THANK YOU FOR PURCHASING THIS JVC PRODUCT. WE WANT TO HELP YOU ACHINEVE A PERFECT EXPERINCE. NEED HELP ON HOW TO HOOK UP? NEED ASSISTANCE ON HOW TO OPERATE? NEED TO LOCATE A JVC SERVICE CENTER?
- Page 2 Do not use liquid cleaners or aerosol cleaners. Use a damp CAUTION: cloth for cleaning. Changes or modification not approved by JVC could - Do not use attachments not recommended by the product void the user’s authority to operate the equipment.
- Page 3 ENGLISH - To allow better heat dissipation, keep a clearance between - Upon completion of any service or repairs to this product, this unit and its surrounding as shown below. When this ask the service technician to perform safety checks to unit is enclosed in a space of dimensions as shown below, determine that the product is in proper operating condition.
- Page 4 Dear Customer, This apparatus is in conformance with the valid European directives and standards regarding electromagnetic compatibility and electrical safety. European representative of Victor Company of Japan, Limited is: JVC Technical Services Europe GmbH Postfach 10 05 04 61145 Friedberg Germany...
- Page 5 ENGLISH ENGLISH Information for Users on Disposal of Old Equipment and Batteries [European Union only] These symbols indicate that equipment with these symbols should not be disposed of as general household waste. If you want to dispose of the product or battery, please consider the collection systems or facilities for appropriate recycling.
- Page 6 Getting started ESPAÑOL / CASTELLANO Información para los usuarios sobre la eliminación de baterías/pilas usadas [Sólo Unión Europea] Estos símbolos indican que el equipo con estos símbolos no debe desecharse con la basura doméstica. Si desea desechar el producto o batería/pila, acuda a los sistemas o centros de recogida para que los reciclen debidamente.
- Page 7 ENGLISH DANSK Brugerinformation om bortskaffelse af gammelt udstyr og batterier [Kun EU] Disse symboler angiver, at udstyr med disse symboler ikke må bortskaffes som almindeligt husholdningsaffald. Hvis du ønsker at smide dette produkt eller batteri ud, bedes du overveje at bruge indsamlingssystemet eller steder, hvor der kan ske korrekt genbrug.
- Page 8 Getting started РУССКИЙ Сведения для пользователей по утилизации старого оборудования и батарей [только для Европейского союза] Данные символы указывают на то, что оборудование, на которое они нанесены, не должны утилизироваться, как обычные бытовые отходы. При необходимости утилизировать такое изделие или батарею обратитесь в специальный пункт сбора...
- Page 9 With a strict focus on image quality and signal processing performance, THX certification promises that this JVC projector is capable of presenting a wide range of video content at maximum resolutions with the correct color and luminance levels. In addition, THX has created a battery of signal processing tests that challenge the projector’s scaling, motion conversion...
- Page 10 Getting started Contents Settings Getting started Safety Precautions..........2 The structure of the Settings menu ....28 THX Certification..........9 Setting Menu ..........30 isf information............. 9 Procedures for Menu Operation ...... 30 Contents............10 Setting Menu ............31 How to Read this Manual/Accessories/ Customizing Projected Images ....
- Page 11 ENGLISH How to Read this Manual/ Accessories/Optional Accessories About this Manual INPUT This manual mainly describes the operating method using the remote control. HDMI 1 HDMI 2 COMP. ● Buttons on the remote control are described as [Button Name]. VIDEO S-VIDEO ●...
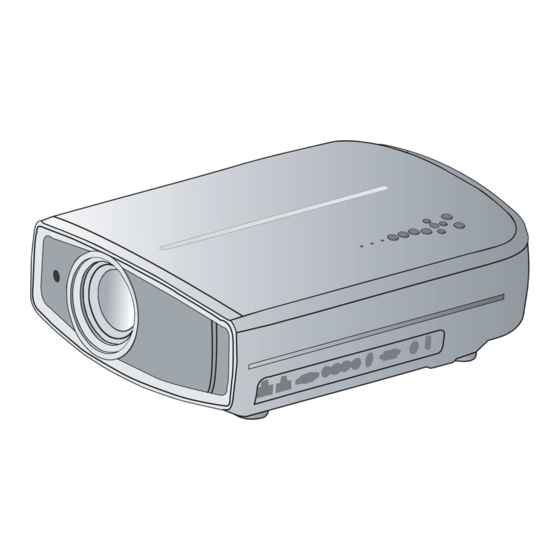
- Page 12 Getting started Controls and features ■ Front Side/Left Side CAUTION ● Do not place your fingers in the gap at the lens during lens shift adjustment. This may cause injuries if your fingers are caught in between the gap. P25) ●...
- Page 13 ENGLISH Light on (Red): Warning mode P47) WARNING LAMP Light on (Red): Light on/Blinking (Orange): Standby mode Lamp warning Light on (Green): STANDBY/ON P47) During projection Blinking (Green): Image is temporarily hidden To turn on/off the power P25) Blinking (Red): P24) To switch input ( INPUT...
- Page 14 Getting started Controls and features (continued) ■ Remote Control STAND BY To turn off the power To turn on the power INPUT HDMI 1 HDMI 2 COMP. To select input mode ( P24) VIDEO S-VIDEO P24) To control lens ( P25) To hide the image temporarily ( LENS...
- Page 15 ENGLISH How to Use the Remote control Loading Batteries ● If the remote control has to be brought closer to the projector to operate, it means that the batteries are wearing out. When this happens, replace the batteries. Insert the batteries according to the marks.
- Page 16 Preparation Selecting Connecting Devices ● Do not turn on the power until connection is complete. ● The connection procedures differ according to the device used. For details, refer to the instruction manual of the device to be connected. ● This device is used for image projection. Connect to an audio output device such as amplifier and speaker for audio output from the connected device.
- Page 17 ENGLISH Connecting Connecting via Video Cable and S-Video Cable Video output This unit video cable (sold separately) To video input termina VCR and camcorder SYNC To S-video input terminal S-video cable (sold separately) S-video output Connecting via Component Video Cable This unit BD/DVD player SYNC...
- Page 18 Preparation Connecting(Continued) Connecting via HDMI Cable This unit Notebook PC BD/DVD recorder To HDMI 1 or HDMI 2 input terminal HDMI cable (sold separately) HDMI output terminal ● If noise is produced, take PCs (Notebook PC) away from this unit. ●...
- Page 19 ENGLISH Connecting via SCART-RCA Cable This unit RS-232C BD/DVD player for European market To RGB video and sync signal input terminals SCART-RCA cable (sold separately) SCART terminal ● Set “COMP.” in the setting menu to “SCART”.( P36 - Connecting via RGB Video Cable This unit Device equipped with RGB output RS-232C...
- Page 20 Preparation Connecting(Continued) Connecting via PC Cable This unit Notebook PC To PC input terminal PC cable(sold separately) VGA output terminal ● “Specifications” For information on supported input signals, please refer to P58) Connecting via Trigger Cable This unit Screen SYNC To Trigger output terminal Trigger cable CAUTION...
- Page 21 ENGLISH Installing the Projector and Screen While installing, please place this unit and the screen perpendicular to each other. Failing to do so may “ increase trapezoidal distortion. Please refer to Keystone”. P39 - Set Angle ● The angle range which can be set for this unit is ±10°. ●...
- Page 22 Preparation Installing the Projector and Screen(Continued) Screen Size and Projection Distance Determine the distance from the lens to the screen to achieve your desired screen size. This unit uses a 2.0x power zoom lens for projection. ■ Relationship Between Projection Screen Size and Projection Distance Projection Screen Size Projection Screen Size Approximate Projection Distance...
- Page 23 ENGLISH MEMO...
- Page 24 Basic Operation Projecting Image This section describes the basic operations to project input images on the screen. Preparation Insert the power plug to the power outlet STAND BY INPUT 1 Connect to this unit STANDBY/ON HDMI 1 HDMI 2 COMP. 2 Connect to the power outlet VIDEO S-VIDEO...
- Page 25 ENGLISH Adjust image position (shift). Lens control TIPS LENS Shift You can hide the image temporarily Select Back Operate BACK You can hide the image temporarily. Adjust accordingly by pressing the up/down buttons ● HIDE After adjusting the image position, it may be necessary to select “Pixel Adjust”...
- Page 26 Basic Operation Convenient Features during Projection You can change the screen size of the projected image or hide the surrounding area of an image for which quality at the outer area has deteriorated. Setting the Screen Size The projected image can be set to a most appropriate screen size (aspect ratio).
- Page 27 ENGLISH Mask the image MEMO Display the setting menu ● Masking is available only when high Picture Adjust definition images are input. Picture Mode Natural Contrast Brightness MENU Color Tint 6500K Color Temp. Gamma Normal Advanced Lens Aperture Reset Operate Exit Back MENU...
- Page 28 Settings The structure of the Settings menu The menu for this device is structured as follows: CAUTION ● There are items that cannot be modified without entry. Picture Adjust Adjusts the pattern of the projected image. Picture Mode Setting: Cinema 1, Cinema 2, Cinema 3, Natural, Stage, Dynamic, User 1, User 2, THX Adjusts the contrast of the projected image.
- Page 29 ENGLISH Installation Controls the individual motorized function of the lens when setting up the projector. Lens Control Setting: Focus, Zoom, shift, Image pattern, Lock Makes fine adjustments of 1 pixel unit for each minor color shift in the horizontal/vertical direction of the image.
- Page 30 Settings Setting Menu Projected images can be adjusted to a desired view by changing the initial settings. Procedures for Menu Operation Example: When changing “Aspect(Video)” from “4:3” to “16:9” STAND BY Display the setting menu INPUT Picture Adjust HDMI 1 HDMI 2 COMP.
- Page 31 ENGLISH Setting Menu Item values shown in are factory settings. ● Items that can be configured differ according to the input signals. CAUTION ● There are items that cannot be modified without entry. Picture Adjust Picture Mode Selects Picture Mode(Cinema 1, Cinema 2, Cinema 3, Natural, Stage, Dynamic, User 1, User 2 and THX). Cinema 1 This is the picture setting closest to film.
- Page 32 Settings Setting Menu (Continued) Picture Adjust > Color Temp. Color Temp. Sets the color temperature of the projected image. (Cannot set when the “Picture Mode” in “THX”.) Select this to give a reddish tinge to the 5800K image. 6500K Select this to have a balanced image. Only offset can be set.
- Page 33 ENGLISH Picture Adjust > Gamma Gamma Sets the gradation characteristics of the projected image. (Cannot set when the “Picture Mode” in “THX”.) For normal circumstances, select this Normal This is the setting for Standard Tones. setting. This is the setting for expressing rich dark Set gamma to “A”.
- Page 34 Settings Setting Menu (Continued) * Regarding “Copy” and “Paste” 1 Copies the Gamma Adjustment data. Picture Adjust Gamma Normal Correction Value White 1023 Geen Blue Costom1 Copy Costom2 Paste Costom3 Reset 100(%) Input: 50% Output: 595 Exit Back Back Check After TEST MENU...
- Page 35 ENGLISH * About “Color Management Adjustment” 1 Set the picture mode of the color management. 2 Select the color to be adjusted by color management. 3 Select color adjustment. just just Picture Ad Picture Ad Color Management Color Management > >...
- Page 36 Settings Setting Menu (Continued) Input Signal > COMP. COMP. Configures the input signal for the component video input terminals. Y Pb/Cb Pr/Cr Select this when the component video signals are input. Select this when the RGB video signals are input. Color Space Select this when RGB video signals and sync signals are SCART...
- Page 37 ENGLISH Input Signal > Aspect (Video) Aspect (Video) Configures the screen size of the projected image. Sets the screen size of the projected image as 4:3. 16:9 Sets the screen size of the projected image as 16:9. Zoom Zooms the images. (This item cannot be selected in the case of HD signals.) ●...
- Page 38 Settings Setting Menu (Continued) Input Signal > Mask Mask Masks (Hides) the outer area of the projected image. 2.5% Mask 2.5% of the screen. Mask 5% of the screen. No masking. ● Masking is available only when high definition images are input. Input Signal >...
- Page 39 ENGLISH Installation > Installation Style Installation Style Flips the image to the left or right, up or down according to the projection state of the projector. Front Select this for tabletop front projection. Ceiling Mount (F) Select this for ceiling front projection. Rear Select this for tabletop rear projection.
- Page 40 Settings Setting Menu (Continued) Display Setup > Line Display Line Display Sets whether to display the input setting when switching the input. 5 sec Display for 5 seconds. Do not display. Display Setup > Source Display Source Display Sets whether to display the source of input signals when changing the input. Display the source of input signals.
- Page 41 ENGLISH Function > Trigger Trigger Configures the output of Trigger terminal. Do not activate. On(Power) Move the screen UP/DOWN in conjunction with the power. On(V-Stretch) Operate the anamorphic lens in conjunction with the “V-Stretch”. Function > Test Pattern Test Pattern Display 6 types of test patterns.
- Page 42 Settings Customizing Projected Images You can adjust the projected image to a desired image quality and register the adjusted value. (Picture Mode) Besides the five default “Cinema 1”, “Cinema 2”, “Cinema 3”, “Natural”, “Stage”, “Dynamic” and “THX” settings, there are 2 more types of user-defined settings for Picture Mode. Changing the Initial Setting of Picture Mode “Contrast”, “Brightness”, “Color”, “Tint”, “Color Temp.”, “Gamma”, “Sharpness”,...
- Page 43 ENGLISH Registering User-defined Picture Mode CAUTION Select the picture mode ● Adjustment settings of image quality will not be registered if other picture mode is selected before registering Adjust picture quality these settings. ● See “Changing the initial setting of picture Mode” for procedures P42) on adjusting the picture quality.
- Page 44 Troubleshooting Troubleshooting Before sending the unit to your authorized dealer for repair, please check the following points. The following situations are not malfunctions. ■ You do not need to worry about the following situations if there is no abnormality on the screen. ●...
- Page 45 ENGLISH The image cannot output by HDMI terminal Is the setup of Control with HDMI ” “ Set up the “Control with HDMI” function to “Off”. P35 - function “Off” ● Even if the “Control with HDMI” function is “On”, there are still some devices cannot reveal image normally. Color does not appear or looks strange Is the image correctly adjusted? Adjust “Color”...
- Page 46 Troubleshooting What to Do When these Messages Are Displayed Message Cause (Details) No device is connected to the input terminal. COMP. The input terminal is connected but there is no signal. No Input Input the video signals. A video signal that cannot be used in this unit has been input. COMP.
- Page 47 ENGLISH About Warning Indicators The accumulated lamp time or warning mode of this unit is displayed by the indicators. For information on indicator display during normal operation, see “Controls and Features”. ( P12) Indicator Interval Blinking Blinking between Content Time Frequency WARNING LAMP STANDBY/ON Blinks...
- Page 48 Troubleshooting Replacing the Lamp The lamp is a consumable item. If the image is dark or the lamp is turned off, replace the lamp unit. ● When the lamp replacement time approaches, a message is displayed on the screen and the condition is indicated by the P46, 47) indicator.
- Page 49 ENGLISH Install the new lamp unit CAUTION ● Use only genuine replacement parts for the lamp unit. Also, never attempt to reuse an old lamp unit. This may cause a malfunction. ● Do not touch the surface of a new lamp. This may shorten the lamp life and cause lamp blowout.
- Page 50 Troubleshooting Replacing the Lamp (Continued) Resetting Lamp Time STAND BY After replacing the lamp, reset the lamp time. INPUT HDMI 1 HDMI 2 COMP. Insert the power plug to the power VIDEO S-VIDEO outlet LENS ASPECT HIDE Light on (Red) LIGHT TEST Must operate with the remote control...
- Page 51 ENGLISH Cleaning and Replacing the Filter Clean the filter regularly or air intake efficiency may deteriorate and malfunction may occur. Remove the inner filter CAUTION ● Pull the power plug from the power Lift up while pushing the claw outlet. MEMO If the filter is damaged or too Clean the filter...
- Page 52 Others RS-232C Interface Control of this unit via a computer is possible by connecting the computer to this unit with a RS-232C cross cable (D-Sub 9 pin). RS-232C Specifications This unit Pin No. Signal Function Signal Direction Receive data PC→This unit Transmit data This unit→PC Signal ground...
- Page 53 ENGLISH ■ Command and data Operating command and data (Binary code) Command Type Data description Check whether communication is available between this unit 0000 Connection check and the PC during standby. During standby 31: Turn on the power. 5057 Power supply During power on 30: Turn off the power.
- Page 54 Others RS-232C Interface (Continued) ■ Remote control code ● Binary code is sent during communication. Remote control button Remote control button Binary code Binary code name name 37 33 30 31 TEST 37 33 35 39 37 33 30 32 CINEMA 3 37 33 36 36 BACK...
- Page 55 ENGLISH RS-232C Communication Examples This section shows the communication examples of RS-232C. ■ Operating command Type Command Description PC→This unit: 21 89 01 00 00 0A Connection check Connection check This unit→PC: 06 89 01 00 00 0A PC→This unit: 21 89 01 50 57 31 0A When power is turned on from standby Power (On) This unit→PC: 06 89 01 50 57 0A...
- Page 56 Others Copyright and Caution About Trademarks and Copyrigh t ● HDMI, HDMI logo and high definition multimedia interface are trademarks or registered trademarks of HDMI Licensing LCC. Caution D-ILA Device Characteristics Maintenance Procedures Do not project still pictures or pictures that have still Dirt on the cabinet ●...
- Page 57 Regardless whether the unit is still under guarantee, this unit. Be sure to ask your dealer or a specialist to JVC is not liable for any product damage caused by perform mounting. mounting the unit with non-JVC ceiling fittings or when ●...
- Page 58 Others Specifications Product Name D-ILA Projector Model Name DLA-HD950 / DLA-HD990 *1 *2 D-ILA device Display Panel/Size 0.7" (1920pixels x 1080pixels) x 3 (Total no. of pixels: Approx. 6.22million) Projection Lens 2.0 x power zoom lens (1.4:1 to 2.8:1)(Zoom/Focus: Power) 200 W Ultra-high pressure mercury lamp [Part No.
- Page 59 ENGLISH ■ PC compatible signals ● HDMI No. of No. of Polarity Total No. Total No. Dot CLK effective effective Designation Resolution of dots of lines [kHz] [Hz] [MHz] dots lines [dot] [line] [dot] [line] VGA 60 640 X 480 31.500 60.000 25.200...
- Page 60 Others Specifications(Continued) Dimensions ■ (Unit: mm) ■ Top Surface Bottom Surface 64.5 ■ ■ Front Back Surface 225.4 Φ42 Lens center Lamp cover...
- Page 61 ENGLISH Index HDMI Standard ..........Page 58 Connecting .......... Page 18 Settings ........Page 35 Warning ..........Page 47 Screen size Distance Chart ........Page 22 Settings ..........Page 26 Mask Settings ..........Page 27 Batteries Types ..........Page 11 Shift Shift Amount ........Page 21 Adjustment ........
- Page 62 Others MEMO...
- Page 63 FRANÇAIS MANUEL D’INSTRUCTIONS PROJECTEUR D-ILA DLA-HD950/DLA-HD990...
- Page 64 Les transformations ou les modifications n’étant pas N’utilisez pas d’accessoires non recommandés par le fabricant approuvées par JVC pourraient annuler le droit de de l’appareil car ils pourraient être dangereux. l’utilisateur d’utiliser l’équipement. N’utilisez pas ce produit près de l’eau. Ne pas l’utiliser non plus NOTE : après l’avoir déplacé...
- Page 65 FRANÇAIS Quand le remplacement des pièces est nécessaire, Afin de permettre une meilleure dissipation de la chaleur , assurezvous que le réparateur a utilisé les pièces de laissez un espace libre tout autour de cet appareil, tel rechange spécifiées par le fabricant ou possédant les qu’illustré...
- Page 66 Cher(e) client(e), Cet appareil est conforme aux directives et normes européennes en vigueur concernant la compatibilité électromagnétique et à la sécurité électrique. Représentant européen de la société Victor Company of Japan, Limited: JVC Te Services Europe GmbH chnical Postfach 10 05 04...
- Page 67 FRANÇAIS ENGLISH Information for Users on Disposal of Old Equipment and Batteries [European Union only] These symbols indicate that equipment with these symbols should not be disposed of as general household waste. If you want to dispose of the product or battery, please consider the collection systems or facilities for appropriate recycling.
- Page 68 Pour commencer ESPAÑOL / CASTELLANO Información para los usuarios sobre la eliminación de baterías/pilas usadas [Sólo Unión Europea] Estos símbolos indican que el equipo con estos símbolos no debe desecharse con la basura doméstica. Si desea desechar el producto o batería/pila, acuda a los sistemas o centros de recogida para que los reciclen debidamente.
- Page 69 FRANÇAIS DANSK Brugerinformation om bortskaffelse af gammelt udstyr og batterier [Kun EU] Disse symboler angiver, at udstyr med disse symboler ikke må bortskaffes som almindeligt husholdningsaffald. Hvis du ønsker at smide dette produkt eller batteri ud, bedes du overveje at bruge indsamlingssystemet eller steder, hvor der kan ske korrekt genbrug.
- Page 70 Pour commencer РУССКИЙ Сведения для пользователей по утилизации старого оборудования и батарей [только для Европейского союза] Данные символы указывают на то, что оборудование, на которое они нанесены, не должны утилизироваться, как обычные бытовые отходы. При необходимости утилизировать такое изделие или батарею обратитесь в специальный пункт сбора...
- Page 71 Centrée exclusivement sur la qualité de l'image et la performance de traitement du signal, la certification THX garantit que ce projecteur JVC est capable de présenter un large éventail de contenus vidéo avec un maximum de résolutions offrant la couleur et les niveaux de luminance exacts.
- Page 72 Pour commencer Contenu Pour commencer Réglages Importantes Mesures De Sécurité ..2 Certification THX .........9 La structure du menu Paramètres ....28 Informations sur isf ......9 Menu de configuration ......30 Contenu ..........10 Procédures d'utilisation du menu ....30 Menu de configuration .......31 Comment lire ce manuel/Accessoires/ Accessories facultatifs .......
- Page 73 FRANÇAIS Comment lire ce manuel/Accessoi- res/Accessoires facultatifs À propos de ce manuel INPUT Ce manuel décrit principalement le mode de fonctionnement de HDMI 1 HDMI 2 COMP. l’appareil au moyen de la télécommande. VIDEO S-VIDEO ● Les boutons sur la télécommande sont décrits par [Nom du bouton]. ●...
- Page 74 Pour commencer Commandes et fonctionnalités ■ Face avant / Face gauche AVERTISSEMENT ● Ne mettez pas vos doigts dans l’ouverture de l’ob- jectif lorsque vous réglez le décalage de l’objectif, cela pourrait vous blesser si vos doigts se retrouvent P25) coincés.
- Page 75 FRANÇAIS Témoin allumé (rouge): P47) Mode avertissement ( WARNING LAMP Témoin allumé (rouge): Témoin allumé/clignotant (orange): Mode veille. Témoin d’avertissement de lampe Témoin allumé (vert): STANDBY/ON P47) Au cours de la projection Clignotant (vert): L’image est temporairement Pour allumer/éteindre l'appareil P25) cachée ( Clignotant (rouge):...
- Page 76 Pour commencer Commandes et fonctionnalités (Suite) ■ Télécommande STAND BY Pour éteindre l’appareil Pour allumer l’appareil INPUT HDMI 1 HDMI 2 COMP. P24) Pour changer d'entrée ( VIDEO S-VIDEO P24) Pour contrôler l'objectif ( Pour masquer temporairement l'image LENS ASPECT HIDE P25) Pour régler la taille de l'écran...
- Page 77 FRANÇAIS Comment utiliser la télécommande Mise en place des piles ● S’il est nécessaire de rapprocher la télécommande du projecteur pour qu’elle fonctionne, cela signifie que les piles sont faibles. Quand cela survient, remplacer les piles. Insérer les piles selon les marques ●...
- Page 78 Préparation Sélectionner les périphériques à raccorder ● Ne pas allumer avant d’avoir fini le raccordement. ● Les procédures de raccordement peuvent varier selon le type de périphérique utilisé. Pour les détails, se reporter au manuel d’instructions du périphérique à raccorder. ●...
- Page 79 FRANÇAIS Raccordements Raccordement via un câble vidéo et un câble S-vidéo Sortie vidéo Cet appareil Câble vidéo (vendu séparément) à une borne d’entrée vidéo Magnétoscope et caméscope SYNC à une borne d’entrée S-vidéo Câble S-Vidéo (vendu séparément) Sortie S-vidéo Raccordement via un câble vidéo composantes Cet appareil Lecteur BD/DVD SYNC...
- Page 80 Préparation Raccordements (Suite) Raccordement par un câble HDMI Cet appareil PC portable Enregistreur BD/DVD à une borne d’entrée HDMI 1 ou HDMI 2 Câble HDMI (vendu séparément) Borne de sortie HDMI ● Si du bruit apparaît, écartez tout PC (PC portable) de ce produit. ●...
- Page 81 FRANÇAIS Raccordement via un câble SCART-RCA Cet appareil RS-232C Lecteur BD/DVD pour le marché européen vers une vidéo RVB et sync les bornes d'entrée signal Câble SCART-RCA (vendu séparément) Borne SCART ● P35 - Réglez “COMP.” dans le menu configuration à “SCART”. ( Raccordement via câble vidéo RGB Cet appareil Appareil équipé...
- Page 82 Préparation Raccordements (Suite) Raccordement par un câble PC Cet appareil PC portable Vers la borne d'entrée PC Câble PC (vendu séparément) Borne de sortie VGA ● P58) Pour plus d’information sur les signaux d’entrée pris en chargé, veuillez consulter les “Caractéristiques”.
- Page 83 FRANÇAIS Installation le projecteur et l’écran Lors de l'installation, veuillez placer cet appareil et l'écran perpendiculairement l'un par rapport à l'autre. À défaut, vous risquez d'augmenter la distorsion trapézoïdale. Veuillez vous référer à “Trapèze”. P38 - Régler l'angle ● L'angle maximal pouvant être donné pour cet appareil est de ±10°. ●...
- Page 84 Préparation Installation le projecteur et l’écran (Suite) Taille de l’écran et distance de projection Déterminer la distance entre l’objectif et l’écran pour obtenir la taille d’écran que vous souhaitez. Cet appareil utilise un objectif avec zoom de facteur x2,0 pour la projection. ■...
- Page 85 FRANÇAIS Mémo...
- Page 86 Fonctionnement Projection d'images Ce chapitre décrit les opérations de base pour projeter des images en entrée sur l’écran. Préparation Branchez la prise du câble d’alimenta- tion dans la prise électrique STAND BY INPUT 1 Raccordez le câble à cet STANDBY/ON HDMI 1 HDMI 2 COMP.
- Page 87 FRANÇAIS Règle la position de l’image (décalage). Contrôle Objectif CONSEILS LENS Décalage Vous pouvez masquer temporairement l’image. Sélection Retour BACK Activation Ajustez en conséquence en Vous pouvez masquer temporairement appuyant sur les boutons l’image. Haut / Bas HIDE ● Après réglage de la position de l’image, il peut être néces- saire de sélectionner “Décalage pixels”...
- Page 88 Fonctionnement Fonctions utiles pendant la projection Vous pouvez modifier la taille de l’écran de l’image projetée ou masquer la zone entourant une image dont la qualité de la zone périphérique s’est détériorée. Régler de la taille de l’écran L’image projetée peut être réglée pour correspondre à la taille d’écran la plus appropriée.
- Page 89 FRANÇAIS Masquer l’image Affichez le menu de configuration NOTE ● Le masquage n'est disponible que lorsque Qualité image Modes Naturel des images haute définition sont en Contraste entrée. Luminosité MENU Couleur Teinte Temp. Couleur 6500K Gamma Normal Avancé Ouverture R.A.Z. Activation Sortie Retour...
- Page 90 Réglages La structure du menu Paramètres Le menu pour ce périphérique est structuré de la façon suivante : AVERTISSEMENT ● Certains objets ne peuvent être modifiés sans entrée. Qualité image Règle le modèle de l’image projetée. Modes Paramètre: Cinema 1, Cinema 2, Cinema 3, Naturzl, Scène, Dynamique, Util. 1, Util. 2, THX Règle le contraste de l’image projetée.
- Page 91 FRANÇAIS Installation Contrôle le déplacement motorisé de l’objectif lors du réglage du projecteur. Contrôle Objectif Paramètre: Mise au point, Zoom, Décalage, Mire de test, Verrouillage Effectuez des réglages fins d’un pixel pour chaque décalage de couleur mineur dans le sens ho- rizontal / vertical de l’image.
- Page 92 Réglages Menu de configuration Les images projetées peuvent être réglées pour correspondre au format souhaité en changeant les paramètres par défaut. Procédures d’utilisation du menu Exemple: Changer l' “Aspect (Vidéo)” de “4:3” à “16:9” STAND BY Affichez le menu de configuration INPUT HDMI 1 HDMI 2...
- Page 93 FRANÇAIS Menu de configuration Les valeurs des éléments présentés en sont les réglages d'usine prédéfinis. ● Les éléments pouvant être configurés varient selon les signaux entrants. AVERTISSEMENT ● Certains objets ne peuvent être modifiés sans entrée. Qualité image Modes Sélectionne le mode Image(Cinéma1, Cinéma2, Cinéma3, Naturel, Scène, Dynamique, Util. 1, Util. 2, et THX). Cinéma1 Il s’agit du paramètre d’image le plus proche du film.
- Page 94 Réglages Menu de configuration (suite) Qualité image > Temp. Couleur Temp. Couleur Règle la température de la couleur de l’image projetée. (Ne peut pas être choisi lorsque les “Modes” sont en “THX”.) Sélectionnez ceci pour donner un ton 5 800K rouge à...
- Page 95 FRANÇAIS Qualité image > Gamma Gamma Règle les caractéristiques de la gradation de l’image projetée. Dans les cas habituels, choisissez ce Il s’agit du paramètres pour des tons stan- Normal paramétrage. dards. Il s’agit du paramètres pour de riches tons Régle le gamma à...
- Page 96 Réglages Menu de configuration (suite) * Concernant “Copier” et “Coller”. 1 Copie des données de réglage Gamma. Qualité image Gamma Normal Réglage de Base Blanc 1023 Rouge Vert Bleu Perso 1 Copier Perso 2 Coller Perso 3 R.A.Z. 100(%) Input: 50% Output: 595 Retour Sortie...
- Page 97 FRANÇAIS * Concernant le “Ajustement du réglage couleur” 1 Choisissez le mode image du réglage couleur. 2 Choisissez la couleur à régler avec le réglage couleur. 3 Choisissez le réglage couleur. Qualité image Qualité image Réglage couleur Réglage couleur > >...
- Page 98 Réglages Menu de configuration (suite) Signal d'entrée > Vidéo / S-Vidéo Vidéo / S-Vidéo Règle les signaux d'entrée Vidéo / S-Vidéo. 0IRE Règle la gradation des signaux sans le réglage 7.5 IRE. Niveau NTSC 7,5IRE Règle la gradation des signaux avec le réglage 7.5 IRE. ●...
- Page 99 FRANÇAIS Signal d'entrée > Aspect (PC) Aspect (PC) Configure la taille de l'écran de l'image projetée. Agrandi le signal PC horizontalement et verticalement jusqu’à ce qu’il prenne la Auto hauteur de l’écran, en affichant le signal dans son format original. Affiche le signal PC correspondant à...
- Page 100 Réglages Menu de configuration (suite) Installation > Contrôle Objectif Contrôle Objectif Contrôle le déplacement motorisé de l’objectif lors du réglage du projecteur. Mise au point Fonction pour régler la mise au point de l’objectif. Zoom Fonction pour régler le zoom de l’objectif. Fonction pour régler le décalage de l’objectif.
- Page 101 FRANÇAIS Installation > Type Ecran Type Ecran Corrige l’équilibre des blancs biaisé dérivé des caractéristiques réflectives de l’écran. Arrêt N’apporte aucune correction. (Généralement réglé sur arrêt). Corrige en légèrement rougeâtre. Corrige en légèrement verdâtre. Corrige en légèrement bleuâtre. Affichage > Couleur fond Couleur fond Configure la couleur de l’écran affichée en l’absence de signaux entrants.
- Page 102 Réglages Menu de configuration (suite) Affichage > Logo Logo Détermine si “Logo” doit être affiché lors du démarrage. Marche Affichage pendant 5 secondes. Arrêt Ne pas afficher. Affichage > Langue Langue Détermine la langue d’affichage du menu. Japonais English Anglais Deutsch Allemand Español...
- Page 103 FRANÇAIS Fonction > Mire de test Mire de test Affiche 6 types de mires de test. Pour vérification de la condition et du ton de couleur, ainsi que de la taille de pixel. À utiliser lorsque nécessaire. ● P14) Cela peut également être configuré à partir de la télécommande. ( Fonction >...
- Page 104 Réglages Personnalisation des images projetées Vous pouvez ajuster l'image projetée à une qualité d'image désirée et enregistrer la valeur réglée. (Modes) Hormis les cinq modes par défaut Cinéma 1 Cinéma 2 Cinéma 3 Naturel Scène Dynamique “ ” “ ” “...
- Page 105 FRANÇAIS Enregistrer un mode défini par l'utilisateur AVERTISSEMENT Sélectionnez le mode ● Le réglage des paramètres de qualité d’image ne sera pas enregistré si d’autres profiles d’image sont sélec- Ajuste laqualité d'image tionnés avant l’enregistrement de ces paramètres. ● Consultez “Changer le réglage initial des modes” pour la procédure de P42) réglage de la qualité...
- Page 106 Dépannage Dépannage Avant d’envoyer votre appareil à votre détaillant agréé pour une réparation, veuillez vérifier les points suivants. Les situations suivantes ne sont pas des défectuosités. ■ Vous n'avez pas à vous inquiéter des situations suivantes si vous ne constatez aucune anomalie à l’écran. ●...
- Page 107 FRANÇAIS L’image ne peut pas être sortie via la borne HDMI. Est-ce que la Configuration de la P35 - fonction “Contrôle avec HDMI” est Réglez la fonction “Contrôle avec le HDMI” sur “Arrêt”. sur “Arrêt” ? ● Même si la fonction “Contrôle avec le HDMI” est sur “Marche”, il existe toujours certains appareils qui ne peuvent pas afficher l’image normalement.
- Page 108 Dépannage Que faire lorsque ces messages s'affichent Message Cause (Description) Aucun appareil n’est raccordé à la borne d’entrée. COMP. La borne d’entrée est raccordée mais il n’y a pas de signal. Pas de signal Activez l’entrée des signaux vidéo. Un signal vidéo ne pouvant pas être utilisé par cet appareil a été entré. Faites entrer des signaux vidéo pouvant être utilisés.
- Page 109 FRANÇAIS À propos des indicateurs d’alertes Le temps cumulé d’utilisation de la lampe ou le mode d’avertissement de cet appareil est affiché par les indicateurs. Pour de plus amples informations concernant l'affichage des indicateurs au cours du fonctionnement normal, consul- P12) tez “Commandes et fonctionnalités”.
- Page 110 Dépannage Remplacement de la lampe La lampe est un produit périssable. Si l’image est sombre ou si la lampe est éteinte, remplacez la lampe. ● Lorsque le moment de remplacer la lampe approche, un message s’affiche à l’écran et son état est indiqué par le témoin. P46 à...
- Page 111 FRANÇAIS Installez le nouveau module de la AVERTISSEMENT lampe ● N’utilisez que des produits originaux pour remplacer le module de la lampe. De plus, n’essayez jamais de réutiliser un module de lampe usagé. Cela pour- rait provoquer un dysfonctionnement. ● Ne pas toucher la surface de la nou- velle lampe.
- Page 112 Dépannage Remplacement de la lampe (Suite) Remettre à zéro le temps lampe STAND BY Une fois la lampe changée, remettez le Temps lampe à zéro. INPUT Branchez la prise du câble d’alimentation à la prise électrique HDMI 1 HDMI 2 COMP.
- Page 113 FRANÇAIS Nettoyage et remplacement du filtre Nettoyez le filtre régulièrement faute de quoi l’efficacité de l’entrée d’air risque de diminuer, et un dysfonctionnement pourrait survenir. Retirez le filtre intérieur AVERTISSEMENT Soulevez la patte tout en la poussant ● Débranchez le câble d’alimentation de la prise électrique.
- Page 114 Autres Interface RS-232C Le contrôle de cet appareil est possible en connectant l'ordinateur à cet appareil avec un câble RS-232C (D-Sub 9 broches). Caractéristiques RS-232C Cet appareil Broche n° Signal Fonction Direction du signal Recevoir des données PC→cet appareil Transmettre des cet appareil→PC données Masse...
- Page 115 FRANÇAIS ■ Commande et données Commande de fonctionnement et données (Code binaire) Commande Type Description des données Vérifie si la communication est disponible entre cet appareil et 0000 Vérification de la connexion le PC pendant la veille. Pendant la veille 31: Allume l’appareil.
- Page 116 Autres Interface RS-232C (suite) ■ Code de la télécommande ● Le code binaire est envoyé pendant la communication. Nom du bouton de contrôle Nom du bouton de contrôle de Code binaire Code binaire de la télécommande la télécommande 37 33 30 31 TEST 37 33 35 39 37 33 30 32...
- Page 117 FRANÇAIS Exemples de communication RS-232C Cette section montre des exemples de communication du RS-232C. ■ Commande pour l'utilisation Type Commande Description Vérification de la PC→Cet appareil: 21 89 01 00 00 0A Vérification de la connexion connexion Cet appareil→PC: 06 89 01 00 00 0A PC→Cet appareil: 21 89 01 50 57 31 0A Lorsque l'appareil est allumé...
- Page 118 Autres Droits d’auteurs et mise en garde À propos des marque de commerce et droits d’auteurs ● HDMI, le logo HDMI ainsi que l’interface multimédia haute définition sont des marques de commerce ou des marques déposées de HDMI Licensing LCC. Mises en garde Caractéristiques du D-ILA Procédures d’entretien...
- Page 119 ● ● Une expertise et des techniques particulières sont nécessai- JVC n’est pas responsable des dommages provoqués res pour installer cet appareil. Assurez-vous de demander à par l’installation de l’appareil avec des fixations de votre détaillant ou à un spécialiste d’effectuer l’installation.
- Page 120 Autres Caractéristiques Nom du produit Projecteur D-ILA Nom du modèle DLA-HD950 / DLA-HD990 Appareil D-ILA *1 *2 Panneau d'affichage/Taille 0,7"(1920 pixels x 1080 pixels) x 3 (nombres total de pixels : environ 6,22 millions) 2,0 x puissance de zoom de l'objectif (1,4:1 to 2,8:1) (Zoom / Mise au point: Puis- Objectif de projection sance) 200 W Lampe au mercure à...
- Page 121 FRANÇAIS ■ Signaux PC compatibles ● HDMI Nombre Nombre Nombre Nombre Polarité Fréquence total de total de de points de lignes N°. Désignation Résolution [kHz] [kHz] points lignes effectifs effectives [MHz] [dot] [line] [dot] [line] VGA 60 640 X 480 31,500 60,000 25,200...
- Page 122 Autres Caractéristiques(suite) Dimensions ■ (Appareil: mm) ■ Dessus Face inférieure 64.5 ■ ■ Proj. avant Surface arrière 225.4 Φ42 Centre de l'objectif. couvercle de la lampe.
- Page 123 FRANÇAIS Sommaire HDMI Standard ............. Page 58 Raccordement ............Page 18 Réglages .............Page 35 Diode Avertissement ............. Page 47 Taille de l’écran Tableau des distances ......... Page 22 Réglages ..............Page 26 Masque Réglages ............. Page 27 Piles Types ..............Page 11 Décalage Montant de décalage ...........
- Page 124 Autres Mémo...
Need help?
Do you have a question about the DLA-HD950BE and is the answer not in the manual?
Questions and answers