Rommelsbacher EKO 364/E, EKO 366/E, EKO 376/G, EKO364 Manual
- Instruction manual (28 pages) ,
- Instruction manual (33 pages) ,
- Instruction manual (29 pages)
Advertisement
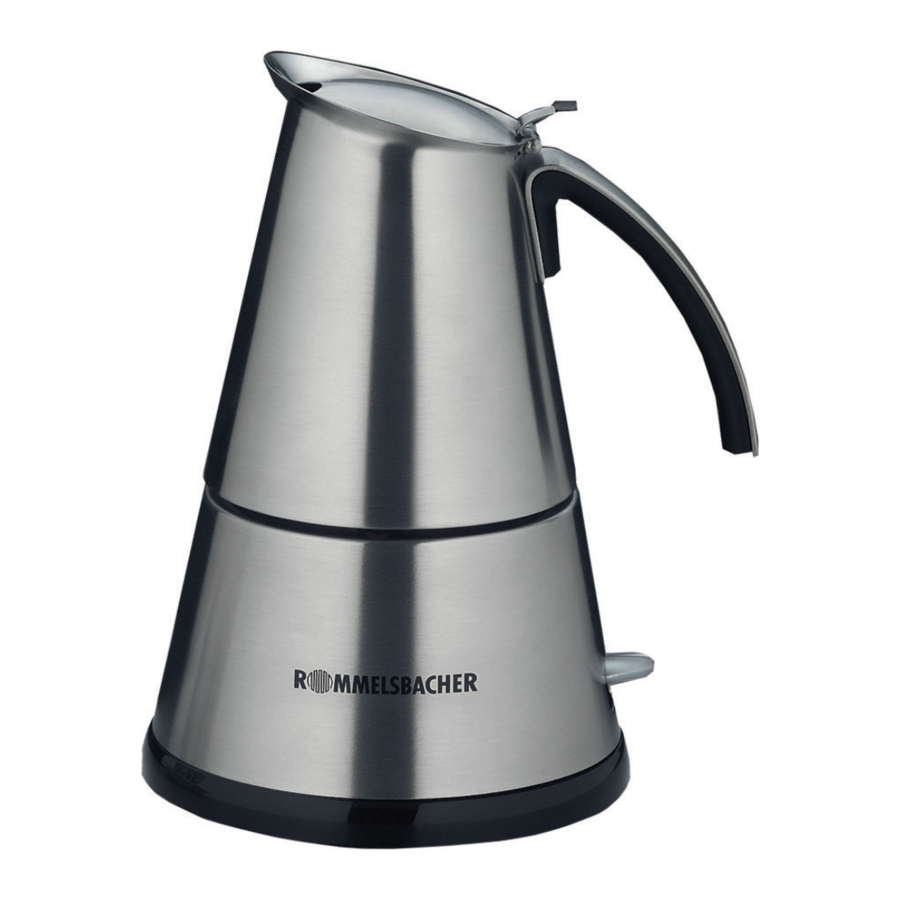
Description

- upper vessel (coffee jug)
- cover
- handle
- stainless steel tube
- sealing set (sealing rubber and filter plate)
- filter insert for 3 or 2 cups respectively
- filter funnel for 6 or 4 cups respectively
- control valve (starts as of 3.5 bar)
- water tank
- illuminated ON/OFF switch
- stay cool base
- power base
Introduction
 We are pleased that you have decided in favour of this superior Espresso Maker and thank you for your confidence. This appliance allows you to prepare delicious, original Italian espresso in a professional way with the option to make 3 or 6 cups and 2 or 4 cups respectively. To make sure you will have much pleasure with your new appliance, please be sure to read the below information attentively and follow it. Keep this instruction manual safely. Hand out all documents to third persons when passing on the appliance. Thank you very much.
Intended use
The appliance is designed for preparing espresso coffee and meant for domestic use only (in the kitchen, at table, in office, etc.). Other uses or modifications of the appliance are not intended and harbour considerable risks. For damage arising from not intended use, the manufacturer does not assume liability. The appliance is not designed for commercial use.
Technical data
Only connect the appliance to an isolated ground receptacle installed according to regulations.
The rated voltage must comply with the details on the rating label. Only connect to alternating current.
| Type: | EKO 364/E (2/4 cups) | EKO 366/E (3/6 cups) | EKO 376/G (3/6 cups) |
| Nominal voltage: | 230 V ~ 50 Hz | 230 V ~ 50 Hz | 230 V ~ 50 Hz |
| Nominal power, ca.: | 365 W | 365 W | 365 W |
| Standby-consumption: | 0 W | 0 W | 0 W |
| Filling quantity, ca.: | 250 ml max. | 350 ml max. | 350 ml max. |
Packing material
Do not simply throw the packing material away but recycle it.
Deliver paper, cardboard and corrugated cardboard packing to collecting facilities. Also put plastic packing material and foils into the intended collecting basins.

In the examples for the plastic marking PE stands for polyethylene, the code figure 02 for PE-HD, 04 for PE-LD, PP for polypropylene, PS for polystyrene.
Initial use
For a start, please clean all the accessory parts with warm water tank. Do not immerse the water tank or the power base in water in this process.
For hygienic reasons we recommend for initial use that you prepare one pot of espresso and pour it away then.
When delivered the power cord is put in the cord storage at the underside of the power base. You may take it out depending on the length that is needed.
Take care that the cord runs through the opening provided in the power base to guarantee an even surface for standing.
Only operate the appliance on a stable and even surface and make sure that the cord does not hang over the surface's edge.
Only fill water in the water tank. On no account must it be filled with coffee, milk or other liquids. When filling it please take care that no water is dropped on the power base or the underside of the water tank.
Control valve
The new valve type grants the perfect functionality of the coffee maker and ensures the best possible coffee quality.
For a reliable functioning of the safety valve it is important to move the pivot in the middle of the valve back and forth with your finger several times. Do this before each operation and particularly after a certain non-use period.
Preparation
 Attention: The appliance is under pressure when hot! Do not separate water tank from coffee jug before cooled down!

Touch the espresso maker only on the heat-insulated handle!
 Attention: If water tank is overfilled boiling coffee may be ejected.
With your espresso maker you can prepare two different quantities of espresso, just depending on your personal desire.
- Without the reducing filter insert you will get the maximum quantity of espresso.
- With the reducing filter insert, there will be a smaller quantity of espresso.
Full amount of cups (6 or 4 cups)
- Fill water into the water tank up to the "6" or "4" mark.
- Take the 6-cup or 4-cup filter funnel and fill it brimful, but loosely, with ground espresso powder (no ordinary coffee powder!). Just smooth out the filling and do not press it into the filter on any account!
- Insert the filled funnel in the water tank.
- Remove any powder residues from the rim in order for the seal to close perfectly.
- Tightly screw together the upper vessel and the water tank to prevent the escaping of steam. Do not hold the coffee maker at the handle when doing so. Make sure the upper vessel is not put on canted but straight.
- Put the can on the power base and connect the plug to the electrical outlet.
- By pressing down the ON/OFF switch the espresso maker is turned on. The indicator light in the switch glows.
- Do not open the cover until the cooking process is finished.
- When the espresso is ready the ON/OFF switch snaps back into the starting position, the indicator light goes out and the appliance switches off automatically.
- Disconnect the mains plug.
- Now you can serve the espresso.
- If you would like to prepare another supply of espresso, let the appliance cool and then start with the preparation again.
Reduced amount of cups (3 or 2 cups)
- Fill water into the water tank up to the "3" or "2" mark.
- Take the 6-cup or 4-cup filter funnel and place the additional 3-cup or 2-cup filter insert in it.
Then fill it brimful, but loosely, with ground espresso powder (no ordinary coffee powder!).
Just smooth out the filling and do not press it into the filter on any account! - Then proceed as per the preparation of 6 or 4 cups, starting from point 3.
Some tips:
- Perfect espresso is served and enjoyed in well preheated espresso cups!
- Since the coffee is served directly from the appliance, slightly sway it before pouring out in order to grant an equal consistence of the espresso.
Cleaning and maintenance

Hazard of injury and burns!
Before cleaning, always unplug the appliance and let all parts cool down.
- Remove the pot from the base before cleaning.
- Clean the accessory parts in hot water. For that you can readily use a small, soft bottle-brush.
- It is quite normal that there are some residues of water and coffee powder left in the water tank. Howe-ver, never immerse water tank and power base into water and do not hold them under running water.
- Regularly check the Control valve and make sure it is not blocked.
- Also make sure that no water or steam can infiltrate the underside.
- Do not clean it in the automatic dishwasher!
- Do not use abrasives or cleaning sprays.
- Never use a steam jet appliance for cleaning.
- Always let the appliance dry out completely; we therefore recommend that the appliance be stored unscrewed.
- Before using the espresso maker again, all electrical connections at the water tank and the power base must be completely dry!
- The filter plate as well as the sealing rubber must be kept clean and be replaced regularly. You can buy those as an accessory set in specialist shops or order from us directly under article no. F 13.13 (ElPresso for 6/3 cups) and F 13.14 (ElPresso mini for 4/2 cups) respectively.
![information]() Our tip: Loose soiling in the water container can be easily removed by filling half of it with warm water, connecting it firmly with the top and shaking it well.
Our tip: Loose soiling in the water container can be easily removed by filling half of it with warm water, connecting it firmly with the top and shaking it well.- Deposits of coffee oil (brown layer) can be removed with a special coffee oil remover, available in the specialist trade. Observe the manufacturer's instructions.
Descaling
Depending on the water hardness, limescale might form inside the water tank. Therefore, regular descaling is recommended. This will help to save energy and grants an always excellent espresso.
We recommend a digestible descaling procedure with citric acid or vinegar. For doing so, put some hot water with some citric acid or vinegar into the water tank and let it soak for a while. Then empty the water tank and rub it inside with a damp cloth. Finally rinse with pure water and let dry.
First aid
| Finding | Possible cause | Corrective |
| No function |
|
|
| Aroma too weak |
|
|
| Espresso too strong, very bitter taste |
|
|
| Steam leaks from the screwed joint between upper vessel and water tank |
|
|
| Heavy steam coming out of the control valve at the water tank |
|
|
For your safety

Read all safety advices and instructions. Nonobservance of the safety advices and instructions may cause electric shock, fire and/or bad injuries!
General safety advices:
- Children must not use this appliance. Always keep children away from the product and the power cord.
- Persons not having the knowledge or experience in operating the appliance or having handicaps of physical, sensorial or mental nature must not operate the appliance without supervision or instruction by a person, responsible for their safety. Never leave the appliance unattended during operation.
- Children should be supervised in order to ensure that they do not play with the appliance.
- Packing material like e. g. foil bags should be kept away from children.
- Do not operate this unit with an external timer or a separate telecontrol system.
- Prior to each use, check the appliance and the attachments for soundness, it must not be operated if it has been dropped or shows visible damage. In these cases, the power supply must be disconnected and the appliance has to be checked by a specialist.
- When laying the power cord, make sure that no one can get entangled or stumble over it in order to avoid that the appliance is pulled down accidentally.
- Keep the power cord away from hot surfaces, sharp edges and mechanical forces. Check the power cord regularly for damage and deteriorations. Damaged or entangled cords increase the risk of an electric shock.
- Do not misuse the power cord for unplugging the appliance!
- Never immerse the appliance, power cord and power plug in water for cleaning.
- Do not store the appliance outside or in wet rooms.
- This electrical appliance complies with the relevant safety standards. In case of signs of damage to the appliance or the power cord, unplug the appliance immediately. Repairs may be effected by authorised specialist shops only. Improper repairs may result in considerable dangers for the user.
- Improper use and disregard of the instruction manual void all warranty claims.
Safety advices for using the appliance:
Hazard of injury and burns!
- Housing-surfaces like base, water tank, coffee jug, cover, other components and the contents are getting hot during use and firstly stay hot after switch-off!
- Caution, hot steam!
EKO 376/G:
- The jar is made of glass and thus, it is fragile. Handle the glass jar with care to avoid breakage of glass and splinters!
Thus, act with caution:
- Only touch it on the handle. We recommend using pot cloths for protection!
- As protection against fire, do generally not put objects made of paper, plastic, fabric or other inflammable material on hot surfaces!
- Never operate the espresso maker without water and only in combination with the power base provided for it.
- Do not open the lid until the cooking process has been completed and the pilot lamp gone out. During the cooking process the pot must not be removed from the power base.
- The appliance must be switched off before removing the pot from the base.
The appliance is under pressure when hot!
Never unscrew, re-adjust, loosen or otherwise manipulate water tank container and upper vessel during operation!
- Do not transport the appliance when hot. Appliance and accessories must have cooled completely before cleaning or moving them!
- Observe the following when setting up the appliance:
- Place the appliance on a heat-resistant, stable and even surface (no varnished surfaces, no table cloths etc.).
- Never place the unit on electric heating plates or an open gas flame!
- Place it beyond children's reach.
- Leave a sufficient ventilation distance around the espresso maker to avoid damage by heat or vapour and to grant an unobstructed work area. Unhindered air supply has to be ensured.
- Do not operate the appliance in the vicinity of sources of heat (oven, gas flame etc.) or in explosive environments, where inflammable liquids or gases are located.
- Pull the power plug after each use for safe switch-off.
- Do not "park" or store the empty pot on the connected power base.
- Do not use the appliance as space heater.
Documents / ResourcesDownload manual
Here you can download full pdf version of manual, it may contain additional safety instructions, warranty information, FCC rules, etc.
Download Rommelsbacher EKO 364/E, EKO 366/E, EKO 376/G, EKO364 Manual
Advertisement


Need help?
Do you have a question about the EKO 364/E and is the answer not in the manual?
Questions and answers