
Subscribe to Our Youtube Channel
Related Manuals for CAS HS-200


Summary of Contents for CAS HS-200
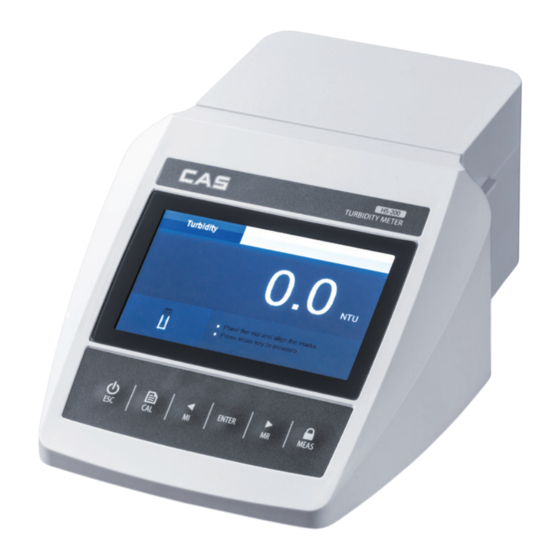
- Page 1 Laboratory Turbidity Meter 카스 실험실용 탁도계 HS-200 사용설명서 ㅣOWNER'S MANUAL 제품 이미지는 실물과 다를 수 있으며, 사정에 따라 일부 변경될 수 있습니다.
- Page 3 구매해 주셔서 감사합니다. 제품의 올바른 사용과 유지를 위해서 반드시 제품을 사용하기 앞서 본 사용설명서를 잘 읽어주시기 바랍니다. 차 례 개요 머리말 ..................................환경 조건 ................................... 구성품 ..................................계기 개요 계기 개요 ................................... 커넥터 ..................................키패드 ..................................계기 켜기 또는 끄기 ............................
- Page 4 개요 머리말 HS-200 실험실용 탁도계를 선택해 주셔서 감사합니다. 이 사용자 매뉴얼은 계기를 작동하는 데 도움이 되는 단계별 가이드를 제공하므로 사용하기 전에 다음과 같은 지침을 주의 깊게 읽으십시오. 여기서의 지침을 어기고 사용하면 보증이 무효화 되고 계기에 영구적인 손상을 줄 수 있습니다.
- Page 5 커넥터 1. 전원 어댑터용 소켓 2. 컴퓨터에 대한 USB-B 인터페이스 키패드 키 기능 •계기 켜기 또는 끄기 •교정, 설정, 데이터 로그를 종료하고 측정 모드로 돌아감 •교정 시작 •키를 누른 상태로 유지하여 설정 메뉴로 들어감 •현재 판독값을 메모리에 저장 •값을 높이거나 옵션 목록을 위로 스크롤 •데이터...
- Page 6 설정 계기 설정 HS-200 탁도계에는 측정 요구 사항을 충족하도록 디스플레이 옵션을 사용자 정의할 수 있는 통합 설정 메뉴가 포함되어 있습니다. 다음 표는 각 메뉴 항목의 기능을 설명합니다. 설정 메뉴 날짜와 시간 데이터 로그에 대한 연, 월, 일, 시, 분을 설정합니다.
- Page 7 설정 메뉴 0.1 기본값 0.01 TSS 계수 총 부유 물질 측정을 위한 환산 계수를 설정합니다. 0.13 기본값 자동 종료 활성화된 경우, 2시간 이내에 키를 누르지 않으면 계기가 자동으로 꺼집니다. 2 시간 기본값 비활성화 데이터 삭제 메모리에 있는 모든 데이터 로그를 삭제합니다. 저장된...
- Page 8 비밀번호 설정 비밀번호 보호 기능은 비인가 교정 및 설정을 방지하는데 사용됩니다. 활성화된 경우, 사용자는 4자리 비밀번호를 입력해야 설정 메뉴 또는 교정 모드로 들어갑니다. 키를 길게 눌러 설정 메뉴로 들어갑니다. 키를 눌러 비밀번호를 선택하고 Enter 키를 눌러 확인합니다. 키를 눌러 활성화를 선택합니다. Enter 키를 누르면 화면에 0000이 표시되고...
- Page 9 잔여물이 있으면 판독값이 부정확할 수 있습니다. 탁도 교정 HS-200 탁도계는 최소 2 포인트에서 최대 7 포인트의 탁도 교정을 허용하며 기본 교정 포인트에는 0.02, 10, 200, 500, 1000, 1500 및 2000 NTU가 포함됩니다. 더 나은 정확도를 위해 측정 중인 샘플 값에 가까운 교정 포인트를 선택하는 것이...
- Page 10 계기 교정 1. Cal 키를 눌러 교정 모드에 들어갑니다. 키를 눌러 교정 포인트 수를 선택합니다. 2. Enter 키를 누르면 화면에 0.02 NTU가 표시됩니다. 필요한 경우, 키를 눌러 첫 번째 교정 포인트를 선택하면 계기가 낮은 탁도에서 높은 탁도로 교정을 수행합니다. 3. 부속품 박스에서 해당 탁도 표준(예: 0.02 NTU)을 꺼내고 보푸라기가 없는 천으로...
- Page 11 4. 바이알을 측정 챔버에 삽입합니다. 바이알 캡의 삼각형 표시를 계기의 화살표에 맞춥니다. 차광 덮개를 닫습니다. 화살표 정렬 5. Enter 키를 누르면 계기가 교정을 시작합니다. 교정 아이콘이 화면 오른쪽 상단에 표시됩니다. 판독값이 안정되면, 계기는 자동으로 다음 교정 포인트를 표시합니다. 필요한 경우, 키를 눌러 원하는 교정 포인트를 선택합니다. 6.
- Page 12 탁도 측정 정확한 탁도 측정은 좋은 측정 기술에 달려 있습니다. 깨끗한 샘플 바이알, 측정 챔버 내 바이알 위치 지정, 차광 덮개로 바이알 덮기, 계기 교정, 기포 제거 등과 같은 요인에 관한 자세한 지침은 측정 및 교정 힌트 섹션 페이지를 참조하십시오. 낮은...
- Page 13 = 원본 샘플의 부피(ml) = 희석수의 부피(ml) 총 부유 물질(Total Suspended Solid: TSS) 측정 HS-200 탁도계에는 총 부유 물질 모드가 포함되어 있으며, 측정 전에 변환 계수를 입력해야 합니다. TSS 계수 계산 1. 남아 있을 수도 있는 고형물을 제거하기 위해 필터 디스크를 증류수로 헹굽니다.
- Page 14 TSS 계수 설정 키를 길게 눌러 설정 메뉴로 들어감 2. 키를 눌러 TSS Factor를 선택하고 Enter 키를 눌러 확인합니다. 키를 눌러 변환 계수를 설정하고 Enter 키를 눌러 저장합니다.
- Page 15 TSS 측정 모드 선택 키를 길게 눌러 설정 메뉴로 들어감 2. 키를 눌러 측정 모드를 선택하고 Enter 키를 눌러 확인합니다. 키를 눌러 mg/L(TSS)을 선택하고 Enter 키를 눌러 총 부유 물질 측정 모드로 들어갑니다. TSS 측정 총 부유 물질의 측정 방법은 탁도와 동일합니다. 자세한 지침은 탁도 측정 섹션을 참조하십시오.
- Page 16 (Are you sure you want to delete all stored data)?"가 표시됩니다. 4. 확인하려면 Enter 키를 누르거나 취소하려면 ESC 키를 누릅니다. 통신 HS-200 탁도계는 무료 DAS 소프트웨어를 통해 데이터를 컴퓨터로 전송하거나 데이터를 Excel로 가져올 수 있습니다. 이 소프트웨어는 공식 웹사이트에서 다운로드할 수 있습니다. 설치하기 전에 Windows 10 운영 체제가 컴퓨터에...
- Page 17 데이터 수신 1. USB 케이블을 계기와 컴퓨터에 연결합니다. 2. DAS 아이콘을 클릭하면, 시스템은 사용 가능한 통신 포트를 자동으로 검색하고 "컴퓨터에서 포트를 찾았습니다(Found a port on your computer)"라는 메시지 상자를 표시합니다. 3. OK를 누르면 애플리케이션이 시작됩니다. 4. Connect를 누르면 화면에 "포트가 연결되었습니다(Port is connected)"가 표시됩니다.
- Page 18 부록 샘플 바이알 일치시키기 정확도와 반복성을 향상시키려면 인덱스가 생성된 샘플 바이알을 사용하는 것이 탁도 측정에 가장 적합합니다. 몇 개의 바이알을 사용해야 하는 경우, 바이알 일치시키기가 필요합니다. 1. 각 바이알에 대해 위의 1~ 6 단계를 반복하고 판독값을 기록합니다. 2. 이 바이알 측정값의 가장 가까운 위치를 찾아 표시합니다. 포르마진...
- Page 19 탁도 표준 0.02, 200, 500, 1000 NTU, 30 ml USB-B USB 커넥터 A-B, 1m(3.3피트) 케이블 DCPA-12V 12V DC 전원 어댑터, 유럽 표준 플러그 사양 모델 HS-200 측정 방법 ISO 7027 혼탁 방식(90°) 범위 0~2000NTU/FNU 0~500 EBC 0~9999 ASBC TSS 범위는 변환 계수에 따라 다릅니다.
- Page 20 폐기할 수 없습니다. 전기 및 전자 장비에 대해 지정된 수거 장소에서 현지 규정에 따라 제품을 폐기하십시오. 보증서 •CAS는 구입 일자로부터 1년 간 정상적인 사용 조건에서 사용한 경우 품질에 무상 보증을 합니다. •다음을 포함한 남용이나 잘못된 사용에 따른 피해는 보증에서 제외됩니다.
- Page 21 Thank you very much for selecting the CAS Laboratory Turbidity Meter HS-200. Please do read the user manual carefully and thoroughly so as to ensure the safe usage of this product, and keep the manual well for further reference in case you have problems.
- Page 22 Overview Introduction Thank you for selecting the HS-200 laboratory turbidity meter. This user manual provides a step-by-step guide to help you operate the meter, please carefully read the following instructions before use. Any use outside of these instructions may invalidate your warranty and cause permanent damage to the meter.
- Page 23 Connectors 1. Socket for power adapter 2. USB-B interface to computer Keypad Function • Switch the meter on or off • Exit the calibration, settings, data logs and return to the measurement mode • Start calibration • Press and hold the key to enter the setup menu •...
- Page 24 Setup Meter Setup The HS-200 turbidity meter contains an integrated setup menu for customizing the displayed option to meet measurement requirements. The following table describes the functions of each menu item. Setup Menu Date and Time Set the year, month, day, hour, minute for data log.
- Page 25 Setup Menu 0.1 default 0.01 TSS Factor Set the conversion factor for measurement of the total suspended solids. 0.13 default Auto-Power Off If enabled, the meter will automatically switch off if no key is pressed within 2 hours. 2 hours default Disable Delete Data Delete all data logs in the memory.
- Page 26 Setting the Password The password protection feature is used to prevent the unauthorized calibration and settings. If enabled, the user must enter a 4-digit password to enter the setup menu or calibration mode. 1. Press and hold the key to enter the setup menu. 2.
- Page 27 Any residues can cause inaccurate readings. Turbidity Calibration The HS-200 turbidity meter allows turbidity calibration up to 7 points with minimum of 2 points, the default calibration points include the 0.02, 10, 200, 500, 1000, 1500 and 2000 NTU. For better accuracy, we recommend to select a calibration point close to the sample value you are measuring.
- Page 28 Calibrating the Meter 1. Press the Cal key to enter the calibration mode. Press the key to select the number of calibration points. 2. Press the Enter key, the screen shows 0.02 NTU. If necessary, press the key to select first calibration point, the meter will perform the calibration from the low to high turbidity.
- Page 29 4. Insert the vial into the measurement chamber. Align the triangle mark on the vial cap with the arrow on the meter. Close the light shield lid. Align arrows 5. Press the Enter key, the meter begins calibration. The Calibrating icon shows on the upper right corner of the screen.
- Page 30 Turbidity Measurement An accurate turbidity measurement depends on good measurement techniques. Factors such as clean sample vial, positioning of vial in the measurement chamber, covering the vial with the light shield lid, meter calibration, removal of bubbles, etc. Refer to the Measurement and Calibration Hints section for detailed instructions on page.
- Page 31 = Volume of the original sample (ml) = Volume of the dilution water (ml) Total Suspended Solids Measurement The HS-200 turbidity meter contains a Total Suspended Solids mode and needs to enter a conversion factor before measurement. Calculating the TSS Factor 1.
- Page 32 Setting the TSS Factor 1. Press and hold the key to enter the setup menu. key to select the TSS Factor, press the Enter key to confirm. 2. Press the key to set the conversion factor, press the Enter key to save. 3.
- Page 33 Selecting the TSS Measurement Mode 1. Press and hold the key to enter the setup menu. key to select the Measurement Mode, press the Enter key to confirm. 2. Press the key to select the mg/L (TSS), press the Enter key to enter 3.
- Page 34 4. Press the Enter key to confirm or the ESC key to cancel. Communication The HS-200 turbidity meter is capable of transferring the data to the computer or importing the data to Excel by a free DAS software. You are able to download this software from our official website.
- Page 35 Receiving the Data 1. Connect the USB cable to the meter and computer. 2. Click the DAS icon, the system automatically scans an available communication port and shows a message box "Found a port on your computer". 3. Click the OK, the application starts. 4.
- Page 36 Appendix Matching the Sample Vials For better accuracy and repeatability, using an indexed sample vial is best choice for turbidity measurement. If you need to use a few vials, match these vials are necessary. 1. Repeat steps 1 through 6 above for each vial and record the readings. 2.
- Page 37 USB-B USB connector A to A, 1 m (3.3 ft) cable DCPA-12V 12V DC power adapter, european standard plug Specifications Model HS-200 Measurement Method ISO 7027 nephelometric method (90° ) Range 0~2000NTU/FNU 0~500 EBC 0~9999 ASBC TSS range depends on conversion factor Resolution 0.01NTU(0~99NTU)
- Page 38 Warranty •CAS warrants its products free of defects in materials and workmanship in normal use for a period of ONE year from the date of retail purchase. •This warranty does NOT cover damages caused by misuse or abuse, including but not limited to: Failure caused by unauthorized repairs or modifications;...
- Page 40 HS-200 고객서비스지원센터 1577-1514 수리 및 고장 접수 카스공식홈페이지 : http://www.cas.co.kr 본사 : 경기도 양주시 광적면 그루고개로 262 TEL : 031 820 1100 서울사무소 : 서울 강동구 양재대로 1315(성내동) 카스빌딩 T : 02 2225 3500 / F : 02 475 4668/9...
Need help?
Do you have a question about the HS-200 and is the answer not in the manual?
Questions and answers