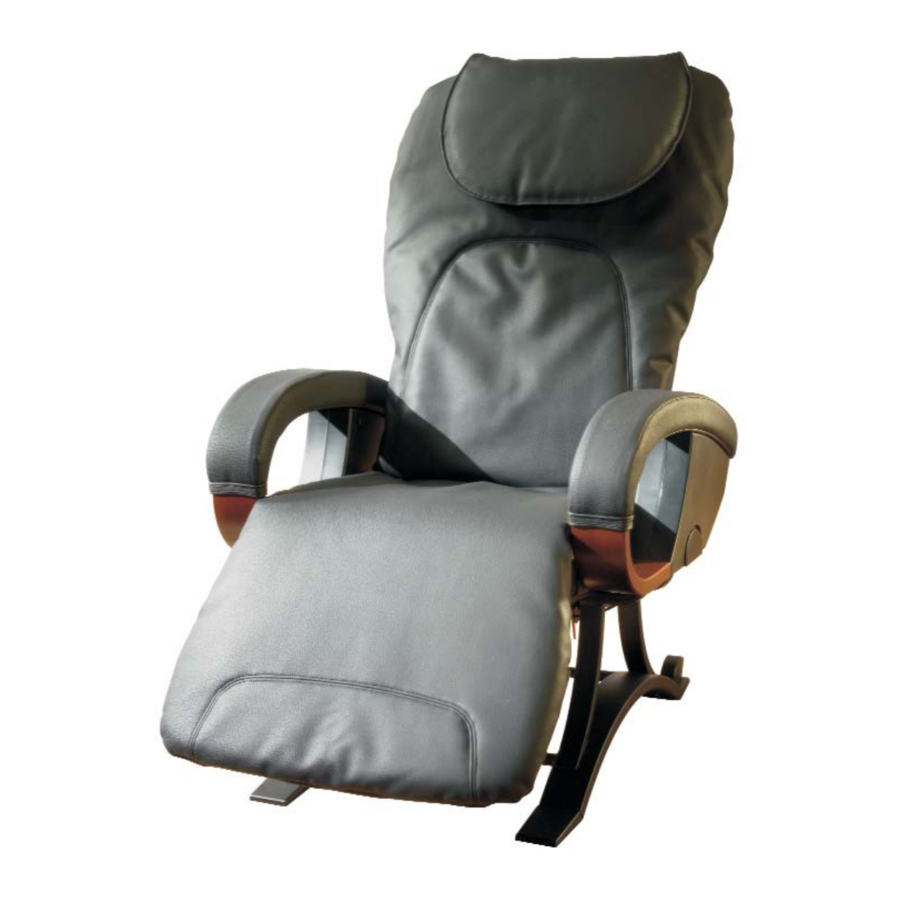
Homedics Haven MR-100 Manual
- Instruction manual and warranty information (16 pages)
Advertisement
Introduction
Congratulations! You have made a wonderful investment in yourself and your family by bringing the Haven™ massage chair into your home. In addition to being a comfortable, relaxing place to sit, the Haven massage chair provides a full range of massage options to enjoy. The more you use your Haven massage chair, the more relaxed and rejuvenated you will feel.
Haven massage chairs incorporate Quad-Roller Massage Technology, the technology of choice for the most discerning consumers. The rollers are shaped and positioned to feel like the hands of a professional massage therapist, and are controlled by the highest quality components. HoMedics integrates this advanced technology with custom designed, comfortable recliners to provide a quiet, soothing and effective massage experience.
To obtain the best results from your massage chair, it is important that you read this instruction manual. Please take the time to go through it, and if you have any questions about its contents, or need help, call HoMedics Consumer Relations at 1-800-466-3342.
Please complete the enclosed registration form to help us serve you better. Or, if you prefer, you can register on line at www.homedics.com.
Thank you for your purchase and enjoy your new massage chair.
Assembly Instructions
Setting up your massage chair is easy to do. Your massage chair is almost completely assembled. You will need two people to take the chair out of the box, but the final assembly can be done by one person. After carefully removing all the contents from the packaging, inspect the chair and its components to make sure everything has been received.
Components:
- Back cushion
- Hand control
- Seat cushion
- Softening pad
- Head rest
- Locate the red lever at the base of the back frame and press inward to release the chair back from the folded position into an upright position. The lever will align with the red knob attached to the gas spring, which is located on the bottom of the chair seat. You may need to lift the gas spring slightly to help the hinge connect.
![]()
- Locate the seat cushion (Fig. 3), slide the metal frame into the pocket on the back of the cushion and line up with the adhesive strips (Fig. 2). To raise the footrest, pull the lever on the left side of the chair outward.
![]()
- Locate the back cushion (Fig. 4), line up the adhesive strips along the back of the chair and place the cushion on the chair (Fig. 2). It may be easiest to recline the chair back when putting the cushion into place. To recline, locate the lever on the right side of the chair and pull outward. Tuck in the base of the back cushion to align with the seat cushion.
Note: You may attach the optional headrest (Fig. 8) by lining up the adhesive strip located on the back of the chair frame.
![]()
- Unwrap the cord to the hand control and adaptor. Locate the plug jack on the back of the massage chair (Fig. 5). Make sure the power switch is in the "off" position. Now plug the cord into the receptacle and place the hand control against the magnetic plate on the right side of the chair. This is where you may store your remote.
![]()
- Plug the adaptor into a grounded 120-volt outlet. This product is equipped with a grounded plug and should only be used with the appropriate outlet. Once all pieces of the massage chair are in place and the main power line is plugged in, you may turn the power switch on (Fig. 5).
The Haven massage chair also includes an electrical outlet with a 300 maximum wattage (Fig. 5).
NOTE: The outlet is an added convenience for use with items such as a laptop computer or reading light. It will not power the chair.


Enjoying Your Chair and General Use
Choosing a Location
It is important to choose a location that will allow you to best enjoy the chair's benefits. The following is required for the massage chair:
- The chair back should be a minimum of 2.5 feet from the nearestobject to recline fully.
- An electrical outlet that is a maximum of 8 feet from the chair.
In addition, we would suggest you consider the following for your massage chair location:
- Choose a low traffic area so you can create a peaceful environment when getting your massage.
- Choose a location in your home that makes you feel the most comfortable and relaxed, but is also convenient.
- Adjustable lighting near the chair allows you to create the right setting for your mood.
Moving Your Chair
Once you have selected the location for your chair, you can easily move it with the convenient wheels located on the back legs of the chair (Fig. 6).

To move your chair, stand behind the chair and tilt it backwards until the wheels are engaged. Then simply push your chair to the location you want. When you are lowering the front of the chair in the spot you want it, be careful not to drop it too hard or fast, as it may cause damage to your floors.
Turning On Your Chair
The Haven massage chair has a master power switch that must be in the "on" position in order to work. Once you have plugged the chair power cord into the electrical outlet, turn on the master power switch located on the back of the chair (Fig. 7).

Adjusting the Chair Cushions and Recline Systems
Your Haven massage chair cushions and recline angles can be adjusted to provide the most comfort while you are just sitting or getting a massage. Changing the arrangement of cushions and the recline angle of the backrest and footrest adjusts the intensity and range of the massage along your back.
Adjusting the Cushions
There are two adjustable cushions that are included with your chair: the headrest pillow and the backrest softening pad.
THE HEADREST PILLOW:
The headrest pillow is designed to support your head and neck while sitting and relaxing (Fig. 8). When you are using the massage functions, you may need to move or remove the headrest pillow to feel the massage in the upper shoulder or neck area. The headrest attaches with adhesive strips and is easily adjusted.

THE BACKREST SOFTENING PAD:
Your massage chair comes with the backrest softening pad included (Fig. 9). It is recommended that you have this softening pad installed for the most comfort while just sitting in the chair. In addition, it is recommended that you use the softening pad while using the product until your body is "used to" the intensity of the massage. Once you are comfortable with it, you may want to increase the intensity of the massage by removing the softening pad. This will allow you to experience a deeper, more therapeutic massage.

To install the softening pad, remove the back cushion and locate the zipper in the lower back portion. Unzip this and insert the softening pad into the pocket. Close the zipper and replace the back cushion.
ADDITIONAL CUSHIONS:
You may add additional cushioning to the chair with your own pillows. Keep in mind that the more cushioning you add, the less you will be able to feel the massage.
Adjusting the Backrest Angle
You can adjust the backrest angle to recline up to approximately 165 degrees. Reclining the backrest increases the intensity of the massage, and also repositions the body so that the massage range along your back and neck is changed. Typically, the further you recline, the further the massage will reach in the shoulder and neck area. Reclining the chair fully is the best way to experience a neck massage.
RECLINE
To recline the backrest using the manual control, lift the lever on the right side of the chair seat (Fig. 10) and lean back. When you are in the desired position, release the lever.

When you are ready to raise the backrest, pull the lever up again and lean forward. The hydraulic gas system will raise the backrest for you.
ADJUSTING THE FOOTREST
To raise the footrest, pull up on the footrest lever located on the left side of the chair seat (Fig. 11). Relax your legs so they do not provide extra resistance. The hydraulic cylinder will begin to raise the footrest. When you have reached the desired position, release the lever.

To lower the footrest, make sure the backrest of your chair is in the upright position. Pull up on the footrest lever and gently push down with your legs until the footrest is lowered. Release the lever when finished.
It is recommended that you elevate your feet while the backrest is reclined to avoid strain on the lower back. It is also best to elevate your feet during a massage session to promote circulation.
NOTE: In order to avoid strain and potential injury to your back, never attempt to get in or out of the massage chair with the backrest reclined or the footrest raised. Make sure the chair is the closed (lowered) position.
Remote Control Overview

Note: The massage system will completely shut off 20 minutes after the last command for safety purposes. However, it will not shut off if the last command was a programmed massage session.
- Power – To turn the massage chair on or off.
- Pause – To pause the current operation in place.
- Demo – To activate a brief preset course of the massage functions.
- Energize – To activate a preset, energizing massage program for the entire back.
- Relax – To activate a preset, relaxing massage program for the entire back.
- Upper – To activate a preset massage program for the upper section of the back.
- Lower – To activate a preset massage program for the lower section of the back.
- Full Knead – To activate the kneading function.
- Full Roll – To activate the rolling function.
- Full Tap – To activate the tapping function.
- Spot Knead – To activate the stationary kneading function.
- Spot Tap – To activate the stationary tapping function.
- Adjust Up – To adjust the massage roller up during a stationary function.
- Adjust Down - To adjust the massage rollers down during a stationary function.
- Speed – To adjust the speed of the massage.
- Width – To adjust the width of the massage.
Haven Master Controls

Power
Press this button to engage the massage system. The LED light will blink while the system is engaging. Once the LED light is illuminated and no longer blinking, you can start the massage functions.
When finished with the massage session, press again to turn the system off. Doing this stops the massage and returns it to the disengaged position (top of the backrest). This will take up to 30 seconds during which the LED light will blink.
NOTE: Once turned off, do not attempt to turn the massage system back on until the massage has been fully disengaged (stopped at the top of the backrest).

Pause
Press the pause button to stop the massage in its current mode without turning the massage chair off (the LED will turn ON). To resume the massage where you left off, press the pause button again (the LED will be OFF).
NOTE: If you leave the chair after pushing the pause button, be careful when you sit back down as the rollers may be in a position that will cause discomfort or injury when you sit back down.

Demo
The demonstration button is an approximately 2 minute preset program to give you a quick idea of what the Haven massage chair functions feel like and to familiarize yourself with the chair. You might also find that this short program is great for when you don't have a lot of time.
NOTE: You can engage the Demo program by pressing the Demo button without first pressing Power although you may press Power first if you like. You can stop the Demo program by either pressing Demo again or Power. You cannot switch to other functions while in Demo. You must stop the Demo program, press Power to reengage the mechanism and then select another function
Haven Programmed Massage Sessions
The pre-programmed massage options have been designed with a professional massage therapist to closely emulate an actual massage session by combining different massage functions in various sequences. Each session lasts from 12-15 minutes and is designed to deliver a massage that meets your specific need. Just select the program that best meets your needs and let the Haven massage chair do the rest.
To activate a massage program, check that the power is turned on and simply press the desired program button. To stop a program, press the button again.
NOTE: When stopping a programmed massage, the LED light will blink until the function has completely disengaged.

Energize
This approximately 15 minute program is designed to help invigorate your body and prepare you for the day or activity ahead of you. This program combines rolling, kneading and tapping to stretch out the back and spine, increase circulation and help move fatiguing toxins out of your body.

Relax
This approximately 15 minute program is designed to help you relax, work out tension and prepare you for a good night's sleep. It combines kneading and rolling along the entire back, with an emphasis on the shoulder and lower back area, where stress is most typically felt.

Upper Back
This approximately 12 minute program is designed to reduce tension and stiffness in the upper back and shoulder area. After warming up your entire back, this session combines kneading, tapping, and rolling focused on the upper back area.
NOTE: Prior to the massage, make sure to adjust the position of the backrest to ensure shoulder massage is being done on area and the intensity you need. Also, you may wish to remove the headrest cushion.

Lower Back
This approximately 12 minute program is designed to reduce tension and stiffness in the lower back. After warming up your entire back, the massage session focuses on the lower back area with a combination of functions. This session will help loosen your lower back and reduce pressure on the spine.
NOTE: Prior to the massage, make sure to adjust the position of the backrest to ensure lower back massage is being done on area and the intensity you need.
Haven Manual Massage Functions
The massage programs provided will usually meet your needs, and are the easiest way to enjoy your massage chair. However, there may be times when you want to customize the type and length of a massage using the manual control functions. The manual controls allow you to:
- To concentrate on a particular spot or problem area
- Change the speed and width of the massage on your back to adjust to your body frame
- Choose a massage function you like best
To activate a massage function, check that the power is turned on and simply press the desired program button. To stop a function, press the button again.
NOTE: When stopping a manual massage function, the LED light will blink until the function has completely disengaged.

Full Roll
Full rolling moves the rollers along either side of the spine, gently massaging the paraspinal muscles with a pressing motion up and down the full length of the back. This function emulates "ephleurage", the type of massage used by professionals to warm up and prepare the muscles for a deeper massage. Rolling helps relax the back, relieve muscle tension and increase circulation.

Full Knead
Full kneading combines rolling massage with kneading to create a penetrating, circular motion up and down the back. This function emulates the thumb kneading of a massage therapist. It helps relieve tension and soreness by moving and stretching the muscle and also increases circulation. Kneading is ideal for working out knots or kinks.

Full Tap
Full tapping combines a rapid back and forth tapping along the paraspinal muscles while moving up and down (rolling) the full length of the back. This function simulates fists or hands tapping the back. Popular in sports medicine and deep tissue massage, tapping works well for loosening stiff muscles prior to physical activity or more intense massage. It also increases blood flow and helps flex the spine for improved spinal health.

Spot Knead
Stationary version of the kneading function, which can be adjusted up or down with the up/down controls.

Spot Tap
Stationary version of the tapping function, which can be adjusted up or down with the up/down controls.

Up/Down
Available with Spot Knead or Spot Tap, the Up/Down button adjusts the location of the massage to a specific position along the back. To move the massage location up or down, press and hold the respective button until you have reached the desired location.
When you release the button, the massage location will be set.

Speed
Available with kneading and tapping functions, the speed button adjusts the speed of the massage function. The default speed is always medium, and the speed setting is indicated by the LED light. To change the speed, press and release the button. Repeat this until you have reached the desired setting.

Width
Available with Rolling and Tapping functions, the width button adjusts the location of the massage rollers. Each setting represents the distance between the rollers. The 3 settings are approx.: (1) 1.6", (2) 3.2", (3) 4.7". The default setting is 2 and the width setting is indicated by the LED light. The width setting allows you to customize the massage to the size of your back or to massage a different section of your back. To adjust the width of the rollers, push and release the button. Repeat until you have reached the desired setting.
Automatic Shut Off
The Haven massage chair has been designed for convenience and safety. As a special precaution against falling asleep while using the unit or leaving the unit on while it is still in operation, we've programmed it to automatically shut off 20 minutes after the last manual command. This special feature should not be considered as a substitute for OFF. Always remember to turn your unit off when not in use.
Note: The automatic shut off feature will not function if the last command was a programmed massage session.
Product Care & Maintenance
To Clean
- Disconnect the recliner from power source before cleaning.
- A soft, damp cloth may be used for the recliner. When cleaning the controller or around the power switch, use a dry cloth only.
- Dust may be removed from the backrest or armrest with a vacuum.
- Do not use abrasive cleaners, brushes, gasoline, kerosene, polish or paint thinner to clean.
- The cushions are not machine washable. Do not immerse in liquids to clean.
To Store
- Place the controller in its specially designed recess on the right side of the chair.
- Avoid contact with sharp edges or pointed objects which might damage/puncture the fabric.
- Do not store near heat or open flame. Do not leave this product exposed to direct sunlight for long periods of time. This may cause fading.
- It is recommended that the recliner be covered when not in use for long periods of time.
- It is suggested that the power cord be coiled and the unit kept in an area free of dust and moisture if not in use for long periods of time.
Other General Care & Use Guidelines
- Foreign objects should not be inserted between the massage nodes or the unit housing.
- The mechanics of the product are specially designed and constructed to be maintenance free. No periodic lubrication or servicing is required.
Troubleshooting
| Problem | Probable Cause(s) | Suggested Solution |
| Massage action does not start. | No massage function button was pressed. | Press one of the massage function buttons to start manual or programmed massage. |
| The power cord is not plugged in. | Plug the power cord into a 120-volt AC outlet. | |
| The power switch on the chair is not turned on. | Turn the power switch to on. | |
| The remote control is not plugged in. | Check the remote control modular jack to make sure it is correctly plugged in. | |
| Desired massage action does not start. | The correct massage function button was not pressed. | When pressing the massage function buttons, watch the LED's on the remote control. They will indicate the active function. |
| The current function must complete a mini cycle (pass through the top or bottom of the track) before it can change. | Wait for the rollers to pass the top or bottom of the track from the current position. | |
| The massage function button was pressed too quickly after the last button. | Wait several seconds and press the desired function again. | |
| Massage rollers stop while in action. | The fuse has failed. | Check the fuse. Replace if needed with a standard 5A 250V fuse. (See Fig. 5 for fuse location.) |
| The self-contained safety device may stop the action if the chair has operated for an excessive period of time. | Turn the main power switch to off, unplug the chair and wait 30 minutes before restarting. | |
| Massage action does not stop after normal 20 minute auto shut off cycle. | Additional press of massage function button could have restarted another massage cycle. | Press the currently activated massage function button to discontinue the function or press the Power button. |
| Power will not turn off on remote control. | Turn off power with main power switch on the back of chair | |
| Power LED is illuminated on remote control, but massage functions will not activate. | Turn off power with main power switch on the chair back. Wait 15 seconds and turn the switch back on. Press Power on the remote control again. | |
| Unable to recline. | An object may be in the way of the backrest or footrest. | Check to make sure there is a clear path for both the backrest and footrest. |
| The gas spring is not attached | Check underneath the chair to make sure the gas spring is attached to the hook (both pieces are marked in red). |
Specifications
| Model Number | MR-100 |
| Operating Voltage | 120V |
| Power Consumption | 85W |
| Massage Rollers | 4 |
| Massage Functions | Roll, Knead, Tap |
| Multi-massage Options | Roll/Knead, Roll/Tap |
| Pre-Programmed Massage Sessions | 5 |
| Adjustable Functions | Speed, Width, Height |
| Total Massage Stroke Length | 21" |
| Recline Angle | Approx. 110 – 165 degrees |
| Recline Type | Manual |
| Footrest | Integrated |
| Auto Timer Shut Off | 20 minutes |
| Chair Dimensions | 29" W x 38"L x 47"H (not reclined) 29"W x 68"L x 27"H (fully reclined) |
| Chair Weight | Approx. 106 lbs. |
| Cover Fabric Material | Synthetic Leather, Micro Fiber |
| Warranty | 2 year limited |
* Specifications are subject to change without prior notice.
IMPORTANT SAFEGUARDS
WHEN USING ELECTRICAL PRODUCTS, ESPECIALLY WHEN CHILDREN ARE PRESENT, BASIC SAFETY PRECAUTIONS SHOULD ALWAYS BE FOLLOWED, INCLUDING THE FOLLOWING:
READ ALL INSTRUCTIONS BEFORE USING

TO REDUCE THE RISK OF ELECTROCUTION:
- ALWAYS unplug the appliance from the electrical outlet immediately after using and before cleaning.
- DO NOT reach for an appliance that has fallen into water. Unplug it immediately.
- DO NOT use while bathing or showering.

TO REDUCE THE RISK OF BURNS, ELECTROCUTION, FIRE OR INJURY TO PERSONS:
- An appliance should NEVER be left unattended when plugged in. Unplug from outlet when not in use and before putting on or taking off parts or attachments.
- Close supervision is necessary when this appliance is used by, on or near children, invalids or disabled persons.
- Use this appliance only for its intended use as described in this manual. DO NOT use attachments not recommended by HoMedics; specifically any attachments not provided with the unit.
- NEVER operate this appliance if it has a damaged cord or plug, if it is not working properly, if it has been dropped or damaged, or dropped into water. Return it to HoMedics Service Center for examination and repair.
- NEVER use pins or other metallic fasteners with this appliance.
- Keep cord away from heated surfaces.
- NEVER block the air openings of the appliance. Keep air openings free of lint, hair, etc.
- NEVER use while sleeping or fall asleep while using the massager.
- NEVER drop or insert any object into any opening.
- DO NOT operate where aerosol (spray) products are being used or where oxygen is being administered.
- Connect this appliance to a properly grounded outlet only. See Grounding Instructions.
- DO NOT operate under a blanket or pillow. Excessive heating can occur and cause fire, electrocution or injury to persons.
- DO NOT carry this appliance by supply cord or use cord as handle.
- To disconnect, turn all controls to the "OFF" position, then remove plug from outlet.
- This appliance is designed for household use only.
- This appliance is designed for personal, non-professional use only. This appliance should be used only for personal, non-professional uses. Any other use will void warranty.
Grounding Instructions
This product must be grounded. If it should malfunction or breakdown, grounding provides a path of least resistance for the electric current to reduce the risk of electric shock. This product is equipped with a cord having an equipment-grounding conductor and a grounding plug. The plug must be plugged into an appropriate outlet that is properly installed and grounded in accordance with all local codes and ordinances.
Improper connection of the equipment-grounding conductor can result in a risk of electric shock. Check with a qualified electrician or serviceman if you are in doubt as to whether the product is properly grounded. Do not modify the plug provided with the product - if it will not fit the outlet, you may temporarily use an adaptor (such as the one shown in Figure B) until you have a proper outlet (such as the one shown in Figure C) installed by a qualified electrician.
This product is for use on a nominal 120-volt circuit, and has a grounding plug that looks like the plug illustrated in Figure A. A temporary adapter that looks like the adapter illustrated in Figure B may be used to connect this plug to a 2-pole receptacle as shown in Figure D if a properly grounded outlet is not available. The temporary adapter should be used only until a properly grounded outlet Figure C can be installed by a qualified electrician. The tab for grounding screw Figure B extending from the adapter must be connected to a permanent ground such as a properly grounded outlet box cover. Whenever the adapter is used, it must be held in place by a metal screw. See Figures D and E.


Please read all instructions carefully before operating.
- If you have any concerns regarding your health consult your doctor before using this product.
- Those with the following conditions should consult their physician prior to using this massage chair:
- Malignant tumor
- Heart Disease
- Pregnancy
- Conditions requiring rest
- Back Disease or back trouble from an injury or accident.
- Diabetes
- Individuals with pacemakers should consult a doctor before use.
- NEVER leave the appliance unattended, especially if children are present.
- NEVER cover the appliance when it is in operation.
- DO NOT use this product for more than 20 minutes at a time.
- Extensive use could lead to the products excessive heating and shorter life. Should this occur, discontinue use and allow the unit to cool before operating.
- NEVER use this product directly on swollen or inflamed areas or skin eruptions.
- This product is a non-professional appliance designed to provide soothing massage to worn muscles. DO NOT use this product as a substitute for medical attention.
- This product should NEVER be used by any individual suffering from any physical ailment that would limit the user's capacity to operate the controls.
- This product should never be used by any individual suffering from any ailments that would limit or altogether inhibit the user's capacity to feel or have any sensation in the body part that the product is being used on.
- If you detect a malfunction or any other abnormal condition in the operation of your chair, turn off the power immediately and disconnect the power cord from the outlet.
- Should you have a power failure, turn the power switch to the OFF position.
- If the chair has gotten wet or liquid is spilled near the main power switch, turn the chair off, unplug it from the wall socket and call HoMedics Consumer Relations.
- Do not use the massager while standing on a damp floor or when any part of the body is in contact with plumbing or any similar ground.
- Do not use unit if noise above normal sound is heard.
HoMedics
3000 Pontiac Trail
Commerce Township, MI
48390
Consumer Relations
e-mail: cservice@homedics.com
phone: 800-466-3342
Documents / Resources
References
Download manual
Here you can download full pdf version of manual, it may contain additional safety instructions, warranty information, FCC rules, etc.
Advertisement


Need help?
Do you have a question about the Haven MR-100 and is the answer not in the manual?
Questions and answers