Singer NO. 27 Instructions For Using Manual
Hide thumbs
Also See for NO. 27:
- Function manual (20 pages) ,
- Instructions for using manual (21 pages)
Table of Contents

Related Manuals for Singer NO. 27


Summary of Contents for Singer NO. 27
-
Page 1: Sewing Machine
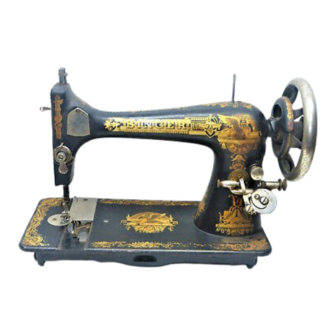
27 & 28 INSTRUCTIONS FOR USING SINGER* SEWING MACHINE NO. 27 & 28 VIBRATING SHUTTLE, FOR FAMILY USE When requiring Look for the Needle, Oil, Red "S" Parts or Repairs, There are Singer for your Machine Shops in every City... -
Page 2: Table Of Contents
27 & 28 The Table of Contents Warning Hints To all whom it may concern Singer Service Needles Breaking Thread Breaking It’s sew easy by electricity Skipping Stitches The Hand Attachment Stitches Looping Stop Motion Material Puckering To Operate the Hand Machine... -
Page 3: Warning
Every description of sewing machine use of any SINGER Machine and its repaired, Attachments. We hope, too, that you will make the SINGER SEWING CENTRE your headquarters for sewing supplies and service. Only there, or through SINGER authorized representatives, can you secure SINGER oil, cotton, needles,... - Page 4 27 & 28...
-
Page 5: The Hand Attachment
27 & 28 The Hand Attachment FIG. 1 FIG. 2 When the cover is removed from the machine, the hand attachment will be found to be out of working position, as shown in Fig. 1. To operate the machine, pull the small spring stud (2, Fig. 1) and turn the handle back until the lever (1, Fig. -
Page 6: Stop Motion
27 & 28 Stop Motion This device a allows the hand wheel to run free, so that bobbins may be wound without operating the mechanism. To loosen the wheel hold it with the left hand and with the right hand turn the stop motion screw over towards you, as shown in Fig. -
Page 7: To Ensure Perfect Action Of The Machine
27 & 28 To Ensure Perfect Action of the Machine The hand wheel must always turn over towards you. Do not work the machine with the presser foot lowered or with the shuttle and the nee- dle threaded, except when sewing Both slides over the shuttle must be kept closed. -
Page 8: To Thread The Needle
The SINGER Needle Threader saves time, trouble and patience, and is invaluable to those having defective sight. -
Page 9: To Wind The Bobbin
27 & 28 To Wind the Bobbin (See Fig. 6) Loosen the hand wheel (see Fig. 3) and push the top of the winder from you until its rubber ring (5) just touches the ledge of the hand wheel. Turn the latter over towards you until the thread guide (2) moves to the extreme right. -
Page 10: To Remove The Shuttle
27 & 28 To Remove the Shuttle Open the front slide of the machine and turn the hand wheel towards you until the shuttle comes full under the opening. Press down the point of the shuttle with the thumb and lift out. Turn the open end of the shuttle downward and the bobbin will drop out. - Page 11 27 & 28 To Thread the Shuttle Continued... Place the forefinger of the left hand on the end of the bobbin, and draw the thread down into the slot of the shuttle, towards the point, as far as it will go (see Fig. 8); then pull the thread tightly upwards and down again, so that it lies across the point in the centre of the spring, as shown in...
-
Page 12: To Replace The Shuttle
27 & 28 To Replace the Shuttle.. After threading, take the shuttle in the right hand with its point towards you, and place it in the shuttle carrier, as shown in Fig. 10, leaving a loose end of thread about three inches long above the slide. -
Page 13: To Prepare For Sewing
27 & 28 To Prepare for Sewing With the left hand hold the end of the nee- dle thread, leaving it slack from the hand to the needle. Turn the hand wheel over towards you for the needle to move down and up again to its highest. -
Page 14: To Regulate The Tension
27 & 28 To Regulate the Tensions Correct Stitch. For ordinary stitching, the tension on the upper and under threads should be equal, so as to lock both threads in the centre of the work, as above. If either tension is stronger than the other, imperfect stitching will be the result, thus: Needle Thread Tension FIG. -
Page 15: To Alter The Length Of Stitch
27 & 28 To Alter the Length of Stitch Turn the thumb screw inwards (see Fig. 13) to lengthen the stitch, or turn outwards to shorten it. To Change the Pressure on Material For ordinary family sewing it is seldom nec- essary to change the pressure on the mate- rial. -
Page 16: To Oil Machine
27 & 28 To Oil the Machine FIG. 14 To ensure easy running the machine requires to be oiled so that all moving parts in contact are covered with a film of oil. These should never be allowed to become dry. If used constantly, the machine should be oiled daily, while with moderate use, an occasional oiling is sufficient. - Page 17 To Oil the Machine continued... FIG. 15 After oiling, run the machine rapidly for a few Always use SINGER oil. Inferior oil clogs minutes so that the oil may reach the bear- the bearings, prevents efficient working, ings. Neglect to oil the machine will shorten and causes rapid wear of the mechanism.
-
Page 18: Needles Breaking
27 & 28 HINTS. Needles Breaking. Skipping of Stitches. See that the needle is not bent, the upper See that the needle is correctly set (see page tension is not too tight, and the presser foot 5), is not blunt, bent, or too fine for the or attachments are securely fastened. -
Page 19: Instructions For Using Attachments
A tiresome task becomes a pleasure! Read how to do this in separate pamphlet, Form 1001 ad 33, which maybe obtained free from any SINGER SEWING CENTRE or Singer Salesman. -
Page 20: Bias Gauge
27 & 28 Bias Gauge The Bias Gauge will be found very useful (especially in the case of soft materials) when cut- ting bias steps from 7/16 inch to 1 3/8 inches in width. This may be done by placing the bias gauge upon the point of the scissors and setting the blued indicator to the width desired. -
Page 21: The Binder - Binding
27 & 28 The Binder - Binding Pass the binding through the scroll of the binder and draw it under the needle. Place the edge of the material to be bound between the scroll of the binder and under the needle, lower the presser-bar lifter and sew as usual. -
Page 22: The Adjustment And Operation Of The Binder
27 & 28 The Adjustment and Operation of the Binder The edge to be bound should be held well within the centre slot of the scroll, and with a little practice this is quite easy. If the material is allowed to slip away from the scroll when near the needle, the edge will not be caught in the binding. -
Page 23: Binding Outside Curves
27 & 28 Binding Outside Curves Practice is required to bind a curved edge properly. The edge to be bound must be allowed to pass freely through the scroll and should not be crowded in or against it. Guiding should be from the back of the binder and to the left, allowing unfinished edges to swing naturally into the scroll of the binder. -
Page 24: Binding Inside Curves
27 & 28 Binding Inside Curves This curve is found on nearly all garments which are finished with a bound edge, but practice is necessary on venous materials. When binding an inside curve, straighten out the edge as it is being fed into the Binder. When doing this, take care not to stretch the edge of the material. -
Page 25: The Quilter
27 & 28 The Quilter The quilter guide can be used at either the right or left of the needle, and the distance of the guide from the needle determines the width between the rows of stitching. Slide the wire into its holder on the foot, and set it to the width desired;... -
Page 26: The Foot Hemmer - Hemming
27 & 28 The Foot Hemmer -- Hemming Clip off the right hand corner of the material for its edge to curl easily. Then, with the hemmer foot raised, place the material from left to right under the foot and, with its edge slightly raised, insert the corner into the mouth of the hemmer, easing it along until it fills the curl and reaches the needle. -
Page 27: Hemming And Sewing
27 & 28 Hemming and Sewing on Lace in One Operation Start the hem and, when it is well started, raise the needle to its highest point. Raise the hemmer to relieve the pressure on the hem, and pass the end of the lace through the slot in the side of the attachment and over the hem, as shown. -
Page 28: The Foot Hemmer - Felling
27 & 28 The Foot Hemmer - Felling The two pieces of cloth should be laid, wrong side out, one over the other, with the edge of the under piece a little farther to the right than the upper piece, as shown in the illustration. -
Page 29: The Adjustable Hemmer
27 & 28 The Adjustable Hemmer With its slide closed, the attachment will make hems up to one inch wide. Loosen the screw at the front and move the slide until the pointer is against the desired width then tighten the screw. Insert the edge of the material between the slide and the number gauge, and draw it backward and forward until the hem is formed, stopping with its end under the needle. -
Page 30: The Adjsutable Hemmer - Wide Hemming
27 & 28 The Adjustable Hemmer - Wide Hemming To make a hem more than one inch wide, loosen the screw, draw the slide to the right, as far as it will go, and turn it towards you, as in the illustration. Fold and crease down a hem of the desired width, pass the fold under the extension at the right of the hemmer, then insert the edge of the material into the folder, and proceed to sew. -
Page 31: The Under Braider - Braiding
27 & 28 The Under Braider - Braiding Fit the quilter foot, as shown. To attach the under braider, draw the front and back slides that cover the shuttle, and insert the downward projecting parts of the attachment against the edge of the throat plate. Close first the back slide, then the front, so that the end of the front slide will enter the turned under part of the attachment and hold it firmly in position.
Need help?
Do you have a question about the NO. 27 and is the answer not in the manual?
Questions and answers