Advertisement
Available languages
Available languages
Quick Links
□ IF-1330TCL □ IF-1336TCL □ IF-1340TCL
□ IF-1350TCL□ IF-1360TCL□ IF-1370TCL
CONSUMER SAFETY INFORMATION
Read this manual before installing and operating this appliance
Failure to follow these instructions may result in electric shock, fire property,
or personal injury
Do not store or use gasoline or other flammable liquids in vicinity of this
appliance.
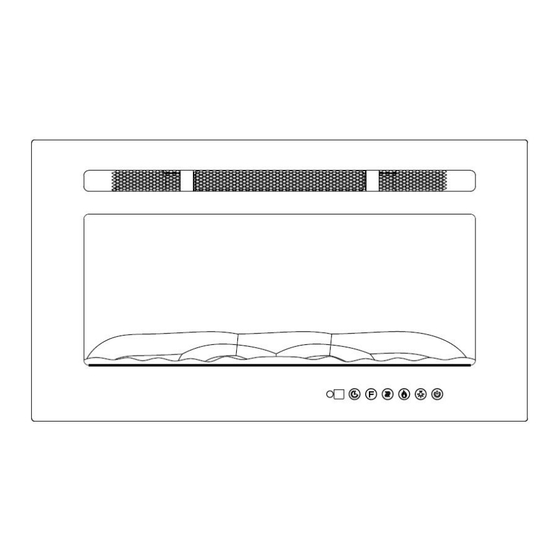
Electric Fireplace
Model No.:
Service contact: service@alipuinc.com
Advertisement

Subscribe to Our Youtube Channel
Related Manuals for Clihome IF-1340TCL


Summary of Contents for Clihome IF-1340TCL
- Page 1 Electric Fireplace Model No.: □ IF-1330TCL □ IF-1336TCL □ IF-1340TCL □ IF-1350TCL□ IF-1360TCL□ IF-1370TCL CONSUMER SAFETY INFORMATION Read this manual before installing and operating this appliance Failure to follow these instructions may result in electric shock, fire property,...
- Page 2 IMPORTANT SAFETY INFORMATION! WARNING Read all instructions before using this heater! This heater is hot when in use. To avoid burns, DO NOT let bare skin touch hot surfaces. If provided, use handles when moving this heater. Keep combustible materials, such as furniture, pillows, bedding, papers, clothes, and curtains at least 3 feet (0.9m) from the front of the heater, and keep them away from the sides and rear.
- Page 3 NEVER use a wall mount bracket from another manufacturer. This product is not intended to be a primary heat source. It is for supplemental heat only. INDOOR use only! NEVER use this heater outdoors! Doing so may result in electric shock! ...
- Page 4 PARTS & HARDWARE b. Wood Screws c-Drywall anchors Remote control d Wall Bracket e-Log set Fixed on back of firebox a.Fireplace f-Decorative Crystals Specification and Dimension PRODUCT DIMENSIONS Model Number IF-1330TCL 30” 17.0” 4.13” 26.2” 16.2” 9.1” 23.7” 76.2cm 43.2cm 10.5cm 66.5cm 41.2cm...
- Page 5 IF-1370TCL 72” 17.0” 4.13” 68.2” 16.2” 9.1” 65.7” 152.4cm 43.2cm 10.5cm 173.2cm 41.2cm 23.2cm 166.9cm Installation and Assembly Your appliance is a wall-mounted, recessed and /or mantel installed appliance. Select a suitable location that is not susceptible to moisture and is away from drapes, furniture and high traffic areas. NOTE:...
- Page 6 STEP A. Selection a dry wall to open a hole for fireplace box. Size of hole as below chat Figure (A) Framing Hole Size Model Number IF-1330TCL 26.77”(68.0cm) 16.54”(42.0cm) IF-1336TCL 32.77(83.2cm) 16.54”(42.0cm) IF-1340TCL 38.77”(98.5cm) 16.54”(42.0cm) 46.77”(118.8cm) 16.54”(42.0cm) IF-1350TCL IF-1360TCL 56.77”(144.2cm) 16.54”(42.0cm) 68.77”(174.7cm) 16.54”(42.0cm)
- Page 7 IF-1330TCL IF-1336TCL Figure (B ) IF-1340TCL IF-1350TCL...
- Page 8 IF-1360TCL IF-1370TCL STEP B. Fix the four wall anchors in each side of the fireplace box according to the dimensions Showed on the drawing. Figure (B)
- Page 9 STEP C. Take off the two screws in both sides of fireplace. Figure (C) STEP D. Have two person to take the glass panel out of the fireplace box. Place it to a soft and clean place. Figure (D) , taks two pcs of foam out of fireplace(E). (‘F) STEP E.
- Page 10 Wall Mounted Installation Due to the many different materials used on different walls, it is highly recommended that you consult your local builder before you install this appliance on the wall. A. Select a location that is not prone to moisture and is located at least 36”(914mm) away from combustible materials such as curtain drapes, furniture, bedding, paper, etc.
- Page 11 NOTE: It is strongly Recommended that the mounting bracket(d) be screwed into the wall studs where possible. If the wall studs cannot be used, ensure that the supplied plastic anchors are used to affix the bracket to the wall and the bracket is adequately secured. With the wall mounting bracket installed have two people lift the appliance up and insert the two hooks on the bracket into the two slots on the back of the appliance.Use original 4x8mm screws to fasten wall bracket.
- Page 12 Logset /Crystal Ember Installation (Note: Please make the installation according to the embers which you bought or selected.) A. Glass front must be removed and the appliance must be mounted in its final location before the logset/crystal embers are installed. B.
- Page 13 WARNING Read and understand this entire owner’s manual, including all safety information, before plugging in or using this product. Failure do to so could result in electric shock, fire, serious injury, or death. Power Plug the power cord into a 110-120V Volt 12 Amp grounded outlet (see IMPORTANT SAFETY INFORMATION on Pages 2 and 3).Make sure the outlet is in good condition and that the plug is not loose.NEVER exceed the maximum amperage for the circuit.
- Page 14 Touch panel/Remote control Operation BUTTON FUNCTION ACTION&INDICATION ON: Enables control panel functions and remote 1. Press once. Indicator light turns on. Power turns control.Turn on flame effect. on. All functions enabled. OFF: Disables control panel functions and remote 2. Press again. Indicator light turns off. Power POWER control.Turn off flame effect.
- Page 15 Step1, remove back cap’s screws. Step 2, take back cap out off remote, insert 2x AAA batteries. Last, fasten back cap again. NOTE: Remote control battery used depends on the remote control type which selected above. NEVER dispose of batteries in fire. Failure to observe this precaution may result in an explosion. Dispose of batteries at your local hazardous material processing center.
- Page 16 Metal: Buff using a soft cloth, slightly dampened with a citrus oil-based product. DO NOT use brass polish or household cleaners as these products will damage the metal trim. Glass: Use a good quality glass cleaner and dry thoroughly with a paper towel or lint-free cloth. ...
- Page 17 3. “Flame Rod” out of place due to rough transit/handing product. This issue can be corrected as simple as removing the glass, flipping the fireplace upside and down, removing a set of screws that are holding the bottom frame plate and placing the flame rod back into place.
- Page 18 Cheminée Électrique No. Modèle: □ IF-1330TCL □ IF-1336TCL □ IF-1340TCL □ IF-1350TCL□ IF-1360TCL□ IF-1370TCL INFORMATION DE SÉCURITÉ DES CONSOMMATEURS Veuillez lire ce manuel avant d'installer et d'utiliser cet appareil. Le non-respect de ces instructions pourrait entraîner un choc électrique, un incendie ou des blessures corporelles.
- Page 19 INFORMATION IMPORTANTE DE SÉCURITÉ AVERTISSEMENT Veuillez lire toutes les instructions avant d'utiliser cet appareil de chauffage! Cet appareil de chauffage est chaud en fonctionnement. Pour éviter les brûlures, NE laissez PAS la peau exposée au contact des surfaces chaudes. Le cas échéant, utilisez des poignées pour déplacer ce chauffage.
- Page 20 ÉVITEZ LES INCENDIES ! Inspecter régulièrement tous les trous de ventilation pour s'assurer qu'ils sont exempts de poussière, de laine ou de toute autre substance obstruante. Débranchez l'appareil et nettoyez-le avec un aspirateur UNIQUEMENT. NE PAS rincer ou mouiller. ...
- Page 21 Ce produit intègre un panneau en VERRE ! Toujours faire preuve d'une extrême prudence lors du traitement du verre. Le non-respect de cette consigne pourrait entraîner des blessures corporelles ou des dommages matériels. Enlevez toutes les pièces et le matériel du carton et déposez-les sur une surface propre, douce et sèche.
- Page 22 Numéro du Modèle IF-1330TCL 30” 17.0” 4.13” 26.2” 16.2” 9.1” 23.7” 76.2cm 43.2cm 10.5cm 66.5cm 41.2cm 23.2cm 60.2cm IF-1336TCL 36” 17.0” 4.13” 32.2” 16.2” 9.1” 29.7” 91.5cm 43.2cm 10.5cm 81.8cm 41.2cm 23.2cm 60.2cm IF-1342TCL 42” 17.0” 4.13” 38.2” 16.2” 9.1” 35.7”...
- Page 23 ÉTAPE A. Sélectionnez un mur sec pour percer un trou pour la boîte à cheminée, les dimensions sont ci- dessous Figure (A) Dimension de Trou du Cadre Numéro de Modèle IF-1330TCL 26.77”(68.0cm) 16.54”(42.0cm) 32.77(83.2cm) 16.54”(42.0cm) IF-1336TCL IF-1340TCL 38.77”(98.5cm) 16.54”(42.0cm) IF-1350TCL 46.77”(118.8cm) 16.54”(42.0cm) 56.77”(144.2cm) 16.54”(42.0cm) IF-1360TCL IF-1370TCL 68.77”(174.7cm)
- Page 24 Ancrage mural Ancrage mural (4 pièces) (4 pièces) IF-1330TCL IF-1336TCL Ancrage mural Ancrage mural (4 pièces) (4 pièces) Figure (B ) IF-1340TCL IF-1350TCL...
- Page 25 Ancrage mural Ancrage mural (4 pièces) (4 pièces) IF-1360TCL IF-1370TCL ÉTAPE B. Fixez les quatre ancrages muraux dans chaque côté de la boîte à cheminée selon les dimensions indiquées sur le dessin. Figure (B)
- Page 26 ÉTAPE C. Dévissez les deux vis des deux côtés de la cheminée. Figure (C) ÉTAPE D. Deux personnes sont chargées de sortir le panneau de verre de la boîte à cheminée. Placez-le dans un endroit doux et propre. Figure (D) , Retirez deux pièces de mousse de la cheminée (E). (‘F) ÉTAPE E.
- Page 27 Installation au Mur Étant donné les nombreux matériaux différents utilisés sur les différents murs, nous vous recommandons de demander conseil à votre constructeur local avant d'installer cet appareil sur le mur. I. Sélectionnez une localisation qui n'est pas susceptible d'être exposée à l'humidité et qui est située à un intervalle d'au moins 36"...
- Page 28 NOTE: Il est recommandé de visser le support de montage (partie e) dans les poteaux du mur si possible. Dans le cas contraire, assurez-vous que les ancrages en plastique fournis sont utilisés pour fixer le support au mur et que le support est correctement fixé. Après avoir installé...
- Page 29 Installation de Logset / Braise en Crystal (Note: Veuillez effectuer l'installation conformément aux braises achetées ou sélectionnées.) E. La face avant en verre doit être démontée et l'appareil doit être monté à sa position finale avant l'installation en bois et des braises en cristal. F.
- Page 30 AVERTISSEMENT Veuillez lire et comprendre ce manuel d'utilisation en totalité, notamment toutes les informations relatives à la sécurité, avant de brancher ou d'utiliser ce produit. Tout manquement à cette consigne pourrait causer un choc électrique, un incendie, des blessures graves, voire la mort. Puissance Branchez le câble d'alimentation dans une prise de courant 110-120V Volt 12 Amp à...
- Page 31 Panneau tactile/Opération de télécommande Bouton FONCTION ACTION&INDICATION ON: Activation des fonctions du panneau de commande et 3. Appuyez une fois. La lampe indicateur s'allume. de la télécommande. Activation de l'effet de flamme. Mise sous tension. Toutes les fonctions sont OFF: Désactivation des fonctions du panneau de activées.
- Page 32 4. Avec l'interrupteur POWER en position OFF, branchez le câble d'alimentation dans la prise de courant. 5. Si le problème subsiste, demandez à un professionnel d'inspecter la prise et le câblage. Informations sur la Batterie de la Télécommande Avec 2 batteries AAA. Étape, Dévissez les vis du capuchon arrière.
- Page 33 Nettoyage TOUJOURS éteindre l'appareil et débrancher le câble d'alimentation de la prise avant de nettoyer, de procéder à l'entretien ou de déplacer cette cheminée. Le non-respect de cette précaution pourrait entraîner un choc électrique, un incendie ou des blessures corporelles. Ne JAMAIS immerger dans l'eau ou pulvériser de l'eau.
- Page 34 AVERTISSEMENT DÉBRANCHEZ COMPLÈTEMENT L'APPAREIL ET LAISSEZ REFROIDIR AVANT TOUTE RÉPARATION.. SEUL UN TECHNICIEN QUALIFIÉ PEUT EFFECTUER LA RÉPARATION ET L'ENTRETIEN DE CETTE APPLICATION ÉLECTRIQUE. PROBLÈME CAUSE POSSIBLE SOLUTION 1. La cheminée est éteinte et ne La cheminée a surchauffé et le Réinitialisez l'interrupteur se rallume pas.
Need help?
Do you have a question about the IF-1340TCL and is the answer not in the manual?
Questions and answers