Table of Contents
Advertisement
Available languages
Available languages
CONSUMER SAFETY INFORMATION
Read this manual before installing and operating this appliance.
Failure to follow these instructions may result in electric shock, fire property,
or personal injury.
Do not store or use gasoline or other flammable liquids in the vicinity of this
appliance.
Electric Fireplace
Model No.:
□ IF-50FSB □ IF-60FSB □ IF-72FSB
Service contact:
Telephone: 303-747-4421
service@alipuinc.com
Advertisement
Table of Contents

Related Manuals for Clihome IF-72FSB


Summary of Contents for Clihome IF-72FSB
- Page 1 Electric Fireplace Model No.: □ IF-50FSB □ IF-60FSB □ IF-72FSB CONSUMER SAFETY INFORMATION Read this manual before installing and operating this appliance. Failure to follow these instructions may result in electric shock, fire property, or personal injury. Do not store or use gasoline or other flammable liquids in the vicinity of this appliance.
-
Page 2: Important Safety Information
IMPORTANT SAFETY INFORMATION! WARNING Read all instructions before using this heater! This heater is hot when in use. To avoid burns, DO NOT let bare skin touch hot surfaces. If provided, use handles when moving this heater. Keep combustible materials, such as furniture, pillows, bedding, papers, clothes, and curtains at least 3 feet (0.9m) from the front of the heater, and keep them away from the sides and rear. - Page 3 ALWAYS mount to wall bracket before use. DO NOT set on the floor, or other surface, to use. NEVER use a wall mount bracket from another manufacturer. This product is not intended to be a primary heat source. It is for supplemental heat only. ...
-
Page 4: Parts & Hardware
You will need the following tools (not included): Phillips screwdriver; stud finder; level; tape measure; electric drill; 1/4” wood drill bit, hammer. PARTS & HARDWARE B. Wood Screws C. Wall Anchors D. 4x8mm Screws (11pcs) (11pcs) (2pcs)l E. Wall Bracket F. -
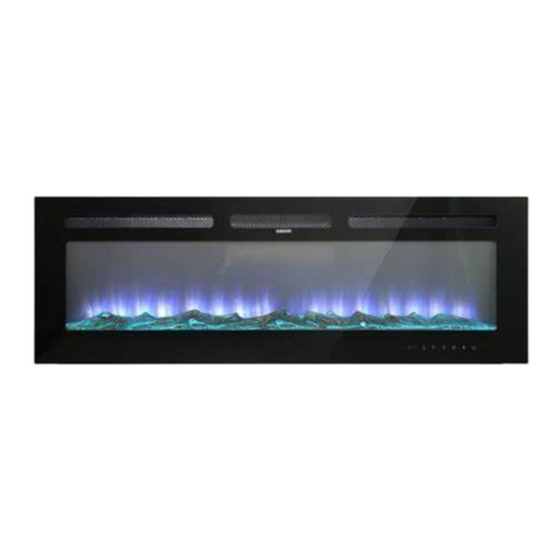
Page 5: Product Dimensions
PRODUCT DIMENSIONS Model Number " " " " " " " 17.7 48.7 16.3 12.2 46.0 IF-50FSB 127.0cm 45.0cm 14.2cm 123.8cm 41.5cm 30.9cm 116.8cm " " " " " " " 17.7 58.7 16.3 12.2 56.0 IF-60FSB 152.4cm 45.0cm 14.2cm 149.2cm 41.5cm 30.9cm... - Page 6 RECESSED TO WALL INSTALLATION ( Tips:Wall bracket removing is NOT required. STEP 1 Select a dry wall to open a hole for fireplace box. Figure (A) Figure (A) Hole cut size Size of hole as below chat-Framing Hole Size Framing Hole Size Model Number 48.7"(123.8cm) 16.3"(41.5cm)
- Page 7 Figure (C) STEP 3 Take off the front tempered glass of the fireplace. Figure (D) Figure (D) TEP 4 Take foam out of the fireplace. Figure (E)
- Page 8 Figure (E) STEP 6 Have two people to move the fireplace box to the wall hole or fireplace mantel. Figure(F) If the appliance is fully recessed into the wall: Figure (F) Use the 4 screws(provided) to lock the appliance into wall with the existing two side flanges, Figure(G)
- Page 9 Figure(G) STEP 7 Put carbon log or crystal stone to bed. Figure (H) Figure(H) STEP 7 Place the front panel lock the appliance. Figure (I)
-
Page 10: Wall Mounted Installation
Figure(I) WALL MOUNTED INSTALLATION Due to many different materials used on different walls, it is highly recommended that you consult your local builder before you install this appliance on the wall. STEP 1 Select a location that is not prone to moisture and is located at least 36"(914mm) away from combustible materials such as curtain drapes, furniture, bedding, paper, etc. - Page 11 Figure(b) STEP 4 Take the glass panel out of the fireplace box. Place it in a soft and clean place. Figure (c) STEP 5 Take foam(A) out of the fireplace. Figure(d) Figure (c)
- Page 12 Figure (d) STEP 6 Mark out location, then mount the bracket(part e) onto the wall using the supplied screws. This bracket MUST have the hooks facing upward and be level. Figure(e) Figure(e) NOTE: It is strongly recommended that the mounting bracket(part e) be screwed into the wall studs where possible.
- Page 13 Fasten the metal bracket (F) at the back of fireplace with 2pcs of 4x8mm screws, the other end to the wall with 1pc of drywall anchors. STEP 7 With the wall mounting bracket installed have two people lift the appliance up and insert the two hooks on the bracket into the two slots on the back of the appliance.
- Page 14 Free Standing Option Lay the heater on the floor or a table Install the base with 6pcs screws ( screws is on the bottom of the fireplace) as provided...
- Page 15 LOG-SET/CRYSTAL EMBER INSTALLATION (Note: Please make the installation according to the embers which you bought or selected.) * Glass front must be removed and the appliance must be mounted in its final location before the log- set/crystal embers are installed. * If your fireplace come with log-set, remove the log-set from the package, put it to the fireplace designed place.
-
Page 16: Methods Of Operation
WARNING Read and understand this entire owner’s manual, including all safety information, before plugging in or using this product. Failure do to so could result in electric shock, fire, serious injury, or death. POWER Make sure the ON/OFF switch, located on the control panel, is in the OFF position.Plug the power cord into a 110-120V Volt 12 Amp grounded outlet (see IMPORTANT SAFETY INFORMATION on Pages 2 and 3).Make sure the outlet is in good condition and that the plug is not loose.NEVER exceed the maximum amperage for the circuit. - Page 17 Turn on switch button first BUTTON FUNCTION ACTION&INDICATION ON: Enables control panel functions and remote 1. Press once. Indicator light turns on. Power control.Turn on flame effect. turns on. All functions enabled. OFF: Disables control panel functions and remote 2. Press again. Indicator light turns off. Power POWER control.
-
Page 18: Care And Maintenance
3. Inspect the fireplace to make sure no vents are blocked, or clogged with dust or lint. If there are, use a vacuum to clean the vent areas. 4. With the POWER switch in the OFF position, plug the power cord back into the outlet. 5. -
Page 19: Troubleshooting
Electrical and Moving Parts: The fan motors are lubricated at the factory and will not require lubrication. Electrical components are integrated in the fireplace and are not serviceable by the consumer. Storage: Store heater in a clean dry place when not in use. WARNING! No other servicing should be performed by the consumer. - Page 20 1. Replace batteries remote control. 1. Low batteries. 2. Aim control at sensor located Remote control does 2. Not aiming control correctly. directly behind glass screen in center not work. 3. Defective remote control and of unit just above logs. /or sensor.
- Page 21 Cheminée Électrique No. Modèle : □ IF-50FSB □ IF-60FSB □ IF-72FSB INFORMATION DE SÉCURITÉ DES CONSOMMATEURS Veuillez lire ce manuel avant d'installer et d'utiliser cet appareil. Le non-respect de ces instructions pourrait entraîner un choc électrique, un incendie ou des blessures corporelles.
-
Page 22: Information Importante De Sécurité
INFORMATION IMPORTANTE DE SÉCURITÉ AVERTISSEMENT Veuillez lire toutes les instructions avant d'utiliser cet appareil de chauffage! Cet appareil de chauffage est chaud en fonctionnement. Pour éviter les brûlures, NE laissez PAS la peau exposée au contact des surfaces chaudes. Le cas échéant, utilisez des poignées pour déplacer ce chauffage. - Page 23 ÉVITEZ LES INCENDIES ! Inspecter régulièrement tous les trous de ventilation pour s'assurer qu'ils sont exempts de poussière, de laine ou de toute autre substance obstruante. Débranchez l'appareil et nettoyez-le avec un aspirateur UNIQUEMENT. NE PAS rincer ou mouiller. ...
-
Page 24: Spécifications Et Dimensions
Ce produit intègre un panneau en VERRE ! Toujours faire preuve d'une extrême prudence lors du traitement du verre. Le non-respect de cette consigne pourrait entraîner des blessures corporelles ou des dommages matériels. Enlevez toutes les pièces et le matériel du carton et déposez-les sur une surface propre, douce et sèche. Les pièces et les étapes de montage sont mises à... -
Page 25: Dimensions Du Produit
DIMENSIONS DU PRODUIT Numéro du Modèle " " " " " " " 17.7 48.7 16.3 12.2 46.0 IF-50FSB 127.0cm 45.0cm 14.2cm 123.8cm 41.5cm 30.9cm 116.8cm " " " " " " " 17.7 58.7 16.3 12.2 56.0 IF-60FSB 152.4cm 45.0cm 14.2cm 149.2cm... - Page 26 ÉCARTS MINIMUMS DU MANTEAU AVERTISSEMENT EN CAS D'UTILISATION DE PEINTURE OU DE LAQUE POUR LA FINITION DE LA CHEMINÉE, LA PEINTURE OU LAQUE DOIT ÊTRE RÉSISTANTE À LA CHALEUR POUR ÉVITER TOUTE DÉCOLORATION. INSTALLATION ENCASTRÉE AU MUR ( Remarques : Le support mural NE nécessite PAS d'être démonté.
- Page 27 ÉTAPE 2 Dévissez les deux vis de chaque côté de la cheminée au niveau du coin avant. Figure (C) Figure (C) ÉTAPE 3 Démonter le verre trempé de la façade de la cheminée. Figure (D) Figure (D)
- Page 28 ÉTAPE 4 Retirer la mousse de la cheminée. Figure (E) Figure (E) ÉTAPE 6 Deux personnes doivent déplacer la boîte à cheminée dans le trou du mur ou sur le manteau de la cheminée. Figure(F) En cas de positionnement complet de l'appareil dans le mur : Figure (F)
- Page 29 Utilisez les 4 vis (fournies) pour verrouiller l'appareil dans le mur avec les deux brides latérales existantes, Figure(G) Figure(G) ÉTAPE 7 Mettre au lit la brique de carbone ou la pierre de cristal. Figure (H) Figure(H)
-
Page 30: Installation Au Mur
ÉTAPE 7 Placez le panneau avant pour verrouiller l'appareil. Figure (I) Figure(I) INSTALLATION AU MUR Étant donné les nombreux matériaux différents utilisés sur les différents murs, nous vous recommandons de demander conseil à votre constructeur local avant d'installer cet appareil sur le mur. - Page 31 Figure(a) Figure(b) ÉTAPE 4 Enlevez le panneau de verre de la boîte de la cheminée. Placez-le dans un endroit doux et propre. Figure (c) ÉTAPE 5 Retirer la mousse(A) de la cheminée. Figure(d)
- Page 32 Figure (c) Figure (d) ÉTAPE 6 Marquez la localisation, puis montez le support (partie e) sur le mur en utilisant les vis fournies. Le support DOIT avoir les crochets dirigés vers le haut et être horizontal. Figure(e) Support Crochet Crochet Figure(e) NOTE: Il est recommandé...
- Page 33 possible. Dans le cas contraire, assurez-vous que les ancrages en plastique fournis sont utilisés pour fixer le support au mur et que le support est correctement fixé. Figure(f) Figure(f) Fixez le support métallique (F) à l'arrière de la cheminée avec 2 pièces de vis 4x8mm, l'autre extrémité...
- Page 34 Option de Support Libre Installez la base avec les 6 vis ( les vis sont sur le bas de la cheminée) comme indiqué. Installer la base avec les 6 vis ( les vis sont sur le bas de la cheminée) comme indiqué.
- Page 35 INSTALLATION DE LOGSET/BRAISE EN CRYSTAL (Note: Veuillez effectuer l'installation conformément aux braises achetées ou sélectionnées.) * La face avant en verre doit être démontée et l'appareil doit être monté à sa position finale avant l'installation en bois et des braises en cristal. * La face avant en verre doit être démontée et l'appareil doit être installé...
- Page 36 AVERTISSEMENT Veuillez lire et comprendre ce manuel d'utilisation en totalité, notamment toutes les informations relatives à la sécurité, avant de brancher ou d'utiliser ce produit. Tout manquement à cette consigne pourrait causer un choc électrique, un incendie, des blessures graves, voire la mort. PUISSANCE Assurez-vous que l'interrupteur ON/OFF, qui se trouve sur le panneau de commande, est en position OFF.Branchez le câble d'alimentation dans une prise de courant 110-120V Volt 12 Amp à...
- Page 37 Allumez en premier le bouton de l'interrupteur Bouton FONCTION ACTION&INDICATION ON: Activation des fonctions du panneau de 1. Appuyez une fois. La lampe indicateur commande et de la télécommande. Activation de s'allume. Mise sous tension. Toutes les l'effet de flamme. fonctions sont activées.
-
Page 38: Soins Et Entretien
Ce chauffage est équipé d'un Contrôle de Limitation de la Température. Si le chauffage atteint une température risquée, il s'éteint automatiquement. Pour le réinitialiser : 1. Débrancher le câble d'alimentation de la prise. 2. Réglez l'interrupteur ON/OFF du PANNEAU DE COMMANDE sur OFF. Patientez 5 minutes. -
Page 39: Dépannage
Nettoyez l'extérieur de la cheminée avec un chiffon ou un chiffon de nettoyage légèrement humide. Entretien Risque de choc électrique ! NE PAS OUVRIR ! Aucune pièce remplaçable à l'intérieur! TOUJOURS éteindre le chauffage et débrancher le câble d'alimentation de la prise avant de nettoyer, d'effectuer l'entretien ou de déplacer cette cheminée. - Page 40 4. Vérifiez que le câblage n'est pas desserré. 5. Contactez un technicien de service qualifié pour remplacer le moteur de la flamme. 1. Le câblage est desserré. 6. La "Tige de Flamme" n'est pas en 2. Le moteur de la flamme est La flamme ne se place due à...
Need help?
Do you have a question about the IF-72FSB and is the answer not in the manual?
Questions and answers