Advertisement
Quick Links
Advertisement

Related Manuals for Gree GWHD 36 NK6RO


Summary of Contents for Gree GWHD 36 NK6RO
- Page 1 Change for life Service Manual GREE ELECTRIC APPLIANCES, INC. OF ZHUHAI...
- Page 2 Table of Contents Service Manual Part I : Technical Information ............1 1. Summary .......................1 2. Specifications ....................2 3. Outline Dimension Diagram ............6 4. Refrigerant System Diagram ............7 5. Electrical Part ....................9 5.1 Wiring Diagram ......................9 5.2 PCB Printed Diagram .................... 11 6.
- Page 3 Service Manual 10. Exploded View and Parts List ..........50 11. Removal Procedure ................52 Appendix ........................58 Appendix 1: Reference Sheet of Celsius and Fahrenheit .......58 Appendix 2: Pipe Expanding Method ..............59 Appendix 3: List of Resistance for Temperature Sensor ........60 Table of Contents...
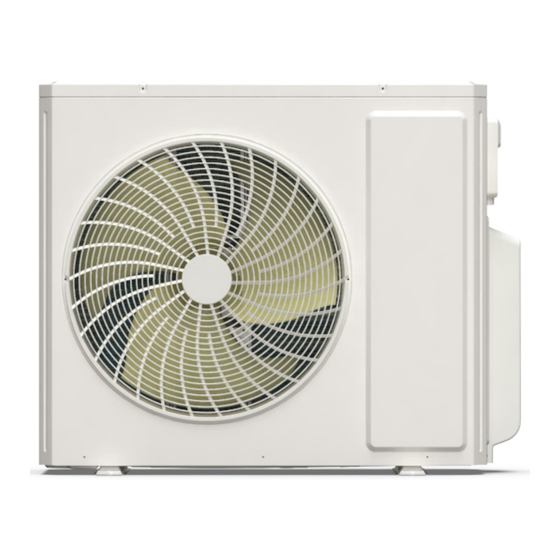
- Page 4 1. Summary Service Manual Outdoor Unit: GWHD(36)NK6RO GWHD(42)NK6RO Model list: Model Product Code Water Tank Model Water Tank Product Code Wired Controller GWHD(36)NK6RO CB228W20400 SXTD200LCJW/A-K ER20000342 XE71-45/GC1 GWHD(42)NK6RO CB228W20500 Technical Information...
- Page 5 2. Specifications Service Manual Model GWHD(36)NK6RO Product Code CB228W20400 Rated Voltage 220-240 Rated Frequency Phases Recommended Power Cable Cooling Capacity 10.6 Heating Capacity Cooling Power Input 2.95 Heating Power Input Cooling Current Input Heating Current Input 14.0 Rated Input Rated Current 29.5 Air Flow Volume 5800...
- Page 6 Service Manual Fan Motor Speed r/min Cooling: 860 / Heating: 860 Fan Motor Power Output Motor Full Load Amp(FLA) Fan Motor Capacitor μF Fan Type Axial-flow Fan Diameter Φ550-205 Defrosting Method Automatic Defrosting Climate Type Isolation Moisture Protection IPX4 Permissible Excessive Operating Pressure for the Discharge Side Permissible Excessive Operating Pressure for the Suction Side Sound Pressure Level dB(A)
- Page 7 Service Manual Model GWHD(42)NK6RO Product Code CB228W20500 Rated Voltage 220-240 Rated Frequency Phases Recommended Power Cable Cooling Capacity 12.1 Heating Capacity Cooling Power Input Heating Power Input 3.35 Cooling Current Input Heating Current Input 14.8 Rated Input Rated Current 29.5 Air Flow Volume 5800 3.56...
- Page 8 Service Manual Fan Motor Speed r/min Cooling: 860 / Heating: 860 Fan Motor Power Output Motor Full Load Amp(FLA) Fan Motor Capacitor μF Fan Type Axial-flow Fan Diameter Φ550-205 Defrosting Method Automatic Defrosting Climate Type Isolation Moisture Protection IPX4 Permissible Excessive Operating Pressure for the Discharge Side Permissible Excessive Operating Pressure for the Suction Side Sound Pressure Level dB(A)
- Page 9 3. Outline Dimension Diagram Service Manual GWHD(36)NK6RO GWHD(42)NK6RO 1020 Unit:mm Technical Information...
- Page 10 4. Refrigerant System Diagram Service Manual GWHD(36)NK6RO WATER HEATER OUTDOOR Solenoid valve III Filter Liquid side Liquid cut off valve One-way valve Condenser Temperature Sensor Filter Water Tank Heat Exchanger A Outdoor Heat Exchanger Gas side Gas cut off valve Liquid side Liquid cut off valve Filter...
- Page 11 Service Manual GWHD(42)NK6RO WATER HEATER OUTDOOR Solenoid valve III Filter Liquid side Liquid cut off valve One-way valve Condenser Temperature Sensor Filter Water Tank Heat Exchanger A Outdoor Heat Exchanger Gas side Gas cut off valve Liquid side Liquid cut off valve Filter Indoor Heat Exchanger B Solenoid valve II...
- Page 12 5. Electrical Part Service Manual 5.1 Wiring Diagram ● Instruction Symbol Symbol Color Symbol Symbol Color Symbol Name White Green COMP Compressor Yellow Brown Grounding wire Blue YEGN Yellow/Green Black Violet Orange ● Outdoor Unit GWHD(36)NK6RO POWER TERMINAL MAGNETIC MAGNETIC BLOCK RING RING...
- Page 13 Service Manual GWHD(42)NK6RO POWER TERMINAL MAGNETIC MAGNETIC BLOCK RING RING BN(BK) AC-L AC-L L-OUT YEGN N-OUT MAGNETIC MAIN BOARD RING HIGH PRESSURE YEGN SWITCH WATER HEATER COM-MANUAL WIRED CONTROLLER YEGN WAY1 WATER HEATER 2-WAY VALVE (white) WATER TANK UPPER θ SENSOR T-SENSOR 4WAY...
- Page 14 Service Manual 5.2 PCB Printed Diagram (1) Silk screen on main board 1 GWHD(36)NK6OO GWHD(42)NK6OO Name Name Compressor Overload Needle Stand 12 Communication Neutral Wire Insertion EEP Flash Drive Needle Stand 13 Compressor Wire Insertion DRED Needle Stand 14 Outdoor Fan Needle Stand High Pressure Protection Needle Stand 15 Temperature Sensor Needle Stand Low Pressure Protection Needle Stand...
- Page 15 Service Manual (2) Silk screen on main board 2 GWHD(36)NK6OO GWHD(42)NK6OO Name Name Water Tank Auxiliary Electronic Heater Communication Wire Insertion Neutral Wire Insertion Water Tank Auxiliary Electronic Heater Two-way Valve Needle Stand 1 Live Wire Insertion Live Wire Insertion Two-way Valve Needle Stand 2 Water Heater Wired Controller Needle Stand Two-way Valve Needle Stand 3...
- Page 16 6. Function and Control Service Manual 1 Basic functions of the system 1.2.5 In dry mode, the maximum value A of the capacity requirement percentage of single unit is 90% of that in cooling 1.1 Cooling Mode mode. 1.1.1 Cooling conditions and process: The open condition of the electronic expansion valve, outdoor fan and compressor is the same as those in cooling mode.
- Page 17 6. Function and Control Service Manual 1.3.5.2 Oil-returned process in heating mode 1.4.5.2 Oil-returned process in hot water mode The indoor unit displays "H1". High frequency operation of compressor 1.3.5.3 Oil-returned finished condition in heating mode 1.4.5.3 Oil-returned finished condition in hot water mode The duration reaches 5min.
- Page 18 Service Manual through the power. (if the running time of the compressor is protection. The malfunction will be cleared after 1min, the unit longer than 7min, the protection times record will be cleared.) will restart and then detect if there is still has phase-lacking protection.
- Page 19 7. Notes for Installation and Maintenance Service Manual Safety Precautions: Important! from the manufacture or distributor. Prohibit prolong the wire by yourself. 11. For the unit without plug, an air switch must be installed Please read the safety precautions carefully before installation in the circuit.
- Page 20 Service Manual Safety Precautions for Installing and Relocating the Unit: To ensure safety, please be mindful of the following precautions. WARNINGS 1. When installing or relocating the unit, be sure to keep the If refrigerant recovery takes too much time, air may be sucked refrigerant circuit free from air or substances other than the in and cause pressure rise or compressor rupture, resulting in specified refrigerant.
- Page 21 Service Manual Safety Precautions for Refrigerant R32: 675 ● To realize the function of the air conditioner unit, a special refrigerant circulates in the system. The used refrigerant is the fluoride R32, which is specially cleaned. The refrigerant This marking indicates that this product should not be is flammable and inodorous.
- Page 22 Service Manual table a - Minimum room area ( m a. Shut down the unit and cut power supply Charge b. Eliminate the refrigerant Floor Window Wall Ceiling amount location mounted mounted mounted (kg) c. Vacuuming ≤1.2 d. Clean it with N 14.5 16.8 e.
- Page 23 Service Manual corrected; If any hot work is to be conducted on the refrigerating equipment or any associated parts, appropriate fire — refrigerating pipe or components are installed in a extinguishing equipment shall be available to hand. Have a position where they are unlikely to be exposed to any dry powder or CO fire extinguisher adjacent to the charging substance which may corrode refrigerant containing...
- Page 24 Service Manual position where they are unlikely to be exposed to any ● Repair to intrinsically safe components substance which may corrode refrigerant containing Do not apply any permanent inductive or capacitance loads components, unless the components are constructed of to the circuit without ensuring that this will not exceed the materials which are inherently resistant to being corroded permissible voltage and current permitted for the equipment...
- Page 25 Service Manual refrigerants, oxygen free nitrogen (OFN) shall then be purged ● Label the system when charging is complete (if not through the system both before and during the brazing already). process. ● Extreme care shall be taken not to overfill the ●...
- Page 26 Service Manual valves on the equipment are closed off. refrigerants including, when applicable, flammable refrigerants. In addition, a set of calibrated weighing scales k) Recovered refrigerant shall not be charged into another shall be available and in good working order. Hoses shall refrigerating system unless it has been cleaned and checked.
- Page 27 Service Manual Main Tools for Installation and Maintenance Level meter Measuring tape Screw driver Impact drill Drill head Electric drill Electroprobe Universal meter Inner hexagon Electronic Torque wrench Open-end wrench spanner leakage detector Vacuum pump Pressure meter Pipe pliers Pipe pliers Pipe cutter Pipe expander Pipe bender...
- Page 28 8. Installation Service Manual Installation Procedures Start installation Preparation before installation Read the requirements Select installation location Prepare tools for electric connection Select indoor unit Select water tank Select outdoor unit installation location installation location installation location Install wall-mounting Install the support of outdoor Drill wall holes frame, drill wall holes unit (select it according to...
- Page 29 Service Manual 8.1 Combinations of Indoor and Outdoor Units See below the number of indoor units that can be connected to one outdoor unit. Sets of connectable indoor units Model Applicable water tank Function Connecting water tank Non-connected water tank GWHD(36)NK6RO SXTD200LCJW/A-K Air conditioning + Water heating...
- Page 30 Service Manual To unit B To unit D To unit A(water heater) To unit C To unit E To water heater To water tank To water tank wired controller upper sensor lower sensor Power cord connecting connecting connecting connecting connecting cable cable cable...
- Page 31 Service Manual 8.3 Installation of Outdoor Unit Location Water tank or Indoor unit shell size code Capacity code 200L Water tank Use bolts to secure the unit to a flat, solid floor. When mounting the unit on a wall or the roof, make sure the support is firmly secured so that it cannot move in the event of intense vibrations or a strong wind.
- Page 32 Service Manual 8.4 Pipe Connection of Indoor Unit and Outdoor Unit Indoor unit or Pipe connection of indoor unit water tank Pipe joint Connecting pipe joint adapter pipe (1) Remove pipe cover and pipe plug. (2) Direct the flare part of copper pipe to the center of screwed joint.
- Page 33 Service Manual 8.5 Pipe Connection of Water Tank Hot water outlet Temperature sensor 1 Refrigerant in Refrigerant out Temperature sensor 2 Exectric box Cold water inlet/drainage outlet Three-way valve Cut-off valve (for exhausting air) Cut-off valve A Cut-off valve (for draining water) Safety valve Filter Cut-off valve B...
- Page 34 Service Manual 8.6 Bleeding Humid air left inside the refrigerant circuit can cause compressor malfunction. After having connected the indoor and outdoor units, bleed the air and humidity from the refrigerant circuit using a vacuum pump. (1) Unscrew and remove the caps from the 2-way and 3-way valves.
- Page 35 Service Manual 8.7 Maintenance Use suitable instruments for the refrigerant R32. Do not use any other refrigerant than R32. Do not use mineral oils to clean the unit. 8.8 Installation Dimension Diagram The installation must be done by trained and qualified service personnel with reliability according to this manual. Contact service center before installation to avoid the malfunction due to unprofessional installation.
- Page 36 Service Manual 8.9 Check after Installation Check Items Problems Owing to Improper Installation Is the installation reliable? The unit may drop, vibrate or make noises May cause unsatisfactory cooling (heating) Has the gas leakage been checked? effect Is the thermal insulation of the unit May cause condensation and water dropping sufficient? May cause condensation and water dropping...
- Page 37 9. Maintenance Service Manual 9.1 Error Code List Display method of indoor unit Malfunction name AC status Possible causes (Error code) Liquid valve 1. Temperature sensor is not well connected or damaged; temperature 2. The wire of temperature sensor is damaged, causing short sensor is ON / circuit to copper pipe or outer casing;...
- Page 38 Service Manual Display method of indoor unit Malfunction name AC status Possible causes (Error code) Communication Cool: compressor stops malfunction operation, while indoor fan between indoor See "Communication malfunction" operates; unit and outdoor Heat: all loads stops operation. unit Cool: compressor stops High temperature operation while indoor fan See “High temperature prevention protection;...
- Page 39 Service Manual Display method of indoor unit Malfunction name AC status Possible causes (Error code) 1. Overload wire of compressor is loose; Cool/Dry: compressor stops 2. The overload protector is damaged. Under normal Overload operation, while indoor fan circumstances, the resistance between both ends of terminal is protection of operates.
- Page 40 Service Manual Display method of indoor unit Malfunction name AC status Possible causes (Error code) Cool/Dry: compressor stops Over-phase operation, while indoor fan See “Overload protection of compressor , High discharge current protection operates; temperature protection of compressor” of compressor Heat: all loads stops operation.
- Page 41 Service Manual 9.2 Procedure of Troubleshooting 1. Overload protection of compressor , high discharge temperature protection of compressor Main check points: (1) electronic expansion valve (2) expansion valve terminal (3) charging amount of refrigerant (4) overload protector NOTE: The control board as below means the control board of outdoor unit. After the unit has been cut off the power for more than 20mins...
- Page 42 Service Manual 2. AC overcurrent protection Start The normal fluctuation is about 10% of rated Eliminate malfunction The power voltage is unstable. voltage on the nameplate. The power voltage is too low and the Adjust the power voltage to make it normal. Eliminate malfunction load is too high.
- Page 43 Service Manual 3. Communication malfunction 3.1 Communication error of indoor and outdoor unit Main check points: (1) Connection wire between indoor unit and outdoor unit (2) Wiring inside the unit (3) Communication circuit of control board of indoor unit (4) Communication circuit of control board of outdoor unit Start Check whether the unit has operated normally before...
- Page 44 Service Manual 3.2 Communication error between wired controller and indoor unit Main check points: (1) Connection wire of wired controller (2) Wiring terminal (3) Wired controller (4) Main board of indoor unit Start Check whether the Connect the wired controller and connection wire of wired controller indoor unit correctly according to and main board of the indoor...
- Page 45 Service Manual 4. High temperature prevention protection Main check points: (1) outdoor temperature (2) fan (3) air inlet and air outlet of indoor/outdoor unit NOTE: The control board as below means the control board of outdoor unit. Overload protection, high temperature prevention protection Normal protection.
- Page 46 Service Manual 5. Troubleshooting for temperature sensor Main check points: (1) connection terminal (2) temperature sensor (3) main board Start Check whether the connection terminal between the temperature sensor and the control board is loose or not connected well. Insert the temperature sensor well Eliminate the malfunction...
- Page 47 Service Manual 6. IPM protection , over-phase current of compressor Main check points: (1) compressor COMP terminal (2) power supply voltage (3) compressor (4) charging amount of refrigerant (5) air inlet and air outlet of indoor/outdoor unit NOTE: The control board as below means the control board of outdoor unit. Put through the power and turn on the unit...
- Page 48 Service Manual 7. Desynchronization diagnosis for compressor Main check point: (1) system pressure (2) power supply voltage NOTE: The control board as below means the control board of outdoor unit. Desynchronization occurs Desynchronization occurs during operation after turning on the unit Check whether the fan Replace the fan Does the outdoor fan operate...
- Page 49 Service Manual 8. Malfunction diagnosis for failure startup Main check points: (1) compressor wire (2) compressor (3) charging amount of refrigerant NOTE: The control board as below means the control board of outdoor unit. Put through the power and turn on the unit The time for stop operation is not enough and the system's high pressure and low pressure is...
- Page 50 Service Manual 9. Charging malfunction of capacitor Main check points: (1) wiring board XT (2) reactor NOTE: The control board as below means the control board of outdoor unit. Put through the power to turn on the unit and then wait for 1min Measure the voltage at both ends of electrolytic capacitor with DC voltmeter.
- Page 51 Service Manual 9.3 Troubleshooting for Normal Malfunction 1. Air Conditioner Can't be Started Up Discriminating Method (Air conditioner Possible Causes Troubleshooting Status) Confirm whether its due to power failure. If yes, No power supply, or poor connection After energization, operation indicator isn't wait for power recovery.
- Page 52 Service Manual 4. ODU Fan Motor Can't Operate Possible causes Discriminating method (air conditioner status) Troubleshooting Wrong wire connection, or poor Check the wiring status according to circuit Connect wires according to wiring diagram to make connection diagram sure all wiring terminals are connected firmly Measure the capacity of fan capacitor with an Capacity of the ODU fan motor is universal meter and find that the capacity is out...
- Page 53 10. Exploded View and Parts List Service Manual GWHD(36)NK6RO The component is only for rererence; please refer to the actual product. Description Description Description Left Side Plate 13 Main Board 25 Electric Expand Valve Fitting Handle 14 Condenser Assy 26 4-Way Valve Assy Brushless DC Motor 15 Gas-liquid Separator Assy 27 Inhalation Tube Sub-assy...
- Page 54 Service Manual GWHD(42)NK6RO The component is only for rererence; please refer to the actual product. Description Description Description Left Side Plate 13 Main Board 25 Electric Expand Valve Fitting Handle 14 Condenser Assy 26 4-Way Valve Assy Brushless DC Motor 15 Gas-liquid Separator Assy 27 Inhalation Tube Sub-assy Motor Support Sub-assy...
- Page 55 11. Removal Procedure Service Manual GWHD(36)NK6RO GWHD(42)NK6RO Warning: Be sure to wait for a minimum of 20 minutes after turning off all power supplies and discharge the refrigerant NOTE: Take 42K model for example. completely before removal. Step Procedure 1. Before disassembly Complete axonometric drawing.
- Page 56 Service Manual Step Procedure 4. Remove top panel Top panel Remove the connection screws connecting the top panel and the front panel, and then remove the top panel. 5. Remove front grille Grille Remove the connection screws connecting the front grille and the front panel, and then loosen the clasp to remove the front grille.
- Page 57 Service Manual Step Procedure 7. Remove right side plate Right side plate Remove the screws connecting the right side plate with the chassis and the valve support. Then remove the right side plate. 8. Remove rear grill Rear grill Remove the screws connecting the rear grill and left side plate, and then remove the rear grill.
- Page 58 Service Manual Step Procedure 10. Remove axial flow blade Axial flow blade Remove the nut on the blade and then remove the axial flow blade. 11. Remove motor and motor support Motor support Remove the 4 tapping screws fixing the motor and Motor disconnect the leading wire insert of the motor.
- Page 59 Service Manual Step Procedure 13. Remove 4-way valve assy 4-way valve assy Remove screws fixing the electricbox; loosen the wire bundle; pull out the wiring terminals and then pull electric box upwards to remove it. 14. Remove valve support sub-assy and expansion valve assy Expansion valve assy Remove the screw connecting the valve support and...
- Page 60 Service Manual Step Procedure 16. Remove compressor Compressor Remove the 3 foot nuts fixing the compressor and then remove the compressor. 17. Remove condenser assy Condenser assy Support Remove the screws fixing the condenser support and then remove the condenser support. Remove the screws connecting the condenser support and the chassis assy, and then remove the condenser assy.
- Page 61 Appendix Service Manual Appendix 1: Reference Sheet of Celsius and Fahrenheit Conversion formula for Fahrenheit degree and Celsius degree: Tf=Tcx1.8+32 Set temperature Fahrenheit display Fahrenheit Celsius Fahrenheit display Fahrenheit Celsius Fahrenheit display Fahrenheit Celsius temperature(℉) temperature(℉) temperature(℉) (℉) (℃) (℉) (℃)...
- Page 62 Service Manual Appendix 2: Pipe Expanding Method Pipe Note: Improper pipe expanding is the main cause of refrigerant leakage.Please expand Pipe cutter the pipe according to the following steps: A:Cut the pip Leaning Uneven Burr ● Confirm the pipe length according to the distance of indoor unit and outdoor unit. ●...
- Page 63 Service Manual Appendix 3: List of Resistance for Temperature Sensor Resistance Table of Ambient Temperature Sensor for Indoor and Outdoor Units(15K) Temp( Resistance(kΩ) Temp( Resistance(kΩ) Temp( Resistance(kΩ) Temp( Resistance(kΩ) 138.1 18.75 3.848 1.071 128.6 17.93 3.711 1.039 121.6 17.14 3.579 1.009 16.39 3.454...
- Page 64 Service Manual Resistance Table of Tube Temperature Sensors for Indoor and Outdoor (20K) Temp( Resistance(kΩ) Temp( Resistance(kΩ) Temp( Resistance(kΩ) Temp( Resistance(kΩ) 181.4 25.01 5.13 1.427 171.4 23.9 4.948 1.386 162.1 22.85 4.773 1.346 153.3 21.85 4.605 1.307 20.9 4.443 1.269 137.2 4.289 1.233...
- Page 65 Service Manual Resistance Table of Discharge Temperature Sensor for Outdoor(50K) Temp( Resistance(kΩ) Temp( Resistance(kΩ) Temp( Resistance(kΩ) Temp( Resistance(kΩ) 853.5 18.34 4.75 799.8 93.42 17.65 4.61 89.07 16.99 4.47 703.8 84.95 16.36 4.33 660.8 81.05 15.75 4.20 620.8 77.35 15.17 4.08 580.6 73.83 14.62...
- Page 66 JF00305623 GREE ELECTRIC APPLIANCES, INC. OF ZHUHAI Add: West Jinji Rd, Qianshan, Zhuhai,Guangdong, China, 519070 Tel: (+86-756) 8522219 Fax: (+86-756) 8669426 E-mail: global@cn.gree.com For product improvement, specifications and appearance in this manual are subject to change without prior notice.
Need help?
Do you have a question about the GWHD 36 NK6RO and is the answer not in the manual?
Questions and answers