
Related Manuals for MEI AC 4041


Summary of Contents for MEI AC 4041
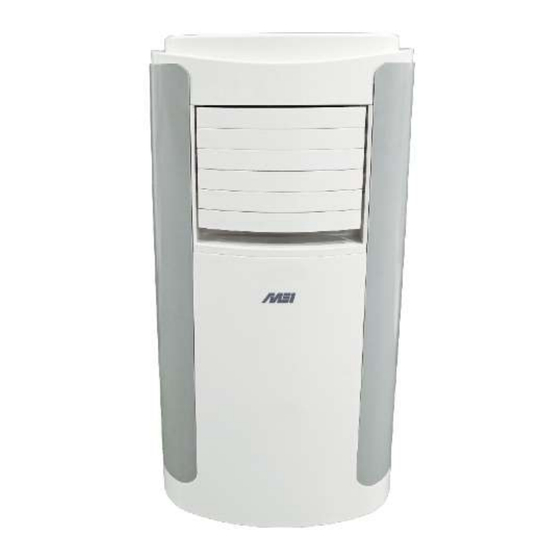
- Page 1 MANUAL DE INSTRUÇÕES/INSTRUCTIONS MANUAL AR CONDICIONADO PORTÁTIL PORTABLE AIR CONDITIONER MEI AC 4041...
- Page 3 Conteúdo PT INSTRUÇÕES DE SEGURANÇA ......................5 INDICAÇÕES ESPECIAIS DE SEGURANÇA E DE POUPANÇA DE ENERGIA ........6 FUNCIONALIDADES E CARACTERÍSTICAS ..................6 DESCRIÇÃO DOS COMPONENTES ....................7 INSTALAÇÃO DO APARELHO ......................8 INSTALAÇÃO DO KIT DE JANELA ...................... 9 Indicações de Segurança! ......................
- Page 4 Content EN SAFETY INSTRUCTIONS ........................22 ENERGY SAVING AND UNIT SAFETY PROTECTION TIPS ..............23 FEATURES ............................23 OVERVIEW OF THE COMPONENTS ....................24 INSTALLATION ..........................25 INSTALLATION OF WINDOW KIT ....................... 26 Important Safeguards! ........................ 26 OPERATION ............................27 REMOTE CONTROL ...........................
- Page 5 INSTRUÇÕES DE SEGURANÇA Leia atentamente o manual de instruções antes de colocar o aparelho em funcionamento pela primeira vez. Guarde este manual de instruções incluindo a garantia, a factura e, se possível, a caixa com a embalagem interior. Se der este aparelho a alguém, por favor passe também este manual de instruções.
- Page 6 Para garantir a segurança das crianças, por favor mantenha todas as embalagens (sacos de plástico, caixas, esferovites etc.) longe do seu alcance. As crianças devem ser supervisionadas o tempo todo para garantir que não brincam com o aparelho. INDICAÇÕES ESPECIAIS DE SEGURANÇA E DE POUPANÇA DE ENERGIA ...
- Page 7 DESCRIÇÃO DOS COMPONENTES Painel superior Painel de controlo Palas de ventilação Painel Painel frontal traseiro Rodízios Entrada de ar superior Saída de exaustão Pega de transporte Entrada de ar inferior Cabo de alimentação Barra deslizante para janela Tubo de drenagem Mangueira de exaustão...
- Page 8 INSTALAÇÃO DO APARELHO AVISO: Antes de utilizar o aparelho, mantenha-o na posição vertical durante cerca de 3-4 horas. Este aparelho pode facilmente ser movimentado de uma divisão para outra. Ao deslocar o aparelho, certifique-se de que está sempre na posição vertical e depois colocado numa superfície nivelada.
- Page 9 INSTALAÇÃO DO KIT DE JANELA NOTAS: O Kit de janela (barra deslizantes e conector) está concebido apenas para ser utilizado em janelas de correr ou de guilhotina. O kit não está indicado para utilizar noutros tipos de janelas. O adaptador pode ser usado sem a barra deslizante na maioria das janelas ou portas.
- Page 10 Indicações de Segurança! O comprimento da mangueira de exaustão estende-se de 30 cm a 180 cm. Se a mangueira for esticada acima desta medida, o aparelho pode não funcionar correctamente e pode invalidar a garantia. A saída de ventilação deve estar bem ventilada e sem obstrução, pois pode causar sobreaquecimento.
- Page 11 FUNCIONAMENTO Pressione este botão para Ligar e Desligar o aparelho. Pressione o Botão MODO para alternar entre 3 modos. Em cada um dos modos a luz indicadora acende-se. COOL: A divisão é arrefecida com o ar fresco a ser enviado através da saída de ar frontal.
- Page 12 As funções do temporizador não podem ser combinadas ou repetidas. Temporização para ligar Com o aparelho em modo de standby, pressione o botão TIMER para definir a hora a que quer que o aparelho se ligue. Utilize os botões + e - para ajustar a duração do temporizador (1 a 24 horas).
- Page 13 COMANDO À DISTÂNCIA Pressione para ligar e desligar o aparelho POWER Pressione estes botões para diminuir a temperatura duração TEMP - temporizador. Pressione estes botões para aumentar a temperatura duração TEMP + temporizador. Pressione para alternar entre SPEED velocidades. Pressione este botão para entrar no SLEEP modo SLEEP.
- Page 14 no modo automático de descongelação, e o símbolo de aquecimento irá piscar no painel de controlo. Protecção térmica automática Para proteger o tempo de vida útil do aparelho, o ar condicionado tem um sistema automático de protecção térmica. Se a temperatura dentro do aparelho estiver fora da escala especificada, o compressor e o motor inferior param o seu funcionamento.
- Page 15 Pode canalizar este tubo no seu sistema de canalização, conduzi-lo para o exterior ao usar- se da gravidade ou de uma bomba de água. NOTA: Este modelo vem equipado com uma função de auto-evaporação, que reduz a necessidade de esvaziar o depósito. Se o aparelho estiver correctamente ventilado, a maioria da água é...
- Page 16 Limpeza do sistema superior do filtro Deslize as grelhas do filtro para fora da unidade. Se existirem parafusos s prender o filtro no lugar, deverá removê-los. A grelha de e evaporação do filtro pode ser limpa em água morna (cerca de 40ºC/104ºF) e um detergente neutro.
- Page 17 Problemas Causas prováveis Soluções Não há electricidade. Ligue após colocar a ficha numa tomada com corrente. O visor mostra “E4” Retire a água do depósito. temperatura ambiente é Utilize o aparelho apenas no intervalo O ar muito baixa ou muito alta. de temperatura de 7-35ºC (44-95ºF).
- Page 18 Sem refrigerante ou com muito Contacte o nosso serviço de Assistência pouco refrigerante. Técnica (800 200 092). Protecção anti-gelo. Aguarde que descongele. A função irá retomar automaticamente. Outras Não é necessária intervenção situações. utilizador. Protecção de alta pressão. Após a pressão interna do gás descer, as funções retomam automaticamente.
- Page 19 DADOS TÉCNICOS Modelo AC 4041 Capacidade de arrefecimento 14 000 BTU Capacidade de aquecimento 13 800 BTU Potência de refrigeração 1500 W Potência de aquecimento 1450 W Classe energética Refrigeração/Aquecimento A/A+ Ventoinha Motor AC com 3 velocidades de ventilação Volume de ar 420 m³/h...
- Page 20 Após a expiração do prazo de garantia, poderão ser efectuados arranjos por pessoal especializado, ou pelos nossos serviços de reparações, mediante aprovação de orçamento. MEI EUROPA LDA Linha Verde: 800 200 092 Website: www.mei.pt...
- Page 22 ENGLISH SAFETY INSTRUCTIONS Carefully read the instructions before operating the unit. This appliance is for indoor use only and intended for use in a domestic environment only. Any other use is not recommended by the manufacturer and may cause fire, electrical shocks or other injury to user or property and could result in a voided warranty.
- Page 23 The room must be such as to prevent stagnation of possible leaks of refrigerant gas as there could be a danger of fire or explosion should the refrigerant come into contact with electric heaters, stoves or other sources of ignition. Do not use the product and contact the retailer for advice, if damage has occurred to the unit which may have compromised the refrigerant system.
- Page 24 OVERVIEW OF THE COMPONENTS...
- Page 25 INSTALLATION WARNING: Before using this unit, please keep it upright for at least 3-4 hours. This unit can easily be moved from one room to another. While moving the unit please note that it must always be kept upright and then placed on an even surface. 1.
- Page 26 INSTALATION OF WINDOW KIT NOTES: The window kit is only designed to be installed with sliding or sash windows or doors. The window kit is not designed or to be used with any other style of windows. The fish tail adaptor can be used without the slide bar with most windows / doors. ...
- Page 27 Keep the hose as straight and short as possible and avoid bending the air hose by more than 30 degrees in order to maintain the performance of the unit. Excessive bends in the hose may prevent the unit from expelling the hot air, which can lead to internal damage which would invalidate the warranty.
- Page 28 Press the POWER button to turn the unit ON or OFF. Press the MODE button to cycle between the 3 modes, the indicator for the selected mode will be illuminated. COOL: The room is cooled with the cold air expelled through the front air outlet while hot air is expelled through the vent pipe.
- Page 29 Used to adjust temperature in COOL and HEAT modes and to set the duration of the TIMER. The buttons are not used in FAN or DRY modes. Press both buttons together to change between displaying the temperature in Celsius and Fahrenheit. DRY (DEHUMIDIFY) The unit should be operated without the vent hose and with the unit set up for continuous drainage to remove moisture from the air.
- Page 30 Overflow protection When the water in the internal water tank exceeds the warning level, the machine will stop operating and sound an alarm with the LCD display showing “E4”. To resume operation empty the internal water tank. After the water is emptied, the machine will automatically return to the original state.
- Page 31 Continuous drainage Unscrew the drain plug cap and remove the rubber stopper. Connect a water pipe to the upper water outlet. You can plumb this pipe into your current plumbing system, lead it outside and use gravity fall or use a water pump. NOTE: ...
- Page 32 Clean the upper filter screen frame Slide out the filter screen frames from the unit. If there are screws holding the filter in place these should be removed. The evaporator filter screen can be cleaned in warm water with neutral detergent (about 40℃...
- Page 33 TROUBLESHOOTING Do not repair or disassemble the air conditioner. Unqualified repair will invalidate the warranty and may lead to failure, causing injuries and property damage. Only use it as directed in this user manual and only perform operations advised here. Problems Reasons Solutions...
- Page 34 with the receiver. Batteries are dead. Replace batteries. No refrigerant or there is very little Refer to Service Centre (800 200 092). refrigerant. Waiting for defrosting. Anti-freezing protection Function will recover automatically. Others No user input needed. After inside gas pressure comes High pressure protection.
- Page 35 TECHNICAL DATA Model AC 4041 Cooling capacity 14 000 BTU Heating Capacity 13 800 BTU Cooling Input Power 1500 W Heating Input Power 1450 W Energy Class Cooling/Heating A/A+ AC motor with 3 fan speeds Air flow volume 420 m³/h Cooling Input Current 6.5 A...
- Page 36 This will contribute to the recycling and other forms of reutilization of electrical and electronic equipment. Information concerning where the equipment can be disposed of can be obtained from your local authority. MEI EUROPA LDA Free Support Line: 800 200 092 Website:...
Need help?
Do you have a question about the AC 4041 and is the answer not in the manual?
Questions and answers