
Related Manuals for MEI AC 1890


Summary of Contents for MEI AC 1890
- Page 1 MANUAL DE INSTRUÇÕES/INSTRUCTIONS MANUAL AR CONDICIONADO PORTÁTIL PORTABLE AIR CONDITIONER MEI AC 1890...
-
Page 3: Table Of Contents
Conteúdo PT INSTRUÇÕES DE SEGURANÇA ......................5 INDICAÇÕES ESPECIAIS DE SEGURANÇA E DE POUPANÇA DE ENERGIA ........6 FUNCIONALIDADES E CARACTERÍSTICAS ..................6 DESCRIÇÃO DOS COMPONENTES ....................7 INSTALAÇÃO DO APARELHO ......................8 INSTALAÇÃO DO KIT DE JANELA ...................... 9 Indicações de Segurança! ...................... - Page 4 OVERVIEW OF THE COMPONENTS ....................23 INSTALLATION ..........................24 INSTALATION OF WINDOW KIT ......................25 Important Safeguards! ........................ 26 OPERATION ............................27 REMOTE CONTROL ........................... 28 MULTI PROTECTIVE FUNCTIONS ....................... 29 Frost protection..........................29 Overflow protection ........................29 Auto-defrost ..........................29 Automatic thermal protection ....................
-
Page 5: Instruções De Segurança
INSTRUÇÕES DE SEGURANÇA Leia atentamente o manual de instruções antes de colocar o aparelho em funcionamento pela primeira vez. Guarde este manual de instruções incluindo a garantia, a fatura e, se possível, a caixa com a embalagem interior. Se der este aparelho a alguém, por favor passe também este manual de instruções. -
Page 6: Indicações Especiais De Segurança E De Poupança De Energia
Se o aparelho for colocado a funcionar em divisões sem ventilação ou inferiores a 18.2m deve fazer-se circulação de ar para prevenir estagnação ou possíveis fugas de gás refrigerante, que pode causar risco de incêndio, em contacto com aquecedores elétricos ou outras fontes de calor. -
Page 7: Descrição Dos Componentes
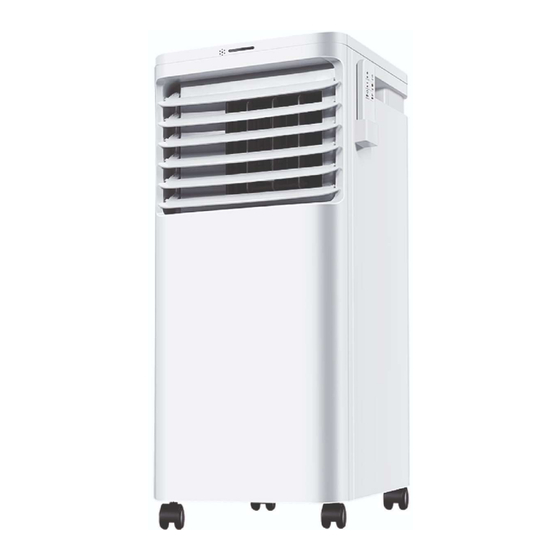
DESCRIÇÃO DOS COMPONENTES Painel superior Pega Palas de ventilação Painel frontal Rodízios Painel Traseiro Entrada de ar superior Saída de exaustão Entrada de ar inferior Tubo de drenagem Barra deslizante para janela Mangueira de exaustão... -
Page 8: Instalação Do Aparelho
INSTALAÇÃO DO APARELHO AVISO: Antes de utilizar o aparelho, mantenha-o na posição vertical durante cerca de 3-4 horas. Este aparelho pode facilmente ser movimentado de uma divisão para outra. Ao deslocar o aparelho, certifique-se de que está sempre na posição vertical e depois colocado numa superfície nivelada. -
Page 9: Instalação Do Kit De Janela
INSTALAÇÃO DO KIT DE JANELA NOTAS: O Kit de janela (barra deslizantes e conector) está concebido apenas para ser utilizado em janelas de correr ou de guilhotina. O kit não está indicado para utilizar noutros tipos de janelas. O adaptador pode ser usado sem a barra deslizante na maioria das janelas ou portas. -
Page 10: Indicações De Segurança
Indicações de Segurança! O comprimento da mangueira de exaustão estende-se de 30 cm a 150 cm. Se a mangueira for esticada acima desta medida, o aparelho pode não funcionar corretamente e pode invalidar a garantia. A saída de ventilação deve estar bem ventilada e sem obstrução, pois pode causar sobreaquecimento. -
Page 11: Funcionamento
FUNCIONAMENTO Pressione este botão para Ligar e Desligar o aparelho. Pressione o Botão MODE para alternar entre 3 modos. Em cada um dos modos a luz indicadora acende-se. COOL: A divisão é refrigerada com o ar fresco a ser enviado através da saída de ar frontal. -
Page 12: Comando À Distância
SWING (oscilação) Pressione este botão para ativar o modo de oscilação. Ao pressionar novamente o botão SWING as palas irão parar na posição atual. Não tente ajustar manualmente o ângulo das palas. Temporização para ligar Com o aparelho em modo de standby, pressione o botão SWING cerca de 3 segundos para definir a hora a que quer que o aparelho se ligue. -
Page 13: Funções De Protecção
NOTA: O aspeto do comando pode variar do diagrama, devido a melhorias contínuas do produto. FUNÇÕES DE PROTECÇÃO Proteção anti-gelo Nos modos COOL e DRY se a temperatura de exaustão for muito baixa, o aparelho pára automaticamente até que a temperatura aumente. Proteção contra sobrenchimento Quando a água no depósito interno excede o seu limite máximo, o aparelho pára automaticamente o seu funcionamento e soa um alarme em que o visor mostra “E4”. -
Page 14: Esvaziar O Depósito Interno De Água
ESVAZIAR O DEPÓSITO INTERNO DE ÁGUA Drenagem manual Assim que o depósito ficar cheio, o aparelho interrompe o seu funcionamento e o visor mostra E4. Desligue o aparelho e retire a ficha da tomada. Tente não mover bruscamente o aparelho, pode fazer com que o depósito entorne. Coloque um recipiente por baixo da ligação inferior da água ou coloque o aparelho num local apropriado para drenar a água. -
Page 15: Limpeza Da Superfície
Limpeza da superfície Limpe a superfície do aparelho com um pano macio ligeiramente humedecido. Não utilize químicos, como benzeno, álcool, gasolina, etc.; caso contrário pode causar danos na superfície e/ou no funcionamento interno do aparelho. Limpeza do filtro de ar Se o sistema do filtro estiver entupido com pó, a eficiência ao ar condicionado estará... -
Page 16: Problemas E Soluções
Enrole o cabo e prenda-o. Separe o tubo de exaustão de ar e guarde-o num local seguro. Cubra o aparelho e guarde-o num local seco. Retire as pilhas do comando e guarde-as ou recicle-as. Guarde os acessórios junto do aparelho até... -
Page 17: Códigos De Erro
O aparelho não está colocado Coloque o aparelho numa superfície Ruído alto. numa superfície nivelada. nivelada com piso duro (para reduzir o ruído). Foi ativada a proteção de Aguarde 3 minutos até a temperatura compressor sobreaquecimento. baixar e depois reinicie o aparelho. não trabalha. -
Page 18: Dados Técnicos
Luz MODE a compressor não iniciou, a luz proteção do compressor termine (aprox. 3 piscar de modo pisca. É normal. minutos). DADOS TÉCNICOS Modelo AC 1890 Capacidade de refrigeração 9 000 BTU Potência 980 W Classe energética Ventoinha 2 velocidades Volume de ar 320 m³/h... -
Page 19: Significado Do Símbolo "Contentor Do Lixo
Após a expiração do prazo de garantia, poderão ser efetuados arranjos por pessoal especializado, ou pelos nossos serviços de reparações, mediante aprovação de orçamento. MEI EUROPA LDA Linha Verde: 800 200 092 Website: www.mei.pt... -
Page 21: English
ENGLISH SAFETY INSTRUCTIONS Carefully read the instructions before operating the unit. This appliance is for indoor use only and intended for use in a domestic environment only. Any other use is not recommended by the manufacturer and may cause fire, electrical shocks or other injury to user or property and could result in a voided warranty. -
Page 22: Energy Saving And Unit Safety Protection Tips
R290 refrigerant gas complies with European environmental directives. R290 has a low GWP (Global Warming Potential) of 3. This air conditioner contains around 220 g of R290 refrigerant gas. Refrigerant gas may be odourless. Do not use or store in an unventilated space with an area smaller than 18.2 m2 per unit. The room must be such as to prevent stagnation of possible leaks of refrigerant gas as there could be a danger of fire or explosion should the refrigerant come into contact with electric heaters, stoves or other sources of ignition. -
Page 23: Overview Of The Components
OVERVIEW OF THE COMPONENTS Top Cover Carry Handle Louvres Front Cover Castors Rear Housing Upper Air Inlet Exhaust Outlet Lower Air Inlet... -
Page 24: Installation
INSTALLATION WARNING: Before using this unit, please keep it upright for at least 3-4 hours. This unit can easily be moved from one room to another. While moving the unit please note that it must always be kept upright and then placed on an even surface. 1. -
Page 25: Instalation Of Window Kit
INSTALATION OF WINDOW KIT NOTES: The window kit is only designed to be installed with sliding or sash windows or doors. The window kit is not designed or to be used with any other style of windows. The fish tail adaptor can be used without the slide bar with most windows / doors. ... -
Page 26: Important Safeguards
Important Safeguards! The length of the soft hose extends from approximately 30 cm to 150 cm. If hose is extended above this length, the unit may malfunction which can invalidate the warranty. The outlet vent must be well ventilated and not obstructed as this will cause the unit to overheat. -
Page 27: Operation
OPERATION Press the POWER button to turn the unit ON or OFF. Press the MODE button to cycle between the 3 modes, the indicator for the selected mode will be illuminated. COOL: The room is cooled with the cold air expelled through the front air outlet while hot air is expelled through the vent pipe. -
Page 28: Remote Control
SWING Press this button to enable the swing function. When the SWING button is pressed again the louvres will stop in their current position. Do not attempt to adjust the angle of the blades manually. The timer functions cannot be combined or repeated. POWER ON TIMER With the appliance in standby, press and hold the SWING button for 3 seconds to set the power-on timer. -
Page 29: Multi Protective Functions
MULTI PROTECTIVE FUNCTIONS Frost protection In COOL or DRY modes, if the temperature of the exhaust is too low, the machine will automatically stop operating until the temperature has risen. Overflow protection When the water in the internal water tank exceeds the warning level, the machine will stop operating and sound an alarm with the LCD display showing “E4”. -
Page 30: Continuous Drainage
When the internal water tank is full the unit will stop working, and the unit will display E4. Turn off the unit and unplug it from the mains. Try not to move the appliance abruptly as this may cause the water in the internal tank to spill out. -
Page 31: Clean The Surface
Clean the surface Clean the surface of the machine with a wet soft cloth. Do not use chemicals, such as benzene, alcohol, gasoline, etc.; otherwise, as this may cause damage to the surface and or the internal workings of the machine. Air filter cleaning If the filter screen is clogged with dust, the effectiveness of the air conditioner is reduced. -
Page 32: Troubleshooting
Separate the air-exhaust pipe and store it safely. Cover the unit and keep it in a dry place. Take the batteries out of remote control and store or dispose of them safely. Keep all accessories with the unit ready for next season. TROUBLESHOOTING Do not repair or disassemble the air conditioner. -
Page 33: Error Codes
Compressor Wait for 3 minutes until the does not Overheat protection starts. temperature is lowered, and then work. restart the machine. The distance between the Let the remote control get close to machine and the remote control is The remote the air conditioner, and make sure too far. -
Page 34: Technical Data
TECHNICAL DATA Model AC 1890 Cooling capacity 9 000 BTU Input Power 980 W Energy Class 2 fan speeds Air flow volume 320 m³/h Refrigerant R290/220g Sound power level 55 dB(A) Thermostat 15ºC - 32ºC Maximum working pressure of suction/exhaust 1.0/3.5 MPa... -
Page 35: Warranty
This will contribute to the recycling and other forms of reutilization of electrical and electronic equipment. Information concerning where the equipment can be disposed of can be obtained from your local authority. MEI EUROPA LDA Free Support Line: 800 200 092 Website:...
Need help?
Do you have a question about the AC 1890 and is the answer not in the manual?
Questions and answers