
Related Manuals for Vonluce CFN-1314-00


Summary of Contents for Vonluce CFN-1314-00
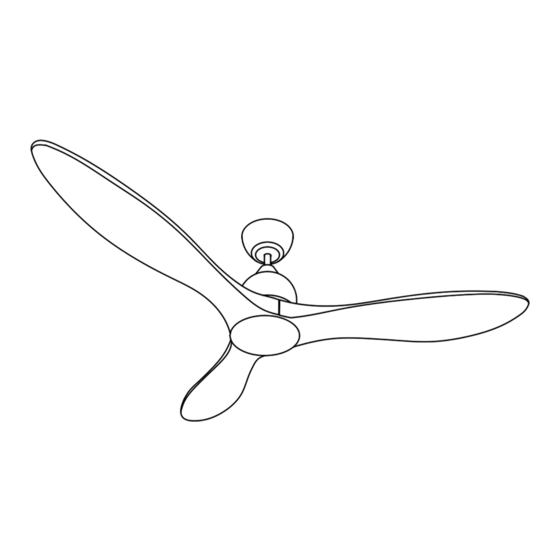
- Page 1 V202311229 Ceiling Fan and Light Instruction Manual Make A House Home C F N - 1 3 1 4 - 0 0 C F N - 1 3 1 4 - N I...
- Page 2 To ensure successful installation, please read this manual carefully before starting your work. For the latest PDF version, scan the left QR code using the appropriate app on your smartphone. For video form, go to our YouTube channel Vonluce and search for “CFN 1314” or simply scan the right QR code.
- Page 3 Contents Introduction ......................1 Package List......................2 Safety Information ....................3 Preparation......................4 Installation ......................5 Mounting Bracket.................... 6 Fan Blades ..................... 6 Downrod and Motor ..................6 Wiring ......................10 Canopy ......................11 Light ......................12 Remote Control Operation ................13 Cellphone App Operation ................
- Page 4 Introduction Before beginning installation of this product, read the package list on Page 2 and ensure all parts are present and display no defects. If any part is missing or damaged, contact customer service and do not attempt to install the product. Read all of the safety information on Page 3 before installation or use.
- Page 5 Package List Mounting Bracket Canopy Coupling Cover Grommet Fan Blades (×3) Fan Motor Assembly 5″ Downrod 10″ Downrod Shade LED Light Kit Receiver Remote Control Steel Screws (×2) Flat Washers (×4) Wire Nuts (×4) Spring Washers (×4) Mounting Bolts (×2) Star Washers (×2) Blade Washers (×7) Plastic Anchors (×2)
- Page 6 Safety Information Warning! 1. To reduce the risk of electric shock, ensure electricity has been turned off at the circuit breaker or fuse box before beginning. 2. All wiring MUST be in accordance with national and local electrical codes. Electrical installation should be performed by a qualified licensed electrician.
- Page 7 Preparation 1. Turn off Your Power Begin installation by removing fuses or turning off circuit breakers to the wiring you will be using. Use your compatible UL listed junction box if you already have one installed. Failure to disconnect the power supply prior to installation may result in serious injury or death.
- Page 8 Installation Mounting Bracket 1. Pass the supply wires through the central hole of the mounting bracket. 2. Secure the mounting bracket to your junction box with appropriate fasteners. For wood or other thinner and weaker ceilings, partially fasten the bracket using the mounting bolts and star washers.
- Page 9 Fan Blades 1. Place one blade underneath the fan motor assembly, aligning their holes. 2. Making sure the blade is straight, attach 2 sets of blade washers and bolts to secure it in place. 3. Repeat for the remaining blades. Fan Motor Assembly Blade Blade Washer...
- Page 10 Attaching a Downrod to the Motor 1. Select either the 5″ or the 10″ downrod to match the height of your ceiling. Then, pass the downrod through the coupling cover as shown. 2. Feed the lead wires and safety cable loop from the fan motor assembly through the downrod. 3.
- Page 11 Reassembling the Downrod Kit 1. Slide down the coupling cover. Place the grommet and canopy onto the downrod’s top and then slide them to the coupling cover as shown. 2. Replace the downrod’s mount, passing the lead wires and safety cable loop through it. 3.
- Page 12 Hanging the Downrod and Motor 1. Release the cable lock by loosening its Phillips bolt. Unwind the safety cable loop, wrap the cable around the mounting bracket, and thread it back through the lock. Retighten the bolt to re-secure the lock. 2.
- Page 13 Wiring Again, ensure that the power has been cut before working with the wiring. Use the wire nuts provided with your fan. Ensure there are no loose wires or connections and secure connectors with electrical tape. 1. Connect the plugs of the receiver to those Junction Box from the fan motor assembly as shown.
- Page 14 Canopy 1. Slide the canopy up to the mounting bracket and place the key holes over the bolts preinstalled on the bracket. Rotate the canopy until the bolts’ heads lock in place at the narrow sections of the key holes. Tighten these bolts as needed. Key Hole Canopy Bolt...
- Page 15 Light 1. Remove the bolts from the bottom of the fan motor assembly. 2. Feed the wire plug of the fan motor assembly through the middle of the LED light kit. 3. Connect the wire plug to the socket on the LED light kit. 4.
- Page 16 Remote Control Operation If needed, install the remote control holder onto a wall or any other suitable flat surface using appropriate fasteners. For wood or other thinner and weaker surfaces, use the provided steel screws and plastic anchors. For reinforced concrete or similar surfaces, use anchor bolts for best results.
- Page 17 Cellphone App Operation For optimal convenience, install and use the following apps to operate your fan seamlessly with your cellphone. Smart Life offers comprehensive intelligent controls, while Amazon Alexa and Google Home enable you to control the fan effortlessly through voice commands. The layout of the app interfaces and specific instructions may change as the apps update.
- Page 18 4. Ignore the instructions that appear in the Reset the device interface that opens. Simply select the first option, Confirm the indicator is blinking or breathing. In the next display, select the right option, Blink Quickly. 5. In the network interface that opens, select 2.4Ghz Wi-Fi and your Wi-Fi name. Enter your password if needed but DO NOT click Next yet.
- Page 19 6. Turn on the fan at its wall switch and IMMEDIATELY hold F/R on the remote control until the fan has beeped three times. IMMEDIATELY start the connection by clicking Next in the app, which should open a wait screen with a two-minute countdown. If you were unable to hold F/R and press Next quickly enough, repeat the preceding steps.
- Page 20 Dimmer Function Item Activates the warmest color temperature for the LED light (3000K) Warm Activates the medium color temperature for the LED light (4500K) White Activates the coolest color temperature for the LED light (6500K) Cool Dimmer Night Activates the lowest brightness level (“1”) and warmest color temperature (3000K) Brightness Changes the percent brightness of the LED light from low (“1”) to high (“100”) Color...
- Page 21 Cycle Timer Function Item Saves your current settings Save Sets the time when the fan and/or LED light will turn on automatically by scrolling up (Numbers) or down the hour and minute columns Sets a day when the fan and/or LED light will turn on automatically each week (“Mon.” Repeat Cycle etc.) or selects the next occasion for a timed activation (“Once”)
- Page 22 Amazon Alexa (Example: Ver. 2.2.501399) Important: Confirm the following issues before setup. • Your cellphone’s Bluetooth is already activated. • The Smart Life app is completely installed as described above. Setup 1. Go online and download the newest version of the Amazon Alexa app onto your cellphone. Set up an account if you have not already done so.
- Page 23 6. In the Link Account interface that opens, enter your Smart Life account information, read and accept the terms of service, and select Next Step. 7. In the Launch Smart Life interface that opens, select This device and then Launch to complete the connection.
- Page 24 Google Home (Example: Ver. 3.3.104) Important: Confirm the following issues before setup. • Your cellphone’s Bluetooth is already activated. • The Smart Life app is completely installed as described above. Setup 1. Go online and download the newest versions of the Google Home and Google Assistant apps onto your cellphone.
- Page 25 5. In the list that opens up, scroll down to Smart Life and select it. Agree to the necessary permission(s) to complete the connection. 6. When pairing is finished, the Choose device window should open, displaying all the fans linked to your Smart Life account.
- Page 26 Control In the Devices interface that opens after Step 8 above, select your fan name. Manual Control In the interface that opens, click the icons to control your fan and light. a. Select light and use On or Off to activate or deactivate the fan’s LED light. b.
- Page 27 Troubleshooting DO NOT bend the blade during ANY of the following procedures. Potential Problems Common Solutions Reconnect the fan to power. Within 10 seconds, hold until you hear 3 consecutive beeps to successfully pair the remote control. Check fuses and/or circuit breakers and reset if needed. Cut off power to the fan and check its internal electrical connections.
- Page 28 Disposal Electrical products should not be disposed of with household products. In the EU and UK, according to the European Directive 2012/19/EU for the disposal of electrical and electronic equipment and its implementation in national laws, used electrical products must be collected separately and disposed of at the collection points provided for this purpose.
- Page 29 Guaranteed Response Within 24 Hours We are dedicated to ensuring your satisfaction. At Vonluce, no inquiries are left unanswered for more than 24 hours. We treat each inquiry with the utmost seriousness, going above and beyond to provide a satisfactory response.
- Page 30 ASAP! For a .pdf copy of the latest version of these instructions, use the appropriate app on your smartphone to scan the QR code to the right. CFN-1314-00 CFN-1314-NI Rev. 29 Dec. 2023...
Need help?
Do you have a question about the CFN-1314-00 and is the answer not in the manual?
Questions and answers