
Related Manuals for Fresh-r Compac On-the-wall


Summary of Contents for Fresh-r Compac On-the-wall
- Page 1 Fresh-r Compac On-the-wall Installation Manual Installation Manual Fresh-r Compac On-the-wall FFF & CFF Page | 1...
- Page 2 Fresh-r Compac. Before starting assembly, please read this manual carefully. The manufacturer Vaventis B.V. is not liable for the installation of the Fresh-r or incorrect operation of the Fresh-r as a result of an incorrect installation. The Fresh-r complies with all applicable UL and CE directives. If you have any questions, please contact your supplier.
- Page 3 • diamond core drill For the fixing screws of the Fresh-r, use 0.3 inch drill bits for a stone wall. Wood should be pre- • drilled with a 0.1 inch drill bit. In the case of thin sheet material such as plasterboard, wooden beams with sufficient load-bearing capacity must be placed behind these sheets.
- Page 4 47 inch from the floor, but at least 4 inch from the floor and ceiling. Please note that you can still remove the door and access the controls. Do not place the Fresh-r behind a curtain or directly above a chair or sofa.
- Page 5 Cut both pipes to size. The required length is the entire wall thickness (inner wall + cavity + outer • wall) + 1.2 inch (0.4 inch on the outside + 0.8 inch insertion into the Fresh-r). For example: with a wall thickness of 12 inch, the correct length for the pipes is 12 + 1.2 = 13.2 inch...
- Page 6 In the case of a stone wall, first place the raw plugs in the drill holes. • Take the Fresh-r and carefully slide it with the two tubes through the two holes all the way in. • When screwing the Fresh-r in place, make sure that the four screw holes are at the height of the drill holes.
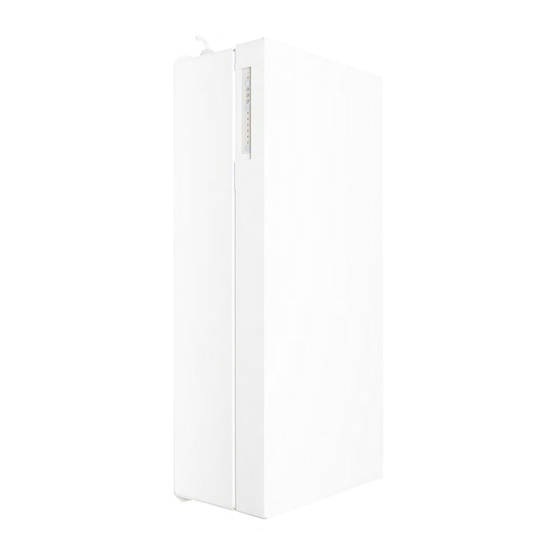
- Page 7 After about one minute, three lights will light up on the control panel at the top left on the outside, see the adjacent image. If the Fresh-r does not start up and no lights come on, check the power supply. If, after checking, you are sure that the Fresh-r is correctly connected to the power supply, but still does not work, switch off...
- Page 8 1. To connect the Fresh-r to Wi-Fi, first switch the Fresh-r off and on again. This can be done via the on/off buton that is located on the inside at the top left. Then go to your laptop/tablet/PC.
- Page 9 13. To view the data, go to www.fresh-r.me. Log in with the username and password provided by Fresh-r. Don't have a username and password yet? Request it at your supplier. 14. After the connection is established, you will no longer find Fresh-R AP….. or Vaventis AP ..in the list of Wi-Fi connections on your laptop/tablet/PC.
- Page 10 • by pressing button A again, the Fresh-r returns to automatic mode. After an hour and a half, the Fresh-r automatically returns to automatic mode. On/Off switch • This switch should only be used before cleaning or maintenance to switch off the Fresh-r.
- Page 11 Congratulations on the installation of your Fresh-r Compac, the installation is complete and the Fresh-r is ready to use. We wish you a very good time with the Fresh-r and enjoy the clean air, the comfortable indoor climate and the energy savings.
- Page 12 Runs on 110 Volt, with average use below 7 Watt, the same as one led lamp. Fresh-r can be installed both on and in the outside wall. For on the wall installation, only two holes of 5 inch need to be core drilled.
- Page 13 , RH The air flow rate is automatically adjusted. CO and temperature sensors with its smart control are always included in the Fresh-r and are situated in Modular Design outgoing air stream. The automatic mode can manually be overruled by increasing / decreasing fan The Fresh-r is constructed of independent speed.
- Page 14 C E R T I F I C A T E O F C O M P L I A N C E UL-US-2318988-1 Certificate Number E529210-20230531 Report Reference 4-Oct-2023 Date Vaventis BV Issued to: Weleweg 417 Enschede, Overijssel 7548 PK Netherlands LZUU - Heat-recovery Ventilators, Nonducted This is to certify that...
- Page 15 Date This is to certify that representative samples of the product as specified on this certificate were tested according to the current UL requirements Model Category Description Fresh-r-Series, In-the-wall Everywhere Heat-Recovery Ventilators In-the-wall Everywhere Compac Heat-Recovery Ventilators Fresh-r-Series, In-the-wall Standard...
- Page 16 C E R T I F I C A T E O F C O M P L I A N C E UL-CA-2316555-1 Certificate Number E529210-20230531 Report Reference 4-Oct-2023 Date Vaventis BV Issued to: Weleweg 417 Enschede, Overijssel 7548 PK Netherlands LZUU7 - Heat-recovery Ventilators, Nonducted Certified for This is to certify that...
- Page 17 Date This is to certify that representative samples of the product as specified on this certificate were tested according to the current UL requirements Model Category Description Fresh-r-Series, In-the-wall Everywhere Heat-Recovery Ventilators In-the-wall Everywhere Compac Heat-Recovery Ventilators Fresh-r-Series, In-the-wall Standard...
- Page 18 Model/type: Compac On-the-wall Is in conformity with the following Directives 2006/95/EC Low Voltage (LVD) The product bears the CE label Woen van Andel (Managing Director) Enschede, August 1st, 2021 Installation Manual Fresh-r Compac On-the-wall FFF & CFF Page | 18...
- Page 19 19,50 UNLESS OTHERWISE SPECIFIED: FINISH: DEBUR AND DO NOT SCALE DRAWING REVISION DIMENSIONS ARE IN MILLIMETERS BREAK SHARP SURFACE FINISH: EDGES TOLERANCES: LINEAR: ANGULAR: NAME SIGNATURE DATE TITLE: DRAWN 01-12-23 Compac OTW FFF CHK'D APPV'D MATERIAL: DWG NO. WEIGHT: SCALE: SHEET 1 OF 1...
Need help?
Do you have a question about the Compac On-the-wall and is the answer not in the manual?
Questions and answers