
Related Manuals for Fresh-r In-The-Wall


Summary of Contents for Fresh-r In-The-Wall
- Page 1 In-The-Wall Installation manual IMPORTANT: Read this manual carefully before installing the fresh-r Keep this manual for future use.
- Page 2 The information in this manual is important for the correct and safe installation of the fresh-r. With the table of contents, you’ll be able to find the right information in the manual quickly. This is the installation manual. Besides this manual there is also a user manual available which covers operation and maintenance.
-
Page 3: Table Of Contents
Prepare the fresh-r unit ................................ 14 Install the fresh-r .................................. 17 To install the grilles do the following: ..........................22 Connect the fresh-r electrically and test its functionality....................23 Connect the fresh-r to the internet............................23 Installation checklist ................................25 Specifications .................................. - Page 4 Figure 17 Deburr and chamfer the duct pipes making insertion into the white ring possible ........15 Figure 18 Bottom outlet of Fresh-r USE Hard PVC glue to ensure water tight seal............15 Figure 19 DO NOT USE PCV GLUE Top of Fresh-r unit ....................15 Figure 20 Use plenty –...
-
Page 5: Intended Use
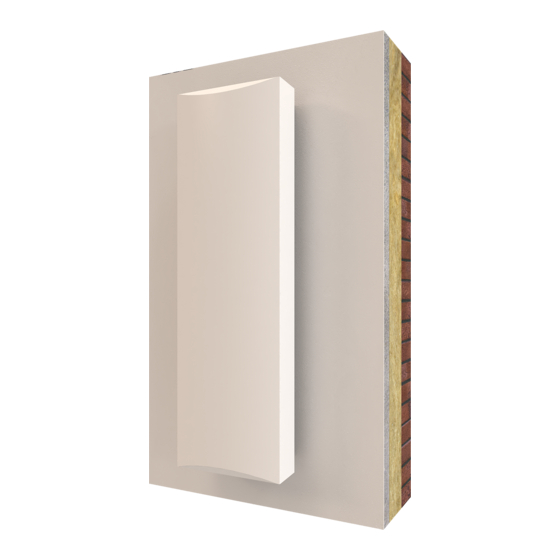
1. Intended use The fresh-r In-The-Wall is a decentral ventilation unit with heat recovery. The fresh-r takes heat from the stale air it expels and uses it to warm up the fresh air it brings in from outside. It improves air quality for a healthy indoor air quality and at the same time reduces your energy bill. -
Page 6: General Safety Instructions
4. General safety instructions DANGER • Connecting the fresh-r to the mains electricity supply must be done by a qualified electrician. • Risk for electric shocks or electrocution. Turn off the mains electricity supply in the distribution box before connecting the fresh-r electrically. -
Page 7: Installation Frame
6. Installation Frame NOTE: Recess Figure 2 Installation frame contents A. 2No. Metal edge for top and bottom B. 4No. Distance screws + 4 No. wall plugs, 24No. wood screws for mounting metal edges, 6No. wood screws for securing door frame into timber frame, 8no. wood screws for assembly of timber frame. C. -
Page 8: Installation Frame Assembly
7. Installation Frame Assembly Figure 4 Timber frame screwed together Figure 3 Bending U shap top and bottom metal edge 7.1 Assemble the timber frame Put the 4 pieces of the timber frame together with the recess all facing inwards and all on the top edge. - Page 9 Figure 8 Fit the two middle strips so that all edges do not overlap Figure 7 Install the screws and secure the middle strips so that they are fitting properly against the U shape that has been fastened with screws Place the top and bottom U-shaped metal edge Secure the metal edge on the end without a cutout using the screws supplied vii)
-
Page 10: Tools Needed For The Installation
Insert the two side pieces and secure with screws iii) The top edge can be fitted and secured after installing the Fresh-r unit and extract duct connection Figure 11 Installation Frame configured for the ITW Everywhere 8. Tools needed for the installation •... -
Page 11: How To Install The Fresh-R
9. How to install the fresh-r DANGER The person responsible for installing the fresh-r should be familiar with the local building regulations. 9.1 Prepare the wall You will need a rectangular hole cutting in the inner wall 1190mm X 340mm and two round holes (Ø 160 mm) in the outer wall of the building, for the air pipes;... - Page 12 Figure 12 Drilling dimension diagram 9.3 Drilling the 160mm duct holes To drill the lower big hole (160 mm), do the following: Drill from inside through both the inner wall across the cavity (if present) and through outer wall at a downward angle of 2 degrees.
- Page 13 Figure 13 Minimum distance from leading metal edge (surface finish) to the outer wall inside the cavity is 21cm NOTE – if the cavity is not deep enough then the door for the fresh-r will not properly fit and ventilation will be impeded.
-
Page 14: Prepare The Fresh-R Unit
Prepare the fresh-r unit 10.1 Cut the duct pipes to length To. cut the duct pipes, do the following: Remove the EPP covers. 2. Cut the upper duct pipe (input fresh air) to the total width of the wall (D1) + 25mm 3. - Page 15 Deburr and chafer the end of the duct pipes that will be inserted into the Fresh-r. Use a deburring tool, such as a file Figure 17 Deburr and chamfer the duct pipes making insertion into the white ring possible 10.2 Install the duct pipes into the fresh-r...
- Page 16 5. Bend the 4 mounting brackets so that they fall flat across the front edge of the installation frame. Figure 24 Internal wall sealing Figure 25 Mounting bracket as shipped Figure 27 Mounting bracket formed and fixed with Figure 26 Lower end of fresh-r properly secured screw in dedicated hole...
-
Page 17: Install The Fresh-R
5. Make the electrical connection - this can be to a junction box within the wall or a surface mounted junction box depending upon you electrical design 6. Press the fresh-r into the installation frame and secure each mounting bracket with a screw in the dedicated holes that are provided in the metal edge. - Page 18 11.3 Examples of extract duct connections Figure 32 Fresh-r standard duct adapter 204 x 60mm Figure 31 Low loss bend fitted directly onto adapter Figure 35 Square to round (125mm) fitted Figure 34 Square to round adapter with Figure 33 Square to round adapter with...
- Page 19 Figure 40 Adapt and Radial socket RDA 3 x 75 Figure 39 Adapt and Radial socket RDA 3 x 75...
- Page 20 11.4 Insulate between the gap between the fresh-r and the installation frame Now that you have installed the fresh-r unit as well as the extract ducts (everywhere version only) the gap between the fresh-r unit and the installation frame needs to be closed with PUR foam. See figure 42 To do this you need to insert the PUR foam nozzle into the gap and all the way to the bottom (8cm) see figure 41.
- Page 21 Installing the outer grilles 12.1 Trim the pipes to length if needed The top pipe does not need to protrude The lower pipe needs to protrude by 20mm so that the condensate will fall away from the wall surface and into the catch tray of the grille 20mm 2 degree...
-
Page 22: To Install The Grilles Do The Following
To install the grilles do the following: The grilles are 198mmX 195mm, which gives an allowance of 35mm to mask core drill misalignment. Mark the best center line out that allows the grilles to properly cover the duct pipe and core drill hole keeping the grilles in vertical alignment for best visual appearance. -
Page 23: Connect The Fresh-R Electrically And Test Its Functionality
OFF and contact your supplier. Connect the fresh-r to the internet By connecting the fresh-r to the internet you will benefit from automatic software updates. You will also have access to data graphs showing actual performance values of the air temperature and quality. - Page 24 8. Press save and reboot – wait for the dialog requesting confirmation that you want to exit configuration and select OK. 9. Power off and on the Fresh-r and it should now be connected to the internet to receive updates and provide user data.
-
Page 25: Installation Checklist
Installation checklist Use the following checklist after you have completed the installation. For a properly functioning fresh-r please make sure you can answer all questions with ‘yes’. Check the following More information Yes No Is the bottom duct pipe water tight with PVC Glue... -
Page 26: Declaration Of Conformity
Declaration of conformity as required by EC Directive Fresh-r BV The manufacturer: Weleweg 417, 7548 PK Enschade Address: The Netherlands declare under our sole responsibility that the following product Air handling unit with heat recovery E quipment: Vaventis Brand name:...
Need help?
Do you have a question about the In-The-Wall and is the answer not in the manual?
Questions and answers