
Subscribe to Our Youtube Channel
Related Manuals for BOXLIGHT SD-1M


Summary of Contents for BOXLIGHT SD-1M
- Page 1 trusted dependable most name projector lamp sales. http://www.myprojectorlamps.com http://www.myprojectorlamps.ca http://www.myprojectorlamps.eu The following projector manual has not been modified or altered in any way.
- Page 2 SD-1m ™ Projector...
- Page 3 This entire user’s guide is available on the enclosed CD as an Adobe Acrobat pdf file in the following languages: English, French, German, Italian, Norwe- gian, Portuguese, Spanish, Russian, Japanese, Korean, Traditional Chinese, Simplified Chinese. Before using this projector, please read these instructions. Le mode d'emploi complet est disponible sur le CD joint sous forme de fichier pdf d'Adobe Acrobat dans les langues suivantes : anglais, français, allemand, italien, norvégien, portugais, espagnol, russe, japonais, coréen, chinois traditionnel, chinois simplifié.
- Page 4 Declaration of Conformity We declare under our sole responsibility that the projector conforms to the following directives and norms: EMC Directive 89/336/EEC, Amended by 93/68/EEC EMC: EN 55022 EN 55024 EN 61000-3-2 EN 61000-3-3 Low Voltage Directive 73/23/EEC, Amended by 93/68/EEC Safety: EN 60950: 2000 May, 2003 Trademarks...
- Page 5 Table of Contents If you are experienced in setting up projection systems, use the Quick Setup card that was included. For complete details on connecting and operating Introduction Positioning the projector the projector, refer to this User’s Guide. Projector and Device Connector Guide Important Operating Considerations Computer connections Video connections...
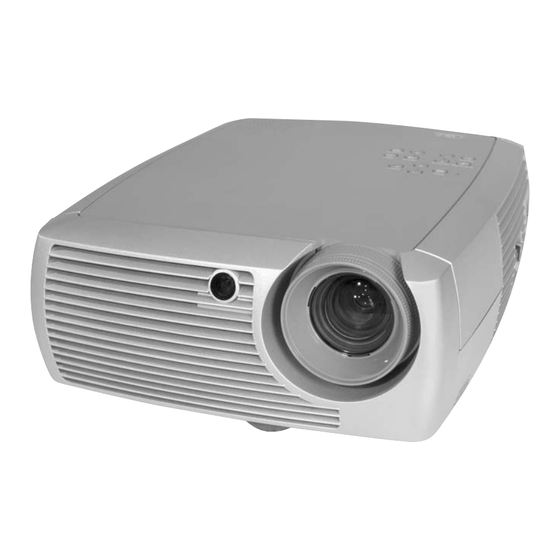
- Page 6 Introduction speaker keypad Your new digital projector is easy to connect, use, and maintain. It is an exceptional projector for both business presentations and home entertain- power cord connector ment. The digital projector is compatible with a wide variety of computers and video devices, including: power switch •...
- Page 7 Positioning the projector To determine where to position the projector, consider the size and shape of your screen, the location of your power outlets, and the distance between the projector and the rest of your equipment. Here are some general guide- lines: •...
- Page 8 Projector and Device Connector Guide The following should help you find the connectors that you want to use to obtain the best resolution possible from your input devices, such as computers, standard VCRs, DVD players (progressive and interlaced), HDTV sources (1080i, 1035i, and 720P HDTV formats), TV and satellite tuners, camcorders, video games (progressive and interlaced), and laser disc players.
- Page 9 Attach to this Video If Your Device Video Device Labeled Connector Comments For Setup Instructions, see Compatibility Connector Is on Projector NTSC, PAL, and Composite video Composite video Composite video connection on SECAM formats or S-video or S-video page 15. Standard Broadcast TV (not S-video connection on page 15 HDTV) via: cable, digital...
- Page 10 Attach to this Video If Your Device Video Device Labeled Connector Comments For Setup Instructions, see Compatibility Connector Is on Projector 1080i, 720p Computer In Not for Component VGA connection on page 16 HDTV 480i (High Definition TV) Component 480p Component video Computer In (via a Not for Component...
- Page 11 Connecting a computer source connect computer cable Required computer connections Connect one end of the computer cable (see page 14 for connecting video devices) to the dark blue Computer In connector on the projector. Connect the other end to the video port on your computer. If you are using a desktop computer, you will need to disconnect the monitor cable from the com- puter’s video port first.
- Page 12 Displaying a computer source image remove lens cap Remove the lens cap. Toggle the Power switch on the side of the projector to the On position. toggle Power switch The LED flashes green and the fans start to run. When the lamp comes on, the start up screen displays and the LED is steady green.
- Page 13 Adjusting the image Adjust the height of the projector, if necessary, by pressing the release but- adjust height ton to extend the foot. rotate Rotate the leveling foot located at the rear of the projector, if necessary. leveling foot elevator Avoid placing your hands in near the hot exhaust vent in front of the projec- foot release button...
- Page 14 Using the projector with Windows 98 for the first time The first time you connect a computer running Windows 98 to the projector, the computer recognizes the projector as “new hardware” and the Add New Hardware Wizard appears. Follow these instructions to use the Wiz- ard to load the correct driver (which was installed with your Windows operating system).
- Page 15 Skip this page if you did not connect a USB mouse cable For Windows 98: • If you connected the USB cable, the Add New Hardware Wizard appears again. Drivers must be installed to use the USB functionality. • The Wizard launches three times. The first time it detects a USB Composite Device.
- Page 16 Connecting a video device 16:9 screen 4:3 screen You can connect video devices such as VCRs, DVD players, camcorders, digital cameras, video game consoles, HDTV receivers, and TV tuners to the projector. There is also an audio input. You can connect the audio directly to the projector to get sound from the built-in speaker, or you can connect the Do Not Use mode...
- Page 17 Video device connections Composite video connection Plug the composite video cable’s (not included) yellow connector into the connect video cable and audio cable (via video-out connector on your video device. Plug the other yellow connector the audio adapter) into the yellow Video In connector on the projector. Plug the included audio adapter’s white connector into the left audio out connector on your video device;...
- Page 18 Component video connection connect component cables via component If your video device has component connectors, use a Component to S- to S-video adapter and audio cables via video adapter or a Component to VESA adapter (available from a third- audio adapter party vendor) for HD and progressive sources.
- Page 19 Displaying video remove lens cap Remove the lens cap. toggle Power switch Toggle the Power switch on the side of the projector to the On position. The LED flashes green and the fans start to run. When the lamp comes on, the start-up screen is displayed and the LED is steady green.
- Page 20 Adjust the zoom and focus. adjust zoom and focus focus zoom (thin ring) (thick ring) If the image is not square, adjust the keystone using the buttons on the key- adjust keystone pad. Press the top Keystone button to reduce the upper part of the image, and press the bottom Keystone button to reduce the lower part.
- Page 21 Shutting down the projector Troubleshooting your setup The projector automatically displays a black screen after no active source is If your image appears correctly on the screen, skip to the next section. If it detected for 30 minutes. This black screen helps preserve the life of the pro- does not, troubleshoot the setup.
- Page 22 Problem Solution Result plug power cord in projector’s left side no start up screen correct image remove lens cap toggle power switch toggle power switch on side press the Computer button only start up screen appears computer image projected activate laptop’s external port restart laptop...
- Page 23 Problem Solution Result press the Auto Image button on keypad computer image projected no computer image, just the words “Signal out of range” adjust computer refresh rate in Control Panel>Display>Settings>Advanced>Adapter (location varies by operating system) you may also need to set a different resolution on your computer, as shown in the following problem, “image fuzzy or cropped”...
- Page 24 Problem Solution Result set your computer’s display resolution to image fuzzy or cropped image clear and not cropped the native resolution of the projector (Start>Settings>Control Panel>Display>Settings tab) select 800x600 For a laptop, disable laptop monitor or turn-on dual- display mode move projector, adjust zoom, adjust height image not centered on screen correct image...
- Page 25 Problem Solution Result image not square adjust Keystone on keypad square image adjust Sharpness (video sources only) in the image not sharp correct image Picture>Advanced menu change aspect ratio to 4:3 or 16:9 in correct image image does not fit 4:3 or 16:9 screen Picture>Aspect ratio menu...
- Page 26 Problem Solution Result correct image image upside down turn off ceiling in Settings>System menu image reversed left to right turn off rear in Settings>System menu correct image adjust color, tint, color temperature, projected colors don’t match source brightness, contrast in the menus correct image COLOR COLOR...
- Page 27 Problem Solution Result make sure vents aren’t blocked, turn off the projector and allow it to cool for a minute lamp won’t turn on, LED blinking red lamp turns on lamp turns on if lamp hours > 4,000, lamp must be “Change lamp”...
- Page 28 Using the remote control next button previous button The remote uses two (2) provided AA batteries. They are easily installed by sliding the cover off the remote’s back, aligning the + and - ends of the batteries, sliding them into place, and then replacing the cover. Caution: When replacing the batteries, be aware that using batteries other than the type provided with the projector may risk severe damage to the remote.
- Page 29 Using the audio To use the projector’s speaker, connect your source to the Audio In connec- connect audio cable tor on the projector. See page 15 regarding using the audio adapter. To adjust the volume, press the Volume buttons on the keypad or remote. To mute the sound, press the Mute button on the remote.
- Page 30 Optimizing computer images Presentation features Several features are provided to make giving presentations easier. Here is an After your computer is connected properly and the computer’s image is on overview, details are found in the menu section. the screen, you can optimize the image using the onscreen menus. For gen- eral information on using the menus, see page 30.
- Page 31 Optimizing video images Customizing the projector After your video device is connected properly and the image is on the You can customize the projector for your specific setup and needs. See screen, you can optimize the image using the onscreen menus. For general page 34 to page 36 for details on these features.
- Page 32 Using the menus keypad navigation Main menu To open the menus, press the Menu button on the keypad or remote. (The buttons menus automatically close after 60 seconds if no buttons are pressed.) The Main menu appears. Use the arrow buttons to move up and down to high- light the desired submenu, then press the Select button.
- Page 33 Picture menu Picture menu To adjust the following settings, highlight the setting, press Select, use the up and down arrows to adjust the values, then press Select to confirm the changes. Keystone: adjusts the image vertically and makes a squarer image. You can also adjust keystone from the keypad.
- Page 34 Presets: Presets are provided that optimize the projector for displaying computer presentations, photographs, film images, and video images. Film input is material originally captured on a film camera, like a movie; video input is material originally captured on a video camera, like a TV show or Presets sporting event.
- Page 35 Advanced menu Sharpness: (video sources only) changes the clarity of the edges of a video Advanced menu image. Select a sharpness setting. Sharpness Color Temperature: changes the intensity of the colors. Select a listed rela- Color Temperature tive warmth value. Color Control: allows you to individually adjust the gain for the red, green, and blue colors.
- Page 36 Settings menu Settings menu Audio: allows adjustments to Volume of the internal speaker. Adjustments can also be made from the projector’s keypad and the remote. Audio Sources: Power-up Source determines which source the projector checks first for active video during power-up. When the Autosource feature is On, the projector automatically finds the active source, checking the Power-up Source first.
- Page 37 Startup Logo: allows you to display a blank screen instead of the default screen at startup, and when no source is detected. Startup Logo Blank Screen: determines what color is displayed when you press the Blank Screen Blank button on the remote. Effect Key: allows you to assign a different function to the Effect button on the remote, allowing you to quickly and easily use the effect.
- Page 38 Language: allows you to select a language for the onscreen display. Language menu Service: To use these features, highlight them and press Select. Service menu Factory Reset: restores all settings to their default. Lamp Reset: resets the lamp hours used counter in the About menu to zero.
- Page 39 Maintenance Cleaning the Lens Apply a non-abrasive camera lens cleaner to a soft, dry cloth. • Avoid using an excessive amount of cleaner, and don’t apply the cleaner directly to the lens. Abrasive cleaners, solvents or other harsh chemicals might scratch the lens. Lightly wipe the cleaning cloth over the lens in a circular motion.
- Page 40 Loosen the two captive screws that attach the lamp housing to the pro- lamp jector. connector Detach the lamp connector from the projector by depressing the locking lamp cable tab on the connector and lightly pulling it free. WARNING: To avoid burns, allow the projector to cool for at least 30 minutes before you replace the lamp.
- Page 41 Cleaning the Lamp Housing Screens In dirty or dusty environments, the two dust filter screens in the lamp hous- lamp housing ing can become clogged, causing high temperatures and premature lamp failure. Routine maintenance to remove dust from the screens lowers the lamp operating temperature and prolongs lamp life.
- Page 42 Appendix Accessories Standard Accessories Specifications (ship with the projector) Shipping Box (with packaging) ° ° Temperature 50 to 104 F (10 to 40 C) at sea level Soft Carrying Case ° ° Operating 50 to 95 F (10 to 35 C) at 10,000 feet Computer Cable 6 ft (1.8 m) °...
- Page 43 Projected image size Red LED Behavior and Projector Errors If the projector is not functioning properly and the LED is blinking red, con- sult Table 3 to determine a possible cause. There are two-second pauses Table 2: between the blinking cycles. Range of distance to the screen for a given screen size for the Projector Table 3: Distance to screen...
- Page 44 Numerics video devices 4 component cable connector 16 16x9 vs 4x3 screen aspect 14 Computer In connector 9 800x600 resolution 4 connecting video device 14 connectors on projector 7, 8 About 35, 36 Contrast 31 Accessories customizing the projector 29 standard 40 Advance menu 33 Display Messages 34...
- Page 45 keypad buttons Phase 33 projector 27 Picture menu 31 keystone adjustment 11, 18 Power connector 9 power cord 9, 16 Power Save 19 lamp Power switch 10 ordering 40 PowerPoint Lamp Housing Screens remote’s mouse buttons 26 cleaning 39 Power-up Source 34 lamp replacement 37 presentation Lamp Reset 36...
- Page 46 solid green 19 solid red 19 Sources 34 Specifications 40 Startup Logo 35 S-video connector 15 System 34 temperature limits 40 Tint 31 Tracking 33 troubleshooting 19 turning off projector 19 TV tuner 14 USB 9 USB, using your mouse 9 vents 3 Vertical 33 Video In connector 15...
- Page 48 pá=îçìë=ÆíÉë=ìå=ìíáäáë~íÉìê=ÅÜÉîêçåå¨=ÇÉë=ëóëí≠ãÉë=ÇÉ=éêçàÉÅíáçåI=ìíáäáëÉò=ä~= ÑáÅÜÉ=ÇÉ=Ǩã~êê~ÖÉ=ê~éáÇÉ=ÅáJàçáåíÉK=mçìê=ÇÉë=Ǩí~áäë=ÅçãéäÉíë=ëìê=äÉ= fåíêçÇìÅíáçå= mçëáíáçååÉãÉåí=Çì=éêçàÉÅíÉìê= Äê~åÅÜÉãÉåí=Éí=äÉ=ÑçåÅíáçååÉãÉåí=Çì=éêçàÉÅíÉìêI=êÉéçêíÉòJîçìë=¶=ÅÉ=jçÇÉ= dìáÇÉ=ÇÉë=ÅçååÉÅíÉìêë=Çì=éêçàÉÅíÉìê=Éí=ÇÉë=~éé~êÉáäë ÇÛÉãéäçáK= o~ÅÅçêÇÉãÉåíë=ÇÉ=äÛçêÇáå~íÉìê o~ÅÅçêÇÉãÉåíë=îáǨç `çåëáǨê~íáçåë=ÇÉ=ÑçåÅíáçååÉãÉåí=áãéçêí~åíÉë o~ÅÅçêÇÉãÉåí=ÇÛìåÉ=ëçìêÅÉ=çêÇáå~íÉìê= kÉ=éä~ÅÉò=é~ë=äÉ=éêçàÉÅíÉìê=ëìê=ìåÉ=å~ééÉ=çì=íçìí=~ìíêÉ=êÉîÆíÉãÉåí=ãçì=èìá= `çååÉñáçåë=ÇÛçêÇáå~íÉìê=ÉñáÖ¨Éë= éçìêê~áí=çÄëíêìÉê=äÉë=¨îÉåíë=~î~åí=çì=~êêá≠êÉK=mçìê=äÉ=ãçåí~ÖÉ=~ì=éä~ÑçåÇI= `çååÉñáçåë=ÇÛçêÇáå~íÉìê=çéíáçåÉääÉë= ^ÑÑáÅÜ~ÖÉ=ÇÛìåÉ=áã~ÖÉ=ÇÉ=ëçìêÅÉ=çêÇáå~íÉìê= ìíáäáëÉò=ÉñÅäìëáîÉãÉåí=ìå=ëóëí≠ãÉ=ÇÉ=ãçåí~ÖÉ=~ééêçìî¨K=a~åë=äÉ=Å~ë=éÉì= o¨Öä~ÖÉ=ÇÉ=äÛáã~ÖÉ= éêçÄ~ÄäÉ=ÇÛìåÉ=êìéíìêÉ=ÇÉ=ä~=ä~ãéÉI=åÉííçóÉò=ëçáÖåÉìëÉãÉåí=ä~=òçåÉ=ÇÉî~åí= ríáäáë~íáçå=Çì=éêçàÉÅíÉìê=~îÉÅ=táåÇçïë=VU= äÉ=éêçàÉÅíÉìê=Éí=ÉåäÉîÉò=äÉë=~äáãÉåíë=èìá=ëÉ=íêçìîÉê~áÉåí=¶=éêçñáãáí¨K éçìê=ä~=éêÉãá≠êÉ=Ñçáë= o~ÅÅçêÇÉãÉåí=ÇÛìå=~éé~êÉáä=îáǨç= `çååÉñáçåë=ÇÛ~éé~êÉáäë=îáǨç= `çååÉñáçå=îáǨç=ÅçãéçëáíÉ= `çååÉñáçå=pJîáǨç= `çååÉñáçå=Åçãéçë~åí=îáǨç= `çååÉñáçå=sd^= ^ÑÑáÅÜ~ÖÉ=îáǨç= o¨Öä~ÖÉ=ÇÉ=äÛáã~ÖÉ= ^êêÆí=Çì=éêçàÉÅíÉìê= a¨é~åå~ÖÉ=ÇÉ=äÛáåëí~ää~íáçå= ríáäáë~íáçå=ÇÉ=ä~=í¨ä¨Åçãã~åÇÉ= ríáäáë~íáçå=ÇÉ=äÛ~ìÇáç= kÉ=éä~ÅÉò=é~ë=ÇÛçÄàÉíë ríáäáë~íáçå=ÇÉë=Äçìíçåë=Çì=Åä~îáÉê= Ç~åë=ÅÉííÉ=òçåÉ=ÇÉî~åí léíáãáë~íáçå=ÇÉë=áã~ÖÉë=éêçîÉå~åí=ÇÛìå=çêÇáå~íÉìê= äÉ=éêçàÉÅíÉìêK cçåÅíáçåë=ÇÉ=éê¨ëÉåí~íáçå= léíáãáë~íáçå=ÇÉë=áã~ÖÉë=îáǨç= mÉêëçåå~äáë~íáçå=Çì=éêçàÉÅíÉìê= ríáäáë~íáçå=ÇÉë=ãÉåìë=...
- Page 49 fåíêçÇìÅíáçå Ü~ìíJé~êäÉìê Åä~îáÉê sçíêÉ=åçìîÉ~ì=éêçàÉÅíÉìê=åìã¨êáèìÉ=Éëí=Ñ~ÅáäÉ=¶=Äê~åÅÜÉêI=¶=ìíáäáëÉê=Éí= ÉåíêÉíÉåáêK=`É=éêçàÉÅíÉìê=ÉñÅÉéíáçååÉä=Éëí=ÇÉëíáå¨=~ìëëá=ÄáÉå=~ìñ= ÅçååÉÅíÉìê= ~ééäáÅ~íáçåë=ÇÉ=ÇáîÉêíáëëÉãÉåí=¶=ìë~ÖÉ=ÇçãÉëíáèìÉ=èìÛ~ìñ=~ééäáÅ~íáçåë= Çì=ÅçêÇçå= éêçÑÉëëáçååÉääÉëK=iÉ=éêçàÉÅíÉìê=åìã¨êáèìÉ=Éëí=Åçãé~íáÄäÉ=~îÉÅ=ìå=Öê~åÇ= ÇD~äáãÉåí~íáçå åçãÄêÉ=ÇÛçêÇáå~íÉìêë=Éí=ÇÛ~éé~êÉáäë=îáǨçI=ó=Åçãéêáë=W áåíÉêêìéíÉìê= Ö¨å¨ê~ä √ ä~=éäìé~êí=ÇÉë=ã~Öå¨íçëÅçéÉëI=ÇÉë=äÉÅíÉìêë=asa=E~ÑÑáÅÜ~ÖÉ=ÉåíêÉä~Ũ=Éí= åçåJÉåíêÉä~ŨFI=ÇÉë=ëçìêÅÉë=eaqs=EÑçêã~íë=NMUMáI=NMPRá=Éí=TOMm=eaqsFI= ê¨ÅÉéíÉìê=ÇÉ= ÇÉë=ëóåíçåáëÉìêë=EíìåÉêëF=ÇÉ=ê¨ÅÉéíáçå=ÇÉ=í¨ä¨îáëáçå=ÇáÑÑìë¨É=çì=é~ê= í¨ä¨Åçãã~åÇÉ=EfoF Äçìíçå=ÇÉ=ǨîÉêêçìáää~ÖÉ= ë~íÉääáíÉI=ÇÉë=Å~ãÉëÅçéÉëI=ÇÉë=àÉìñ=îáǨç=Éí=ÇÉë=äÉÅíÉìêë=ÇÉ=ÇáëèìÉë=ä~ëÉêëK Çì=éáÉÇ=ê¨Öä~ÄäÉ ãáëÉ=~ì=éçáåí= √ lêÇáå~íÉìêë=Åçãé~íáÄäÉë=f_jI=ó=Åçãéêáë=äÉë=éçêí~ÄäÉëI=àìëèìD¶=NMOQñTSU= òççã=E~ååÉ~ì=¨é~áëF E~ååÉ~ì=ãáåÅÉF Éå=ê¨ëçäìíáçåK ∆ ∆ ∆ √ lêÇáå~íÉìêë=^ééäÉ =j~ÅáåíçëÜ =Éí=mçïÉê_ççâ =àìëèìÛ¶=NMOQñTSU=Éå= ê¨ëçäìíáçåK îçäÉí=Çì= iÉ=éêçàÉÅíÉìê=Éëí=Ççí¨=ÇÛìåÉ=ê¨ëçäìíáçå=UMMñSMM=psd^=å~íáîÉ=Éí=äÉ=ãçÇ≠äÉ= Äç≤íáÉê= ëí~åÇ~êÇ=ÇáëéçëÉ=ÇÉë=~ÅÅÉëëçáêÉë=ëìáî~åíëK= ÇÉ=ä~=ä~ãéÉ...
- Page 50 mçëáíáçååÉãÉåí=Çì=éêçàÉÅíÉìê mçìê=ǨíÉêãáåÉê=äÛÉãéä~ÅÉãÉåí=Çì=éêçàÉÅíÉìêI=ÅçåëáǨêÉò=ä~=í~áääÉ=Éí=ä~=ÑçêãÉ= ÇÉ=îçíêÉ=¨Åê~åI=äÉë=Éãéä~ÅÉãÉåíë=ÇÉë=éêáëÉë=ÇÉ=Åçìê~åí=Éí=ä~=Çáëí~åÅÉ=ÉåíêÉ=äÉ= éêçàÉÅíÉìê=Éí=äÉë=~ìíêÉë=~éé~êÉáäëK=sçáÅá=èìÉäèìÉë=ê≠ÖäÉë=¨ä¨ãÉåí~áêÉë=W √ mçëáíáçååÉò=äÉ=éêçàÉÅíÉìê=ëìê=ìåÉ=ëìêÑ~ÅÉ=éä~åÉ=¶=~åÖäÉ=Çêçáí=~îÉÅ=äÛ¨Åê~åK= NV=éá iÉ=éêçàÉÅíÉìê=Ççáí=ÆíêÉ=~ì=ãáåáãìã=¶=NIQV=ã=EQIV=éáÉÇëF=ÇÉ=äÛ¨Åê~å=ÇÉ= TIR=éá éêçàÉÅíáçåK QIU=éáK √ mçëáíáçååÉò=äÉ=éêçàÉÅíÉìê=¶=ãçáåë=ÇÉ=P=ã≠íêÉë=ENM=éáÉÇëF=ÇÉ=ä~=ëçìêÅÉ=ÇÉ= Åçìê~åí=Éí=ÇÉ=NIU=ã≠íêÉë=ES=éáÉÇëF=ÇÉ=äÛ~éé~êÉáä=îáǨç=Eë~ìÑ=ëá=îçìë= ÇáëéçëÉò=ÇÉ=ê~ääçåÖÉëFK=mçìê=~ëëìêÉê=ìå=~ÅÅ≠ë=~Ǩèì~í=~ìñ=ÅßÄäÉëI=åÉ= éä~ÅÉò=é~ë=äÉ=éêçàÉÅíÉìê=¶=ãçáåë=ÇÉ=MINR=ã=ES=éçìÅÉëF=Çì=ãìê=çì=ÇÛìå= ~ìíêÉ=çÄàÉíK √ mçëáíáçååÉò=äÉ=éêçàÉÅíÉìê=¶=ä~=Çáëí~åÅÉ=îçìäìÉ=é~ê=ê~ééçêí=¶=äÛ¨Åê~åK=i~= Çáëí~åÅÉ=ÉåíêÉ=äÛçÄàÉÅíáÑ=Çì=éêçàÉÅíÉìê=Éí=äÛ¨Åê~åI=äÉ=ê¨Öä~ÖÉ=Çì=òççã=Éí=äÉ= Ñçêã~í=îáǨç=ǨíÉêãáåÉåí=ä~=í~áääÉ=ÇÉ=äÛáã~ÖÉ=éêçàÉí¨ÉK=iDáääìëíê~íáçå=Éå= NM=éá=ÇÉ Ü~ìí=¶=ÇêçáíÉ=ãçåíêÉ=íêçáë=í~áääÉë=ÇÛáã~ÖÉë=éêçàÉí¨ÉëK=mçìê=éäìë=ÇÉ=Ǩí~áäë= ^åÖäÉ=ÇÉ=éêçàÉÅíáçå=~ì= Ü~ìí=áã~ÖÉ ëìê=äÉë=í~áääÉë=ÇÛáã~ÖÉ=¶=ÇÉë=Çáëí~åÅÉë=ÇáÑѨêÉåíÉëI=êÉéçêíÉòJîçìë=¶=Â=q~áääÉ= Ñçêã~í=QWP=Eé~ê=ǨÑ~ìíF ÇÉ=äÛáã~ÖÉ=éêçàÉí¨É=ÊI=é~ÖÉ QNK √ iÛáã~ÖÉ=ëçêí=Çì=éêçàÉÅíÉìê=¶=ìå=ÅÉêí~áå=~åÖäÉK=iÉ=ǨÅ~ä~ÖÉ=ÇÛáã~ÖÉ=Éëí=ÇÉ= NNOIO=B=äçêëèìÉ=äÉ=éêçàÉÅíÉìê=Éëí=~ì=Ñçêã~í=QWP=EãçÇÉ=é~ê=ǨÑ~ìíFK=`Éä~= ëáÖåáÑáÉ=èìÉ=äÉ=Ä~ë=ÇÉ=äÛáã~ÖÉ=ëÉ=íêçìîÉ=¶=PT=ÅÉåíáã≠íêÉë=ENIOO=éáÉÇëF=~ìJ ÇÉëëìë=Çì=ÅÉåíêÉ=ÇÉ=äÛçÄàÉÅíáÑ=äçêëèìÉ=ëÛ~ÑÑáÅÜÉ=ìåÉ=áã~ÖÉ=ÇÉ=P=ã≠íêÉë=ÇÉ= Ü~ìíK= Ä~ë=ÇÉ=äÛáã~ÖÉ √ iÉ=ǨÅ~ä~ÖÉ=ÇÛáã~ÖÉ=Éëí=ÇÉ=NPOIV=B=äçêëèìÉ=äÉ=éêçàÉÅíÉìê=Éëí=~ì=Ñçêã~í= NIOO=éáÉÇë=~ìJÇÉëëìë= ÅÉåíêÉ=ÇÉ=äÛçÄàÉÅíáÑ NSWVK=`Éä~=ëáÖåáÑáÉ=èìÉ=äÉ=Ä~ë=ÇÉ=äÛáã~ÖÉ=ëÉ=íêçìîÉ=¶=N=ã≠íêÉë=EPIOV=éáÉÇëF= ÇÉ=äÛçÄàÉÅíáÑ...
- Page 51 dìáÇÉ=ÇÉë=ÅçååÉÅíÉìêë=Çì=éêçàÉÅíÉìê=Éí=ÇÉë=~éé~êÉáäë iÉ=ÇçÅìãÉåí=ëìáî~åí=îçìë=~áÇÉê~=¶=ǨíÉêãáåÉê=äÉë=ÅçååÉÅíÉìêë=èìÉ=îçìë=ëçìÜ~áíÉò=ìíáäáëÉê=éçìê=çÄíÉåáê=ä~=ãÉáääÉìêÉ=ê¨ëçäìíáçå=ÇÉ=îçë=ÇáëéçëáíáÑë=ÇDÉåíê¨ÉI= ÅçããÉ=äÉë=çêÇáå~íÉìêëI=äÉë=ã~Öå¨íçëÅçéÉë==ëí~åÇ~êÇI=äÉë=äÉÅíÉìêë=asa=EéêçÖêÉëëáÑë=Éí=ÉåíêÉä~ŨëFI=äÉë=~éé~êÉáäë=ÇÉ=í¨ä¨îáëáçå=Ü~ìíÉ=ǨÑáåáíáçå=EÑçêã~íë=ÇÉ= í¨ä¨îáëáçå=Ü~ìíÉ=ǨÑáåáíáçå=NMUMáI=NMPRá=Éí=TOMmFI=äÉë=í¨ä¨îáëáçåë=Éí=äÉë=íìåÉêë=ë~íÉääáíÉëI=äÉë=Å~ãÉëÅçéÉëI=äÉë=àÉìñ=îáǨç=EéêçÖêÉëëáÑë=Éí=ÉåíêÉä~ŨëF=Éí=äÉë=äÉÅíÉìêë= ÇÉ=ÇáëèìÉ=ä~ëÉêK iÉë=ê~ÅÅçêÇÉãÉåíë=ÇÉ=äÛçêÇáå~íÉìê=áãéäáèìÉåí=ä~=Ñáñ~íáçå=Çì=ÅßÄäÉ=ÇÉ=äÛçêÇáå~íÉìê=Åçãéêáë=~îÉÅ=äÉ=éêçàÉÅíÉìê=¶=é~êíáê=ÇÛìå=çêÇáå~íÉìê=¶=äÛÉåíê¨É=`çãéìíÉê=få= EÉåíê¨É=ÇÉ=äÛçêÇáå~íÉìêF=Çì=éêçàÉÅíÉìêK=mçìê=äÉë=ÅçååÉñáçåë=Éå=çéíáçåI=áä=Éëí=å¨ÅÉëë~áêÉ=ÇÉ=êÉäáÉê=äDçêÇáå~íÉìê=~ì=éêçàÉÅíÉìê=¶=äD~áÇÉ=Çì=ÅßÄäÉ=~ìÇáç=èìá=îçìë=~= ¨í¨=ÑçìêåáK=fä=Éëí=¨Ö~äÉãÉåí=å¨ÅÉëë~áêÉ=ÇÉ=ÅçååÉÅíÉê=äÉ=ãçåáíÉìê=ÇÉ=äDçêÇáå~íÉìê=~ì=éêçàÉÅíÉìêI=Éí=ÇÉ=êÉäáÉê=äDçêÇáå~íÉìê=~ì=éêçàÉÅíÉìê=~ì=ãçóÉå=ÇDìå=ÅßÄäÉ=rp_= Eåçå=ÑçìêåáF=éçìê=éÉêãÉííêÉ=äÉ=ǨÑáäÉãÉåí=ÇÉë=Çá~éçëáíáîÉë=ÇDìåÉ=éê¨ëÉåí~íáçå=mçïÉêmçáåí»K=sçáê=é~ÖÉ V=éçìê=ÇÉë=áåÑçêã~íáçåë=ëìê=äÛáåëí~ää~íáçå=ÇÉ= äÛçêÇáå~íÉìê=Éí=Çì=éêçàÉÅíÉìêK i~=éêÉãá≠êÉ=¨í~éÉ=ÇÉë=ê~ÅÅçêÇÉãÉåíë=îáǨç=ÅçåëáëíÉ=¶=ÅÜçáëáê=äÉ=íóéÉ=ÇÉ=ÅçååÉÅíÉìê=ÇÉ=ëçêíáÉ=¶=ê~ÅÅçêÇÉê=~ì=éêçàÉÅíÉìêK=pá=äÉ=ã~í¨êáÉä=ÇáëéçëÉ=ÇÉ=éäìëáÉìêë= ëçêíáÉëI=ë¨äÉÅíáçååÉò=ÅÉääÉ=èìá=çÑÑêÉ=ä~=èì~äáí¨=çéíáã~äÉK=i~=î~äÉìê=N=êÉéê¨ëÉåíÉ=ä~=ãÉáääÉìêÉ=èì~äáí¨I=ä~=î~äÉìê=P=Éëí=ä~=éäìë=Ä~ëëÉ=W `çãéçë~åí=îáǨç pJîáǨç sáǨç=ÅçãéçëáíÉ pá=îçìë=ÅçååÉÅíÉò=äÉ=éêçàÉÅíÉìê=¶=ìåÉ=ëçìêÅÉ=ÇÉ=í¨ä¨îáëáçå=Ü~ìíÉ=ǨÑáåáíáçåI=äÉ=ÅçååÉÅíÉìê=Esd^F=ÇÛçêÇáå~íÉìê=Çì=éêçàÉÅíÉìê=Ççáí=ÆíêÉ=ìíáäáë¨=EêÉé¨ê¨=é~ê=sáÇÉç= fåFK=pçìîÉåÉòJîçìë=èìÉ=ä~=í¨ä¨îáëáçå=Ü~ìíÉ=ǨÑáåáíáçå=Éí=äÉë=ëçìêÅÉë=éêçÖêÉëëáîÉë=ÇçáîÉåí=ÆíêÉ=Ö¨ê¨Éë=é~ê=äÉ=ÅçååÉÅíÉìê=sd^=Çì=éêçàÉÅíÉìêK=iÉ=éçêí=ëJîáǨ=åÉ= ÑçåÅíáçååÉ=é~ë=~îÉÅ=äÉë=ëçìêÅÉë=éêçÖêÉëëáîÉë=ãÆãÉ=~îÉÅ=ìå=D~Ç~éí~íÉìê=Åçãéçë~åí=îÉêë=ëJîáǨçK=^îÉÅ=äÉë=ëçìêÅÉë=éêçÖêÉëëáîÉëI=ìíáäáëÉò==ìå=~Ç~éí~íÉìê= Åçãéçë~åí=îÉêë=sbp^K=`Éë=ÇÉìñ=~Ç~éíÉìêë=åÉ=ëçåí=é~ë=áåÅäìë=~îÉÅ=äÉ=éêçàÉÅíÉìê=Éí=éÉìîÉåí=ÆíêÉ=~ÅÜÉí¨ë=~ìéê≠ë=ÇDìå=ÑçìêåáëëÉìê=íáÉêëK ÅçååÉÅíÉìêë=ÇDÉåíê¨É=Çì=éêçàÉÅíÉìê Éåíê¨É=çêÇáå~íÉìê= Çì=éçêí~ÄäÉ=çì ëJîáÇÉç îáÇÉç=áå ~ìÇáç=áå E`çãéìíÉê=fåF=Eeaqs= EëçêíáÉF Éí=ëçìêÅÉë=ÇÉ= Åçãéçë~åíëF...
- Page 52 cáñÉò=¶=ÅÉ= pá=îçíêÉ= `çãé~íáÄáäáí¨= ÅçååÉÅíÉìê= mçìê=ÇÉë=áåëíêìÅíáçåë= ^éé~êÉáä=îáǨç ÅçååÉÅíÉìê= `çããÉåí~áêÉë îáÇ¨ç ¨íáèìÉí¨=ëìê=äÉ= ÇDáåëí~ää~íáçåI=îçáê= ÇÛ~éé~êÉáä=Éëí éêçàÉÅíÉìê cçêã~íë=kqp`I= sáǨç=ÅçãéçëáíÉ sáǨç=ÅçãéçëáíÉ `çååÉñáçå=îáǨç=ÅçãéçëáíÉI= m^i=Éí=pb`^j çì=pJîáǨç çì=pJîáǨç é~ÖÉ=NR q¨ä¨îáëáçå=ëí~åÇ~êÇ=Eåçå= `çååÉñáçå=pJîáǨçI=é~ÖÉ=NR= Ü~ìíÉ=ǨÑáåáíáçåF=îá~=W=ÅßÄäÉI= ÅßÄäÉ=åìã¨êáèìÉI=í¨ä¨îáë¨= `çãéçë~åí=QUMá `çãéçë~åí=îáǨç pJîáǨç=îá~=ìå= kçå=ÇÉëíáå¨=~ìñ= `çååÉñáçå=Åçãéçë~åí=îáǨçI= ë~íÉääáíÉI=asa=çì= ~Ç~éí~íÉìê= ëçìêÅÉë=éêçÖêÉëëáîÉë= é~ÖÉ=NS ã~Öå¨íçëÅçéÉ= Åçãéçë~åí=îÉêë= EéKÉñK=ä~=í¨ä¨îáëáçå= ëJîáǨç Ü~ìíÉ=ǨÑáåáíáçåFK= sçáê=é~ÖÉ=ëìáî~åíÉ cçêã~íë=kqp`I= sáǨç=ÅçãéçëáíÉ...
- Page 53 cáñÉò=¶=ÅÉ= pá=îçíêÉ= `çãé~íáÄáäáí¨= ÅçååÉÅíÉìê= mçìê=ÇÉë=áåëíêìÅíáçåë= ^éé~êÉáä=îáǨç ÅçååÉÅíÉìê= `çããÉåí~áêÉë îáÇ¨ç ¨íáèìÉí¨=ëìê=äÉ= ÇDáåëí~ää~íáçåI=îçáê= ÇÛ~éé~êÉáä=Éëí éêçàÉÅíÉìê NMUMáI=TOMé `çãéìíÉê=få=EÉåíê¨É= m~ë=éçìê=äÉ= `çååÉñáçå=sd^I=é~ÖÉ=NS eaqs çêÇáå~íÉìêF Åçãéçë~åí=QUMá Eí¨ä¨îáëáçå=Ü~ìíÉ=ǨÑáåáíáçåF `çãéçë~åí=QUMá `çãéçë~åí=îáǨç `çãéìíÉê=få=Eîá~=ìå= m~ë=éçìê=äÉ= `çååÉñáçå=Åçãéçë~åí=îáǨçI= baqs ~Ç~éí~íÉìê= Åçãéçë~åí=QUMá é~ÖÉ=NS Eí¨ä¨îáëáçå=¶=ǨÑáåáíáçå= Åçãéçë~åí=îÉêë= ~ã¨äáçê¨ÉF= sbp^F NMUMáI=TOMé `çãéìíÉê=få=EÉåíê¨É= `çååÉñáçå=sd^I=é~ÖÉ=NS çêÇáå~íÉìêF asa=éêçÖêÉëëáÑ `çãéçë~åí=QUMé `çãéçë~åí=îáǨç...
- Page 54 o~ÅÅçêÇÉãÉåí=ÇÛìåÉ=ëçìêÅÉ=çêÇáå~íÉìê ê~ÅÅçêÇÉò=äÉ=ÅßÄäÉ=ÇÉ=äDçêÇáå~íÉìê oÉäáÉò=äÉ=ÅßÄäÉ=ÇÛçêÇáå~íÉìê=Eîçáê=é~ÖÉ NQ=éçìê=äÉ=Äê~åÅÜÉãÉåí=ÇÉë=~éé~êÉáäë= îáǨçF=~ì=ÅçååÉÅíÉìê=`çãéìíÉê=få=EÉåíê¨É=çêÇáå~íÉìêF=ÄäÉì=ÑçåŨ=Çì= éêçàÉÅíÉìêK=o~ÅÅçêÇÉò=äÛ~ìíêÉ=Éñíê¨ãáí¨=~ì=éçêí=îáǨç=ÇÉ=äÛçêÇáå~íÉìêK=pá= îçìë=ìíáäáëÉò=ìå=çêÇáå~íÉìê=ÇÉ=ÄìêÉ~ìI=îçìë=ÇÉîÉò=ÇD~ÄçêÇ=ǨÅçååÉÅíÉê=äÉ= ÅßÄäÉ=Çì=ãçåáíÉìê=Çì=éçêí=îáǨç=ÇÉ=äÛçêÇáå~íÉìêK= =Äê~åÅÜÉò=äÉ=ÅßÄäÉ=ÇD~äáãÉåí~íáçå _ê~åÅÜÉò=äÉ=ÅßÄäÉ=ÇÛ~äáãÉåí~íáçå=åçáê=~ì=ÅçååÉÅíÉìê=mçïÉê=E~äáãÉåí~íáçåF= ëìê=äÉ=Å∑í¨=Çì=éêçàÉÅíÉìê=Éí=Ç~åë=ä~=éêáëÉ=ÇÉ=Åçìê~åíK obj^onrb=W=ríáäáëÉò=íçìàçìêë=äÉ=ÅçêÇçå=ÇÛ~äáãÉåí~íáçå=èìá=~ÅÅçãé~ÖåÉ= äÉ=éêçàÉÅíÉìêK= Äê~åÅÜÉò=äÉ=ÅßÄäÉ=~ìÇáç mçìê=ëçåçêáëÉê=îçíêÉ=éê¨ëÉåí~íáçåI=ê~ÅÅçêÇÉò=äÉ=ÅßÄäÉ=~ìÇáç=¶=îçíêÉ= çêÇáå~íÉìê=Éí=~ì=ÅçååÉÅíÉìê=^ìÇáç=få=EÉåíê¨É=~ìÇáçF=Çì=éêçàÉÅíÉìêK= ê~ÅÅçêÇÉò=äÉ=ÅßÄäÉ=Çì=ãçåáíÉìê pá=îçìë=ìíáäáëÉò=ìå=çêÇáå~íÉìê=ÇÉ=ÄìêÉ~ì=Éí=èìÉ=îçìë=ëçìÜ~áíÉò=îçáê=äÛáã~ÖÉ= ëìê=äÛ¨Åê~å=ÇÉ=îçíêÉ=çêÇáå~íÉìê=Éå=ãÆãÉ=íÉãéë=èìÉ=ëìê=äÛ¨Åê~å=ÇÉ= éêçàÉÅíáçåI=Äê~åÅÜÉò=äÉ=ÅßÄäÉ=Çì=ãçåáíÉìê=~ì=ÅçååÉÅíÉìê=ÇÉ=ëçêíáÉ=Çì= ãçåáíÉìê=jçåáíçê=lìí=Çì=éêçàÉÅíÉìêK= ê~ÅÅçêÇÉò=äÉ=ÅßÄäÉ=rp_ mçìê=Ñ~áêÉ=ǨÑáäÉê=äÉë=Çá~éçëáíáîÉë=ÇÛìåÉ=éê¨ëÉåí~íáçå=mçïÉêmçáåí=~îÉÅ=ä~= í¨ä¨Åçãã~åÇÉI=Äê~åÅÜÉò=äÉ=ÅçååÉÅíÉìê=rp_=Çì=ÅßÄäÉ=ÇÉ=äDçêÇáå~íÉìê=~ì= ÅçååÉÅíÉìê=ÇÉ=ëçìêáë=rp_=ÇÉ=îçíêÉ=çêÇáå~íÉìêK=i~=ÑçåÅíáçåå~äáí¨=rp_=ÉñáÖÉ= äÛáåëí~ää~íáçå=ÇÉë=éáäçíÉë=~Ǩèì~íëK=mçìê=ÇÉ=éäìë=~ãéäÉë=áåÑçêã~íáçåëI=îçáê= é~ÖÉ NPK...
- Page 55 ^ÑÑáÅÜ~ÖÉ=ÇÛìåÉ=áã~ÖÉ=ÇÉ=ëçìêÅÉ=çêÇáå~íÉìê êÉíáêÉò=äÉ=Å~éìÅÜçå=ÇÉ=äDçÄàÉÅíáÑ oÉíáêÉò=äÉ=Å~éìÅÜçå=ÇÉ=äÛçÄàÉÅíáÑK _~ëÅìäÉò=äÛáåíÉêêìéíÉìê=Ö¨å¨ê~ä=~äáãÉåí~íáçå=ëìê=äÉ=Å∑í¨=Çì=éêçàÉÅíÉìê=Éå= Ä~ëÅìäÉò=äÛáåíÉêêìéíÉìê=Ö¨å¨ê~ä éçëáíáçå=ã~êÅÜÉK iÉ=îçó~åí=äìãáåÉìñ=ëÉ=ãÉí=¶=ÅäáÖåçíÉê=Éå=îÉêí=Éí=äÉë=îÉåíáä~íÉìêë=ÅçããÉåJ ÅÉåí=¶=íçìêåÉêK=nì~åÇ=ä~=ä~ãéÉ=ëÛ¨Åä~áêÉI=äÛ¨Åê~å=ÇÉ=Ǩã~êê~ÖÉ=ëÛ~ÑÑáÅÜÉ=Éí=äÉ= îçó~åí=äìãáåÉìñ=é~ëëÉ=Éå=îÉêí=ÅçåíáåìK=fä=Ñ~ìí=Éåîáêçå=ìåÉ=ãáåìíÉ=éçìê=èìÉ= äÛáã~ÖÉ=~ííÉáÖåÉ=ë~=äìãáåçëáí¨=Åçãéä≠íÉK= \=^ìÅìå=¨Åê~å=ÇÉ=Ǩã~êê~ÖÉ=\=oÉéçêíÉòJîçìë=¶=äD~áÇÉ=é~ÖÉ NVK Ǩã~êêÉò=îçíêÉ=çêÇáå~íÉìê a¨ã~êêÉò=îçíêÉ=çêÇáå~íÉìêK iÛáã~ÖÉ=ÇÉ=äÛçêÇáå~íÉìê=Ççáí=~éé~ê~≤íêÉ=ëìê=äÛ¨Åê~å=ÇÉ=éêçàÉÅíáçåK=a~åë=äÉ=Å~ë= Åçåíê~áêÉI=~ééìóÉò=ëìê=äÉ=Äçìíçå=`çãéìíÉê=Çì=Åä~îáÉê=Çì=éêçàÉÅíÉìêK= pá=äÛçêÇáå~íÉìê=íçìêåÉ=ëçìë=táåÇçïë=VUI=êÉéçêíÉòJîçìë=¶=Â=ríáäáë~íáçå=Çì= éêçàÉÅíÉìê=~îÉÅ=táåÇçïë=VU=éçìê=ä~=éêÉãá≠êÉ=Ñçáë=ÊI=é~ÖÉ NO=~ì=ëìàÉí=ÇÉ= äÛáåëí~ää~íáçå=ÇÉë=éáäçíÉëK ~ÅíáîÉò=äÉ=éçêí=ÉñíÉêåÉ=ÇÉ=äDçêÇáå~íÉìê=éçêí~ÄäÉ s¨êáÑáÉò=èìÉ=äÉ=éçêí=îáǨç=ÉñíÉêåÉ=ÇÉ=äÛçêÇáå~íÉìê=éçêí~ÄäÉ=Éëí=~ÅíáÑK= aÉ=åçãÄêÉìñ=çêÇáå~íÉìêë=éçêí~ÄäÉë=åÛ~ÅíáîÉåí=é~ë=~ìíçã~íáèìÉãÉåí=äÉìê= éçêí=îáǨç=ÉñíÉêåÉ=èì~åÇ=ìå=éêçàÉÅíÉìê=Éëí=ê~ÅÅçêǨK=bå=Ö¨å¨ê~äI=ìåÉ= ÅçãÄáå~áëçå=ÇÉ=íçìÅÜÉë=Eé~ê=ÉñÉãéäÉ=ck=H=cRF=éÉêãÉí=ÇÛ~êêÆíÉê=Éí=ÇÉ= ãÉííêÉ=Éå=ã~êÅÜÉ=äÛ~ÑÑáÅÜ~ÖÉ=ÉñíÉêåÉK=`çåëìäíÉò=ä~=ÇçÅìãÉåí~íáçå=ÇÉ=îçíêÉ= çêÇáå~íÉìê=éçêí~ÄäÉ=éçìê=íêçìîÉê=ÅÉííÉ=ÅçãÄáå~áëçå=ÇÉ=íçìÅÜÉëK= \=^ìÅìåÉ=áã~ÖÉ=ëìê=äÛçêÇáå~íÉìê=\=bëë~óÉò=ÇÛ~ééìóÉê=ëìê=ä~=íçìÅÜÉ= ^ìíç=fã~ÖÉ=Çì=Åä~îáÉêK=oÉéçêíÉòJîçìë=¶=äÛ~áÇÉ=é~ÖÉ OMK=...
- Page 56 ê¨ÖäÉò=ä~= ^ì=ÄÉëçáåI=ê¨ÖäÉò=ä~=Ü~ìíÉìê=Çì=éêçàÉÅíÉìê=Éå=~ééìó~åí=ëìê=äÉ=Äçìíçå=ÇÉ= Ü~ìíÉìê ǨîÉêêçìáää~ÖÉ=éçìê=éêçäçåÖÉê=äÉ=éáÉÇK= Ñ~áíÉë=éáîçíÉê c~áíÉë=éáîçíÉê=äÉ=éáÉÇ=ÇÉ=ãáëÉ=¶=åáîÉ~ì=Çì=éêçàÉÅíÉìê=ëá=å¨ÅÉëë~áêÉK äÉ=éáÉÇ=ÇÉ ãáëÉ=¶=åáîÉ~ì éáÉÇ=¨ä¨î~íÉìê °îáíÉò=ÇÉ=éä~ÅÉê=äÉë=ã~áåë=¶=éêçñáãáí¨=ÇÉ=äÛ¨îÉåí=ÇÛ¨àÉÅíáçå=ÇÛ~áê=ÅÜ~ìÇ= Äçìíçå=ÇÉ=ǨîÉêêçìáää~ÖÉ ÇÉî~åí=äÉ=éêçàÉÅíÉìêK mä~ÅÉò=äÉ=éêçàÉÅíÉìê=¶=ä~=Çáëí~åÅÉ=Ǩëáê¨É=ÇÉ=äÛ¨Åê~å=¶=ìå=~åÖäÉ=ÇÉ=VM=ÇÉÖê¨ë= ê¨ÖäÉò=ä~=Çáëí~åÅÉ é~ê=ê~ééçêí=¶=äÛ¨Åê~åK= sçáê=é~ÖÉ QN=äÉ=í~ÄäÉ~ì=áåÇáèì~åí=äÉë=í~áääÉë=ÇÛ¨Åê~åë=Éí=äÉë=Çáëí~åÅÉëK o¨ÖäÉò=äÉ=òççã=Éí=ä~=ãáëÉ=~ì=éçáåíK ê¨ÖäÉò=äÉ=òççã=çì=ä~=ãáëÉ=~ì=éçáåí ãáëÉ=~ì=éçáåí òççã E~ååÉ~ì=ãáåÅÉF E~ååÉ~ì=¨é~áëF pá=äÛáã~ÖÉ=åÛÉëí=é~ë=ÇÛ¨èìÉêêÉI=ê¨ÖäÉò=ä~=ÅçêêÉÅíáçå=íê~é¨òç≥Ç~äÉ=Éå=ìíáäáë~åí= äÉë=Äçìíçåë=Çì=Åä~îáÉêK= ê¨ÖäÉò=ä~=Çáëíçêëáçå=íê~é¨òç≥Ç~äÉ ^ééìóÉò=ëìê=äÉ=Äçìíçå=ëìé¨êáÉìê=ÇÉ=hÉóëíçåÉ=Eaáëíçêëáçå=íê~é¨òç≥Ç~äÉF= éçìê=ê¨ÇìáêÉ=ä~=é~êíáÉ=ëìé¨êáÉìêÉ=ÇÉ=äÛáã~ÖÉ=Éí=~ééìóÉò=ëìê=äÉ=Äçìíçå= áåѨêáÉìê=ÇÉ=hÉóëíçåÉ=Eaáëíçêëáçå=íê~é¨òç≥Ç~äÉF=éçìê=ê¨ÇìáêÉ=ä~=é~êíáÉ= áåѨêáÉìêÉK o¨ÖäÉò=äÉ=Åçåíê~ëíÉ=çì=ä~=äìãáåçëáí¨=Ç~åë=äÉ=ãÉåì=fã~ÖÉK= sçáê=é~ÖÉ PN=éçìê=çÄíÉåáê=ÇÉ=äÛ~áÇÉ=ëìê=äÉë=ãÉåìë=Éí=ÅÉë=ê¨Öä~ÖÉëK...
- Page 57 nì~åÇ=îçìë=Äê~åÅÜÉò=éçìê=ä~=éêÉãá≠êÉ=Ñçáë=ìå=çêÇáå~íÉìê=íçìêå~åí=ëçìë= táåÇçïë=VU=~ì=éêçàÉÅíÉìêI=äÛçêÇáå~íÉìê=ÅçåëáÇ≠êÉ=äÉ=éêçàÉÅíÉìê=ÅçããÉ=ìå= Â=åçìîÉ~ì=ã~í¨êáÉä=Ê=Éí=äÛ^ëëáëí~åí=^àçìí=ÇÉ=åçìîÉ~ì=ã~í¨êáÉä=~éé~ê~≤íK= pìáîÉò=ÅÉë=áåëíêìÅíáçåë=éçìê=ìíáäáëÉê=äÛ~ëëáëí~åí=Éí=ÅÜ~êÖÉê=äÉ=éáäçíÉ=ÅçêêÉÅí= Eáåëí~ää¨=Éå=ãÆãÉ=íÉãéë=èìÉ=äÉ=ëóëí≠ãÉ=ÇDÉñéäçáí~íáçå=ÇÉ=táåÇçïëKF pá=îçìë=ìíáäáëÉò=táåÇçïë=OMMM=çì=táåÇçïë=jbI=ë~ìíÉò=ÅÉë=¨í~éÉë=Éí=~ääÉò= ÇáêÉÅíÉãÉåí=¶=ä~=ëÉÅíáçå=Â=o¨Öä~ÖÉ=ÇÉ=äÛáã~ÖÉ=Ê=é~ÖÉ NNK Ä `äáèìÉò=ëìê=pìáî~åí=éçìê=êÉÅÜÉêÅÜÉê=äÉ=éáäçíÉK ^ëëìêÉòJîçìë=èìÉ=äÛçéíáçå=Â=oÉÅÜÉêÅÜÉê=äÉ=ãÉáääÉìê=éáäçíÉ=éçìê=îçíêÉ= é¨êáéܨêáèìÉ=Ê=Éëí=ë¨äÉÅíáçåå¨É=éìáë=~ééìóÉò=ëìê=pìáî~åíK Å a¨ë~ÅíáîÉò=íçìíÉë=äÉë=Å~ëÉë=ÅçÅܨÉë=¨îÉåíìÉääÉë=éìáë=~ééìóÉò=ëìê=pìáî~åíK= táåÇçïë=êÉé≠êÉ=~ìíçã~íáèìÉãÉåí=äÉ=éáäçíÉK=pá=äÉ=éáäçíÉ=~=¨í¨=ëìééêáã¨I= êÉÅÜ~êÖÉòJäÉ=Éå=ìíáäáë~åí=äÉ=`aJolj=Çì=ëóëí≠ãÉ=ÇDÉñéäçáí~íáçå=táåÇçïëK Ç råÉ=Ñçáë=èìÉ=táåÇçïë=~=êÉé¨ê¨=äÉ=éáäçíÉI=îçìë=ÆíÉë=éêÆí=¶=äÛáåëí~ääÉêK= ^ééìóÉò=ëìê=pìáî~åíK...
- Page 58 mçìê=táåÇçïë=VU=W √ pá=îçìë=~îÉò=ê~ÅÅçêǨ=äÉ=ÅßÄäÉ=rp_I=äÛçéíáçå=^ëëáëí~åí=^àçìí=ÇÉ=åçìîÉ~ì= ã~í¨êáÉä=~éé~ê~≤í=¶=åçìîÉ~ìK=i~=ÑçåÅíáçåå~äáí¨=rp_=ÉñáÖÉ=äÛáåëí~ää~íáçå= ÇÉë=éáäçíÉë=~Ǩèì~íëK= √ iÛ^ëëáëí~åí=Éëí=ä~åŨ=íêçáë=ÑçáëK= i~=éêÉãá≠êÉ=ÑçáëI=áä=ǨíÉÅíÉ=ìå=m¨êáéܨêáèìÉ=rp_=ÅçãéçëáíÉK= i~=ëÉÅçåÇÉ=ÑçáëI=áä=ǨíÉÅíÉ=ìå=m¨êáéܨêáèìÉ=ÇÛáåíÉêÑ~ÅÉ=ìíáäáë~íÉìê=rp_= Eéçìê=äÉ=Åä~îáÉêFK= i~=íêçáëá≠ãÉ=ÑçáëI=áä=ǨíÉÅíÉ=ìå=m¨êáéܨêáèìÉ=ÇÛáåíÉêÑ~ÅÉ=ìíáäáë~íÉìê=rp_= Eéçìê=ä~=ëçìêáëFK= mçìê=táåÇçïë=OMMMI=táåÇçïë=jb=Éí=táåÇçïë=um=W √ iÉë=éáäçíÉë=rp_=ëçåí=áåëí~ää¨ë=~ìíçã~íáèìÉãÉåíK=...
- Page 59 o~ÅÅçêÇÉãÉåí=ÇÛìå=~éé~êÉáä=îáǨç ã~Öå¨íçëÅçéÉëI=äÉë=îáǨçëÅçéÉë=åìã¨êáèìÉë=Éí=äÉë=Äç≤íáÉêë=ÇÉ=ÅçÑÑêÉíë=ÇÉ= ê¨ÅÉéíáçå=ÇÉ=í¨ä¨îáëáçå=é~ê=ë~íÉääáíÉK=lå=éÉìí=~ÑÑáêãÉê=èìÉ=íçìí=~éé~êÉáä= sçìë=éçìîÉò=ÅçååÉÅíÉê=ÇÉë=ã~Öå¨íçëÅçéÉëI=ÇÉë=äÉÅíÉìêë=asaI=ÇÉë=Å~ãÉJ Å~é~ÄäÉ=ÇÉ=ÅÜ~åÖÉê=ÇÉ=ÅÜ~≤åÉ=Éëí=ìå=ëóåíçåáëÉìêK ëÅçéÉëI=ÇÉë=~éé~êÉáäë=éÜçíçJåìã¨êáèìÉëI=ÇÉë=àÉìñ=îáǨçI=ÇÉë=ê¨ÅÉéíÉìêë= eaqs=Éí=ÇÉë=ëóåíçåáëÉìêë=qs=~ì=éêçàÉÅíÉìêK=fä=ÇáëéçëÉ=¨Ö~äÉãÉåí=ÇÛìåÉ= Éåíê¨É=~ìÇáçK=sçìë=éçìîÉò=ÅçååÉÅíÉê=äÉ=ëçå=ÇáêÉÅíÉãÉåí=~ì=éêçàÉÅíÉìê=éçìê= ¨Åê~å=NSWV ¨Åê~å=QWP Ĩå¨ÑáÅáÉê=ÇÉ=ëÉë=ÉåÅÉáåíÉë=áåíÉêåÉëI=çì=äÉ=ÅçååÉÅíÉê=¶=ìå=ê¨ÅÉéíÉìê=ëí¨ê¨ç= éçìê=¨ÅçìíÉê=äÉ=ëçå=ëìê=îçë=ÉåÅÉáåíÉë=éÉêëçååÉääÉëK kÉ=é~ë=ìíáäáëÉê ^î~åí=ÇÉ=ÅçååÉÅíÉê=äÉ=éêçàÉÅíÉìêI=ÅÜçáëáëëÉò=ä~=í~áääÉ=ÇÛ¨Åê~å=èìÉ=îçìë= jçÇÉ=QWP ëçìÜ~áíÉò=ìíáäáëÉêK=sçìë=~ÅŨÇÉò=~ì=é~ê~ã≠íêÉ=q~áääÉ=ÇÉ=äD¨Åê~å=Çì=éêçàÉÅíÉìê= é~ê=äÉ=ãÉåì=Çì=éêçàÉÅíÉìêK=sçáê=é~ÖÉ PN=éçìê=ÇÉ=éäìë=~ãéäÉë=áåÑçêã~íáçåëK i~=í~áääÉ=ÇÉ=äÛ¨Åê~å=Éëí=ǨÑáåáÉ=é~ê=äÉ=ê~ééçêí=ä~êÖÉìêJÜ~ìíÉìê=ÇÉ=äÛáã~ÖÉK=iÉë= ¨Åê~åë=ÇÉ=í¨ä¨îáëÉìêë=çåí=ìå=Ñçêã~í=QWPI=äÉ=é~ê~ã≠íêÉ=é~ê=ǨÑ~ìí=ëìê=ÅÉ= éêçàÉÅíÉìêK=i~=í¨ä¨îáëáçå=Ü~ìíÉ=ǨÑáåáíáçå=Éí=ä~=éäìé~êí=ÇÉë=äÉÅíÉìêë=asa=çåí= ìå=Ñçêã~í=NSWVK=pá=îçìë=éêçàÉíÉò=äÛáã~ÖÉ=ëìê=ìå=¨Åê~åI=ä~=í~áääÉ=Éí=ä~=ÑçêãÉ=ÇÉ= ÅÉäìáJÅá=ǨíÉêãáåÉêçåí=ë~åë=ÇçìíÉ=îçíêÉ=ÅÜçáñK=^ìÅìåÉ=êÉëíêáÅíáçå=ÇÉ=í~áääÉ= åÛÉëí=éê¨îìÉ=éçìê=äÉë=éêçàÉÅíáçåë=ëìê=ÇÉë=ãìêë=åìëK=iÉ=íóéÉ=ÇÉë=áã~ÖÉë= éêçàÉí¨Éë=îçìë=~áÇÉê~=¨Ö~äÉãÉåí=¶=ÅÜçáëáê=äÉ=Ñçêã~í=QWP=çì=äÉ=Ñçêã~í=NSWVK=i~= éäìé~êí=ÇÉë=¨Åê~åë=ÇÉ=í¨ä¨îáëáçå=ëçåí=~ì=Ñçêã~í=QWP=í~åÇáë=èìÉ=äÉ=Åáå¨ã~= ìíáäáëÉ=äÉ=Ñçêã~í=NSWVK jçÇÉ=NSWV pá=îçìë=ÇáëéçëÉò=ÇÛìå=¨Åê~å=NSWVI=îçìë=ÇÉîÉò=ë¨äÉÅíáçååÉê=ìåÉ=í~áääÉ=ÇD¨Åê~å= ÇÉ=NSWV=éçìê=äÉë=Ñáäãë=~å~ãçêéÜáèìÉë=çì=ä~=í¨ä¨îáëáçå=Ü~ìíÉ=ǨÑáåáíáçåK= p¨äÉÅíáçååÉò=k~íáÑ=éçìê=äÉ=ÅçåíÉåì=QWPK==pá=îçìë=ÇáëéçëÉò=ÇÛìå=¨Åê~å=QWPI= îçìë=éçìîÉò=íçìàçìêë=ìíáäáëÉê=ìåÉ=í~áääÉ=ÇÛ¨Åê~å=ÇÉ=NSWV=éçìê=äÉë=Ñáäãë= ~å~ãçêéÜáèìÉë=çì=ä~=í¨ä¨îáëáçå=Ü~ìíÉ=ǨÑáåáíáçå=ã~áë=îçìë=~îÉò=ä~= éçëëáÄáäáí¨=ÇÛìíáäáëÉê=QWP=Eéçìê=ìíáäáëÉê=íçìí=äÛ¨Åê~åF=çì=k~íáÑ=Eéçìê=ìå= ã~éé~ÖÉ=ÇáêÉÅí=ÇÉë=éáñÉäëF=éçìê=äÉ=ÅçåíÉåì=QWPK==iÉë=Ñáäãë=~å~ãçêéÜáèìÉë= åÛ~éé~ê~áëëÉåí=ÅçêêÉÅíÉãÉåí=èìÉ=ëá=äÉ=äÉÅíÉìê=asa=Éëí=ǨÑáåá=éçìê=ëçêíáê=ëìê= ìåÉ=í¨ä¨îáëáçå=NSWVK= jçÇÉ=å~íáÑ= iÉ=éêçàÉÅíÉìê=éÉìí=ÆíêÉ=ÅçååÉÅí¨=¶=ä~=éäìé~êí=ÇÉë=~éé~êÉáäë=îáǨç=èìá= Ekqp`= ÇáëéçëÉåí=ÇÛìåÉ=ëçêíáÉ=îáǨçK=sçìë=åÉ=éçìîÉò=é~ë=ÅçååÉÅíÉê=ÇáêÉÅíÉãÉåí=äÉ= ëÉìäÉãÉåíF ÅßÄäÉ=Åç~ñá~ä=èìá=ÇÉëëÉêí=ä~=ê¨ÅÉéíáçå=ÇÉë=ÅÜ~≤åÉë=ÅßÄä¨Éë=çì=ë~íÉääáíÉ=Ç~åë=...
- Page 60 `çååÉñáçåë=ÇÛ~éé~êÉáäë=îáǨç _ê~åÅÜÉò=äÉ=ÅçååÉÅíÉìê=Åçãéçë~åí=à~ìåÉ=Eåçå=áåÅäìëF=Çì=ÅßÄäÉ=îáǨç=Ç~åë=äÉ= ÅçååÉÅíÉìê=ÇÉ=ëçêíáÉ=îáǨç=ëìê=äÛ~éé~êÉáä=îáǨçK=_ê~åÅÜÉò=äÛ~ìíêÉ=ÅçååÉÅíÉìê= ÅçååÉÅíÉò=äÉ=ÅßÄäÉ==îáÇÉç==Éí=äÉ=ÅßÄäÉ=~ìÇáç= à~ìåÉ=Ç~åë=äÉ=ÅçååÉÅíÉìê=sáÇÉç=få=EÉåíê¨É=îáǨçF=à~ìåÉ=ëìê=äÉ=éêçàÉÅíÉìêK= EÉå=ìíáäáë~åí=äÛ~Ç~éí~íÉìê=~ìÇáçF _ê~åÅÜÉò=äÉ=ÅçååÉÅíÉìê=Ää~åÅ=EÑçìêåáF=ÇÉ=äÛ~Ç~éí~íÉìê=~ìÇáç=Ç~åë=äÉ= ÅçååÉÅíÉìê=ÇÉ=ëçêíáÉ=~ìÇáç=Ö~ìÅÜÉ=ëìê=îçíêÉ=~éé~êÉáä=îáǨç=Éí=Äê~åÅÜÉò=äÉ= ÅçååÉÅíÉìê=êçìÖÉ=ÇÉ=äÛ~Ç~éí~íÉìê=Ç~åë=äÉ=ÅçååÉÅíÉìê=ÇÉ=ëçêíáÉ=~ìÇáç=Çêçáí= ëìê=äÛ~éé~êÉáä=îáǨçK=_ê~åÅÜÉò=äÉ=ÅßÄäÉ=~ìÇáç=EÑçìêåáF=Ç~åë=äÉ=ÅçååÉÅíÉìê= åçáê=ëìê=äÛ~Ç~éí~íÉìêK=_ê~åÅÜÉò=äÛ~ìíêÉ=Éñíê¨ãáí¨=Çì=ÅßÄäÉ=~ìÇáç=Ç~åë=äÉ= ÅçååÉÅíÉìê=^ìÇáç=få=EÉåíê¨É=~ìÇáçF=ÄäÉì=Çì=éêçàÉÅíÉìêK= kÛçìÄäáÉò=é~ë=èìÉ=äÉë=ëçêíáÉë=îáǨç=ÇÉë=ÅçååÉñáçåë=ÇÉ=ëçìêÅÉ=ÅçãéçëáíÉ= åÛçåí=é~ë=ä~=èì~äáí¨=ëìé¨êáÉìêÉ=ÇÉë=ëçêíáÉë=pJîáǨç=çì=Åçãéçë~åí=îáǨçK pá=äÛ~éé~êÉáä=îáǨç=ìíáäáëÉ=ìå=ÅçååÉÅíÉìê=pJîáÇÉç=êçåÇ=¶=èì~íêÉ=ÄêçÅÜÉëI= Äê~åÅÜÉò=ìå=ÅßÄäÉ=pJîáÇÉç=Ç~åë=äÉ=ÅçååÉÅíÉìê=pJîáÇÉç=ÇÉ=äÛ~éé~êÉáä=îáǨç=Éí= Ç~åë=äÉ=ÅçååÉÅíÉìê=pJîáÇÉç=Çì=éêçàÉÅíÉìêK=ríáäáëÉò=äÉ=ÅßÄäÉ=~ìÇáç=Éí=ëçå= ~Ç~éí~íÉìê=ÅçããÉ=ǨÅêáí=éäìë=Ü~ìíK ÅçååÉÅíÉò=äÉ=ÅßÄäÉ=~ìÇáç=Éí=pJîáǨç EÉå=ìíáäáë~åí=äÛ~Ç~éí~íÉìê=~ìÇáçF kÛçìÄäáÉò=é~ë=èìÉ=äÉ=ãçÇÉ=pJîáÇÉç=Ñçìêåáí=ìåÉ=ãÉáääÉìêÉ=ëçêíáÉ=îáǨç=èìÉ=äÉ= ãçÇÉ=îáǨç=ÅçãéçëáíÉI=ã~áë=ÇDìåÉ=èì~äáí¨=áåѨêáÉìêÉ=~ì=ãçÇÉ=Åçãéçë~åí= îáǨçK...
- Page 61 Äê~åÅÜÉò=äÉë=ÅßÄäÉë=ÇÉ=Åçãéçë~åíë=îá~ pá=îçíêÉ=~éé~êÉáä=îáǨç=Éëí=¨èìáé¨=ÇÉ=ÅçååÉÅíÉìêë=ÇÉ=Åçãéçë~åíI=ìíáäáëÉò= äÛ~Ç~éí~íÉìê=Åçãéçë~åí=îÉêë=ëJîáǨç äÛ~Ç~éí~íÉìê=Ñ~Åìäí~íáÑ=Åçãéçë~åí=¶=pJîáǨç=çì=äÉ=Åçãéçë~åí=Ñ~Åìäí~íáÑ=¶= çì äÛ~Ç~éí~íÉìê=ÇÉ=sbp^=Eéçìê=ea=Éí=ëçìêÅÉë=éêçÖêÉëëáîÉëFK=_ê~åÅÜÉò=äÉ=ÅßÄäÉ= îá~=äÛ~Ç~éí~íÉìê=Åçãéçë~åí=îÉêë=sbp^ ÇÉ=Åçãéçë~åí=Ç~åë=äÛ~éé~êÉáä=îáǨçK=_ê~åÅÜÉò=äÛ~ìíêÉ=Éñíê¨ãáí¨=Çì=ÅßÄäÉ=ÇÉ= Åçãéçë~åí=Ç~åë=äÛ~Ç~éí~íÉìê=Éí=Äê~åÅÜÉò=ÅÉäìáJÅá=Ç~åë=äÉ=ÅçååÉÅíÉìê= pJîáǨç=Eéçìê=pJîáǨçF=çì=`çãéìíÉê=få=Eéçìê=sbp^F=äÉ=ÅçååÉÅíÉìê=Çì= éêçàÉÅíÉìêK=ríáäáëÉò=äÛ~Ç~éí~íÉìê=~ìÇáç=ÅçããÉ=ǨÅêáí=éäìë=Ü~ìíK `çãéçë~åí îÉêë=sbp^ i~=ÅçååÉñáçå=Åçãéçë~åí=çÑÑêÉ=ä~=ãÉáääÉìêÉ=ëçêíáÉ=îáǨçK `çãéçë~åí îÉêë=pJîáÇÉç pá=äÛ~éé~êÉáä=îáǨç=ìíáäáë¨=ÇáëéçëÉ=ÇÛìåÉ=ëçêíáÉ=sd^=¶=NR=ÄêçÅÜÉëI=Äê~åÅÜÉò= Äê~åÅÜÉò=äÉ=ÅßÄäÉ=sd^=Éí=äÉ=ÅßÄäÉ= ~ìÇáç=Éå=ìíáäáë~åí=ìå= ìåÉ=Éñíê¨ãáí¨=Çì=ÅßÄäÉ=çêÇáå~íÉìê=EÑçìêåáF=Ç~åë=äÉ=ÅçååÉÅíÉìê=sd^=ÇÉ=îçíêÉ= ~Ç~éí~íÉìê=~ìÇáç ëçìêÅÉ=îáǨçK=`É=ÅçååÉÅíÉìê=Éëí=ë~åë=ÇçìíÉ=áÇÉåíáÑá¨=é~ê=ä~=ãÉåíáçå=Â=îÉêë=äÉ= ãçåáíÉìê=Ê=ëìê=ä~=ëçìêÅÉ=îáǨçK=_ê~åÅÜÉò=äÛ~ìíêÉ=Éñíê¨ãáí¨=Çì=ÅßÄäÉ=Ç~åë=äÉ= ÅçååÉÅíÉìê=`çãéìíÉê=få=ëìê=äÉ=éêçàÉÅíÉìêK ríáäáëÉò=äÛ~Ç~éí~íÉìê=~ìÇáç=ÅçããÉ=ǨÅêáí=éäìë=Ü~ìíK _ê~åÅÜÉò=äÉ=ÅßÄäÉ=ÇÛ~äáãÉåí~íáçå=~ì=ÅçååÉÅíÉìê=mçïÉê=E~äáãÉåí~íáçåF=ëìê= =Äê~åÅÜÉò=äÉ=ÅßÄäÉ=ÇD~äáãÉåí~íáçå äÉ=Å∑í¨=Çì=éêçàÉÅíÉìê=Éí=Ç~åë=ä~=éêáëÉ=ÇÉ=Åçìê~åíK obj^onrb=W=ríáäáëÉò=íçìàçìêë=äÉ=ÅçêÇçå=ÇÛ~äáãÉåí~íáçå=èìá=~ÅÅçãé~ÖåÉ= äÉ=éêçàÉÅíÉìêK=...
- Page 62 ^ÑÑáÅÜ~ÖÉ=îáǨç êÉíáêÉò=äÉ=Å~éìÅÜçå=ÇÉ=äÛçÄàÉÅíáÑ oÉíáêÉò=äÉ=Å~éìÅÜçå=ÇÉ=äÛçÄàÉÅíáÑK _~ëÅìäÉò=äÛáåíÉêêìéíÉìê=mçïÉê=E~äáãÉåí~íáçåF=ëìê=äÉ=Å∑í¨=Çì=éêçàÉÅíÉìê=Éå=éçëáíáçå= Ä~ëÅìäÉò=äÛáåíÉêêìéíÉìê=Ö¨å¨ê~ä ã~êÅÜÉK iÉ=îçó~åí=äìãáåÉìñ=ëÉ=ãÉí=¶=ÅäáÖåçíÉê=Éå=îÉêí=Éí=äÉë=îÉåíáä~íÉìêë= ÅçããÉåÅÉåí=¶=íçìêåÉêK=nì~åÇ=ä~=ä~ãéÉ=ëÛ~ääìãÉI=äÛ¨Åê~å=ÇÉ=Ǩã~êê~ÖÉ= ~éé~ê~≤í=Éí=äÉ=îçó~åí=äìãáåÉìñ=é~ëëÉ=Éå=îÉêí=ÅçåíáåìK=fä=Ñ~ìí=Éåîáêçå=ìåÉ= ãáåìíÉ=éçìê=èìÉ=äÛáã~ÖÉ=~ííÉáÖåÉ=ë~=äìãáåçëáí¨=Åçãéä≠íÉK= \=^ìÅìå=¨Åê~å=ÇÉ=Ǩã~êê~ÖÉ=\=oÉéçêíÉòJîçìë=¶=äÛ~áÇÉ=é~ÖÉ OMK ãÉííÉò=Éå=ã~êÅÜÉ=äÛ~éé~êÉáä=îáǨç _ê~åÅÜÉò=Éí=ãÉííÉò=îçíêÉ=~éé~êÉáä=îáǨç=ëçìë=íÉåëáçåK iÛáã~ÖÉ=îáǨç=ÇÉîê~áí=~éé~ê~≤íêÉ=ëìê=äÛ¨Åê~å=ÇÉ=éêçàÉÅíáçåK=pá=ÅÉ=åÛÉëí=é~ë=äÉ= Å~ëI=~ééìóÉò=ëìê=äÉ=Äçìíçå=sáÇÉç=Çì=Åä~îáÉê=Çì=éêçàÉÅíÉìêK= \=m~ë=ÇÛáã~ÖÉ=\=oÉéçêíÉòJîçìë=¶=äÛ~áÇÉ=é~ÖÉ OPK ê¨ÖäÉò=ä~=Ü~ìíÉìê o¨ÖäÉò=ä~=Ü~ìíÉìê=Çì=éêçàÉÅíÉìê=Éå=~ééìó~åí=ëìê=äÉ=Äçìíçå=ÇÉ= Ñ~áíÉë= ǨîÉêêçìáää~ÖÉ=éçìê=éêçäçåÖÉê=äÉ=éáÉÇK= éáîçíÉê éáÉÇ=¨ä¨î~íÉìê äÉ=éáÉÇ c~áíÉë=éáîçíÉê=äÉ=éáÉÇ=ÇÉ=ãáëÉ=¶=åáîÉ~ì=Çì=éêçàÉÅíÉìê=ëá=å¨ÅÉëë~áêÉK= ÇÉ=ãáëÉì Äçìíçå=ÇÉ=ǨîÉêêçìáää~ÖÉ ê¨ÖäÉò=ä~=Çáëí~åÅÉ mä~ÅÉò=äÉ=éêçàÉÅíÉìê=¶=ä~=Çáëí~åÅÉ=Ǩëáê¨É=ÇÉ=äÛ¨Åê~å=¶=ìå=~åÖäÉ=ÇÉ=VM=ÇÉÖê¨ë= é~ê=ê~ééçêí=¶=äÛ¨Åê~åK= sçáê=é~ÖÉ QN=äÉ=í~ÄäÉ~ì=áåÇáèì~åí=äÉë=í~áääÉë=ÇÛ¨Åê~å=Éí=äÉë=Çáëí~åÅÉë=ÇÉ= äÛ¨Åê~åK...
- Page 63 o¨ÖäÉò=äÉ=òççã=Éí=ä~=ãáëÉ=~ì=éçáåíK ê¨ÖäÉò=äÉ=òççã=Éí=ä~=ãáëÉ=~ì=éçáåí ãáëÉ=~ì=éçáåí òççã E~ååÉ~ì=ãáåÅÉF E~ååÉ~ì=¨é~áëF pá=äÛáã~ÖÉ=åÛÉëí=é~ë=ÇÛ¨èìÉêêÉI=ê¨ÖäÉò=ä~=ÅçêêÉÅíáçå=íê~é¨òç≥Ç~äÉ=Éå=ìíáäáë~åí= ê¨ÖäÉò=ä~=Çáëíçêëáçå=íê~é¨òç≥Ç~äÉ äÉë=Äçìíçåë=Çì=Åä~îáÉêK=^ééìóÉò=ëìê=äÉ=Äçìíçå=ëìé¨êáÉìê=ÇÉ=hÉóëíçåÉ= Eaáëíçêëáçå=íê~é¨òç≥Ç~äÉF=éçìê=ê¨ÇìáêÉ=ä~=é~êíáÉ=ëìé¨êáÉìêÉ=ÇÉ=äÛáã~ÖÉ=Éí= ~ééìóÉò=ëìê=äÉ=Äçìíçå=áåѨêáÉìê=ÇÉ=hÉóëíçåÉ=Eaáëíçêëáçå=íê~é¨òç≥Ç~äÉF= éçìê=ê¨ÇìáêÉ=ä~=é~êíáÉ=áåѨêáÉìêÉK o¨ÖäÉò=äÉ=îçäìãÉ=ëìê=äÉ=Åä~îáÉê=çì=ä~=í¨ä¨Åçãã~åÇÉK ê¨ÖäÉò=äÉ=îçäìãÉ o¨ÖäÉò=äÉ=Åçåíê~ëíÉI=ä~=äìãáåçëáí¨I=ä~=ÅçìäÉìêI=ä~=íÉáåíÉ=çì=ä~=í~áääÉ=ÇÉ=äÛ¨Åê~å= Ç~åë=äÉ=ãÉåì=fã~ÖÉK=sçáê=é~ÖÉ PN=éçìê=çÄíÉåáê=ÇÉ=äD~áÇÉ=ëìê=äÉë=ãÉåìë=Éí=ÅÉë= ê¨ÖäÉò=äÉë=çéíáçåë=Çì=ãÉåì=fã~ÖÉ ó=Åçãéêáë=ä~=í~áääÉ=ÇÉ=äÛ¨Åê~å ê¨Öä~ÖÉëK mçìê=ä~=í~áääÉ=ÇÉ=äÛ¨Åê~åI=åÛçìÄäáÉò=é~ë=èìÉ=äÉë=äÉÅíÉìêë=asa=ÇçáîÉåí=ÆíêÉ= ÅçåÑáÖìê¨ë=~ì=Ñçêã~í=NSWV=éçìê=çÄíÉåáê=ä~=ãÉáääÉìêÉ=èì~äáí¨=ÇÛáã~ÖÉ= éçëëáÄäÉK=mçìê=éäìë=ÇÛáåÑçêã~íáçåë=ÅçåÅÉêå~åí=ä~=í~áääÉ=ÇÉ=äÛ¨Åê~åI=îçáê= é~ÖÉ NQK...
- Page 64 ^êêÆí=Çì=éêçàÉÅíÉìê a¨é~åå~ÖÉ=ÇÉ=äÛáåëí~ää~íáçå pá=îçíêÉ=áã~ÖÉ=ëÛ~ÑÑáÅÜÉ=ÅçêêÉÅíÉãÉåí=ëìê=äÛ¨Åê~åI=é~ëëÉò=¶=ä~=ëÉÅíáçå=ëìáî~åíÉK=pá=ÅÉ= iÉ=éêçàÉÅíÉìê=~ÑÑáÅÜÉ=~ìíçã~íáèìÉãÉåí=ìå=¨Åê~å=åçáê=ëá=~ìÅìåÉ=ëçìêÅÉ=~ÅíáîÉ= åÛÉëí=é~ë=äÉ=Å~ëI=éêÉåÉò=ÅÉêí~áåÉë=ãÉëìêÉë=éçìê=ÅçêêáÖÉê=äÛáåëí~ää~íáçåK= åÛÉëí=ǨíÉÅí¨É=éÉåÇ~åí=PM=ãáåìíÉëK=`Éí=¨Åê~å=åçáê=éÉêãÉí=ÇÉ=éêçäçåÖÉê=ä~=Çìê¨É= iÉ=îçó~åí=äìãáåÉìñ=ëáíì¨=Éå=Ü~ìí=Çì=éêçàÉÅíÉìê=áåÇáèìÉ=äÛ¨í~í=Çì=éêçàÉÅíÉìê=X=áä= ÇÉ=îáÉ=Çì=éêçàÉÅíÉìêK=iÛáã~ÖÉ=êÉîáÉåí=Ç≠ë=èìÉ=äÉ=ëóëí≠ãÉ=ǨíÉÅíÉ=ìåÉ=ëçìêÅÉ= îçìë=~áÇÉê~=Ç~åë=îçë=áåíÉêîÉåíáçåë ~ÅíáîÉ=çì=èìÛìå=Äçìíçå=ÇÉ=ä~=í¨ä¨Åçãã~åÇÉ=çì=Çì=Åä~îáÉê=~=¨í¨=~Åíáî¨K pá=îçìë=äÉ=ëçìÜ~áíÉòI=ìå=¨Åê~å=åçáê=éÉìí=~éé~ê~≤íêÉ=~éê≠ë=ìå=åçãÄêÉ=ÇÉ=ãáåìíÉë= ÇDáå~Åíáîáí¨=éê¨Ç¨ÑáåáK=fä=ëìÑÑáí=éçìê=ÅÉä~=ÇÛ~ÅíáîÉê=äÛçéíáçå=°Åê~å=sÉáääÉ=Ç~åë=äÉ= ãÉåì= K=sçáê=é~ÖÉ PQK îÉêí=Åçåíáåì iÛáåíÉêêìéíÉìê=Ö¨å¨ê~ä=~=¨í¨=Ä~ëÅìä¨=ëìê=ã~êÅÜÉ= iÉ=éêçàÉÅíÉìê=Éëí=¨Ö~äÉãÉåí=Ççí¨=ÇÛìåÉ=ÑçåÅíáçå=°ÅçåK=°åÉêÖáÉ=èìá=¨íÉáåí= Éí=äÉ=äçÖáÅáÉä=ëÛÉëí=áåáíá~äáë¨K=iÉ=éêçàÉÅíÉìê=~=¨í¨= ~ìíçã~íáèìÉãÉåí=ä~=ä~ãéÉ=äçêëèìÛ~ìÅìåÉ=ëçìêÅÉ=~ÅíáîÉ=åÛÉëí=ǨíÉÅí¨É=Éí= ãáë=Üçêë=íÉåëáçå=¶=é~êíáê=ÇÉ=ä~=í¨ä¨Åçãã~åÇÉK èìÛ~ìÅìåÉ=áåíÉê~Åíáçå=åÛ~=äáÉì=~îÉÅ=äÉ=éêçàÉÅíÉìê=éÉåÇ~åí=OM=ãáåìíÉëK=`ÉííÉ= îÉêí=ÅäáÖåçí~åí iÛáåíÉêêìéíÉìê=Ö¨å¨ê~ä=~=¨í¨=éçëáíáçåå¨=ëìê= ÑçåÅíáçå=Éëí=áå~ÅíáîÉ=é~ê=ǨÑ~ìíK=sçáê=é~ÖÉ PQK ã~êÅÜÉ=Éí=äÉ=äçÖáÅáÉä=áåáíá~äáëÉ=äÉ=éêçàÉÅíÉìê=çì=äÉ= éêçàÉÅíÉìê=Éëí=Éå=éÜ~ëÉ=ÇÛ~êêÆí=Éí=äÉë= îÉåíáä~íÉìêë=íçìêåÉåí=éçìê=êÉÑêçáÇáê=ä~=ä~ãéÉK mçìê=¨íÉáåÇêÉ=äÉ=éêçàÉÅíÉìêI=áä=ëìÑÑáí=ÇÉ=Ä~ëÅìäÉê=äÛáåíÉêêìéíÉìê=Ö¨å¨ê~ä=Éå= éçëáíáçå=~êêÆíK êçìÖÉ=ÅäáÖåçí~åí råÉ=é~ååÉ=ÇÉ=îÉåíáä~íÉìê=çì=ÇÉ=ä~ãéÉ=ëÛÉëí= éêçÇìáíÉK=s¨êáÑáÉò=èìÉ=êáÉå=åÉ=Ñ~áí=çÄëí~ÅäÉ= sçìë=éçìîÉò=¨Ö~äÉãÉåí=~ééìóÉê=ëìê=ä~=íçìÅÜÉ=mçïÉê=E^äáãÉåí~íáçåF=ÇÉ=ä~= îçáê=é~ÖÉ QN=éçìê=ÇÉ=éäìë=~ãéäÉë= ÇÉî~åí=äÉë=¨îÉåíë=Eîçáê=é~ÖÉ ORFK=°íÉáÖåÉò=äÉ= í¨ä¨Åçãã~åÇÉ=éçìê=éä~ÅÉê=äÉ=éêçàÉÅíÉìê=Éå=¨í~í=ÇÉ=îÉáääÉ=Éå=Åçìêë=ÇÉ= áåÑçêã~íáçåë...
- Page 65 mêçÄä≠ãÉ pçäìíáçå o¨ëìäí~í ~ìÅìå=¨Åê~å=ÇÉ=Ǩã~êê~ÖÉ=\ Äê~åÅÜÉò=äÉ=ÅçêÇçå=ÇÛ~äáãÉåí~íáçå=Ç~åë=ä~= áã~ÖÉ=ÅçêêÉÅíÉ Ñ~ÅÉ=Ö~ìÅÜÉ=Çì=éêçàÉÅíÉìê êÉíáêÉò=äÉ=Å~éìÅÜçå=ÇÉ=äÛçÄàÉÅíáÑ Ä~ëÅìäÉò=äÛáåíÉêêìéíÉìê=Ö¨å¨ê~ä Ä~ëÅìäÉò=äÛáåíÉêêìéíÉìê=Ö¨å¨ê~ä ëìê=äÉ=Å∑í¨ iÛáã~ÖÉ=çêÇáå~íÉìê=Éëí=éêçàÉí¨É ~ééìóÉò=ëìê=äÉ=Äçìíçå=Â=çêÇáå~íÉìê=Ê ëÉìä=äD¨Åê~å=ÇÉ=Ǩã~êê~ÖÉ=~éé~ê~≤í ~ÅíáîÉò=äÉ=éçêí=ÉñíÉêåÉ=ÇÉ=äÛçêÇáå~íÉìê= éçêí~ÄäÉ êÉǨã~êêÉò= äÛçêÇáå~íÉìê= éçêí~ÄäÉ...
- Page 66 mêçÄä≠ãÉ pçäìíáçå o¨ëìäí~í ~ìÅìåÉ=áã~ÖÉ=åÉ=éêçîáÉåí=ÇÉ=äÛçêÇáå~íÉìêI= ~ééìóÉò=ëìê=äÉ=Äçìíçå=ÇÛáã~ÖÉ=~ìíçã~íáèìÉ= äÛáã~ÖÉ=çêÇáå~íÉìê=Éëí=éêçàÉí¨É ìåáèìÉãÉåí=äÉë=ãçíë=Â=páÖå~ä=çìí=çÑ=ê~åÖÉ=Ê=EpáÖå~ä= ëìê=äÉ=Åä~îáÉê Üçêë=ÇÉ=äÛáåíÉêî~ääÉF ê¨ÖäÉò=ä~=Ñê¨èìÉåÅÉ=ÇÉ=ê~Ñê~≤ÅÜáëëÉãÉåí=ÇÉ= äÛçêÇáå~íÉìê=Ç~åë=m~ååÉ~ì=ÇÉ=ÅçåÑáÖìê~íáçå=[ ^ÑÑáÅÜ~ÖÉ=[=m~ê~ã≠íêÉë=[=^î~åŨë=[=`~êíÉ EäÛÉãéä~ÅÉãÉåí=î~êáÉ=ëìáî~åí=äÉ=ëóëí≠ãÉ= ÇÛÉñéäçáí~íáçåF áä=Ñ~ìí=é~êÑçáë=ǨÑáåáê=ìåÉ=ê¨ëçäìíáçå ÇáÑѨêÉåíÉ=ëìê=äÛçêÇáå~íÉìêI=ÅçããÉ äÛáåÇáèìÉ=ä~=êìÄêáèìÉ=ÇÉ=Ǩé~åå~ÖÉ= Â=fã~ÖÉ=ÑäçìÉ=çì=íêçåèì¨É=Ê=ëìáî~åíÉ...
- Page 67 mêçÄä≠ãÉ pçäìíáçå o¨ëìäí~í ^äáÖåÉò=ä~=ê¨ëçäìíáçå=ÇÛ~ÑÑáÅÜ~ÖÉ=ÇÉ= áã~ÖÉ=åÉííÉ=Éí=åçå=íêçåèì¨É fã~ÖÉ=ÑäçìÉ=çì=íêçåèì¨É= äÛçêÇáå~íÉìê=ëìê=ä~=ê¨ëçäìíáçå=åçêã~äÉ=Çì= éêçàÉÅíÉìê=Ea¨ã~êêÉê=[=m~ê~ã≠íêÉë=[= m~ååÉ~ì=ÇÉ=ÅçåÑáÖìê~íáçå=[=^ÑÑáÅÜ~ÖÉ=[= çåÖäÉí=m~ê~ã≠íêÉë= ë¨äÉÅíáçååÉò=UMMñSMM= mçìê=ìå=çêÇáå~íÉìê éçêí~ÄäÉI=Ǩë~ÅíáîÉò äÉ=ãçåáíÉìê=Çì éçêí~ÄäÉ=çì=é~ëëÉò Éå=ãçÇÉ=ÇçìÄäÉ ~ÑÑáÅÜ~ÖÉ áã~ÖÉ=åçå=ÅÉåíê¨É=ëìê=äÛ¨Åê~å Ǩéä~ÅÉò=äÉ=éêçàÉÅíÉìêI=ê¨ÖäÉò=äÉ=òççãI= áã~ÖÉ=ÅçêêÉÅíÉ ê¨ÖäÉò=ä~=Ü~ìíÉìê ê¨ÖäÉò=ä~=éçëáíáçå= Üçêáòçåí~äÉ=çì=îÉêíáÅ~äÉ Ç~åë=äÉ=ãÉåì=fã~ÖÉ=[ = ^î~åŨ...
- Page 68 mêçÄä≠ãÉ pçäìíáçå o¨ëìäí~í ê¨ÖäÉò=ä~=ÅçêêÉÅíáçå=íê~é¨òç≥Ç~äÉ=ëìê=äÉ= áã~ÖÉ=ÇÛ¨èìÉêêÉ áã~ÖÉ=åçå=ÇÛ¨èìÉêêÉ Åä~îáÉê ê¨ÖäÉò=ä~=åÉííÉí¨=EëçìêÅÉë=îáǨç=ëÉìäÉãÉåíF= áã~ÖÉ=ÅçêêÉÅíÉ áã~ÖÉ=åçå=åÉííÉ Ç~åë=äÉ=ãÉåì=fã~ÖÉ=[=^î~åŨ= ÅÜ~åÖÉò=ä~=í~áääÉ=ÇÉ=äÛ¨Åê~å=~ì=Ñçêã~í=QWP=çì= áã~ÖÉ=ÅçêêÉÅíÉ äÛáã~ÖÉ=åÉ=Å~ÇêÉ=é~ë=~ì=Ñçêã~í=QWP=çì=NSWV NSWV=Ç~åë=äÉ=ãÉåì=fã~ÖÉ=[=q~áääÉ=ÇÉ=äÛ¨Åê~å...
- Page 69 mêçÄä≠ãÉ pçäìíáçå o¨ëìäí~í áã~ÖÉ=¶=äDÉåîÉêë Ǩë~ÅíáîÉò=jçåí~ÖÉ=éä~ÑçåÇ=Ç~åë=äÉ=ãÉåì= áã~ÖÉ=ÅçêêÉÅíÉ m~ê~ã≠íêÉë=[=póëí≠ãÉ áã~ÖÉ=áåîÉêë¨É=ÇÉ=Ö~ìÅÜÉ=¶=ÇêçáíÉ áã~ÖÉ=ÅçêêÉÅíÉ Ç¨ë~ÅíáîÉò=^êêá≠êÉ=Ç~åë=äÉ=ãÉåì= m~ê~ã≠íêÉë=[=póëí≠ãÉ äÉë=ÅçìäÉìêë=éêçàÉí¨Éë=åÉ=ÅçêêÉëéçåÇÉåí=é~ë=¶=ÅÉääÉë= ê¨ÖäÉò=ä~=ÅçìäÉìêI=ä~=íÉáåíÉI=ä~=íÉãé¨ê~íìêÉ= áã~ÖÉ=ÅçêêÉÅíÉ ÇÉ=ä~=ëçìêÅÉ ÇÉë=ÅçìäÉìêëI=ä~=äìãáåçëáí¨I=äÉ=Åçåíê~ëíÉ= Ç~åë=äÉë=ãÉåìë COLOR COLOR...
- Page 70 mêçÄä≠ãÉ pçäìíáçå o¨ëìäí~í î¨êáÑáÉò=èìÛ~ìÅìå=çÄëí~ÅäÉ=åÉ=ÄäçèìÉ=äÉë= ä~=ä~ãéÉ=ëÛ~ääìãÉ i~=ä~ãéÉ=åÉ=ëÛ~ääìãÉ=é~ë ¨îÉåíëI=¨íÉáÖåÉò=äÉ=éêçàÉÅíÉìê=Éí=ä~áëëÉòJä~= êÉÑêçáÇáê=ìåÉ=ãáåìíÉ= îçó~åí=äìãáåÉìñ iÉ=ãÉëë~ÖÉ=Â=`Ü~åÖÉê=ä~=ä~ãéÉ=Ê=ëÛ~ÑÑáÅÜÉ=~ì= ä~=ä~ãéÉ=ëÛ~ääìãÉ ëá=ä~=ä~ãéÉ=~=ÑçåÅíáçåå¨=ÉåíêÉ=P=MMM=Éí= Ǩã~êê~ÖÉ=çì=i~=ä~ãéÉ=åÉ=ëÛ~ääìãÉ=é~ë=Éí=äÉ=îçó~åí= Q=MMM=ÜÉìêÉëI=ÅÉääÉJÅá=Ççáí=ÆíêÉ=êÉãéä~ŨÉI= êçìÖÉ=ÅäáÖåçíÉ Eîçáê=é~ÖÉ PTF s¨êáÑáÉò=äÉ=íçí~ä=ÇÉë= îçó~åí=äìãáåÉìñ ÜÉìêÉë=ÇÛìíáäáë~íáçå= ÇÉ=ä~=ä~ãéÉ jÉåì=éêáåÅáé~ä=[=È=éêçéçë= êÉãéä~ÅÉò=ä~=ä~ãéÉ...
- Page 71 ríáäáë~íáçå=ÇÉ=ä~=í¨ä¨Åçãã~åÇÉ ëá=îçìë=ÉÑÑÉÅíìÉò=ÅÉííÉ=çé¨ê~íáçå=éçìê=ä~=éêÉãá≠êÉ=ÑçáëK=sçáê=é~ÖÉ=NP=éçìê= ÇÉë=Ǩí~áäë=ëìê=äÉ=ÅÜ~êÖÉãÉåí=ÇÉë=éáäçíÉë=rp_K= i~=í¨ä¨Åçãã~åÇÉ=ìíáäáëÉ=ÇÉìñ=EOF=éáäÉë=^^=ÑçìêåáÉëK=bääÉë=ëçåí=Ñ~ÅáäÉë=¶= áåëí~ääÉê=W=áä=ëìÑÑáí=ÇÉ=Ñ~áêÉ=ÖäáëëÉê=äÉ=ÅçìîÉêÅäÉ=¶=äÛ~êêá≠êÉ=ÇÉ=ä~=í¨ä¨Åçãã~åÇÉI= ÇÛ~äáÖåÉê=äÉë=éçä~êáí¨ë=H=Éí=Ó=ÇÉë=éáäÉëI=ÇÉ=ÖäáëëÉê=äÉë=éáäÉë=Éå=éä~ÅÉ=Éí=ÇÉ= êÉéä~ÅÉê=äÉ=ÅçìîÉêÅäÉK ^ííÉåíáçå=W=kÛçìÄäáÉò=é~ë=~ì=ãçãÉåí=ÇÉ=êÉãéä~ÅÉê=äÉë=éáäÉë=èìÉ= äÛìíáäáë~íáçå=ÇÉ=éáäÉë=ÇÛìå=~ìíêÉ=íóéÉ=èìÉ=ÅÉääÉë=ÑçìêåáÉë=~îÉÅ=äÉ=éêçàÉÅíÉìê= êáëèìÉ=ÇÛÉåÇçãã~ÖÉê=Öê~îÉãÉåí=ä~=í¨ä¨Åçãã~åÇÉK=jÉííÉò=äÉë=éáäÉë=~ì= êÉÄìí=Éå=êÉëéÉÅí~åí=äÉë=ê¨ÖäÉãÉåí~íáçåë=ëìê=äÛÉåîáêçååÉãÉåíK mçìê=äÛìíáäáëÉê=ä~=í¨ä¨Åçãã~åÇÉI=éçáåíÉòJä~=Éå=ÇáêÉÅíáçå=ÇÉ=äÛ¨Åê~å=ÇÉ= éêçàÉÅíáçå=çì=Çì=éêçàÉÅíÉìê=EÉí=åçå=é~ë=îÉêë=äÛçêÇáå~íÉìêFK=i~=í¨ä¨Åçãã~åÇÉ= ¶=ìåÉ=éçêí¨É=çéíáã~äÉ=ÇÉ=QIR=ã≠íêÉë=ENR=éáÉÇëFK iÉ=éêçàÉÅíÉìê=åÉ=ëÉ=ãÉííê~=é~ë=Éå=ã~êÅÜÉ=ëá=îçìë=~ééìóÉò=ëìê=ä~=íçìÅÜÉ= mçïÉê=ÇÉ=ä~=í¨ä¨Åçãã~åÇÉ=~äçêë=èìÉ=äÛáåíÉêêìéíÉìê=Ö¨å¨ê~ä=Çì=éêçàÉÅíÉìê= Éëí=Éå=éçëáíáçå=~êêÆíK=sçìë=ÇÉîÉò=ÇÛ~ÄçêÇ=Ä~ëÅìäÉê=äÛáåíÉêêìéíÉìê=Ö¨å¨ê~ä=ëìê= ã~êÅÜÉ=éçìê=éÉêãÉííêÉ=¶=ä~=í¨ä¨Åçãã~åÇÉ=ÇÛ~ääìãÉê=äÉ=éêçàÉÅíÉìêK a¨é~åå~ÖÉ=ÇÉ=ä~=í¨ä¨Åçãã~åÇÉ sçìë=éçìîÉò=~ééìóÉê=ëìê=ä~=íçìÅÜÉ=mçïÉê=ÇÉ=ä~=í¨ä¨Åçãã~åÇÉ=éÉåÇ~åí=äÉ= ÑçåÅíáçååÉãÉåí=Çì=éêçàÉÅíÉìê=éçìê=~êêÆíÉê=ÅÉäìáJÅá=EäáêÉ=é~ÖÉ NV=ëìê=äÉë= √ ^ëëìêÉòJîçìë=èìÉ=äÉë=éáäÉë=ëçåí=áåëí~ää¨Éë=ëÉäçå=ä~=ÄçååÉ=çêáÉåí~íáçå=Éí= éêçŨÇìêÉë=ÇÛ~êêÆíF=Éí=äÉ=ãÉííêÉ=Üçêë=íÉåëáçåK èìDÉääÉë=åÉ=ëçåí=é~ë=ǨÅÜ~êÖ¨ÉëK ^ééìóÉò=ëìê=äÉ=Äçìíçå=jÉåì=ÇÉ=ä~=í¨ä¨Åçãã~åÇÉ=éçìê=çìîêáê=äÉ=ëóëí≠ãÉ= √ mçáåíÉò=ÄáÉå=ä~=í¨ä¨Åçãã~åÇÉ=Éå=ÇáêÉÅíáçå=Çì=éêçàÉÅíÉìê=çì=ÇÉ=äÛ¨Åê~å=Éí= ÇÉ=ãÉåìë=Çì=éêçàÉÅíÉìêK=ríáäáëÉò=äÉë=Äçìíçåë=Ñä¨Åܨë=éçìê=å~îáÖìÉêI=Éí=äÉ= åçå=é~ë=îÉêë=äDçêÇáå~íÉìêI=Éí=êÉëíÉò=Ç~åë=äÉ=ê~óçå=ÇÉ=éçêí¨É=ÇÉ=ä~= Äçìíçå=ÇÉ=pÉäÉÅí=éçìê=ë¨äÉÅíáçååÉê=äÉë=ÑçåÅíáçåëI=Éí=ê¨ÖäÉò=äÉë=î~äÉìêë=Ç~åë= í¨ä¨Åçãã~åÇÉ=EQIR=ãFK äÉë=ãÉåìëK=sçáê=é~ÖÉ PM=éçìê=éäìë=ÇÛáåÑçêã~íáçåë=ëìê=äÉë=ãÉåìëK √ pá=îçìë=Éëë~óÉò=ÇÉ=Ñ~áêÉ=ǨÑáäÉê=ÇÉë=Çá~éçëáíáîÉë=mçïÉêmçáåíI=î¨êáÑáÉò=èìÉ= i~=í¨ä¨Åçãã~åÇÉ=ÇáëéçëÉ=ÇÉ=Äçìíçåë=ÇÉ=ê¨Öä~ÖÉ=Çì=sçäìãÉ=Éí=jìíÉ= äÉ=ÅßÄäÉ=rp_=Éëí=ÄáÉå=ê~ÅÅçêǨK=pá=îçìë=ìíáäáëÉò=ìå=ÅßÄäÉ=rp_I=î¨êáÑáÉò=èìÉ= Åçåíê∑äÉê=äÉ=ëçåI=Éí=ÇÉë=íçìÅÜÉë=sáÇÉç=Éí=`çãéìíÉê=éçìê=Ä~ëÅìäÉê=ÇÛìåÉ= äÉë=éáäçíÉë=~Ǩèì~íë=ëçåí=áåëí~ää¨ëK ëçìêÅÉ=¶=äÛ~ìíêÉK aÉìñ=ÑçåÅíáçåë=ëé¨ÅáÑáèìÉë=~ìñ=éê¨ëÉåí~íáçåë=ëçåí=¨Ö~äÉãÉåí=ÑçìêåáÉëK=...
- Page 72 ríáäáë~íáçå=ÇÉ=äÛ~ìÇáç== mçìê=ìíáäáëÉê=äÉ=Ü~ìíJé~êäÉìê=Çì=éêçàÉÅíÉìêI=Äê~åÅÜÉò=îçíêÉ=ëçìêÅÉ=~ì= Äê~åÅÜÉò=äÉ=ÅßÄäÉ=~ìÇáç ÅçååÉÅíÉìê=ÇDÉåíê¨É=~ìÇáç=ëìê=äÉ=éêçàÉÅíÉìêK=sçáê=é~ÖÉ NR=éçìê=ÇÉë=Ǩí~áäë= ëìê=äÛìíáäáë~íáçå=ÇÉ=äÛ~Ç~éí~íÉìê=~ìÇáçK mçìê=ê¨ÖäÉê=äÉ=îçäìãÉI=ìíáäáëÉò=äÉë=Äçìíçåë=Çì=sçäìãÉ=ëìê=äÉ=Åä~îáÉê=çì=ä~= í¨ä¨Åçãã~åÇÉK mçìê=ãÉííêÉ=äÉ=ëçå=Éå=ëçìêÇáåÉI=~ééìóÉò=ëìê=äÉ=Äçìíçå=jìíÉ=ÇÉ=ä~= í¨ä¨Åçãã~åÇÉK= a¨é~åå~ÖÉ=ÇÉ=äÛ~ìÇáç pá=îçìë=åDÉåíÉåÇÉò=é~ë=ÇÉ=ëçåI=î¨êáÑáÉò=èìÉ=W ê¨ÖäÉò=äÉ=îçäìãÉ √ iÉ=ÅßÄäÉ=~ìÇáç=Éëí=ÄáÉå=Äê~åÅܨK √ iÉ=Äçìíçå=páäÉåÅÉ=åÛÉëí=é~ë=~Åíáî¨=E~ééìóÉò=ëìê=äÉ=Äçìíçå=jìíÉ=ëìê=ä~= í¨ä¨Åçãã~åÇÉFK= √ iÉ=îçäìãÉ=Éëí=ëìÑÑáë~åíK=o¨ÖäÉò=äÉ=Äçìíçå=Çì=sçäìãÉ=ëìê=äÉ=Åä~îáÉê=çì=ä~= í¨ä¨Åçãã~åÇÉK √ i~=ëçìêÅÉ=ÅçêêÉÅíÉ=Éëí=~ÅíáîÉK √ o¨ÖäÉò=ä~=ëçìêÅÉ=~ìÇáçK √ pá=îçìë=ÆíÉë=Éå=äÉÅíìêÉ=îáǨçI=~ëëìêÉòJîçìë=èìÉ=ä~=äÉÅíìêÉ=åÛÉëí=é~ë=Éå= ãçÇÉ=é~ìëÉK ríáäáë~íáçå=ÇÉë=Äçìíçåë=Çì=Åä~îáÉê i~=éäìé~êí=ÇÉë=Äçìíçåë=ëçåí=ǨÅêáíë=Éå=Ǩí~áä=Ç~åë=ÇÛ~ìíêÉë=ëÉÅíáçåëK=sçáÅá= ìå=~éÉê´ì=ÇÉ=äÉìêë=ÑçåÅíáçåë=W jÉåì=Ó=çìîêÉ=äÉë=ãÉåìë=~ÑÑáÅܨë=ëìê=äÛ¨Åê~å=Eé~ÖÉ PMFK pÉäÉÅí=Ep¨äÉÅíáçåF=Ó=ÅçåÑáêãÉ=äÉë=ÅÜçáñ=ÉÑÑÉÅíì¨ë=Ç~åë=äÉë=ãÉåìë=Eé~ÖÉ PMFK cä≠ÅÜÉë=Ü~ìíLÄ~ë=Ó=éÉêãÉí=ÇÉ=å~îáÖìÉê=Ç~åë=äÉë=ãÉåìë=Éí=ÇÉ=ǨÑáåáê=äÉë= Äçìíçåë=ÇÉ= é~ê~ã≠íêÉë=Eé~ÖÉ PMFK = å ~îáÖ~íáçå=ÇÉë=ãÉåìë ^ìíç=fã~ÖÉ=Efã~ÖÉ=~ìíçF=Ó=ê¨áåáíá~äáëÉ=äÉ=éêçàÉÅíÉìê=¶=ä~=ëçìêÅÉK mêÉëÉíë=Em~ê~ãK=mê¨Ç¨ÑKF=Ó=Ñ~áí=ǨÑáäÉê=äÉë=é~ê~ã≠íêÉë=éê¨Ç¨Ñáåáë= ÇáëéçåáÄäÉë=Eé~ÖÉ...
- Page 73 léíáãáë~íáçå=ÇÉë=áã~ÖÉë=éêçîÉå~åí= cçåÅíáçåë=ÇÉ=éê¨ëÉåí~íáçå ÇÛìå=çêÇáå~íÉìê mäìëáÉìêë=ÑçåÅíáçåë=Ñ~ÅáäáíÉåí=äÉë=éê¨ëÉåí~íáçåëK=bå=îçáÅá=ìå=~éÉê´ìK=iÉë= Ǩí~áäë=ëçåí=Ççåå¨ë=Ç~åë=ä~=ëÉÅíáçå=jÉåìK içêëèìÉ=äÛçêÇáå~íÉìê=Éëí=ÅçêêÉÅíÉãÉåí=ÅçååÉÅí¨=Éí=èìÉ=äÛáã~ÖÉ=ëÛ~ÑÑáÅÜÉ=ëìê= √ i~=íçìÅÜÉ=bÑÑÉí=ÇÉ=ä~=í¨ä¨Åçãã~åÇÉ=éÉêãÉí=ÇÛ~ÑÑÉÅíÉê=ÇáÑѨêÉåíÉë= äÛ¨Åê~å=Éå=éêçîÉå~åÅÉ=ÇÉ=äÛçêÇáå~íÉìêI=îçìë=éçìîÉò=çéíáãáëÉê=äÛáã~ÖÉ=¶= ÑçåÅíáçåë=¶=ä~=íçìÅÜÉK=iÛÉÑÑÉí=é~ê=ǨÑ~ìí=Éëí=È=éêçéçë=èìá=~ÑÑáÅÜÉ=ÇÉë= äÛ~áÇÉ=ÇÉë=ãÉåìë=~ÑÑáÅܨë=¶=äÛ¨Åê~åK=mçìê=ÇÉë=áåÑçêã~íáçåë=Ö¨å¨ê~äÉë=ëìê= áåÑçêã~íáçåë=ëìê=äÉ=éêçàÉÅíÉìê=Éí=ä~=ëçìêÅÉ=~ÅíáîÉK=sçìë=éçìîÉò= äÛìíáäáë~íáçå=ÇÉë=ãÉåìëI=îçáê=é~ÖÉ PMK ë¨äÉÅíáçååÉê=sáÇÉI=páäÉåÅÉI=q~áääÉ=ÇÉ=äÛ¨Åê~åI=pçìêÅÉI=fã~ÖÉ=^ìíçI=dÉäÉêI= √ o¨ÖäÉò=ä~=Çáëíçêëáçå=íê~é¨òç≥Ç~äÉI=äÉ=Åçåíê~ëíÉ=çì=ä~=äìãáåçëáí¨=Ç~åë=äÉ= wççã=Éí=È=éêçéçëK=sçáê=é~ÖÉ PR=éçìê=ÇÉë=Ǩí~áäëK=iÛÉÑÑÉí=dÉäÉê=éÉêãÉí=ÇÉ= ãÉåì=fã~ÖÉ=Eé~ÖÉ PNFK= ÑáÖÉê=äÛáã~ÖÉ=~ÑÑáÅܨÉ=`ÛÉëí=ìåÉ=ÑçåÅíáçå=ìíáäÉ=ëá=îçìë=ëçìÜ~áíÉò=~ééçêíÉê= √ `Ü~åÖÉò=ä~=í~áääÉ=ÇÉ=äÛ¨Åê~åK=`ÜçáëáëëÉò=äDçéíáçå=èìá=ÅçåîáÉåí=äÉ=ãáÉìñ=¶= ÇÉë=ÅÜ~åÖÉãÉåíë=ëìê=äÛçêÇáå~íÉìê=¶=äDáåëì=ÇÉ=îçíêÉ=~ìÇáíçáêÉK=iÛÉÑÑÉí= îçíêÉ=ëçìêÅÉ=ÇÛÉåíê¨É=Eé~ÖÉ PNFK j~ëèìÉ=éÉêãÉí=ÇÉ=êÉÅçìîêáê=ÇDìå=êáÇÉ~ì=åçáê=ìåÉ=é~êíáÉ=ÇÉ=äÛáã~ÖÉK √ o¨ÖäÉò=ä~=åÉííÉí¨=çì=ä~=íÉãé¨ê~íìêÉ=ÇÉë=ÅçìäÉìêë=Ç~åë=äÉ=ãÉåì=^î~åŨ= √ i~=íçìÅÜÉ=ë~åë=ä¨ÖÉåÇÉ=ÇÉ=ä~=í¨ä¨Åçãã~åÇÉ=éÉêãÉí=ÇD~ÑÑáÅÜÉê=ìå=¨Åê~å= Eé~ÖÉ PPFK= îáÇÉ=~ì=äáÉì=ÇÉ=ä~=ëçìêÅÉ=~ÅíáîÉK=sçìë=éçìîÉò=ǨíÉêãáåÉê=ä~=ÅçìäÉìê=ÇÉ= ÅÉí=¨Åê~å=Eé~ÖÉ PRFK √ o¨ÖäÉò=äÉë=çéíáçåë=mÜ~ëÉI=pìáîáI=ä~=éçëáíáçå=Üçêáòçåí~äÉ=çì=îÉêíáÅ~äÉ=Ç~åë= äÉ=ãÉåì=^î~åŨ=Eé~ÖÉ PPFK √...
- Page 74 léíáãáë~íáçå=ÇÉë=áã~ÖÉë=îáǨç mÉêëçåå~äáë~íáçå=Çì=éêçàÉÅíÉìê içêëèìÉ=äD~éé~êÉáä=îáǨç=Éëí=ÅçêêÉÅíÉãÉåí=ÅçååÉÅí¨=Éí=èìÉ=äÛáã~ÖÉ=Éëí= sçìë=éçìîÉò=~Ç~éíÉê=äÉ=éêçàÉÅíÉìê=¶=îçíêÉ=áåëí~ää~íáçå=Éí=¶=îçë=ÄÉëçáåë= ~ÑÑáÅܨÉ=ëìê=äÛ¨Åê~åI=îçìë=éçìîÉò=çéíáãáëÉê=äÛáã~ÖÉ=¶=äÛ~áÇÉ=ÇÉë=ãÉåìë= ëé¨ÅáÑáèìÉë=sçáê=é~ÖÉ PQ=¶=é~ÖÉ PS=éçìê=ÇÉë=Ǩí~áäë=ëìê=ÅÉë=ÑçåÅíáçåëK ~ÑÑáÅܨë=¶=äÛ¨Åê~åK=mçìê=ÇÉë=áåÑçêã~íáçåë=Ö¨å¨ê~äÉë=ëìê=äÛìíáäáë~íáçå=ÇÉë= √ mçìê=ä~=éêçàÉÅíáçå=~êêá≠êÉI=~ÅíáîÉò=äÉ=ãçÇÉ=~êêá≠êÉ=Ç~åë=äÉ=ãÉåì= ãÉåìëI=îçáê=é~ÖÉ PMK m~ê~ã≠íêÉë=[=póëí≠ãÉK √ o¨ÖäÉò=ä~=Çáëíçêëáçå=íê~é¨òç≥Ç~äÉI=äÉ=Åçåíê~ëíÉI=ä~=äìãáåçëáí¨I=ä~=ÅçìäÉìê= √ mçìê=ä~=éêçàÉÅíáçå=~ì=éä~ÑçåÇI=~ÅíáîÉò=äÉ=ãçÇÉ=ãçåí~ÖÉ=éä~ÑçåÇ=Ç~åë=äÉ= çì=ä~=íÉáåíÉ=Ç~åë=äÉ=ãÉåì=fã~ÖÉ=Eé~ÖÉ PNFK= ãÉåì=m~ê~ã≠íêÉë=[=póëí≠ãÉK= √ `Ü~åÖÉò=ä~=í~áääÉ=ÇÉ=äÛ¨Åê~åK=`ÜçáëáëëÉò=äÛçéíáçå=èìá=ÅçåîáÉåí=äÉ=ãáÉìñ=¶= √ pé¨ÅáÑáÉò=ä~=ëçìêÅÉ=èìÉ=äÉ=éêçàÉÅíÉìê=Ççáí=î¨êáÑáÉê=Éå=éêÉãáÉê=éçìê=ÅÜçáëáê= îçíêÉ=ëçìêÅÉ=ÇÛÉåíê¨É=Eé~ÖÉ PNFK ä~=îáǨç=~ÅíáîÉ=~ì=Ǩã~êê~ÖÉK= √ i~=íçìÅÜÉ=bÑÑÉí=ÇÉ=ä~=í¨ä¨Åçãã~åÇÉ=éÉêãÉí=ÇÛ~ÑÑÉÅíÉê=ÇáÑѨêÉåíÉë= √ pé¨ÅáÑáÉò=ä~=ÑçåÅíáçå=ÇÉ=ä~=íçìÅÜÉ=bÑÑÉí=ÇÉ=ä~=í¨ä¨Åçãã~åÇÉK= ÑçåÅíáçåë=¶=ä~=íçìÅÜÉK=iÛÉÑÑÉí=é~ê=ǨÑ~ìí=Éëí=È=éêçéçë=èìá=~ÑÑáÅÜÉ=ÇÉë= √ ^ÅíáîÉò=Éí=Ǩë~ÅíáîÉò=äÉë=ãÉëë~ÖÉë=èìÛ~ÑÑáÅÜÉ=äÉ=éêçàÉÅíÉìêK áåÑçêã~íáçåë=ëìê=äÉ=éêçàÉÅíÉìê=Éí=ä~=ëçìêÅÉ=~ÅíáîÉK=sçìë=éçìîÉò= √ ^ÅíáîÉò=äÉë=ÑçåÅíáçåë=ÇÛ¨ÅçåçãáÉ=ÇÛ¨åÉêÖáÉK= ë¨äÉÅíáçååÉê=sáÇÉI=páäÉåÅÉI=q~áääÉ=ÇÉ=äÛ¨Åê~åI=pçìêÅÉI=fã~ÖÉ=^ìíçI=dÉäÉêI= wççã=Éí=È=éêçéçëK=sçáê=é~ÖÉ PR=éçìê=ÇÉë=Ǩí~áäëK= √...
- Page 75 ríáäáë~íáçå=ÇÉë=ãÉåìë ãÉåì= Äçìíçåë=ÇÉ= éêáåÅáé~ä mçìê=çìîêáê=äÉë=ãÉåìëI=~ééìóÉò=ëìê=äÉ=Äçìíçå=jÉåì=Çì=Åä~îáÉê=çì=ÇÉ=ä~= = å ~îáÖ~íáçå=¶= í¨ä¨Åçãã~åÇÉK=EiÉë=ãÉåìë=ëÉ=ÑÉêãÉåí=~ìíçã~íáèìÉãÉåí=ëá=~ìÅìå=Äçìíçå= é~êíáê=Çì=Åä~îáÉê åÛÉëí=~Åíáî¨=éÉåÇ~åí=SM=ëÉÅçåÇÉëKF=iÉ=ãÉåì=mêáåÅáé~ä=~éé~ê~≤íK=ríáäáëÉò=äÉë= Äçìíçåë=Ñä¨Åܨë=éçìê=îçìë=Ǩéä~ÅÉê=îÉêë=äÉ=Ü~ìí=çì=îÉêë=äÉ=Ä~ë=Éí=ãÉííêÉ=Éå= ëìêÄêáää~åÅÉ=äÉ=ëçìëJãÉåì=Ǩëáê¨I=Éí=~ééìóÉò=ëìê=äÉ=Äçìíçå=ÇÉ=pÉäÉÅíK= mçìê=ÅÜ~åÖÉê=ìå=é~ê~ã≠íêÉ=ÇÉ=ãÉåìI=ãÉííÉòJäÉ=Éå=ëìêÄêáää~åÅÉ=Éí=~ééìóÉò= ëìê=äÉ=Äçìíçå=ÇÉ=pÉäÉÅíI=éìáë=~àìëíÉò=ë~=î~äÉìê=¶=äÛ~áÇÉ=ÇÉë=Äçìíçåë=Ñä¨Åܨë= Ü~ìí=Éí=Ä~ëI=ë¨äÉÅíáçååÉê=ìåÉ=çéíáçå=Éå=ìíáäáë~åí=äÉë=Äçìíçåë=ÇÛçéíáçåI=çì= ~ÅíáîÉêLǨë~ÅíáîÉê=ä~=ÑçåÅíáçå=¶=äÛ~áÇÉ=ÇÉë=Å~ëÉë=¶=ÅçÅÜÉêK=^ééìóÉò=ëìê=äÉ= Äçìíçå=ÇÉ=pÉäÉÅí=éçìê=ÅçåÑáêãÉê=îçë=ÅÜ~åÖÉãÉåíëK=ríáäáëÉò=äÉë=Ñä≠ÅÜÉë=éçìê= é~ëëÉê=¶=ìå=~ìíêÉ=é~ê~ã≠íêÉK=råÉ=Ñçáë=ÅÉë=~àìëíÉãÉåíë=íÉêãáå¨ëI=é~ëëÉò=¶= ãÉåì= ãÉåì=fã~ÖÉ nìáííÉê=Éí=~ééìóÉò=ëìê=äÉ=Äçìíçå=ÇÉ=pÉäÉÅí=éçìê=~ääÉê=~ì=ãÉåì=éê¨Å¨ÇÉåíK= m~ê~ã≠íêÉë sçìë=éçìîÉò=~ééìóÉê=ëìê=äÉ=Äçìíçå=jÉåì=¶=íçìí=ãçãÉåí=éçìê=ÑÉêãÉê=äÉë= éçáåíë ãÉåìëK= aÉë=éçáåíë=~éé~ê~áëëÉåí=ÇÉî~åí=äÉ=åçã=Çì=ãÉåìK=iÉ=åçãÄêÉ=ÇÉ=éçáåíë= áåÇáèìÉ=ëçå=åáîÉ~ì=Ç~åë=äÛ~êÄçêÉëÅÉåÅÉI=Çì=éêÉãáÉê=åáîÉ~ì=EãÉåì= éêáåÅáé~äF=~ì=èì~íêá≠ãÉ=EäÉë=ãÉåìë=äÉë=éäìë=áãÄêáèì¨ëFK= iÉë=ãÉåìë=ëçåí=êÉÖêçìé¨ë=é~ê=íóéÉ=ÇÛìíáäáë~íáçåK √ iÉ=ãÉåì=fã~ÖÉ=éÉêãÉí=äÉë=ê¨Öä~ÖÉë=ÇÉ=äÛáã~ÖÉK √ iÉ=ãÉåì=m~ê~ã≠íêÉë=éÉêãÉí=ÇÛ~ééçêíÉê=ÇÉë=~àìëíÉãÉåíë=~ì=íóéÉ= ÇDáåëí~ää~íáçå=èìá=ëçåí=é~ë=ëçìîÉåí=ãçÇáÑá¨ëK ãÉåì=È=éêçéçë √ iÉ=ãÉåì=È=éêçéçë=~ÑÑáÅÜÉ=ìå=¨Åê~å=ÇÛáåÑçêã~íáçåë=Ççåå¨Éë=¶=íáíêÉ= áåÇáÅ~íáÑ=ëÉìäÉãÉåí=ëìê=äÉ=éêçàÉÅíÉìê=Éí=ä~=ëçìêÅÉ=ÇÛáã~ÖÉK= `Éêí~áåë=¨ä¨ãÉåíë=ÇÉ=ãÉåì=åÉ=ëçåí=é~ë=îáëáÄäÉë=çì=~éé~ê~áëëÉåí=Éå=Öêáë¨=Éå= ÑçåÅíáçå=ÇÉ=ä~=ëçìêÅÉ=ÅçååÉÅí¨ÉK=m~ê=ÉñÉãéäÉI=äÛçéíáçå=kÉííÉí¨=åDÉëí= ÇáëéçåáÄäÉ=èìÉ=éçìê=äÉë=ëçìêÅÉë=îáǨç=ÉíI=ÇÉ=ÅÉ=Ñ~áí=åÛÉëí=é~ë=îáëáÄäÉ=èì~åÇ= ìåÉ=ëçìêÅÉ=çêÇáå~íÉìê=Éëí=~ÅíáîÉK=iÉë=çéíáçåë=ÇÉë=ãÉåìë=åÛ~éé~ê~áëëÉåí=Éå=...
- Page 76 ãÉåì=fã~ÖÉ mçìê=ê¨ÖäÉê=äÉë=Åáåè=é~ê~ã≠íêÉë=ÅáJÇÉëëçìëI=ãÉííÉò=äÉ=é~ê~ã≠íêÉ=Ǩëáê¨=Éå= ëìêÄêáää~åÅÉI=~ééìóÉò=ëìê=äÉ=Äçìíçå=ÇÉ=pÉäÉÅíI=ê¨ÖäÉò=äÉë=î~äÉìêë=¶=äÛ~áÇÉ=ÇÉë= Ñä≠ÅÜÉë=Ü~ìí=Éí=Ä~ë=Éí=~ééìóÉò=ëìê=äÉ=Äçìíçå=ÇÉ=pÉäÉÅí=éçìê=ÅçåÑáêãÉê=äÉë= ÅÜ~åÖÉãÉåíëK aáëíçêëáçå=íê~é¨òç≥Ç~äÉ=W=~àìëíÉ=äÛáã~ÖÉ=îÉêíáÅ~äÉãÉåí=éçìê=èìÛÉääÉ=ëçáí= ÇD¨èìÉêêÉK=sçìë=éçìîÉò=¨Ö~äÉãÉåí=ê¨ÖäÉê=ä~=Çáëíçêëáçå=íê~é¨òç≥Ç~äÉ=¶=é~êíáê= Çì=Åä~îáÉêK `çåíê~ëíÉ=W=Åçåíê∑äÉ=ä~=ÇáÑѨêÉåÅÉ=ÉåíêÉ=äÉë=é~êíáÉë=äÉë=éäìë=Åä~áêÉë=Éí=äÉë=éäìë= ~ìÖãÉåí~íáçå=ÇÉ= ê¨ÇìÅíáçå=ÇÉ= ÑçåŨÉë=ÇÉ=äÛáã~ÖÉ=Éí=ÅÜ~åÖÉ=ä~=èì~åíáí¨=ÇÉ=åçáê=Éí=ÇÉ=Ää~åÅ=Ç~åë=äÛáã~ÖÉK Çáëíçêëáçå=íê~é¨òç≥Ç~äÉ Çáëíçêëáçå=íê~é¨òç≥Ç~äÉ iìãáåçëáí¨=W=ÅÜ~åÖÉ=äÛáåíÉåëáí¨=ÇÉ=äÛáã~ÖÉK `çìäÉìê=W=ê≠ÖäÉ=äÛáã~ÖÉ=îáǨç=éçìê=~ääÉê=Çì=åçáê=Éí=Ää~åÅ=¶=ìåÉ=ë~íìê~íáçå= Åçãéä≠íÉ=ÇÉ=ä~=ÅçìäÉìêK=iÉ=é~ê~ã≠íêÉ=ÅçìäÉìê=åÉ=ëD~ééäáèìÉ=èìÛ~ìñ=ëçìêÅÉë= îáǨçK qÉáåíÉ=W=~àìëíÉ=äÛ¨èìáäáÄêÉ=êçìÖÉJîÉêí=ÇÉë=ÅçìäÉìêë=Ç~åë=äÛáã~ÖÉ=ÇÉë=áã~ÖÉë= îáǨç=kqp`K=iÉ=é~ê~ã≠íêÉ=qÉáåíÉ=åÉ=ëÛ~ééäáèìÉ=èìÛ~ìñ=ëçìêÅÉë=îáǨç= kqp`K q~áääÉ=ÇÉ=äÛ¨Åê~å=W=i~=í~áääÉ=ÇÉ=äÛ¨Åê~å=Éëí=ǨÑáåáÉ=é~ê=äÉ=ê~ééçêí=ä~êÖÉìêJ Ü~ìíÉìê=ÇÉ=äÛáã~ÖÉK=iÉë=¨Åê~åë=ÇÉ=í¨ä¨îáëáçå=ëçåí=Ü~ÄáíìÉääÉãÉåí=~ì=Ñçêã~í= QWPK=eaqs=Éí=ä~=éäìé~êí=ÇÉë=asa=ëçåí=~ì=Ñçêã~í=NSWVK=iÉ=ãçÇÉ=é~ê=ǨÑ~ìí= Éëí=QWPK= p¨äÉÅíáçååÉò=k~íáîÉ=éçìê=îçáê=äÛÉåíê¨É=åçå=ãçÇáÑá¨É=ë~åë= q~áääÉ=ÇÉ=äD¨Åê~å êÉÇáãÉåëáçååÉãÉåí=é~ê=äÉ=éêçàÉÅíÉìêK p¨äÉÅíáçååÉò=NSWV=éçìê=~ÑÑáÅÜÉê=äÉë=asa=Éå=ãçÇÉ=éäÉáå=¨Åê~å=~ã¨äáçê¨K= mçìê=éäìë=ÇÛáåÑçêã~íáçåë=ÅçåÅÉêå~åí=ä~=í~áääÉ=ÇÉ=äÛ¨Åê~åK=sçáê=é~ÖÉ NQK...
- Page 77 m~ê~ã≠íêÉë=éê¨Ç¨Ñáåáë=W=iÉë=é~ê~ã≠íêÉë=éê¨ÇáÑáåáë=Em~ê~ãK=mê¨Ç¨ÑKF= çéíáãáëÉåí=äÉ=éêçàÉÅíÉìê=éçìê=äD~ÑÑáÅÜ~ÖÉ=ÇÉë=éê¨ëÉåí~íáçåëI=ÇÉë=éÜçíçëI=ÇÉë= áã~ÖÉë=ÇÉ=Ñáäã=ëìê=çêÇáå~íÉìê=Éí=ÇÉë=áã~ÖÉë=îáǨçK==iÛÉåíê¨É=Ñáäã=éêçîáÉåí= é~ê~ã≠íêÉë= Ö¨å¨ê~äÉãÉåí=ÇÛáã~ÖÉë=ë~áëáÉë=ëìê=Å~ã¨ê~I=ÇÛìå=Ñáäã=é~ê=ÉñÉãéäÉ=X=äÛÉåíê¨É= éê¨Ç¨Ñáåáë îáǨç=éêçîáÉåí=Ö¨å¨ê~äÉãÉåí=ÇÛáã~ÖÉë=ëìê=ìå=~éé~êÉáä=îáǨçI=ÇÛìåÉ= ¨ãáëëáçå=ÇÉ=í¨ä¨îáëáçå=çì=ÇÛìå=¨î¨åÉãÉåí=ëéçêíáÑ=é~ê=ÉñÉãéäÉK=sçìë= båêÉÖáëíêÉê éçìîÉò=ìíáäáëÉê=äÉë=é~ê~ã≠íêÉë=éê¨Ç¨Ñáåáë=ÅçããÉ=éçáåí=ÇÉ=Ǩé~êí=éçìê= äÉë=é~ê~J éÉêëçåå~äáëÉê=äÉë=é~ê~ã≠íêÉë=ÇÉ=ÅÜ~èìÉ=ëçìêÅÉK=iÉë=é~ê~ã≠íêÉë= ã≠íêÉë= éÉêëçåå~äáë¨ë=ëçåí=ÉåêÉÖáëíê¨ë=Ç~åë=ä~=ÅçåÑáÖìê~íáçå=éê¨Ç¨ÑáåáÉ=ÇÉ=ÅÜ~èìÉ= ìíáäáë~íÉìê ëçìêÅÉK=mçìê=êÉëí~ìêÉê=äÉë=é~ê~ã≠íêÉë=é~ê=ǨÑ~ìíI=ÅÜçáëáëëÉò=o¨Öä~ÖÉ=ìëáåÉ= Ç~åë=äÉ=ãÉåì=m~ê~ã≠íêÉë=[=pÉêîáÅÉ=Eé~ÖÉ PSFK= iÛìíáäáë~íÉìê=éÉìí=éê¨Ç¨Ñáåáê=ÇÉë=é~ê~ã≠íêÉëK=mçìê=éê¨Ç¨Ñáåáê=ÇÉë= é~ê~ã≠íêÉëI=ê¨ÖäÉò=äÛáã~ÖÉI=ë¨äÉÅíáçååÉò=båêÉÖáëíêÉê=ìíáäáë~íÉìê=Ç~åë=äÉ= ãÉåì=m~ê~ãK=mê¨Ç¨ÑK=Éí=ÅÜçáëáëëÉò=lìáK=sçìë=éçìîÉò=ê~ééÉäÉê= ìäí¨êáÉìêÉãÉåí=ÅÉë=é~ê~ã≠íêÉë=Éå=ë¨äÉÅíáçåå~åí=båêÉÖK=ríáäK=NK=...
- Page 78 kÉííÉí¨=W=EëçìêÅÉë=îáǨç=ìåáèìÉãÉåíF=ÅÜ~åÖÉ=ä~=åÉííÉí¨=~ìñ=ÄçêÇë=ÇÉ= ãÉåì=^î~åŨ äDáã~ÖÉ=îáǨçK=p¨äÉÅíáçååÉò=ìå=é~ê~ã≠íêÉ=ÇÉ=åÉííÉí¨K kÉííÉí¨ qÉãé¨ê~íìêÉ=ÇÉë=ÅçìäÉìêë=W=ÅÜ~åÖÉ=äÛáåíÉåëáí¨=ÇÉë=ÅçìäÉìêëK=p¨äÉÅíáçååÉò= qÉãé¨ê~íìêÉ=ÇÉë=ÅçìäÉìêë ìåÉ=î~äÉìêK= `çåíê∑äÉ=ÇÉë=`çìäÉìêë=W=îçìë=éÉêãÉí=ÇÛ~àìëíÉê=áåÇáîáÇìÉääÉãÉåí=äÉ=Ö~áå= EÅÜ~äÉìê=êÉä~íáîÉ=ÇÉ=ä~=ÅçìäÉìêF=~ìñ=ÅçìäÉìêë=êçìÖÉëI=îÉêíÉëI=Éí=ÄäÉìÉëK pí~åÇ~êÇë=îáǨç=W=èì~åÇ=áä=Éëí=ê¨Öä¨=ëìê=^ìíçI=äÉ=éêçàÉÅíÉìê=Éëë~áÉ=ÇÉ= ǨíÉÅíÉê=~ìíçã~íáèìÉãÉåí=äÉ=ëí~åÇ~êÇ=îáǨç=Éå=íÉå~åí=ÅçãéíÉ=Çì=ëáÖå~ä= ÇÛÉåíê¨É=èìÛáä=êÉ´çáíK=EiÉë=çéíáçåë=ÇÉ=ëí~åÇ~êÇë=îáǨç=éÉìîÉåí=î~êáÉê=ëÉäçå=ä~= `çìäÉìêë=Åçåíêçä ê¨Öáçå=Ö¨çÖê~éÜáèìÉ=çª=îçìë=îçìë=íêçìîÉòKF=pá=äÉ=éêçàÉÅíÉìê=åÉ=é~êîáÉåí=é~ë= ¶=ǨíÉÅíÉê=äÉ=ëí~åÇ~êÇ=ÅçêêÉÅíI=äÉë=ÅçìäÉìêë=êáëèìÉåí=ÇÉ=åÉ=é~ë=ëD~ÑÑáÅÜÉê= ÅçêêÉÅíÉãÉåíI=äÛáã~ÖÉ=éê¨ëÉåí~åí=~äçêë=ìå=~ëéÉÅí=Â=ǨÅÜáê¨=ÊK=pá=íÉä=Éëí=äÉ=Å~ëI= ë¨äÉÅíáçååÉò=ã~åìÉääÉãÉåí=ìå=ëí~åÇ~êÇ=îáǨç=Éå=ÅÜçáëáëë~åí=kqp`I=m^i=çì= pb`^j=Ç~åë=äÉ=ãÉåì=pí~åÇ~êÇë=sáǨçK pìêÄ~ä~ó~ÖÉ=W=EëçìêÅÉ=îáǨç=ìåáèìÉãÉåíF=¨äáãáåÉ=äÉ=Äêìáí=~ìíçìê=ÇÉ=äÛáã~ÖÉ= îáǨçK iÉë=èì~íêÉ=EQF=çéíáçåë=ëìáî~åíÉë=ëçåí=ê¨ëÉêî¨Éë=~ìñ=ëçìêÅÉë=çêÇáå~íÉìêë= pí~åÇ~êÇë=îáǨç ëÉìäÉãÉåíK= mÜ~ëÉ=W=ê≠ÖäÉ=ä~=éÜ~ëÉ=Üçêáòçåí~äÉ=ÇÛìåÉ=ëçìêÅÉ=çêÇáå~íÉìêK pìáîá=W=ê≠ÖäÉ=ä~=éÜ~ëÉ=îÉêíáÅ~äÉ=ÇÛìåÉ=ëçìêÅÉ=çêÇáå~íÉìêK mçëáíáçå=Üçêáòçåí~äÉLîÉêíáÅ~äÉ=W=ê≠ÖäÉ=ä~=éçëáíáçå=ÇDìåÉ=ëçìêÅÉ=çêÇáå~íÉìêK...
- Page 79 ãÉåì=m~ê~ã≠íêÉë ^ìÇáç=W=éÉêãÉí=ÇÉ=ê¨ÖäÉê=äÉ=îçäìãÉ=Çì=Ü~ìíJé~êäÉìê=áåíÉêåÉK=iÉë=ê¨Öä~ÖÉë= éÉìîÉåí=¨Ö~äÉãÉåí=ÆíêÉ=ÉÑÑÉÅíì¨ë=¶=é~êíáê=Çì=Åä~îáÉê=Çì=éêçàÉÅíÉìê=Éí=ÇÉ=ä~= ^ìÇáç í¨ä¨Åçãã~åÇÉK pçìêÅÉë=W=iÉ=é~ê~ã≠íêÉ=pçìêÅÉ=ÇÉ=Ǩã~êê~ÖÉ=ÇÉíÉêãáåÉ=ä~=ëçìêÅÉ=èìÉ=äÉ= éêçàÉÅíÉìê=Ççáí=î¨êáÑáÉê=Éå=éêÉãáÉê=éçìê=ÅÜçáëáê=ä~=îáǨç=~ÅíáîÉ=~ì= Ǩã~êê~ÖÉK=nì~åÇ=ä~=ÑçåÅíáçå=pçìêÅÉ=^ìíç=Éëí=~ÅíáîÉI=äÉ=éêçàÉÅíÉìê=íêçìîÉ= pçìêÅÉë ~ìíçã~íáèìÉãÉåí=ä~=ëçìêÅÉ=~ÅíáîÉI=Éå=î¨êáÑá~åí=Éå=éêÉãáÉê=ä~=pçìêÅÉ=ÇÉ= pçìêÅÉ=ÇÉ Ç¨ã~êê~ÖÉK=iÉë=çéíáçåë=éêçéçë¨Éë=ëçåí=lêÇáå~íÉìê=N=éçìê=ìåÉ=ëçìêÅÉ= Ǩã~êê~ÖÉ çêÇáå~íÉìêëI=sáǨç=N=Eéçìê=äÉë=ÅçååÉñáçåë=pJîáǨçF=Éí=sáÇÉç=O=Eéçìê=äÉë= ÅçååÉñáçåë=îáǨç=ÅçãéçëáíÉFK=pá=pçìêÅÉ=^ìíç=åDÉëí=é~ë=ÅçÅܨÉI=äÉ=éêçàÉÅíÉìê= é~ëëÉ=~ìíçã~íáèìÉãÉåí=¶=ä~=ëçìêÅÉ=ë¨äÉÅíáçåå¨É=Ç~åë=pçìêÅÉ=ÇÉ=Ǩã~êê~ÖÉK= mçìê=~ÑÑáÅÜÉê=ìåÉ=~ìíêÉ=ëçìêÅÉI=ë¨äÉÅíáçååÉòJä~=ã~åìÉääÉãÉåí=Éå=~ééìó~åí= ëìê=ä~=íçìÅÜÉ=`çãéìíÉê=çì=sáÇÉç=ÇÉ=ä~=í¨ä¨Åçãã~åÇÉ=çì=Çì=Åä~îáÉêK póëí≠ãÉ=W=^êêá≠êÉ=áåîÉêëÉ=äÛáã~ÖÉ=éçìê=éÉêãÉííêÉ=ìåÉ=éêçàÉÅíáçå=ÇÉêêá≠êÉ= ìå=¨Åê~å=íê~åëé~êÉåíK=jçåí~ÖÉ=éä~ÑçåÇ=êÉåîÉêëÉ=äÛáã~ÖÉ=éçìê=éÉêãÉííêÉ= ãÉåì=póëí≠ãÉ ìåÉ=éêçàÉÅíáçå=é~ê=ãçåí~ÖÉ=~ì=éä~ÑçåÇK=^ÑÑáÅÜÉê=äÉë=ãÉëë~ÖÉë=~ÑÑáÅÜÉ=äÉë= ãÉëë~ÖÉë=ÇD¨í~í=EéKÉñKI=Â=oÉÅÜÉêÅÜÉ=Ê=çì=Â=páäÉåÅÉ=ÊF=Ç~åë=äÉ=Åçáå=áåѨêáÉìê= °Åê~å=sÉáääÉ Ö~ìÅÜÉ=ÇÉ=äD¨Åê~åK=kka=ÉãéÆÅÜÉ=äÛçêÇáå~íÉìê=éçêí~ÄäÉ=ÇÉ=Ä~ëÅìäÉê=Éå=ãçÇÉ= °Åê~å=îÉáääÉ=ëá=ä~=ÅçååÉñáçå=Çì=ÅßÄäÉ=rp_=Éëí=ǨíÉÅí¨ÉK=°ÅçåK=°åÉêÖáÉ=¨íÉáåí= ~ìíçã~íáèìÉãÉåí=ä~=ä~ãéÉ=ëá=~ìÅìå=ëáÖå~ä=åD~=¨í¨=ǨíÉÅí¨=éÉåÇ~åí=OM= ãáåìíÉëK=^éê≠ë=NM=ãáåìíÉë=ëìééä¨ãÉåí~áêÉë=ë~åë=ëáÖå~äI=äÉ=éêçàÉÅíÉìê= ëÛ¨íÉáåí=Éí=äÛáåíÉêêìéíÉìê=Ö¨å¨ê~ä=éÉìí=ÆíêÉ=ÑÉêã¨K=pá=ìå=ëáÖå~ä=~ÅíáÑ=Éëí=êÉ´ì= ~î~åí=èìÉ=äÉ=éêçàÉÅíÉìê=åÉ=ëD¨íÉáÖåÉI=äÛáã~ÖÉ=ëÛ~ÑÑáÅÜÉK=nì~åÇ=äÛçéíáçå= ÇD¨ÅçåçãáÉ=ÇD¨åÉêÖáÉ=Éëí=~Åíáî¨ÉI=ä~=ÑçåÅíáçå=ÇÉ=éêçíÉÅíáçå=ÇÛ¨Åê~å=E°Åê~å= îÉáääÉF=Éëí=Ǩë~Åíáî¨ÉK=°Åê~å=sÉáääÉ=~ÑÑáÅÜÉ=~ìíçã~íáèìÉãÉåí=ìå=¨Åê~å=îáÇÉ=ëá= ~ìÅìå=ëáÖå~ä=åÛÉëí=ǨíÉÅí¨=éÉåÇ~åí=ìå=åçãÄêÉ=éê¨Ç¨Ñáåá=ÇÉ=ãáåìíÉëK= iÛáã~ÖÉ=êÉîáÉåí=Ç≠ë=èìÉ=äÉ=ëóëí≠ãÉ=ǨíÉÅíÉ=ìåÉ=ëçìêÅÉ=~ÅíáîÉ=çì=èìDìå= Äçìíçå=ÇÉ=ä~=í¨ä¨Åçãã~åÇÉ=çì=Çì=Åä~îáÉê=~=¨í¨=~Åíáî¨K=...
- Page 80 içÖç=a¨ã~êê~ÖÉ=W=éÉêãÉí=ÇÛ~ÑÑáÅÜÉê=~ì=Ǩã~êê~ÖÉ=ìå=¨Åê~å=îáÇÉ=~ì=äáÉì=ÇÉ= äÛ¨Åê~å=é~ê=ǨÑ~ìí=èì~åÇ=~ìÅìåÉ=ëçìêÅÉ=åÛÉëí=ǨíÉÅí¨ÉK= içÖç=a¨ã~êê~ÖÉ `çìäK=¨Åê~å=îáÇÉ=W=ǨíÉêãáåÉ=èìÉääÉ=ÅçìäÉìê=ëÛ~ÑÑáÅÜÉ=äçêëèìÉ=ä~=íçìÅÜÉ=ë~åë= °Åê~å=sáÇÉ ä¨ÖÉåÇÉ=Éëí=~Åíáî¨É=ëìê=ä~=í¨ä¨Åçãã~åÇÉK qçìÅÜÉ=bÑÑÉí=W=éÉêãÉí=ÇÛ~ííêáÄìÉê=ìåÉ=ÑçåÅíáçå=ÇáÑѨêÉåíÉ=¶=ä~=íçìÅÜÉ=bÑÑÉí= ëìê=ä~=í¨ä¨Åçãã~åÇÉ=éçìê=ìíáäáëÉê=äÛÉÑÑÉí=~îÉÅ=éäìë=ÇÉ=Ñ~Åáäáí¨K=jÉííÉò=ìå= qçìÅÜÉ=bÑÑÉí ÉÑÑÉí=Éå=ëìêÄêáää~åÅÉ=Éí=~ééìóÉò=ëìê=äÉ=Äçìíçå=ÇÉ=pÉäÉÅí=éçìê=Éå=ÅÜçáëáê=ìå= ~ìíêÉK √ sáÇÉ=W=~ÑÑáÅÜÉ=ìå=¨Åê~å=îáÇÉK √ páäÉåÅÉ=W=ÅçìéÉ=äÉ=ëçåK √ q~áääÉ=ÇÉ=äÛ¨Åê~å=W==éÉêãÉí=ÇÉ=ÅÜçáëáê=ÉåíêÉ=QWPI=NSWV=~åÇ=k~íáîÉ=Eîçáê= é~ÖÉ NQ=Éí=é~ÖÉ PNFK=a¨ÑáåáÉ=ÅçããÉ=íçìÅÜÉ=ÇÛÉÑÑÉíI=ÉääÉ=éÉêãÉí=ÇÉ= ÅÜ~åÖÉê=ä~=í~áääÉ=ÇÉ=äÛ¨Åê~å=éçìê=äÉë=ÇáëèìÉë=asaK √ pçìêÅÉ=W=ê¨é≠íÉ=äÉë=ÅÜçáñ=ÇÉë=ÇáÑѨêÉåíÉë=ëçìêÅÉë=ÇáëéçåáÄäÉëK √ fã~ÖÉ=^ìíç=W=ê¨áåáíá~äáëÉ=äÉ=éêçàÉÅíÉìê=¶=ä~=ëçìêÅÉ=Eé~ÖÉ OTFK= √ dÉäÉê=W=ãÉí=äÛáã~ÖÉ=éêçàÉí¨É=Éå=é~ìëÉK= √ wççã=W=éÉêãÉí=ÇÛ~Öê~åÇáê=ìåÉ=é~êíáÉ=ÇÉ=äÛáã~ÖÉK=^ééìóÉò=ëìê=ä~=íçìÅÜÉ= bÑÑÉíI=éìáë=ëìê=äÉ=Äçìíçå=Ö~ìÅÜÉ=ÇÉ=ä~=ëçìêáë=éçìê=~Öê~åÇáê=äÛáã~ÖÉK= ríáäáëÉò=äÉ=Åçåíê∑äÉ=Çì=ÅìêëÉìê=éçìê=ÉÑÑÉÅíìÉê=ìå=é~åçê~ãáèìÉ=ëìê= äÛáã~ÖÉ=~Öê~åÇáÉK=^ééìóÉò=ëìê=äÉ=Äçìíçå=Çêçáí=ÇÉ=ä~=ëçìêáë=éçìê=ê¨ÇìáêÉ= äÛ~Öê~åÇáëëÉãÉåíK=^ééìóÉò=ëìê=ä~=íçìÅÜÉ=bÑÑÉíI=éçìê=~ååìäÉê=äDÉÑÑÉí=Çì= òççã=Éí=êÉîÉåáê=¶=äÛ~Öê~åÇáëëÉãÉåí=åçêã~äK √ È=éêçéçë=W=äÛÉÑÑÉí=é~ê=ǨÑ~ìíK=fä=çìîêÉ=ìåÉ=ÑÉåÆíêÉ=ÅçåíÉå~åí=ÇÉë= áåÑçêã~íáçåë=ëìê=ä~=ëçìêÅÉ=Éí=äÉ=éêçàÉÅíÉìêK=...
- Page 81 i~åÖìÉë= ãÉåì=i~åÖìÉë pÉêîáÅÉ= ãÉåì=pÉêîáÅÉ pÉäÉÅí o¨Öä~ÖÉ=rëáåÉ= o¨~ÅíáîÉê i~ãéÉ= ãÉåì=È=éêçéçë `çÇÉ=Çì=ëÉêîáÅÉ= È=éêçéçë=...
- Page 82 båíêÉíáÉå ^ééäáèìÉò=ìå=éêçÇìáí=ÇÉ=åÉííçó~ÖÉ=åçå=~Äê~ëáÑ=éçìê=äÉåíáääÉ=ÇÛçÄàÉÅíáÑ= ëìê=ìå=ÅÜáÑÑçå=Ççìñ=Éí=ëÉÅK √ kÛìíáäáëÉò=é~ë=íêçé=ÇÉ=éêçÇìáí=Éí=åÉ=äÛ~ééäáèìÉò=é~ë=ÇáêÉÅíÉãÉåí=ëìê= äÛçÄàÉÅíáÑK=iÉë=éêçÇìáíë=ÇÉ=åÉííçó~ÖÉ=~Äê~ëáÑëI=äÉë=Çáëëçäî~åíë=Éí=äÉë= ~ìíêÉë=éêçÇìáíë=ÅÜáãáèìÉë=éìáëë~åíë=êáëèìÉåí=ÇÉ=ê~óÉê=äÛçÄàÉÅíáÑK m~ëëÉò=ÇçìÅÉãÉåí=äÉ=ÅÜáÑÑçå=ÇÉ=åÉííçó~ÖÉ=ëìê=äÛçÄàÉÅíáÑ=Éå=ìå= ãçìîÉãÉåí=ÅáêÅìä~áêÉK=pá=äÉ=éêçàÉÅíÉìê=åÉ=ëÉê~=é~ë=ìíáäáë¨= áãã¨Çá~íÉãÉåíI=êÉéä~ÅÉò=äÉ=Å~éìÅÜçå=ëìê=äÛçÄàÉÅíáÑK eÉìêÉë=ÇÛìíáäáë~íáçå= ÇÉ=ä~=ä~ãéÉ iÉ=ÅçãéíÉìê=Üçê~áêÉ=ÇÉ=ä~=ä~ãéÉ=Ç~åë=äÉ=ãÉåì=È=éêçéçë=ÅçãéíÉ=äÉ=åçãÄêÉ= ÇÛÜÉìêÉë=ÇÛìíáäáë~íáçå=ÇÉ=ä~=ä~ãéÉK=^éê≠ë=PVUM=ÜÉìêÉë=ÇÛìíáäáë~íáçåI=äÉ= ãÉëë~ÖÉ=Â=`Ü~åÖÉê=ä~=ä~ãéÉ=Ê=ëÛ~ÑÑáÅÜÉ=~ì=Ǩã~êê~ÖÉK=pá=ä~=Çìê¨É=ã~ñáãìã= ÇÉ=QMMM=ÜÉìêÉë=ÇÛìíáäáë~íáçå=Éëí=Ǩé~ëë¨ÉI=ä~=ä~ãéÉ=åÉ=ëÛ~ääìãÉ=é~ëK=a~åë=ÅÉ= é~íáÉåíÉò= Å~ëI=~éê≠ë=~îçáê=êÉãéä~Ũ=ä~=ä~ãéÉI=îçìë=ÇÉîÉò=ê¨áåáíá~äáëÉê=ëÉë=ÜÉìêÉë= PM=ãáåìíÉë ÇÛìíáäáë~íáçå=Éå=~ééìó~åí=ëáãìäí~å¨ãÉåí=ëìê=äÉë=íçìÅÜÉë=sçäìãÉ=Çì=Åä~îáÉê= Éí=Éå=äÉë=ã~áåíÉå~åí=ÉåÑçåŨÉë=éÉåÇ~åí=NM=ëÉÅçåÇÉëK= obj^onrb=W=sçìë=éçìîÉò=Åçãã~åÇÉê=ÇÉ=åçìîÉ~ìñ=Äç≤íáÉêë=ÇÉ=ä~ãéÉë= ~ìéê≠ë=ÇÉ=îçíêÉ=ÇáëíêáÄìíÉìêK=sçáê=Â=^ÅÅÉëëçáêÉë=ÊI=é~ÖÉ QM=éçìê=äÉë=Ǩí~áäëK= ríáäáëÉò=íçìàçìêë=ìåÉ=ä~ãéÉ=ÇÉ=êÉÅÜ~åÖÉ=~ó~åí=äÉ=ãÆãÉ=íóéÉ=Éí=äÉë=ãÆãÉë= Å~ê~Åí¨êáëíáèìÉë=åçãáå~äÉë=èìÉ=ä~=ä~ãéÉ=ÇÛçêáÖáåÉK °íÉáÖåÉò=äÉ=éêçàÉÅíÉìê=Éí=ǨÄê~åÅÜÉò=äÉ=ÅçêÇçå=ÇÛ~äáãÉåí~íáçåK= m~íáÉåíÉò=PM=ãáåìíÉë=éçìê=ä~áëëÉê=äÉ=éêçàÉÅíÉìê=êÉÑêçáÇáê=Åçãéä≠íÉãÉåíK îçäÉí=ÇÉ=ä~=ä~ãéÉ mçëÉò=äÉ=éêçàÉÅíÉìê=ëìê=äÉ=Å∑í¨=ÇÉ=Ñ~´çå=¶=çêáÉåíÉê=äÉ=îçäÉí=ÇÉ=ä~=ä~ãéÉ= îÉêë=îçìëK=^=äÛ~áÇÉ=ÇÛìå=íçìêåÉîáë=¶=ä~ãÉ=éä~íÉI=ë¨é~êÉò=ëçáÖåÉìëÉãÉåí= äÉ=îçäÉí=Çì=éêçàÉÅíÉìê=Éå=áåíêçÇìáë~åí=ä~=ä~ãÉ=Çì=íçìêåÉîáë=ÉåíêÉ=äÛÉëé~ÅÉ= ëìé¨êáÉìê=ÇÉ=ä~=éçêíÉ=Éí=äÉ=éêçàÉÅíÉìêK...
- Page 83 aÉëëÉêêÉò=äÉë=ÇÉìñ=îáë=éêáëçååá≠êÉë=èìá=ã~áåíáÉååÉåí=äÉ=Äç≤íáÉê=ÇÉ=ä~= ä~ãéÉ=~ì=éêçàÉÅíÉìêK ÅçååÉÅíÉìê=ÇÉ=ä~ãéÉ a¨í~ÅÜÉò=äÉ=ÅçååÉÅíÉìê=ÇÉ=ä~=ä~ãéÉ=Çì=éêçàÉÅíÉìê=Éå=~ééìó~åí=ëìê=ä~= ÅçêÇçå=ÇÉ=ä~ãéÉ é~ííÉ=ÇÉ=îÉêêçìáää~ÖÉ=Çì=ÅçååÉÅíÉìê=Éí=Éå=íáê~åí=ä¨Ö≠êÉãÉåí=ÇÉëëìë=éçìê= äÉ=ǨÖ~ÖÉêK ^sboqfppbjbkqp=W mçìê=¨îáíÉê=íçìíÉ=ÄêºäìêÉI=ä~áëëÉò=äÉ=éêçàÉÅíÉìê=êÉÑêçáÇáê=éÉåÇ~åí= PM=ãáåìíÉë=~î~åí=ÇÉ=êÉãéä~ÅÉê=ä~=ä~ãéÉK Äç≤íáÉê=ÇÉ=ä~ãéÉ kÉ=Ñ~áíÉë=é~ë=íçãÄÉê=äÉ=Äç≤íáÉê=ÇÉ=ä~=ä~ãéÉ=Éí=åÉ=íçìÅÜÉò=é~ë= äÛ~ãéçìäÉ=Éå=îÉêêÉ=>=iÉ=îÉêêÉ=éÉìí=ëÉ=ÄêáëÉê=Éå=¨Åä~íë=Éí=éêçîçèìÉê= ÇÉë=ÄäÉëëìêÉëK pçóÉò=íê≠ë=éêìÇÉåí=Éå=êÉíáê~åí=äÉ=Äç≤íáÉê=ÇÉ=ä~=ä~ãéÉK=a~åë=äÉ=Å~ë=éÉì= éêçÄ~ÄäÉ=ÇÛìåÉ=êìéíìêÉI=äÛ~ãéçìäÉ=éÉìí=ëÉ=ÄêáëÉê=Éå=ÇÉ=ãìäíáéäÉë= ¨Åä~íë=ÇÉ=îÉêêÉK=jÆãÉ=ëá=äÉ=Äç≤íáÉê=ÇÉ=ä~=ä~ãéÉ=Éëí=éê¨îì=éçìê=êÉíÉåáê= îáë ÅÉë=Ñê~ÖãÉåíëI=éêçŨÇÉò=~îÉÅ=ëçáå=Éå=êÉíáê~åí=äÉ=Äç≤íáÉê=ÇÉ=ä~=ä~ãéÉK ÅçêÇçå=ÇÉ=ä~ãéÉ ÅçååÉÅíÉìê pçêíÉò=äÉ=Äç≤íáÉê=ÇÉ=ä~ãéÉ=~îÉÅ=éê¨Å~ìíáçåK=jÉííÉò=ä~=ä~ãéÉ=~ì=êÉÄìí=Éå= êÉëéÉÅí~åí=äÉë=ê¨ÖäÉãÉåí~íáçåë=êÉä~íáîÉë=¶=äÛÉåîáêçååÉãÉåíK= é~ííÉ=ÇÉ=îÉêêçìáää~ÖÉ fåëí~ääÉò=äÉ=åçìîÉ~ì=Äç≤íáÉê=ÇÉ=ä~ãéÉ=Éí=ëÉêêÉò=äÉë=îáëK Äç≤íáÉê=ÇÉ=ä~ãéÉ cáñÉò=ÇÉ=åçìîÉ~ì=äÉ=ÅçååÉÅíÉìê=ÇÉ=ä~ãéÉ=~ì=éêçàÉÅíÉìêK=i~=é~ííÉ=ÇÉ= îáë îÉêêçìáää~ÖÉ=ÇÉîê~áí=ëÛÉåÅäÉåÅÜÉê=ëá=äÉ=ÅçååÉÅíÉìê=Éëí=ÄáÉå=ÉåÑçåŨ=Ç~åë= ë~=éêáëÉK oÉéä~ÅÉò=äÉ=îçäÉí=ÇÉ=ä~=ä~ãéÉK _ê~åÅÜÉò=äÉ=ÅçêÇçå=ÇÛ~äáãÉåí~íáçå=Éí=Ä~ëÅìäÉò=äÛáåíÉêêìéíÉìê=mçïÉê= éçìê=êÉǨã~êêÉê=äÉ=éêçàÉÅíÉìêK mçìê=êÉãÉííêÉ=¶=ò¨êç=äÉ=ÅçãéíÉìê=ÇÉë=ÜÉìêÉë=ÇÉ=ÑçåÅíáçååÉãÉåí=ÇÉ=ä~= ãÉåì=pÉêîáÅÉ ä~ãéÉI=~ääÉò=~ì=ãÉåì=m~ê~ã≠íêÉë=[=pÉêîáÅÉ=Éí=ë¨äÉÅíáçååÉò=o¨~ÅíáîÉê= ä~ãéÉK=sçáê=é~ÖÉ PS=éçìê=ÇÉë=Ǩí~áäëK...
- Page 84 a~åë=äÉë=ÉåîáêçååÉãÉåíë=ë~äÉë=Éí=éçìëëá¨êÉìñI=äÉë=ÇÉìñ=ÑáäíêÉë=~åíáJéçìëëá≠êÉ= Äç≤íáÉê=ÇÉ=ä~ãéÉ Çì=Äç≤íáÉê=ÇÉ=ä~ãéÉ=éÉìîÉåí=Éå=ëÛçÄëíêì~åí=Éåíê~≤åÉê=ÇÉë=Ü~ìíÉë= íÉãé¨ê~íìêÉë=¶=äÛáåí¨êáÉìê=Çì=ãçÇìäÉ=Éí=ìåÉ=ǨÑ~áää~åÅÉ=éê¨ã~íìê¨É=ÇÉ=ä~= ä~ãéÉK=rå=ÉåíêÉíáÉå=ê¨ÖìäáÉê=¨äáãáåÉ=ä~=éçìëëá≠êÉ=ÇÉë=ÑáäíêÉëI=ÅÉ=èìá=~Ä~áëëÉ= ÇÉìñ=ÑáäíêÉë= äÉë=íÉãé¨ê~íìêÉë=Éå=ÑçåÅíáçååÉãÉåí=ÇÉ=ä~=ä~ãéÉ=íçìí=Éå=éêçäçåÖÉ~åí=ë~= ä~ãéÉ EÇÉ=ÅÜ~èìÉ Çìê¨É=ÇÛìíáäáë~íáçåK=kÉííçóÉò=ä~=ä~ãéÉ=íçìíÉë=äÉë=ORM=ÜÉìêÉë=ÇÛìíáäáë~íáçå= Å∑í¨=Çì Äç≤íáÉê=ÇÉ=ä~ãéÉF éçìê=Éå=çéíáãáëÉê=ä~=Çìê¨É=ÇÉ=îáÉK= oÉíáêÉò=äÉ=Äç≤íáÉê=ÇÉ=ä~=ä~ãéÉK= bñ~ãáåÉò=äÉë=ÑáäíêÉë=~åíáJéçìëëá≠êÉ=Ç~åë=äÉ=Äç≤íáÉê=ÇÉ=ä~ãéÉK=ríáäáëÉò=äÉ= Å~ë=¨Åܨ~åí=ìå=~ëéáê~íÉìê=ÇÉ=Ñ~áÄäÉ=éìáëë~åÅÉ=éçìê=åÉííçóÉê=äÉë=ÑáäíêÉëK= sÉáääÉò=¶=åÉ=é~ë=Ǩê~åÖÉê=äÉë=Åçãéçë~åíë=áåíÉêåÉë=äçêë=Çì=åÉííçó~ÖÉ=ÇÉë= ÑáäíêÉëK oÉéä~ÅÉò=äÉ=Äç≤íáÉê=ÇÉ=ä~ãéÉ=Éí=ëçå=îçäÉíK ríáäáë~íáçå=Çì=îÉêêçì=ÇÉ=ë¨Åìêáí¨ iÉ=éêçàÉÅíÉìê=~=ìå=îÉêêçì=ÇÉ=ë¨Åìêáí¨=ÇÉëíáå¨=~ì=ëóëí≠ãÉ=ÇÉ=îÉêêçìáää~ÖÉ=é~ê= ÅßÄäÉ=m`=dì~êÇá~å=`~ÄäÉ=içÅâK=pá=îçìë=ÇáëéçëÉò=ÇÛìå=ëóëí≠ãÉ=ÇÉ= îÉêêçìáä~ÖÉ=m`=dì~êÇá~å=`~ÄäÉ=içÅâI=îÉìáääÉò=îçìë=ê¨Ñ¨êÉê=~ìñ= áåÑçêã~íáçåë=ÑçìêåáÉë=~îÉÅ=ÅÉ=ëóëí≠ãÉ=ÇÉ=îÉêêçìáää~ÖÉ=éçìê=çÄíÉåáê=äÉë= ë¨Åìêáí¨ áåëíêìÅíáçåë=ëìê=ëçå=ÑçåÅíáçååÉãÉåíK= îÉêêçì...
- Page 85 ^ååÉñÉ ^ÅÅÉëëçáêÉë=ëí~åÇ~êÇ EÉñé¨Çá¨ë=~îÉÅ=äÉ=éêçàÉÅíÉìêF `~áëëÉ=ÇÛÉñé¨Çáíáçå=E~îÉÅ=ã~í¨êá~ìñ= ° ° qÉãé¨ê~íìêÉ NM=¶=QM =`=ERM=¶=NMQ =cF=~ì=åáîÉ~ì=ÇÉ=ä~=ãÉê ÇDÉãÄ~ää~ÖÉF ° ° cçåÅíáçååÉãÉåí NM=¶=PR =`=ERM=¶=VR =cF=¶=ìåÉ=~äíáíìÇÉ=ÇÉ= j~ääÉííÉ=ÇÉ=íê~åëéçêí PMMM=ã≠íêÉë=ENMKMMM=éáÉÇëF ° ° `ßÄäÉ=ÇÛçêÇáå~íÉìê=ÇÉ=NIU=ã≠íêÉë=ES=éáÉÇëF píçÅâ~ÖÉ JOM=¶=SM `=EJQ=¶=NQM cçåÅíáçååÉãÉåí=Éå= M=¶=PMQU=ã≠íêÉë=EM=¶=NMKMMM=éáÉÇëF= `ßÄäÉ=~ìÇáç=ÇÉ=NIU=ã≠íêÉë=ES=éáÉÇëF ~äíáíìÇÉ ^Ç~éí~íÉìê=o`^=¶=~ìÇáç=ÇÉ=PIR ãã píçÅâ~ÖÉ M=¶=SMVS=ã≠íêÉë=EM=¶=OMKMMM=éáÉÇëF= `ßÄäÉ=ëJîáǨç=ÇÉ=Q=ã≠íêÉë=ENP=éáÉÇëF eìãáÇáí¨=ÇÉ= NM=B=¶=VRB=ÇÛÜìãáÇáí¨=êÉä~íáîÉI=ë~åë= `çêÇçå=ÇÛ~äáãÉåí~íáçå=Eî~êáÉ=ëÉäçå=äÉ=é~óëF ÑçåÅíáçååÉãÉåí= ÅçåÇÉåë~íáçå q¨ä¨Åçãã~åÇÉ=Éí=Ä~ííÉêáÉë píçÅâ~ÖÉ...
- Page 86 pá=äÉ=éêçàÉÅíÉìê=åÉ=ÑçåÅíáçååÉ=é~ë=ÅçêêÉÅíÉãÉåíI=äÉ=îçó~åí=êçìÖÉ=ÅäáÖåçíÉ=X= q~ÄäÉ~ì=O=W= êÉéçêíÉòJîçìë=~ì=í~ÄäÉ~ì=P=éçìê=ǨíÉêãáåÉê=ä~=Å~ìëÉ=ÇÉ=ÅÉííÉ=~åçã~äáÉK=råÉ= fåíÉêî~ääÉë=ÇÉ=Çáëí~åÅÉ=¶=äD¨Åê~å=éçìê=ìåÉ=í~áääÉ=ÇD¨Åê~å=Ççåå¨É=Çì= é~ìëÉ=ÇÉ=ÇÉìñ=ëÉÅçåÇÉë=ë¨é~êÉ=ÅÜ~èìÉ=ë¨èìÉåÅÉ=ÇÉ=ÅäáÖåçíÉãÉåíë=Çì= éêçàÉÅíÉìêK îçó~åíK aáëí~åÅÉ=¶=äÛ¨Åê~å q~áääÉ=ÇÛ¨Åê~å= i~êÖÉìê= aáëí~åÅÉ= aáëí~åÅÉ= Éå=Çá~Öçå~äÉ= ÇÛáã~ÖÉ ã~ñáãìã ãáåáãìã Eã≠íêÉëL Eã≠íêÉëL Eã≠íêÉëL Eã≠íêÉëL éçìÅÉëF éçìÅÉëF éáÉÇëF éáÉÇëF rå=ENF=ÅäáÖåçíÉãÉåí i~=ä~ãéÉ=åÉ=ëÛ~ääìãÉ=é~ë=~éê≠ë=ERF=íÉåí~íáîÉëK= s¨êáÑáÉò=äÉë=ÅçååÉñáçåë=ëìê=äÛáåëí~ää~íáçå=ÇÉ=ä~= NLQM MIULPO NIULRIU NIRLQIU ä~ãéÉ=Éí=ÇÉ=ëçå=îçäÉíK NIPLRM NLQM OIQLTIU OIMLSIR aÉìñ=EOF=ÅäáÖåçíÉãÉåíë iÉ=ÅçãéíÉìê=Üçê~áêÉ=ÇÛìíáäáë~íáçå=ÇÉ=ä~=ä~ãéÉ= NIRLSM NIOLQU OITLUIU OIPLTIR ~=Ǩé~ëë¨=ä~=Çìê¨É=ÇÉ=îáÉ=éê¨îìÉK=oÉãéä~ÅÉò=...
- Page 87 t~êÉåòÉáÅÜÉå ^ééäÉI=j~ÅáåíçëÜ=ìåÇ=mçïÉê_ççâ=ëáåÇ=t~êÉåòÉáÅÜÉå=çÇÉê=ÉáåÖÉíê~ÖÉåÉ=t~êÉåòÉáÅÜÉå=îçå=^ééäÉ=`çãéìíÉêI=fåÅK=f_j=ìåÇ=mpLO=ëáåÇ=t~êÉåòÉáÅÜÉå=çÇÉê=ÉáåÖÉíê~ÖÉåÉ= t~êÉåòÉáÅÜÉå=îçå=fåíÉêå~íáçå~ä=_ìëáåÉëë=j~ÅÜáåÉëI=fåÅK=jáÅêçëçÑíI=mçïÉêmçáåí=ìåÇ=táåÇçïë=ëáåÇ=t~êÉåòÉáÅÜÉå=çÇÉê=ÉáåÖÉíê~ÖÉåÉ=t~êÉåòÉáÅÜÉå=ÇÉê=jáÅêçëçÑí=`çêéçê~íáçåK= c``Jt~êåìåÖ eáåïÉáëW=aáÉëÉ=^ìëêΩëìíåÖ=ïìêÇÉ=ÖÉíÉëíÉí=ìåÇ=áå=§ÄÉêÉáåëíáããìåÖ=ãáí=ÇÉå=dêÉåòïÉêíÉå=ÑΩê=Éáå=ÇáÖáí~äÉë=dÉê®í=ÇÉê=hä~ëëÉ=_=ÖÉã®≈=qÉáä=NR=ÇÉê=c``JoáÅÜíäáåáÉå=ÄÉÑìåÇÉåK= aáÉëÉ=dêÉåòïÉêíÉ=ÄáÉíÉå=~åÖÉÄê~ÅÜíÉå=pÅÜìíò=îçê=ëÅÜ®ÇäáÅÜÉå=pí∏êìåÖÉå=ÄÉá=fåëí~ää~íáçå=ÇÉê=^ìëêΩëíìåÖ=áå=tçÜåÖÉÄáÉíÉåK=aáÉëÉ=^ìëêΩëìíåÖ=ÉêòÉìÖí=ìåÇ=îÉêïÉåÇÉí= o~ÇáçÑêÉèìÉåòÉåÉêÖáÉ=ìåÇ=ëíê~Üäí=ÇáÉëÉ=ã∏ÖäáÅÜÉêïÉáëÉ=~ÄK=tÉåå=ëáÉ=åáÅÜí=áå=§ÄÉêÉáåëíáããìåÖ=ãáí=ÇÉê=^åäÉáíìåÖ=áåëí~ääáÉêí=ïáêÇI=îÉêìêë~ÅÜí=ëáÉ=ã∏ÖäáÅÜÉêïÉáëÉ=pí∏êìåÖÉå= ÇÉê=cìåâJ=ìåÇ=o~Çáçâçããìåáâ~íáçåK=bë=ÄÉëíÉÜí=àÉÇçÅÜ=âÉáåÉ=d~ê~åíáÉI=Ç~ëë=ÉáåÉ=ÄÉëíáããíÉ=fåëí~ää~íáçå=âÉáåÉ=pí∏êìåÖÉå=îÉêìêë~ÅÜíK=c~ääë=ÇáÉ=^ìëêΩëíìåÖ=pí∏êìåÖÉå=ÇÉë=o~ÇáçJ= çÇÉê=cÉêåëÉÜÉãéÑ~åÖë=îÉêìêë~ÅÜíI=ï~ë=ÇìêÅÜ=^ìëJ=ìåÇ=báåëÅÜ~äíÉå=ÇÉê=^ìëêΩëíìåÖ=ΩÄÉêéêΩÑí=ïÉêÇÉå=â~ååI=ëçääíÉ=îÉêëìÅÜí=ïÉêÇÉåI=ÇáÉ=pí∏êìåÖÉå=~ìÑ=ÉáåÉê=ÇÉê=ÑçäÖÉåÇÉå= jÉíÜçÇÉå=òì=ÄÉÜÉÄÉåW Ô=kÉì~ìëêáÅÜíÉå=çÇÉê=kÉì~ìÑëíÉääÉå=ÇÉê=bãéÑ~åÖë~åíÉååÉK Ô=bêÜ∏ÜÉå=ÇÉê=båíÑÉêåìåÖ=òïáëÅÜÉå=^ìëêΩëíìåÖ=ìåÇ=bãéÑ®åÖÉêK Ô=^åëÅÜäìëë=ÇÉê=^ìëêΩëíìåÖ=~å=ÉáåÉ=~åÇÉêÉ=píÉÅâÇçëÉ=~äë=ÇáÉ=îçã=bãéÑ®åÖÉê=îÉêïÉåÇÉíÉK Ô=fã=wïÉáÑÉäëÑ~ää=hçåí~âí~ìÑå~ÜãÉ=ãáí=ÇÉã=e®åÇäÉê=çÇÉê=ÉáåÉã=ÉêÑ~ÜêÉåÉå=o~ÇáçJLqsJqÉÅÜåáâÉêK h~å~Ç~ aáÉëÉë=ÇáÖáí~äÉ=dÉê®í=ÇÉê=hä~ëëÉ=_=ëíáããí=ãáí=ÇÉê=â~å~ÇáëÅÜÉå=f`bpJMMP=ΩÄÉêÉáåK `Éí=~éé~êÉáä=åìã¨êáèìÉ=ÇÉ=ä~=Åä~ëëÉ=_=Éëí=ÅçåÑçêãÉ=¶=ä~=åçêãÉ=kj_JMMP=Çì=`~å~Ç~K páÅÜÉêÜÉáíëòÉêíáÑáòáÉêìåÖÉå riI=ÅJriI=q§sI=dlpq...
- Page 88 fåÜ~äíëîÉêòÉáÅÜåáë c~ääë=páÉ=ãáí=ÇÉê==báåêáÅÜíìåÖ=îçå=mêçàÉâíáçåëëóëíÉãÉå=îÉêíê~ìí=ëáåÇI= îÉêïÉåÇÉå=páÉ=ÄÉáäáÉÖÉåÇÉ=pÅÜåÉääëí~êíJh~êíÉK=sçääëí®åÇáÖÉ=báåòÉäÜÉáíÉå= báåÑΩÜêìåÖ= ^ìÑëíÉääÉå=ÇÉë=mêçàÉâíçêë= òìã=^åëÅÜäìëë=ìåÇ=_ÉíêáÉÄ=ÇÉë=mêçàÉâíçêë=ÑáåÇÉå=páÉ=áå=ÇáÉëÉê= mêçàÉâíçêJ=ìåÇ=dÉê®í~åëÅÜäìëë~åäÉáíìåÖ _ÉåìíòÉê~åäÉáíìåÖK= `çãéìíÉêîÉêÄáåÇìåÖÉå sáÇÉçîÉêÄáåÇìåÖÉå táÅÜíáÖÉ=_ÉíêáÉÄëáåÑçêã~íáçåÉå ^åëÅÜäáÉ≈Éå=ÉáåÉê=`çãéìíÉêèìÉääÉ= píÉääÉå=páÉ=ÇÉå=mêçàÉâíçê=åáÅÜí=~ìÑ=ÉáåÉã=qáëÅÜíìÅÜ=çÇÉê=ÉáåÉå=~åÇÉêÉå= bêÑçêÇÉêäáÅÜÉ=`çãéìíÉêîÉêÄáåÇìåÖÉå= léíáçå~äÉ=`çãéìíÉêîÉêÄáåÇìåÖÉå= ïÉáÅÜÉå=^ÄÇÉÅâìåÖ=~ìÑI=ÇáÉ=ÇáÉ=îçêÇÉêÉå=çÇÉê=ÜáåíÉêÉå=iìÑí∏ÑÑåìåÖÉå= ^åòÉáÖÉå=ÉáåÉë=`çãéìíÉêÄáäÇÉë= îÉêÇÉÅâÉå=â~ååK=sÉêïÉåÇÉå=páÉ=âÉáåÉ=ìåÖÉåÉÜãáÖíÉ=aÉÅâÉåÄÉÑÉëíáÖìåÖK=få= _áäÇÉáåëíÉääìåÖ= ÇÉã=ìåï~ÜêëÅÜÉáåäáÅÜÉå=c~ääI=Ç~ëë=ÇáÉ=_áêåÉ=òÉêÄêáÅÜíI=êÉáåáÖÉå=páÉ=ÇÉå= bêëíã~äáÖÉ=sÉêïÉåÇìåÖ=ÇÉë=mêçàÉâíçêë=ãáí=táåÇçïë=VU= _ÉêÉáÅÜ=îçê=ÇÉã=mêçàÉâíçê=ÖêΩåÇäáÅÜ=ìåÇ=ïÉêÑÉå=páÉ=~ääÉ=iÉÄÉåëãáííÉä=ïÉÖI= ^åëÅÜäáÉ≈Éå=ÉáåÉë=sáÇÉçÖÉê®íÉë= ÇáÉ=ëáÅÜ=ã∏ÖäáÅÜÉêïÉáëÉ=áå=ÇáÉëÉã=_ÉêÉáÅÜ=ÄÉÑìåÇÉå=Ü~ÄÉåK sáÇÉçÖÉê®íîÉêÄáåÇìåÖÉå= `çãéçëáíÉ=sáÇÉçJsÉêÄáåÇìåÖÉå= pJsáÇÉçîÉêÄáåÇìåÖ= hçãéçåÉåíJsáÇÉçîÉêÄáåÇìåÖ= sd^JsÉêÄáåÇìåÖ= ^åòÉáÖÉå=îçå=sáÇÉç= _áäÇÉáåëíÉääìåÖ= ^ÄëÅÜ~äíÉå=ÇÉë=mêçàÉâíçêë= cÉÜäÉêÄÉÜÉÄìåÖ=ÑΩê=ÇáÉ=báåêáÅÜíìåÖ= sÉêïÉåÇÉå=ÇÉê=cÉêåÄÉÇáÉåìåÖ= sÉêïÉåÇÉå=ÇÉë=^ìÇáçëóëíÉãë= sÉêïÉåÇÉå=ÇÉë=q~ëíÉåÑÉäÇÉë= léíáãáÉêÉå=îçå=`çãéìíÉêÄáäÇÉêå= hÉáåÉ=lÄàÉâíÉ=áå mê®ëÉåí~íáçåëÑìåâíáçåÉå= ÇáÉëÉã=_ÉêÉáÅÜ=îçê=ÇÉã léíáãáÉêÉå=îçå=sáÇÉçÄáäÇÉêå= mêçàÉâíçê=éä~íòáÉêÉåK _ÉåìíòÉêÇÉÑáåáÉêíÉ=^åé~ëëìåÖ=ÇÉë=mêçàÉâíçêë=...
- Page 89 fÜê=åÉìÉê=ÇáÖáí~äÉê=mêçàÉâíçê=áëí=ÉáåÑ~ÅÜ=~åòìëÅÜäáÉ≈ÉåI=òì=îÉêïÉåÇÉå=ìåÇ= òì=ï~êíÉåK=bê=áëí=ÑΩê=ÇáÉ=sÉêïÉåÇìåÖ=òì=e~ìëÉ=ìåÇ=áã=_Ωêç=áÇÉ~ä=ÖÉÉáÖåÉíK= aÉê=ÇáÖáí~äÉ=mêçàÉâíçê=áëí=ãáí=ÉáåÉê=sáÉäò~Üä=îçå=`çãéìíÉêå=ìåÇ= sáÇÉçèìÉääÉå=âçãé~íáÄÉäK=a~òì=ÖÉÜ∏êÉåW √ aáÉ=ãÉáëíÉå=pí~åÇ~êÇJsáÇÉçêÉâçêÇÉêI=asaJmä~óÉê=EéêçÖêÉëëáî=ìåÇ= áåíÉêä~ÅÉÇFI=eaqsJnìÉääÉå=EeaqsJcçêã~íÉ=NMUMáI=NMPRá=ìåÇ=TOMmFI= cÉêåëÉÜJ=ìåÇ=o~ÇáçÉãéÑ®åÖÉêI=sáÇÉçâ~ãÉê~ëI=sáÇÉçëéáÉäÉ=ìåÇ= i~ëÉêÇáëâJmä~óÉêK √ f_jJâçãé~íáÄäÉ=`çãéìíÉêI=ÉáåëÅÜäáÉ≈äáÅÜ=i~éíçéëI=ãáí=ÉáåÉê= ^ìÑä∏ëìåÖ=Äáë=òì=NMOQñTUSK ∆ ∆ ∆ √ ^ééäÉ =j~ÅáåíçëÜ =ìåÇ=mçïÉê_ççâ =`çãéìíÉê=ãáí=ÉáåÉê=^ìÑä∏ëìåÖ= Äáë=òì=NMOQñTSUK aÉê=mêçàÉâíçê=Ü~í=ÉáåÉ=^ìÑä∏ëìåÖ=îçå=UMMñSMM=psd^=ìåÇ=ïáêÇ=ãáí=ÇÉã= ÑçäÖÉåÇÉå=pí~åÇ~êÇòìÄÉÜ∏ê=ÖÉäáÉÑÉêíK= oÉÖáëíêáÉêÉå=páÉ=Ç~ë=mêçÇìâí=çåäáåÉ=ìåíÉê=ïïïKáåÑçÅìëKÅçãLëÉêîáÅÉL êÉÖáëíÉêI=ìã=mêçÇìâí~âíì~äáëáÉêìåÖÉåI=_Éâ~ååíã~ÅÜìåÖÉå=ìåÇ=ïÉáíÉêÉ= oÉÖáëíêáÉêìåÖëîçêíÉáäÉ=òì=ÉêÜ~äíÉåK=...
- Page 90 _ÉÇÉåâÉå=páÉ=ÄÉáã=^ìÑëíÉääÉå=ÇÉë=mêçàÉâíçêë=ÇáÉ=_áäÇëÅÜáêãÑçêã=ìåÇ=J Öê∏≈ÉI=ÇáÉ=mçëáíáçå=ÇÉê=píÉÅâÇçëÉå=ìåÇ=ÇáÉ=båíÑÉêåìåÖ=òïáëÅÜÉå=ÇÉã= mêçàÉâíçê=ìåÇ=ÇÉã=oÉëí=ÇÉê=^ìëêΩëíìåÖK=eáÉê=ëáåÇ=ÉáåáÖÉ=~ääÖÉãÉáåÉ= oáÅÜíäáåáÉåW RITV=ã √ píÉääÉå=páÉ=ÇÉå=mêçàÉâíçê=~ìÑ=ÉáåÉê=ÉÄÉåÉå=cä®ÅÜÉ=áã=êÉÅÜíÉå=táåâÉä= OIOV=ã òìã=_áäÇëÅÜáêã=~ìÑK=aÉê=mêçàÉâíçê=ãìëë=ãáåÇÉëíÉåë=NIQV=ã=îçã= NIQS=ã mêçàÉâíáçåëÄáäÇëÅÜáêã=ÉåíÑÉêåí=ëÉáåK √ píÉääÉå=páÉ=ÇÉå=mêçàÉâíçê=áååÉêÜ~äÄ=îçå=P=ã=båíÑÉêåìåÖ=îçå=ÇÉê= píÉÅâÇçëÉ=ÄòïK=NIU=ã=båíÑÉêåìåÖ=îçã=sáÇÉçÖÉê®í=~ìÑ=EÑ~ääë=páÉ=âÉáåÉ= sÉêä®åÖÉêìåÖëâ~ÄÉä=ÖÉâ~ìÑí=Ü~ÄÉåFK=rã=wìÖêáÑÑ=~ìÑ=ÇáÉ=h~ÄÉä=òì= ÖÉï®ÜêäÉáëíÉåI=ãìëë=ÇÉê=mêçàÉâíçê=ãáåÇÉëíÉåë=NR=Åã=îçå=ÇÉê=t~åÇ= çÇÉê=~åÇÉêÉå=lÄàÉâíÉå=ÉåíÑÉêåí=~ìÑÖÉëíÉääí=ïÉêÇÉåK √ píÉääÉå=páÉ=ÇÉå=mêçàÉâíçê=áå=ÇÉê=ÖÉïΩåëÅÜíÉå=båíÑÉêåìåÖ=îçã=_áäÇJ ëÅÜáêã=~ìÑK=aÉê=^Äëí~åÇ=îçå=ÇÉê=mêçàÉâíçêäáåëÉ=òìã=_áäÇëÅÜáêãI=ÇáÉ= P=ã=ÜçÜÉë mêçàÉâíáçåëïáåâÉä=áã= wççãÉáåëíÉääìåÖ=ìåÇ=Ç~ë=sáÇÉçÑçêã~í=ÄÉëíáããÉå=ÇáÉ=dê∏≈É=ÇÉë=éêçàáJ _áäÇ jçÇìë=QWP=Epí~åÇ~êÇF òáÉêíÉå=_áäÇÉëK=aáÉ=fääìëíê~íáçå=êÉÅÜíë=òÉáÖí=ÇêÉá=éêçàáòáÉêíÉ=_áäÇÖê∏≈ÉåK= cΩê=ïÉáíÉêÉ=fåÑçêã~íáçåÉå=ΩÄÉê=_áäÇÖê∏≈Éå=áå=ìåíÉêëÅÜáÉÇäáÅÜÉå= båíÑÉêåìåÖÉå=ëáÉÜÉ=łmêçàáòáÉêíÉ=_áäÇÖê∏≈É =~ìÑ=pÉáíÉ QNK √ a~ë=_áäÇ=îÉêä®ëëí=ÇÉå=mêçàÉâíçê=ìåíÉê=ÉáåÉã=ÄÉëíáããíÉå=táåâÉäK=tÉåå= ÇÉê=mêçàÉâíçê=ëáÅÜ=áã=jçÇìë=QWP=ÄÉÑáåÇÉí=Epí~åÇ~êÇãçÇìëFI=ÄÉíê®Öí=ÇÉê= _áäÇJlÑÑëÉí=NNOIOBK=a~ë=ÜÉá≈í=ÄÉá=ÉáåÉê=_áäÇÜ∏ÜÉ=îçå=P=ã=ÄÉÑáåÇÉí=ëáÅÜ= ìåíÉêÉê=_áäÇê~åÇ ÇÉê=ìåíÉêÉ=o~åÇ=ÇÉë=_áäÇÉë=PT=Åã=ΩÄÉê=ÇÉê=jáííÉ=ÇÉê=iáåëÉK= PT=Åã=ΩÄÉê=ÇÉê= iáåëÉåãáííÉ √ fã=jçÇìë=NSWV=ÄÉíê®Öí=ÇÉê=_áäÇJlÑÑëÉí=NPOIVBK=a~ë=ÜÉá≈í=ÄÉá=ÉáåÉê= iáåëÉ...
- Page 91 aáÉ=ÑçäÖÉåÇÉå=fåÑçêã~íáçåÉå=ÜÉäÑÉå=fÜåÉå=ÄÉáã=_ÉëíáããÉå=ÇÉê=^åëÅÜäΩëëÉI=ÇáÉ=páÉ=òìã=bêòáÉäÉå=ÇÉê=çéíáã~äÉå=^ìÑä∏ëìåÖ=ÇÉê=báåÖ~åÖëÖÉê®íÉ=îÉêïÉåÇÉå= ã∏ÅÜíÉåK=_ÉáëéáÉäÉ=îçå=báåÖ~åÖëÖÉê®íÉå=ëáåÇW=`çãéìíÉêI=pí~åÇ~êÇJsáÇÉçêÉâçêÇÉêI=asaJmä~óÉê=EéêçÖêÉëëáî=ìåÇ=áåíÉêä~ÅÉÇFI=eaqsJnìÉääÉå=ENMUMáI=NMPRá= ìåÇ=TOMm=eaqsJcçêã~íÉFI=cÉêåëÉÜJ=ìåÇ=p~íÉääáíÉåÉãéÑ®åÖÉêI=sáÇÉçâ~ãÉê~ëI=sáÇÉçëéáÉäÉ=EéêçÖêÉëëáî=ìåÇ=áåíÉêä~ÅÉÇF=ìåÇ=i~ëÉêÇáëâJmä~óÉêK `çãéìíÉêîÉêÄáåÇìåÖÉå a~òì=ÖÉÜ∏êí=Ç~ë=^åëÅÜäáÉ≈Éå=ÇÉë=ãáí=ÇÉã=mêçàÉâíçê=ÖÉäáÉÑÉêíÉå=`çãéìíÉêâ~ÄÉäë=~ã=`çãéìíÉê=ëÉäÄëí=ìåÇ=~ã=báåÖ~åÖ=?`çãéìíÉê=få?K=wì=ÇÉå=ï~ÜäÑêÉáÉå= ^åëÅÜäΩëëÉå=ÖÉÜ∏êÉå=ÉáåÉ=sÉêÄáåÇìåÖ=ãáí=ÇÉã=ÖÉäáÉÑÉêíÉå=^ìÇáçâ~ÄÉä=òïáëÅÜÉå=ÇÉã=`çãéìíÉê=ìåÇ=ÇÉã=mêçàÉâíçêI=ÉáåÉ=sÉêÄáåÇìåÖ=òïáëÅÜÉå=ÇÉã= `çãéìíÉêãçåáíçê=ìåÇ=ÇÉã=mêçàÉâíçê=ìåÇ=ÉáåÉ=sÉêÄáåÇìåÖ=ãáí=ÉáåÉã=rp_Jh~ÄÉä=EåáÅÜí=ÖÉäáÉÑÉêíF=òïáëÅÜÉå=ÇÉã=`çãéìíÉê=ìåÇ=ÇÉã=mêçàÉâíçê=òìã= sçêêΩÅâÉå=îçå=aá~ë=áå=ÉáåÉê=mçïÉêmçáåí»Jmê®ëÉåí~íáçåK=fåÑçêã~íáçåÉå=òìã=báåêáÅÜíÉå=îçå=`çãéìíÉêLmêçàÉâíçê=ÑáåÇÉå=páÉ=~ìÑ=pÉáíÉ VK sáÇÉçîÉêÄáåÇìåÖÉå aÉê=ÉêëíÉ=pÅÜêáíí=ÄÉáã=^åëÅÜäáÉ≈Éå=îçå=sáÇÉç=áëí=ÇáÉ=_ÉëíáããìåÖ=ÇÉë=qóéë=îçå=^ìëÖ~åÖI=ÇÉê=~ã=mêçàÉâíçê=~åÖÉëÅÜäçëëÉå=ïÉêÇÉå=ëçääK=c~ääë=ãÉÜê=~äë=Éáå= ^ìëÖ~åÖ=îçêÜ~åÇÉå=áëíI=îÉêïÉåÇÉå=páÉ=ÇÉå=^ìëÖ~åÖ=ãáí=ÇÉê=Ü∏ÅÜëíÉå=nì~äáí®íK=aáÉ=ÄÉëíÉ=nì~äáí®íëÉáåëíìÑìåÖ=EN=áëí=ÇáÉ=Ü∏ÅÜëíÉ=ìåÇ=P=ÇáÉ=åáÉÇêáÖëíÉ= báåëíìÑìåÖF=áëíW hçãéçåÉåíJsáÇÉç pJsáÇÉç `çãéçëáíÉ=sáÇÉç c~ääë=páÉ=ÇÉå=mêçàÉâíçê=~å=eaqsJnìÉääÉå=~åëÅÜäáÉ≈ÉåI=ëçääíÉ=ÇáÉ=`çãéìíÉêîÉêÄáåÇìåÖ=ÇÉë=mêçàÉâíçêë=Esd^F=ãáí=ÇÉê=_ÉòÉáÅÜåìåÖ=sáÇÉç=få=îÉêïÉåÇÉí= ïÉêÇÉåK=aÉåâÉå=páÉ=Ç~ê~åI=Ç~ëë=eaqsJ=ìåÇ=mêçÖêÉëëáîÉJnìÉääÉå=åìê=ΩÄÉê=ÇÉå=sd^J^åëÅÜäìëë=ÇÉë=mêçàÉâíçêë=îÉê~êÄÉáíÉí=ïÉêÇÉå=ëçääíÉåK=aÉê=pJsáÇÉçJ ^åëÅÜäìëë=ÑìåâíáçåáÉêí=åáÅÜí=ãáí=mêçÖêÉëëáîÉJnìÉääÉåI=~ìÅÜ=åáÅÜí=ãáí=ÉáåÉã=hçãéçåÉåíJòìJpJsáÇÉçJ^Ç~éíÉêK=jáí=mêçÖêÉëëáîÉJnìÉääÉå=ãìëë=Éáå= hçãéçåÉåíJòìJsbp^J^Ç~éíÉê=îÉêïÉåÇÉí=ïÉêÇÉåK=_ÉáÇÉ=ÇáÉëÉ=^Ç~éíÉê=ÖÉÜ∏êÉå=åáÅÜí=òìã=iáÉÑÉêìãÑ~åÖ=ÇÉë=mêçàÉâíçêëK=páÉ=â∏ååÉå=ÄÉá=aêáíí~åÄáÉíÉêå= ÖÉâ~ìÑí=ïÉêÇÉåK mêçàÉâíçêÉáåÖ~åÖë~åëÅÜäΩëëÉ jçåáíçê `çãéìíÉê=få sáÇÉç=få ^ìÇáç=få pJsáÇÉç E^ìëÖ~åÖF Eeaqs=ìåÇ mêçÖêÉëëáîÉ nìÉääÉåF...
- Page 92 ^åëÅÜäáÉ≈Éå=~å= qóé=ÇÉë= cΩê=^åäÉáíìåÖÉå=òìê= sáÇÉçÖÉê®í sáÇÉçâçãé~íáÄáäáí®í mêçàÉâíçê~åëÅÜäìë _ÉãÉêâìåÖÉå dÉê®í~åëÅÜäìëëÉë= báåêáÅÜíìåÖ=ëáÉÜÉ= ë=ãáí=_ÉòÉáÅÜåìåÖ kqp`JI=m^iJ=ìåÇ= `çãéçëáíÉ=sáÇÉç `çãéçëáíÉ=sáÇÉç `çãéçëáíÉ=sáÇÉçJsÉêÄáåÇìåÖÉå= pb`^jJcçêã~íÉ= çÇÉê=pJsáÇÉç çÇÉê=pJsáÇÉç ~ìÑ=pÉáíÉ NR kçêã~äÉë=cÉêåëÉÜëáÖå~ä= pJsáÇÉçîÉêÄáåÇìåÖ=~ìÑ=pÉáíÉ NR= EåáÅÜí=eaqsF=ΩÄÉêW= h~ÄÉäI=aáÖáí~äâ~ÄÉäI= hçãéçåÉåí=QUMá hçãéçåÉåíJsáÇÉç pJsáÇÉç=ΩÄÉê=ÉáåÉå= káÅÜí=ÑΩê= hçãéçåÉåíJsáÇÉçîÉêÄáåÇìåÖ=~ìÑ= p~íÉääáíÉåÑÉêåëÉÜÉåI=asa= hçãéçåÉåíJòìJpJ mêçÖêÉëëáîÉJnìÉääÉå= pÉáíÉ NS çÇÉê=s`o= sáÇÉçJ^Ç~éíÉê EòK=_K=eaqsFK=páÉÜÉ= å®ÅÜëíÉ=pÉáíÉK kqp`JI=m^iJ=ìåÇ= `çãéçëáíÉ=sáÇÉç `çãéçëáíÉ=sáÇÉç...
- Page 93 ^åëÅÜäáÉ≈Éå=~å= qóé=ÇÉë= cΩê=^åäÉáíìåÖÉå=òìê= sáÇÉçÖÉê®í sáÇÉçâçãé~íáÄáäáí®í mêçàÉâíçê~åëÅÜäìë _ÉãÉêâìåÖÉå dÉê®í~åëÅÜäìëëÉë= báåêáÅÜíìåÖ=ëáÉÜÉ= ë=ãáí=_ÉòÉáÅÜåìåÖ NMUMáI=TOMé `çãéìíÉê=få káÅÜí=ÑΩê= sd^JsÉêÄáåÇìåÖ=~ìÑ=pÉáíÉ NS eaqs= hçãéçåÉåí=QUMá EeáÖÜ=aÉÑáåáíáçå=qsF hçãéçåÉåí=QUMé hçãéçåÉåíJsáÇÉç `çãéìíÉê=få=ΩÄÉê= káÅÜí=ÑΩê= hçãéçåÉåíJsáÇÉçîÉêÄáåÇìåÖ=~ìÑ= baqs ÉáåÉå=hçãéçåÉåíJ hçãéçåÉåí=QUMá pÉáíÉ NS EbåÜ~åÅÉÇ=aÉÑáåáíáçå=qsF= òìJsbp^J^Ç~éíÉê NMUMáI=TOMé `çãéìíÉê=få sd^JsÉêÄáåÇìåÖ=~ìÑ=pÉáíÉ NS mêçÖêÉëëáîÉJasa hçãéçåÉåí=QUMé hçãéçåÉåíJsáÇÉç `çãéìíÉê=få=ΩÄÉê= káÅÜí=ÑΩê= hçãéçåÉåíJsáÇÉçîÉêÄáåÇìåÖ=~ìÑ= ÉáåÉå=hçãéçåÉåíJ hçãéçåÉåí=QUMá...
- Page 94 `çãéìíÉêâ~ÄÉä=~åëÅÜäáÉ≈Éå bêÑçêÇÉêäáÅÜÉ=`çãéìíÉêîÉêÄáåÇìåÖÉå pÅÜäáÉ≈Éå=páÉ=Éáå=båÇÉ=ÇÉë=`çãéìíÉêâ~ÄÉäë=EëáÉÜÉ=pÉáíÉ NQ=òìã= ^åëÅÜäáÉ≈Éå=îçå=sáÇÉçÖÉê®íÉåF=~å=ÇÉå=ÇìåâÉäÄä~ìÉå=q~ëíÉ=`çãéìíÉê=få= ÇÉë=mêçàÉâíçêë=~åK=sÉêÄáåÇÉå=páÉ=Ç~ë=~åÇÉêÉ=båÇÉ=ãáí=ÇÉã=sáÇÉç~åëÅÜäìëë= ÇÉë=`çãéìíÉêëK=tÉåå=páÉ=ÉáåÉå=aÉëâíçéJ`çãéìíÉê=îÉêïÉåÇÉåI=ãΩëëÉå=páÉ= òìÉêëí=Ç~ë=jçåáíçêâ~ÄÉä=îçã=sáÇÉç~åëÅÜäìëë=ÇÉë=`çãéìíÉêë=íêÉååÉåK= =kÉíòâ~ÄÉä=~åëÅÜäáÉ≈Éå pÅÜäáÉ≈Éå=páÉ=Ç~ë=ëÅÜï~êòÉ=kÉíòâ~ÄÉä=~å=ÇÉå=mçïÉê=~å=ÇÉê=oΩÅâëÉáíÉ=ÇÉë= mêçàÉâíçêë=ìåÇ=~å=ÉáåÉ=píÉÅâÇçëÉ=~åK efktbfpW=sÉêïÉåÇÉå=páÉ=ëíÉíë=Ç~ë=ãáí=ÇÉã=mêçàÉâíçê=ÖÉäáÉÑÉêíÉ=kÉíòâ~ÄÉäK= ^ìÇáçâ~ÄÉä=~åëÅÜäáÉ≈Éå léíáçå~äÉ=`çãéìíÉêîÉêÄáåÇìåÖÉå rã=fÜêÉê=mê®ëÉåí~íáçå=qçå=ÜáåòìòìÑΩÖÉåI=ëÅÜäáÉ≈Éå=páÉ=Ç~ë=^ìÇáçâ~ÄÉä=~å= ÇÉå=`çãéìíÉê=ìåÇ=~å=ÇÉå=^åëÅÜäìëë=^ìÇáç=få=ÇÉë=mêçàÉâíçêë=~åK= jçåáíçêâ~ÄÉä=~åëÅÜäáÉ≈Éå tÉåå=páÉ=ÉáåÉå=aÉëâíçéJ`çãéìíÉê=îÉêïÉåÇÉå=ìåÇ=Ç~ë=_áäÇ=ëçïçÜä=~ìÑ= ÇÉã=`çãéìíÉêJ=~äë=~ìÅÜ=~ìÑ=ÇÉã=mêçàÉâíáçåëÄáäÇëÅÜáêã=ëÉÜÉå=ã∏ÅÜíÉåI= ëÅÜäáÉ≈Éå=páÉ=Ç~ë=jçåáíçêâ~ÄÉä=ÇÉë=`çãéìíÉêë=~å=ÇÉå=^åëÅÜäìëë=jçåáíçê= lìí=ÇÉë=mêçàÉâíçêë=~åK= rp_Jh~ÄÉä=~åëÅÜäáÉ≈Éå rã=aá~ë=áå=ÉáåÉê=mçïÉêmçáåíJmê®ëÉåí~íáçå ãáí=ÇÉê=cÉêåÄÉÇáÉåìåÖ= îçêòìêΩÅâÉåI=ëíÉÅâÉå=páÉ=ÇÉå=rp_J^åëÅÜäìëë=ÇÉë=`çãéìíÉêâ~ÄÉäë=áå=ÇÉå= rp_Jj~ìë~åëÅÜäìëë=~ã=`çãéìíÉêK=rã=ÇáÉ=rp_Jcìåâíáçå~äáí®í=åìíòÉå=òì= â∏ååÉåI=ãΩëëÉå=rp_JqêÉáÄÉê=áåëí~ääáÉêí=ïÉêÇÉåK=tÉáíÉêÉ=fåÑçêã~íáçåÉå= ÑáåÇÉå=páÉ=~ìÑ=pÉáíÉ NPK...
- Page 95 iáåëÉå~ÄÇÉÅâìåÖ=ÉåíÑÉêåÉå båíÑÉêåÉå=páÉ=ÇáÉ=iáåëÉå~ÄÇÉÅâìåÖK pÅÜ~äíÉå=páÉ=ÇáÉ=mçïÉê=~å=ÇÉê=pÉáíÉ=ÇÉë=mêçàÉâíçêë=áå=ÇáÉ=mçëáíáçå=łlå K kÉíòí~ëíÉ=ÇêΩÅâÉå aáÉ=ibaJ^åòÉáÖÉ=Ääáåâí=ÖêΩåI=ìåÇ=ÇáÉ=sÉåíáä~íçêÉå=ëí~êíÉåK=tÉåå=ÇáÉ= i~ãéÉ=~ìÑäÉìÅÜíÉíI=ïáêÇ=ÇÉê=pí~êíÄáäÇëÅÜáêã=ÉáåÖÉÄäÉåÇÉíI=ìåÇ=ÇáÉ=iba= äÉìÅÜíÉí=ÖêΩå=~ìÑK=bë=â~åå=ÉáåÉ=jáåìíÉ=Ç~ìÉêåI=Äáë=Ç~ë=_áäÇ=ÇáÉ=îçääÉ= eÉääáÖâÉáí=ÉêêÉáÅÜíK= \=hÉáå=pí~êíÄáäÇëÅÜáêã\=eáäÑÉ=~ìÑ=pÉáíÉ NVK pÅÜ~äíÉå=páÉ=ÇÉå=`çãéìíÉê=ÉáåK `çãéìíÉê=ÉáåëÅÜ~äíÉå a~ë=`çãéìíÉêÄáäÇ=ëçääíÉ=~ìÑ=ÇÉã=mêçàÉâíáçåëÄáäÇëÅÜáêã=ÉêëÅÜÉáåÉåK=c~ääë= Ç~ë=åáÅÜí=ÇÉê=c~ää=áëíI=ÇêΩÅâÉå=páÉ=ÇáÉ=q~ëíÉ=`çãéìíÉê=få=~ìÑ=ÇÉã= q~ëíÉåÑÉäÇ=ÇÉë=mêçàÉâíçêëK= c~ääë=ÇÉê=`çãéìíÉê=táåÇçïë=VU=îÉêïÉåÇÉíI=ÑáåÇÉå=páÉ=fåÑçêã~íáçåÉå=òìê= qêÉáÄÉêÉáåêáÅÜíìåÖ=ìåíÉê=łbêëíã~äáÖÉ=sÉêïÉåÇìåÖ=ÇÉë=mêçàÉâíçêë=ãáí= táåÇçïë=VU =~ìÑ=pÉáíÉ NOK sÉêÖÉïáëëÉêå=páÉ=ëáÅÜI=Ç~ëë=ÇÉê=ÉñíÉêåÉ=sáÇÉç~åëÅÜäìëë=ÇÉë=i~éíçé=~âíáîáÉêí=áëíK= bñíÉêåÉå=^åëÅÜäìëë=ÇÉë=i~éíçéë=~âíáîáÉêÉå sáÉäÉ=i~éíçéë=~âíáîáÉêÉå=ÇÉå=ÉñíÉêåÉå=sáÇÉç~åëÅÜäìëë=åáÅÜí=~ìíçã~íáëÅÜI= ïÉåå=Éáå=mêçàÉâíçê=~åÖÉëÅÜäçëëÉå=ïáêÇK=kçêã~äÉêïÉáëÉ=â~åå=ÇáÉ=ÉñíÉêåÉ= ^åòÉáÖÉ=ΩÄÉê=ÇáÉ=q~ëíÉåâçãÄáå~íáçå=ck=H=cR=ÉáåJ=ìåÇ=~ìëÖÉëÅÜ~äíÉí= ïÉêÇÉåK=aáÉ=q~ëíÉåâçãÄáå~íáçå=ÑΩê=fÜêÉå=i~éíçé=â∏ååÉå=páÉ=ÇÉê= açâìãÉåí~íáçå=ÉåíåÉÜãÉåK= \=hÉáå=_áäÇ=~ìÑ=ÇÉã=i~éíçé\=aêΩÅâÉå=páÉ=ÇáÉ=q~ëíÉ=^ìíç=fã~ÖÉ=~ìÑ= ÇÉã=q~ëíÉåÑÉäÇK=eáäÑÉ=~ìÑ=pÉáíÉ OMK=...
- Page 96 _áäÇÉáåëíÉääìåÖ e∏ÜÉ=ÉáåëíÉääÉå píÉääÉå=páÉ=ÇáÉ=e∏ÜÉ=ÇÉë=mêçàÉâíçêë=ÖÖÑK=ÉáåI=áåÇÉã=páÉ=~ìÑ=ÇáÉ= båíëéÉêêìåÖëí~ëíÉ=ÇêΩÅâÉåI=ìã=ÇÉå=cì≈=~ìëòìÑ~ÜêÉåK= ^ìëêáÅÜíìåÖëJ aêÉÜÉå=páÉ=ÖÖÑK=ÇÉå=^ìëêáÅÜíìåÖëÑì≈=~å=ÇÉê=oΩÅâëÉáíÉ=ÇÉë=mêçàÉâíçêëK Ñì≈=ÇêÉÜÉå eÉÄÉJ hçããÉå=páÉ=ãáí=ÇÉå=e®åÇÉå=ã∏ÖäáÅÜëí=åáÅÜí=áå=ÇáÉ=k®ÜÉ=ÇÉê=ÜÉá≈Éå= Ñì≈ båíëéÉêêìåÖëí~ëíÉ iΩÑíìåÖë∏ÑÑåìåÖÉå=îçêåÉ=~ã=mêçàÉâíçêK píÉääÉå=páÉ=ÇÉå=mêçàÉâíçê=áå=ÇÉê=ÖÉïΩåëÅÜíÉå=båíÑÉêåìåÖ=áå=ÉáåÉã=táåâÉä= båíÑÉêåìåÖ=ÉáåëíÉääÉå îçå=VM=dê~Ç=òìã=_áäÇëÅÜáêã=~ìÑK= báåÉ=q~ÄÉääÉ=ãáí=ÇÉå=_áäÇëÅÜáêãÖê∏≈Éå=ìåÇ=båíÑÉêåìåÖÉå=ÑáåÇÉå=páÉ=~ìÑ= pÉáíÉ QNK wççã=çÇÉê=cçâìë=ÉáåëíÉääÉå píÉääÉå=páÉ=wççã=ìåÇ=cçâìë=ÉáåK cçâìë EÇΩååÉê=oáåÖF wççã EÇáÅâÉê=oáåÖF c~ääë=Ç~ë=_áäÇ=åáÅÜí=èì~Çê~íáëÅÜ=áëíI=îÉêïÉåÇÉå=páÉ=ÇáÉ=q~ëíÉå=~ìÑ=ÇÉã= hÉóëíçåÉ=ÉáåëíÉääÉå q~ëíÉåÑÉäÇ=òìê=hÉóëíçåÉJbáåëíÉääìåÖK= aêΩÅâÉå=páÉ=~ìÑ=ÇáÉ=çÄÉêÉ=hÉóëíçåÉJq~ëíÉI=ìã=ÇÉå=çÄÉêÉå=qÉáä=ÇÉë=_áäÇë=òì= êÉÇìòáÉêÉå=ÄòïK=~ìÑ=ÇáÉ=ìåíÉêÉ=hÉóëíçåÉJq~ëíÉI=ìã=ÇÉå=ìåíÉêÉå=qÉáä=òì= êÉÇìòáÉêÉåK píÉääÉå=páÉ=hçåíê~ëí=ìåÇ=eÉääáÖâÉáí=áã=_áäÇãÉåΩ=ÉáåK= eáäÑÉ=òì=ÇÉå=jÉåΩÉáåëíÉääìåÖÉå=ÑáåÇÉå=páÉ=~ìÑ=pÉáíÉ PNK...
- Page 97 bêëíã~äáÖÉ=sÉêïÉåÇìåÖ=ÇÉë=mêçàÉâíçêë=ãáí=táåÇçïë=VU tÉåå=páÉ=ÉáåÉå=`çãéìíÉê=ìåíÉê=táåÇçïë=VU=òìã=ÉêëíÉå=j~ä=~å=ÇÉå=mêçàÉâJ íçê=~åëÅÜäáÉ≈ÉåI=ÉêâÉååí=ÇÉê=`çãéìíÉê=ÇÉå=mêçàÉâíçê=~äë=łåÉìÉ=e~êÇï~êÉ I= ìåÇ=ÇÉê=e~êÇï~êÉJ^ëëáëíÉåí=ïáêÇ=ÖÉëí~êíÉíK=_É~ÅÜíÉå=páÉ=ÇáÉ=ÑçäÖÉåÇÉå= ^åïÉáëìåÖÉå=òìê=sÉêïÉåÇìåÖ=ÇÉë=^ëëáëíÉåíÉåI=ìã=ÇÉå=êáÅÜíáÖÉå=qêÉáÄÉê= E~äë=qÉáä=ÇÉë=táåÇçïëJ_ÉíêáÉÄëëóëíÉãë=ÄÉêÉáíë=áåëí~ääáÉêíF=òì=ä~ÇÉåK c~ääë=páÉ=táåÇçïë=OMMM=çÇÉê=táåÇçïë=jb=îÉêïÉåÇÉåI=ΩÄÉêëéêáåÖÉå=páÉ= ÇáÉëÉ=pÅÜêáííÉ=ìåÇ=äÉëÉå=páÉ=áã=^ÄëÅÜåáíí=ł_áäÇÉáåëíÉääìåÖ =~ìÑ=pÉáíÉ NN=ïÉáíÉêK häáÅâÉå=páÉ=~ìÑ=tÉáíÉêI=ìã=ÇáÉ=qêÉáÄÉêëìÅÜÉ=òì=ÄÉÖáååÉåK Ä Ä sÉêÖÉïáëëÉêå=páÉ=ëáÅÜI=Ç~ëë=ÇáÉ=léíáçå=łk~ÅÜ=ÇÉã=ÄÉëíÉå=qêÉáÄÉê= ëìÅÜÉå =~âíáîáÉêí=áëíI=ìåÇ=âäáÅâÉå=páÉ=Ç~åå=~ìÑ=tÉáíÉêK Å Å aÉ~âíáîáÉêÉå=páÉ=~ääÉ=hçåíêçääâ®ëíÅÜÉåI=ìåÇ=âäáÅâÉå=páÉ=Ç~åå=~ìÑ=tÉáíÉêK= táåÇçïë=ÑáåÇÉí=ÇÉå=qêÉáÄÉê=~ìíçã~íáëÅÜK=c~ääë=ÇÉê=qêÉáÄÉê=ÉåíÑÉêåí= ïìêÇÉI=ãΩëëÉå=páÉ=áÜå=îçå=ÇÉê=_ÉíêáÉÄëëóëíÉãJ`a=ÉêåÉìí=ä~ÇÉåK Ç Ç tÉåå=táåÇçïë=ÇÉå=qêÉáÄÉê=ÑáåÇÉíI=â∏ååÉå=páÉ=áÜå=áåëí~ääáÉêÉåK=häáÅâÉå= páÉ=~ìÑ=tÉáíÉêK...
- Page 98 §ÄÉêëéêáåÖÉå=páÉ=ÇáÉëÉ=pÉáíÉI=Ñ~ääë=páÉ=âÉáå=rp_Jj~ìëâ~ÄÉä= ~åÖÉëÅÜäçëëÉå=Ü~ÄÉåK cΩê=táåÇçïë=VUW √ c~ääë=páÉ=Ç~ë=rp_Jh~ÄÉä=~åÖÉëÅÜäçëëÉå=Ü~ÄÉåI=ÉêëÅÜÉáåí=ÇÉê=e~êÇï~êÉJ ^ëëáëíÉåí=ÉêåÉìíK=rã=ÇáÉ=rp_Jcìåâíáçå~äáí®í=åìíòÉå=òì=â∏ååÉåI= ãΩëëÉå=qêÉáÄÉê=áåëí~ääáÉêí=ïÉêÇÉåK= √ aÉê=^ëëáëíÉåí=ïáêÇ=ÇêÉáã~ä=ÖÉëí~êíÉíK= _Éáã=ÉêëíÉå=j~ä=ÑáåÇÉí=Éê=Éáå=âçãÄáåáÉêíÉë=rp_JdÉê®íK= _Éáã=òïÉáíÉå=j~ä=ÑáåÇÉí=Éê=Éáå=rp_JpÅÜåáííëíÉääÉåÖÉê®í=EÑΩê=ÇáÉ= q~ëí~íìêFK= _Éáã=ÇêáííÉå=j~ä=ÑáåÇÉí=Éê=Éáå=rp_JpÅÜåáííëíÉääÉåÖÉê®í=EÑΩê=ÇáÉ=j~ìëFK= cΩê=táåÇçïë=OMMMI=táåÇçïë=jb=ìåÇ=táåÇçïë=umW √ aáÉ=rp_JqêÉáÄÉê=ïÉêÇÉå=~ìíçã~íáëÅÜ=áåëí~ääáÉêíK=...
- Page 99 NSWVJ_áäÇëÅÜáêã QWPJ_áäÇëÅÜáêã páÉ=â∏ååÉå=sáÇÉçêÉâçêÇÉêI=asaJmä~óÉêI=sáÇÉçâ~ãÉê~ëI=ÇáÖáí~äÉ=h~ãÉê~ëI= sáÇÉçëéáÉäÉI=eaqsJbãéÑ®åÖÉê=ìåÇ=cÉêåëÉÜÉãéÑ®åÖÉê=~å=ÇÉå=mêçàÉâíçê= ~åëÅÜäáÉ≈ÉåK=bë=ÖáÄí=~ìÅÜ=ÉáåÉå=^ìÇáçÉáåÖ~åÖK=páÉ=â∏ååÉå=^ìÇáç=ÇáêÉâí=~å= káÅÜí=îÉêïÉåÇÉå QWPJ ÇÉå=mêçàÉâíçê=~åëÅÜäáÉ≈Éå=ìåÇ=ÇáÉ=ÉáåÖÉÄ~ìíÉå=i~ìíëéêÉÅÜÉê=îÉêïÉåÇÉå= jçÇìë çÇÉê=ÇÉå=píÉêÉçÉãéÑ®åÖÉê=îÉêïÉåÇÉåI=ìã=qçå=ΩÄÉê=fÜêÉ=ÉáÖÉåÉå= i~ìíëéêÉÅÜÉê=òì=Ü∏êÉåK páÉ=ëçääíÉå=îçê=ÇÉã=^åëÅÜäìëë=ÇÉë=mêçàÉâíçêë=ÉåíëÅÜÉáÇÉåI=ïÉäÅÜÉ= ^ëéÉâíê~íÉ=páÉ=îÉêïÉåÇÉå=ã∏ÅÜíÉåK=aáÉ=báåëíÉääìåÖ=ÇÉê=^ëéÉâíê~íÉ=ÑΩê=ÇÉå= mêçàÉâíçê=áëí=ΩÄÉê=Ç~ë=mêçàÉâíçêãÉåΩ=ÉêêÉáÅÜÄ~êK=tÉáíÉêÉ=fåÑçêã~íáçåÉå= ÑáåÇÉå=páÉ=~ìÑ=pÉáíÉ PNK aáÉ=^ëéÉâíê~íÉ=áëí=Ç~ë=sÉêÜ®äíåáë=îçå=_áäÇÄêÉáíÉ=òì=_áäÇÜ∏ÜÉK= cÉêåëÉÜÄáäÇëÅÜáêãÉ=îÉêïÉåÇÉå=áå=ÇÉê=oÉÖÉä=QWPI=ÇáÉ=pí~åÇ~êÇÉáåëíÉääìåÖ= ÇÉë=mêçàÉâíçêëK=eaqs=ìåÇ=ÇáÉ=ãÉáëíÉå=asaë=îÉêïÉåÇÉå=NSWVK=c~ääë=páÉ=~ìÑ= NSWVJ ÉáåÉå=_áäÇëÅÜáêã=éêçàáòáÉêÉåI=åÉÜãÉå=cçêã=ìåÇ=dê∏≈É=ÇÉë=_áäÇëÅÜáêã= jçÇìë fÜåÉå=ÇáÉ=båíëÅÜÉáÇìåÖ=~ÄK=_Éá=ÇÉê=mêçàÉâíáçå=~ìÑ=ÉáåÉ=äÉÉêÉ=t~åÇ= ìåíÉêäáÉÖí=ÇáÉ=_áäÇëÅÜáêãÖê∏≈É=ÇáÉëÉå=báåëÅÜê®åâìåÖÉå=åáÅÜíK=a~ë= éêçàáòáÉêíÉ=_áäÇ=Ü~í=ÉÄÉåÑ~ääë=báåÑäìëë=~ìÑ=ÇáÉ=^ìëï~Üä=îçå=QWP=çÇÉê=NSWVK=aáÉ= ãÉáëíÉå=êÉÖìä®êÉå=cÉêåëÉÜÉê=îÉêïÉåÇÉå=QWPI=háåçÑáäãÉ=îÉêïÉåÇÉå=NSWVK tÉåå=páÉ=ÉáåÉå=NSWVJ_áäÇëÅÜáêã=Ü~ÄÉåI=ëçääíÉå=páÉ=ÉáåÉ=^ëéÉâíê~íÉ=îçå=NSWV= ÑΩê=~å~ãçêéÜçíáëÅÜÉ=cáäãÉ=çÇÉê=eaqs=îÉêïÉåÇÉå=ìåÇ=k~íáîÉ=ÑΩê=QWPJ fåÜ~äíK==tÉåå=páÉ=ÉáåÉå=QWPJ_áäÇëÅÜáêã=Ü~ÄÉåI=ëçääíÉå=páÉ=å~ÅÜ=ïáÉ=îçê=NSWV= ÑΩê=~å~ãçêéÜçíáëÅÜÉ=cáäãÉ=çÇÉê=eaqs=îÉêïÉåÇÉåI=ÇçÅÜ=páÉ=â∏ååÉå=~ìÅÜ= ÉåíïÉÇÉê=QWP=Eìã=ÇÉå=_áäÇëÅÜáêã=òì=ÑΩääÉåF=çÇÉê=k~íáîÉ=EÑΩê=aáêÉÅí=máñÉä= j~ééáåÖF=ÑΩê=QWPJfåÜ~äí=îÉêïÉåÇÉåK==_É~ÅÜíÉå=páÉI=Ç~ëë=~å~ãçêéÜçíáëÅÜÉ= k~íáîÉJjçÇìë= cáäãÉ=åìê=Ç~åå=âçêêÉâí=ÉêëÅÜÉáåÉåI=ïÉåå=ÇÉê=asaJmä~óÉê=ÑΩê=ÇáÉ=^ìëÖ~ÄÉ= Eåìê=kqp`F ~ìÑ=Éáå=NSWVJcÉêåëÉÜÖÉê®í=ÉáåÖÉëíÉääí=áëíK= páÉ=â∏ååÉå=ÇÉå=mêçàÉâíçê=~å=ÇáÉ=ãÉáëíÉå=sáÇÉçÖÉê®íÉ=~åëÅÜäáÉ≈ÉåI=ÇáÉ=sáÇÉç= ~ìëÖÉÄÉå=â∏ååÉåK=bë=áëí=åáÅÜí=ã∏ÖäáÅÜI=Ç~ë=hç~ñá~äâ~ÄÉä=ÇÉê=h~ÄÉäJ=çÇÉê= p~íÉääáíÉåÑáêã~=ÇáêÉâí=~åòìëÅÜäáÉ≈ÉåK=a~ë=páÖå~ä=ãìëë=ÇìêÅÜ=ÉáåÉå=qìåÉê= ÖÉÑΩÜêí=ïÉêÇÉåK=j∏ÖäáÅÜÉ=qìåÉê=ëáåÇ=ÄÉáëéáÉäëïÉáëÉ=h~ÄÉäíìåÉêI= sáÇÉçêÉâçêÇÉêI=ÇáÖáí~äÉ=sáÇÉçêÉâçêÇÉê=ìåÇ=p~íÉääáíÉåJcÉêåëÉÜÉãéÑ®åÖÉêK= mê~âíáëÅÜ=àÉÇÉë=dÉê®íI=Ç~ë=h~å®äÉ=®åÇÉêå=â~ååI=áëí=Éáå=qìåÉêK...
- Page 100 `çãéçëáíÉ=sáÇÉçJsÉêÄáåÇìåÖÉå pÅÜäáÉ≈Éå=páÉ=ÇÉå=ÖÉäÄÉå=píÉÅâÉê=ÇÉë=sáÇÉçâ~ÄÉäë=EåáÅÜí=ÉåíÜ~äíÉåF=~å=ÇÉå= sáÇÉçJ=ìåÇ=^ìÇáçâ~ÄÉä=~åëÅÜäáÉ≈Éå= sáÇÉç~ìëÖ~åÖ=ÇÉë=sáÇÉçÖÉê®íÉë=~åK=píÉÅâÉå=páÉ=ÇÉå=~åÇÉêÉå=ÖÉäÄÉå=píÉÅâÉê=áå= EΩÄÉê=ÇÉå=^ìÇáç~Ç~éíÉêF ÇÉå=sáÇÉç=få=ÇÉë mêçàÉâíçêëK=pÅÜäáÉ≈Éå=páÉ=ÇÉå=ïÉá≈Éå=píÉÅâÉê=ÇÉë=áã=iáÉÑÉêJ ìãÑ~åÖ=ÉåíÜ~äíÉåÉå=^ìÇáç~Ç~éíÉêë=~å=ÇÉå=äáåâÉå=^ìÇáç~ìëÖ~åÖ=ÇÉë=sáÇÉçíJ Éê®íÉë=ìåÇ=ÇÉå=êçíÉå=píÉÅâÉê=ÇÉë=^Ç~éíÉêë=~å=ÇÉå=êÉÅÜíÉå=^ìÇáç~ìëÖ~åÖ=ÇÉë= sáÇÉçÖÉê®íÉë=~åK=píÉÅâÉå=páÉ=Ç~ë=ãáíÖÉäáÉÑÉêíÉ=^ìÇáçâ~ÄäÉ=áå=ÇÉå=ëÅÜï~êòÉå= píÉÅâÉê=ÇÉë=^ìÇáç~Ç~éíÉêëK=sÉêÄáåÇÉå=páÉ=Ç~ë=~åÇÉêÉ=båÇÉ=ÇÉë=^ìÇáçâ~ÄÉäë= ãáí=ÇÉã=Ää~ìÉå=^ìÇáç=få=ÇÉë=mêçàÉâíçêëK= aÉåâÉå=páÉ=Çê~åI=Ç~ëë=ÇáÉ=sáÇÉçèì~äáí®í=îçå=`çãéçëáíÉJsÉêÄáåÇìåÖÉå= ïÉåáÖÉê=Öìí=áëí=~äë=pJsáÇÉçJ=çÇÉê=hçãéçåÉåíJsÉêÄáåÇìåÖÉåK pJsáÇÉçîÉêÄáåÇìåÖ c~ääë=Ç~ë=sáÇÉçÖÉê®í=ÉáåÉå=êìåÇÉå=pJsáÇÉçJpíÉÅâÉê=ãáí=îáÉê=píáÑíÉå= îÉêïÉåÇÉíI=îÉêÄáåÇÉå=páÉ=Éáå=pJsáÇÉçâ~ÄÉä=ãáí=ÇÉã= pJsáÇÉç~åëÅÜäìëë=ÇÉë=sáÇÉçÖÉê®íë=ìåÇ=ÇÉã=pJsáÇÉç=~ã=mêçàÉâíçêK= sÉêïÉåÇÉå=páÉ=Ç~ë=^ìÇáçâ~ÄÉä=ìåÇ=ÇÉå=^ìÇáç~Ç~éíÉê=ïáÉ=çÄÉå= pJsáÇÉçJ=ìåÇ=^ìÇáçâ~ÄÉä=~åëÅÜäáÉ≈Éå= ÄÉëÅÜêáÉÄÉåK EΩÄÉê=ÇÉå=^ìÇáç~Ç~éíÉêF aÉåâÉå=páÉ=Ç~ê~åI=Ç~ëë=pJsáÇÉç=ÉáåÉ=ÄÉëëÉêÉ=nì~äáí®í=äáÉÑÉêí=~äë=`çãéçëáíÉI= ~ÄÉê=åáÅÜí=ëç=Öìí=áëí=ïáÉ=hçãéçåÉåíJsáÇÉçK...
- Page 101 hçãéçåÉåíJsáÇÉçîÉêÄáåÇìåÖ hçãéçåÉåíâ~ÄÉä=ΩÄÉê=hçãéçåÉåíJòìJ c~ääë=Ç~ë=sáÇÉçÖÉê®í=ΩÄÉê=hçãéçåÉåíJpíÉÅâÉê=îÉêÑΩÖíI=îÉêïÉåÇÉå=páÉ=ÇÉå= pJsáÇÉçJ^Ç~éíÉê= hçãéçåÉåíJòìJpJsáÇÉçJ^Ç~éíÉê=çÇÉê=ÇÉå=hçãéçåÉåíJòìJsbp^J^Ç~éíÉê= ìåÇ= EÑΩê=ea=çÇÉê=éêçÖêÉëëáîÉ=nìÉääÉåFK=pÅÜäáÉ≈Éå=páÉ=Ç~ë=hçãéçåÉåíâ~ÄÉä=~å= ^ìÇáçâ~ÄÉä=ΩÄÉê=^ìÇáç~Ç~éíÉê=~åëÅÜäáÉ≈Éå Ç~ë=sáÇÉçÖÉê®í=~åK=sÉêÄáåÇÉå=páÉ=Ç~ë=~åÇÉêÉ=båÇÉ=ÇÉë=hçãéçåÉåíâ~ÄÉäë= ãáí=ÇÉã=^Ç~éíÉê=ìåÇ=ëÅÜäáÉ≈Éå=páÉ=ÇÉå=^Ç~éíÉê=~å=ÇÉå=pJsáÇÉç= EhçãéçåÉåíJòìJpJsáÇÉçJ^Ç~éíÉêF=ÇÉë=mêçàÉâíçêë=çÇÉê=`çãéìíÉê=få= EhçãéçåÉåíJòìJsbp^J^Ç~éíÉêFK=sÉêïÉåÇÉå=páÉ=ÇÉå=^ìÇáç~Ç~éíÉê=ëç=ïáÉ= çÄÉå=ÄÉëÅÜêáÉÄÉåK hçãéçåÉåíJòìJsbp^ hçãéçåÉåíJòìJpJsáÇÉç hçãéçåÉåíJsÉêÄáåÇìåÖÉå=ÄáÉíÉå=ÇáÉ=ÄÉëíÉ=sáÇÉçèì~äáí®íK sd^Jh~ÄÉä=ìåÇ=^ìÇáçâ~ÄÉä sd^JsÉêÄáåÇìåÖ ΩÄÉê=^ìÇáç~Ç~éíÉê= ~åëÅÜäáÉ≈Éå c~ääë=Ç~ë=sáÇÉçÖÉê®í=ÉáåÉå=sd^J^ìëÖ~åÖ=ãáí=NR=píáÑíÉå=ÄÉëáíòíI=ëÅÜäáÉ≈Éå= páÉ=Éáå=båÇÉ=ÇÉë=ãáíÖÉäáÉÑÉêíÉå=`çãéìíÉêâ~ÄÉäë=~å=ÇÉå=sd^JpíÉÅâÉê=ÇÉê= sáÇÉçèìÉääÉ=~åK=aÉê=píÉÅâÉê=áëí=~å=ÇÉê=sáÇÉçèìÉääÉ=ã∏ÖäáÅÜÉêïÉáëÉ=ãáí=łqç= jçåáíçê =ÄÉòÉáÅÜåÉíK=sÉêÄáåÇÉå=páÉ=Ç~ë=~åÇÉêÉ=båÇÉ=ÇÉë=h~ÄÉäë=ãáí=ÇÉã= `çãéìíÉê=få=ÇÉë=mêçàÉâíçêëK sÉêïÉåÇÉå=páÉ=ÇÉå=^ìÇáç~Ç~éíÉê=ëç=ïáÉ=çÄÉå=ÄÉëÅÜêáÉÄÉåK =kÉíòâ~ÄÉä=~åëÅÜäáÉ≈Éå pÅÜäáÉ≈Éå=páÉ=Ç~ë=kÉíòâ~ÄÉä=~å=ÇÉå=mçïÉê=~å=ÇÉê=pÉáíÉ=ÇÉë=mêçàÉâíçêë=ìåÇ= ~å=ÉáåÉ=píÉÅâÇçëÉ=~åK efktbfpW=sÉêïÉåÇÉå=páÉ=ëíÉíë=Ç~ë=ãáí=ÇÉã=mêçàÉâíçê=ÖÉäáÉÑÉêíÉ=kÉíòâ~ÄÉäK=...
- Page 102 iáåëÉå~ÄÇÉÅâìåÖ=ÉåíÑÉêåÉå båíÑÉêåÉå=páÉ=ÇáÉ=iáåëÉå~ÄÇÉÅâìåÖK pÅÜ~äíÉå=páÉ=ÇáÉ=mçïÉê=~å=ÇÉê=pÉáíÉ=ÇÉë=mêçàÉâíçêë=áå=ÇáÉ=mçëáíáçå=łlå K kÉíòí~ëíÉ=ÇêΩÅâÉå aáÉ=ibaJ^åòÉáÖÉ=Ääáåâí=ÖêΩåI=ìåÇ=ÇáÉ=sÉåíáä~íçêÉå=ëí~êíÉåK=tÉåå=ÇáÉ= i~ãéÉ=~ìÑäÉìÅÜíÉíI=ïáêÇ=ÇÉê=pí~êíÄáäÇëÅÜáêã=ÉáåÖÉÄäÉåÇÉíI=ìåÇ=ÇáÉ=iba= äÉìÅÜíÉí=ÖêΩå=~ìÑK=bë=â~åå=ÉáåÉ=jáåìíÉ=Ç~ìÉêåI=Äáë=Ç~ë=_áäÇ=ÇáÉ=îçääÉ= eÉääáÖâÉáí=ÉêêÉáÅÜíK= \=hÉáå=pí~êíÄáäÇëÅÜáêã\=eáäÑÉ=~ìÑ=pÉáíÉ OMK pÅÜäáÉ≈Éå=páÉ=Ç~ë=sáÇÉçÖÉê®í=~åI=ìåÇ=ëÅÜ~äíÉå=páÉ=Éë=ÉáåK sáÇÉçÖÉê®í=ÉáåëÅÜ~äíÉå a~ë=_áäÇ=ÇÉë=sáÇÉçÖÉê®íÉë=ëçääíÉ=~ìÑ=ÇÉã=mêçàÉâíáçåëÄáäÇëÅÜáêã=ÉêëÅÜÉáåÉåK= c~ääë=Ç~ë=åáÅÜí=ÇÉê=c~ää=áëíI=ÇêΩÅâÉå=páÉ=ÇáÉ=sáÇÉçí~ëíÉ=~ìÑ=ÇÉã=q~ëíÉåÑÉäÇK= \=hÉáå=_áäÇ\=eáäÑÉ=~ìÑ=pÉáíÉ OPK _áäÇÉáåëíÉääìåÖ e∏ÜÉ=ÉáåëíÉääÉå píÉääÉå=páÉ=ÇáÉ=e∏ÜÉ=ÇÉë=mêçàÉâíçêë=ÉáåI=áåÇÉã=páÉ=~ìÑ=ÇáÉ=båíëéÉêêìåÖëí~ëíÉ= ÇêΩÅâÉåI=ìã=ÇÉå=cì≈=~ìëòìÑ~ÜêÉåK= ^ìëêáÅÜJ aêÉÜÉå=páÉ=ÖÖÑK=ÇÉå=^ìëêáÅÜíìåÖëÑì≈=~å=ÇÉê=oΩÅâëÉáíÉ=ÇÉë=mêçàÉâíçêëK= íìåÖëÑì≈ eÉÄÉJ Ñì≈ ÇêÉÜÉå båíëéÉêêìåÖëí~ëíÉ píÉääÉå=páÉ=ÇÉå=mêçàÉâíçê=áå=ÇÉê=ÖÉïΩåëÅÜíÉå=båíÑÉêåìåÖ=áå=ÉáåÉã=táåâÉä= båíÑÉêåìåÖ=ÉáåëíÉääÉå îçå=VM=dê~Ç=òìã=_áäÇëÅÜáêã=~ìÑK= báåÉ=q~ÄÉääÉ=ãáí=ÇÉå=_áäÇëÅÜáêãÖê∏≈Éå=ìåÇ=båíÑÉêåìåÖÉå=òìã=_áäÇëÅÜáêã= ÑáåÇÉå=páÉ=~ìÑ=pÉáíÉ QNK...
- Page 103 píÉääÉå=páÉ=wççã=ìåÇ=cçâìë=ÉáåK wççã=ìåÇ=cçâìë=ÉáåëíÉääÉå cçâìë EÇΩååÉê=oáåÖF wççã EÇáÅâÉê=oáåÖF c~ääë=Ç~ë=_áäÇ=åáÅÜí=èì~Çê~íáëÅÜ=áëíI=îÉêïÉåÇÉå=páÉ=ÇáÉ=q~ëíÉå=~ìÑ=ÇÉã= hÉóëíçåÉ=ÉáåëíÉääÉå q~ëíÉåÑÉäÇ=òìê=hÉóëíçåÉJbáåëíÉääìåÖK=aêΩÅâÉå=páÉ=~ìÑ=ÇáÉ=çÄÉêÉ=hÉóëíçåÉJ q~ëíÉI=ìã=ÇÉå=çÄÉêÉå=qÉáä=ÇÉë=_áäÇë=òì=êÉÇìòáÉêÉå=ÄòïK=~ìÑ=ÇáÉ=ìåíÉêÉ= hÉóëíçåÉJq~ëíÉI=ìã=ÇÉå=ìåíÉêÉå=qÉáä=òì=êÉÇìòáÉêÉåK píÉääÉå=páÉ=ÇáÉ=i~ìíëí®êâÉ=~ìÑ=ÇÉã=q~ëíÉåÑÉäÇ=çÇÉê=ÇÉê=cÉêåÄÉÇáÉåìåÖ=ÉáåK i~ìíëí®êâÉ=ÉáåëíÉääÉå píÉääÉå=páÉ=hçåíê~ëíI=eÉääáÖâÉáíI=c~êÄÉI=c~êÄíçå=çÇÉê=^ëéÉâíê~íÉ=áã= _áäÇãÉåΩçéíáçåÉå=ÉáåëÅÜäáÉ≈äáÅÜ _áäÇãÉåΩ=ÉáåK=eáäÑÉ=òì=ÇÉå=jÉåΩë=ìåÇ=ÇáÉëÉå=báåëíÉääìåÖÉå=ÑáåÇÉå=páÉ=~ìÑ= ÇÉê=^ëéÉâíê~íÉ=ÉáåëíÉääÉå pÉáíÉ PNK _ÉÇÉåâÉå=páÉ=ÄÉá=ÇÉê=báåëíÉääìåÖ=ÇÉê=^ëéÉâíê~íÉI=Ç~ëë=asaJmä~óÉê=ÑΩê=ÇáÉ= Ü∏ÅÜëíÉ=_áäÇèì~äáí®í=~ìÑ=NSWV=âçåÑáÖìêáÉêí=ïÉêÇÉå=ãΩëëÉåK=tÉáíÉêÉ= fåÑçêã~íáçåÉå=òìê=^ëéÉâíê~íÉ=ÑáåÇÉå=páÉ=~ìÑ=pÉáíÉ NQK...
- Page 104 aÉê=mêçàÉâíçê=òÉáÖí=~ìíçã~íáëÅÜ=ÉáåÉå=äÉÉêÉå=_áäÇëÅÜáêã=~åI=ïÉåå=ÑΩê=ãÉÜê= c~ääë=Ç~ë=_áäÇ=êáÅÜíáÖ=~ìÑ=ÇÉã=_áäÇëÅÜáêã=ÉêëÅÜÉáåíI=äÉëÉå=páÉ=áã=å®ÅÜëíÉå= ~äë=PM=jáåìíÉå=âÉáåÉ=~âíáîÉ=nìÉääÉ=ÑÉëíÖÉëíÉääí=ïáêÇK=aÉê=äÉÉêÉ=_áäÇëÅÜáêã= ^ÄëÅÜåáíí=ïÉáíÉêK=^åÇÉêåÑ~ääë=ãΩëëÉå=páÉ=ÇáÉ=báåêáÅÜíìåÖ=âçêêáÖáÉêÉåK= îÉêä®åÖÉêí=ÇáÉ=iÉÄÉåëÇ~ìÉê=ÇÉë=mêçàÉâíçêëK=a~ë=_áäÇ=âÉÜêí=òìêΩÅâI=ïÉåå= aáÉ=ibaJ^åòÉáÖÉ=çÄÉå=~ìÑ=ÇÉã=mêçàÉâíçê=òÉáÖí=ÇÉå=mêçàÉâíçêëí~íìë=~å=ìåÇ= ÉáåÉ=~âíáîÉ=nìÉääÉ=ÑÉëíÖÉëíÉääí=çÇÉê=ÉáåÉ=q~ëíÉ=~ìÑ=ÇÉê=cÉêåÄÉÇáÉåìåÖ=çÇÉê= â~åå=ÇáÉ=cÉÜäÉêÄÉÜÉÄìåÖ=ÉêäÉáÅÜíÉêåK= ÇÉã=q~ëíÉåÑÉäÇ=ÖÉÇêΩÅâí=ïáêÇK q~ÄÉääÉ=NW=sÉêÜ~äíÉå=ÇÉê=iba=ìåÇ=_ÉÇÉìíìåÖ _áäÇëÅÜáêãëÅÜìíò tÉåå=páÉ=ÇáÉ=_áäÇëÅÜáêãëÅÜìíòÑìåâíáçå=áã=jÉåΩ=báåëíÉääìåÖÉå[póëíÉã= iba=Ó=c~êÄÉLsÉêÜ~äíÉå _ÉÇÉìíìåÖ ~âíáîáÉêÉåI=ÉêëÅÜÉáåí=ÇÉê=äÉÉêÉ=_áäÇëÅÜáêã=å~ÅÜ=ÉáåÉê=òìîçê=ÑÉëíÖÉäÉÖíÉå= ÖêΩå=~ìÑäÉìÅÜíÉåÇ aáÉ=kÉíòí~ëíÉ=ïìêÇÉ=ÖÉÇêΩÅâí=ìåÇ=ÇáÉ= ^åò~Üä=îçå=jáåìíÉåK=páÉÜÉ=pÉáíÉ PQK pçÑíï~êÉ=áåáíá~äáëáÉêíK=aÉê=mêçàÉâíçê=ïìêÇÉ= píêçã=ëé~êÉå ΩÄÉê=ÇáÉ=cÉêåÄÉÇáÉåìåÖ=~ìëÖÉëÅÜ~äíÉíK aÉê=mêçàÉâíçê=îÉêÑΩÖí=ΩÄÉê=ÉáåÉ=píêçãëé~êÑìåâíáçåI=ïÉäÅÜÉ=ÇáÉ=i~ãéÉ= ÖêΩå=ÄäáåâÉåÇ aáÉ=kÉíòí~ëíÉ=ïìêÇÉ=áå=ÇáÉ=píÉääìåÖ=łlå = ~ìíçã~íáëÅÜ=~ìëëÅÜ~äíÉíI=ïÉåå=âÉáåÉ=~âíáîÉ=nìÉääÉ=ÑÉëíÖÉëíÉääí=ïáêÇ=çÇÉê= ÖÉëÅÜ~äíÉí=ìåÇ=ÇáÉ=pçÑíï~êÉ=áåáíá~äáëáÉêíX= OM=jáåìíÉå=ä~åÖ=âÉáåÉ=_ÉÇáÉåìåÖ=ÇÉë=mêçàÉâíçêë=ÇìêÅÜ=ÇÉå=_ÉåìíòÉê= çÇÉê=ÇÉê=mêçàÉâíçê=ïìêÇÉ=~ÄÖÉëÅÜ~äíÉíI= ÉêÑçäÖíK=pí~åÇ~êÇã®≈áÖ=áëí=ÇáÉëÉ=cìåâíáçå=~ìëÖÉëÅÜ~äíÉíK=páÉÜÉ=pÉáíÉ PQK ìåÇ=ÇáÉ=sÉåíáä~íçêÉå=ä~ìÑÉå=åçÅÜI=ìã=ÇáÉ= i~ãéÉ=òì=âΩÜäÉåK ^ìëëÅÜ~äíÉå=ÇÉë=mêçàÉâíçêë páÉ=â∏ååÉå=ÇÉå=mêçàÉâíçê=~ìëëÅÜ~äíÉåI=áåÇÉã=páÉ=ÇáÉ=kÉíòí~ëíÉ=áå=ÇáÉ= êçí=ÄäáåâÉåÇ báå=sÉåíáä~íçê=çÇÉê=ÇáÉ=i~ãéÉ=Ü~í=îÉêë~ÖíK= sÉêÖÉïáëëÉêå=páÉ=ëáÅÜI=Ç~ëë=ÇáÉ=iΩÑíìåÖJ mçëáíáçå=łlÑÑ =ëÅÜ~äíÉåK ë∏ÑÑåìåÖÉå=åáÅÜí=ÄäçÅâáÉêí=ëáåÇ=EëáÉÜÉ= tÉáíÉêÉ=fåÑçêã~íáçåÉå=ÑáåÇÉå=páÉ=~ìÑ= ^ì≈ÉêÇÉã=â∏ååÉå=páÉ=ÇáÉ=kÉòíí~ëíÉ=~ìÑ=ÇÉê=cÉêåÄÉÇáÉåìåÖ=ÇêΩÅâÉåI=ìã=...
- Page 105 mêçÄäÉã i∏ëìåÖ bêÖÉÄåáë kÉíòâ~ÄÉä=~å=ÇÉê=äáåâÉå=pÉáíÉ=ÇÉë= oáÅÜíáÖÉë=_áäÇ hÉáå=pí~êíÄáäÇëÅÜáêã mêçàÉâíçêë=ÉáåëíÉÅâÉå iáåëÉå~ÄÇÉÅâìåÖ=ÉåíÑÉêåÉå kÉíòí~ëíÉ=ÇêΩÅâÉå kÉíòí~ëíÉ=~å=ÇÉê=pÉáíÉ ÇêΩÅâÉå `çãéìíÉêí~ëíÉ=ÇêΩÅâÉå= kìê=ÇÉê=pí~êíÄáäÇëÅÜáêã=ÉêëÅÜÉáåí mêçàáòáÉêíÉë=`çãéìíÉêÄáäÇ bñíÉêåÉå=^åëÅÜäìëë=ÇÉë=i~éíçéë=~âíáîáÉêÉå i~éíçé=åÉì= ëí~êíÉå...
- Page 106 mêçÄäÉã= i∏ëìåÖ bêÖÉÄåáë aêΩÅâÉå=páÉ=ÇáÉ=q~ëíÉ=ł^ìíçJ_áäÇ =~ìÑ=ÇÉã= hÉáå=`çãéìíÉêÄáäÇI=åìê=ÇÉê=qÉñí=łpáÖå~ä=çìí=çÑ= mêçàáòáÉêíÉë=`çãéìíÉêÄáäÇ q~ëíÉåÑÉäÇ ê~åÖÉ =EpáÖå~ä=~ì≈ÉêÜ~äÄ=ÇÉê=oÉáÅÜïÉáíÉF _áäÇïáÉÇÉêÜçäìåÖëê~íÉ=ìåíÉê= łpóëíÉãëíÉìÉêìåÖ=[=^åòÉáÖÉ=[ báåëíÉääìåÖÉå=[=bêïÉáíÉêí[=^Ç~éíÉê ÉáåëíÉääÉå=EÖÉå~ìÉ=mçëáíáçå=Ü®åÖí=îçã= _ÉíêáÉÄëëóëíÉã=~ÄF j∏ÖäáÅÜÉêïÉáëÉ=ãΩëëÉå=páÉ=~ìÑ=ÇÉã `çãéìíÉê=ÉáåÉ=~åÇÉêÉ=^ìÑä∏ëìåÖ=ï®ÜäÉå= EëáÉÜÉ=Ç~ë=ÑçäÖÉåÇÉ=mêçÄäÉã= ł_áäÇ=ìåëÅÜ~êÑ=çÇÉê=~ÄÖÉëÅÜåáííÉå F...
- Page 107 mêçÄäÉã= i∏ëìåÖ bêÖÉÄåáë píÉääÉå=páÉ=ÇáÉ=^åòÉáÖÉ~ìÑä∏ëìåÖ=ÇÉë= _áäÇ=ìåëÅÜ~êÑ=çÇÉê=~ÄÖÉëÅÜåáííÉå= _áäÇ=áëí=ëÅÜ~êÑ=ìåÇ=åáÅÜí=~ÄÖÉëÅÜåáííÉå `çãéìíÉêë=~ìÑ=ÇáÉ=^ìÑä∏ëìåÖ=ÇÉë=mêçàÉâíçê= Éáå=Epí~êí [=báåëíÉääìåÖÉå=[=póëíÉãëíÉìÉêìåÖ= [=^åòÉáÖÉ [=oÉÖáëíÉêâ~êíÉ=łbáåëíÉääìåÖÉå FK t®ÜäÉå=páÉ=UMMñSMM ^ìÑ=ÉáåÉã=i~éíçé ÇÉå=i~éíçéJ jçåáíçê=~ìëJ ëÅÜ~äíÉå=çÇÉê aì~äJ^åòÉáÖÉ= ~âíáîáÉêÉå _áäÇ=áëí=åáÅÜí=~ìÑ=ÇÉã=_áäÇëÅÜáêã=òÉåíêáÉêí sÉêëÅÜáÉÄÉå=páÉ=ÇÉå=mêçàÉâíçêX=ëíÉääÉå=páÉ= oáÅÜíáÖÉë=_áäÇ wççã=ìåÇ=e∏ÜÉ=Éáå píÉääÉå=páÉ=ÇáÉ=Üçêáòçåí~äÉ çÇÉê=îÉêíáâ~äÉ=mçëáíáçå=áã= jÉåΩ=ł_áäÇ=[=bêïÉáíÉêí Éáå...
- Page 108 mêçÄäÉã= i∏ëìåÖ bêÖÉÄåáë píÉääÉå=páÉ=hÉóëíçåÉ=~ìÑ=ÇÉã=q~ëíÉåÑÉäÇ=ÉáåK _áäÇ=åáÅÜí=èì~Çê~íáëÅÜ nì~Çê~íáëÅÜÉë=_áäÇ oáÅÜíáÖÉë=_áäÇ råëÅÜ~êÑÉë=_áäÇ píÉääÉå=páÉ=ÇáÉ=pÅÜ®êÑÉ=Eåìê=sáÇÉçèìÉääÉåF= áã=jÉåΩ=ł_áäÇ=[=bêïÉáíÉêí =ÉáåK ûåÇÉêå=páÉ=ÇáÉ=^ëéÉâíê~íÉ=áã=jÉåΩ=ł_áäÇ=[= _áäÇ=é~ëëí=åáÅÜí=áã=_áäÇëÅÜáêãÑçêã~í=QWP=çÇÉê=NSWV oáÅÜíáÖÉë=_áäÇ ^ëéÉâíê~íÉ =~ìÑ=QWP=çÇÉê=NSWVK...
- Page 109 mêçÄäÉã= i∏ëìåÖ bêÖÉÄåáë aÉ~âíáîáÉêÉå=páÉ=ÇáÉ=léíáçå=łaÉÅâÉåãçåJ _áäÇ=ëíÉÜí=~ìÑ=ÇÉã=hçéÑ oáÅÜíáÖÉë=_áäÇ í~ÖÉ =áã=jÉåΩ=łbáåëíÉääìåÖÉå=[=póëíÉã K aÉ~âíáîáÉêÉå=páÉ=ÇáÉ=léíáçå=łeáåíÉå =áã= a~ë=_áäÇ=áëí=ëéáÉÖÉäîÉêâÉÜêí oáÅÜíáÖÉë=_áäÇ jÉåΩ=báåëíÉääìåÖÉå=[=póëíÉã K píÉääÉå=páÉ=c~êÄÉI=c~êÄíçåI=c~êÄíÉãéÉê~íìêI= aáÉ=éêçàáòáÉêíÉå=c~êÄÉå=ëíáããÉå=åáÅÜí=ãáí=ÇÉê= oáÅÜíáÖÉë=_áäÇ nìÉääÉ=ΩÄÉêÉáåK eÉääáÖâÉáí=ìåÇ=hçåíê~ëí=ÉáåK COLOR COLOR...
- Page 110 mêçÄäÉã= i∏ëìåÖ bêÖÉÄåáë sÉêÖÉïáëëÉêå=páÉ=ëáÅÜI=Ç~ëë=ÇáÉ=iΩÑíìåÖë∏ÑÑJ aáÉ=i~ãéÉ=ÖÉÜí=~å aáÉ=i~ãéÉ=äÉìÅÜíÉí=åáÅÜí=~ìÑI=ÇáÉ=ibaJ^åòÉáÖÉ= åìåÖÉå=åáÅÜí=ÄäçÅâáÉêí=ëáåÇK=pÅÜ~äíÉå=páÉ= Ääáåâí=êçí ÇÉå=mêçàÉâíçê=~ìë=ìåÇ=ä~ëëÉå=páÉ=áÜå=ÉáåÉ= jáåìíÉ=ä~åÖ=~ìëâΩÜäÉåK _Éáã=pí~êí=ÉêëÅÜÉáåí=ÇáÉ=jÉäÇìåÖ=ł`Ü~åÖÉ=ä~ãé = tÉåå=ÇáÉ=i~ãéÉ=òïáëÅÜÉå=PMMM=ìåÇ=QMMM= aáÉ=i~ãéÉ=ÖÉÜí=~å çÇÉê=ÇáÉ=i~ãéÉ=äÉìÅÜíÉí=åáÅÜí=~ìÑ=ìåÇ=ÇáÉ=ibaJ _ÉíêáÉÄëëíìåÇÉå=~ìÑïÉáëíI=ãìëë=ëáÉ=ÉêëÉíòí= ïÉêÇÉå=EëáÉÜÉ=pÉáíÉ PTFK ^åòÉáÖÉ=Ääáåâí=êçí= _ÉíêáÉÄëëíìåÇÉå=ÇÉê= i~ãéÉ=ΩÄÉêéêΩÑÉåW e~ìéíãÉåΩ=[=fåÑç= tÉÅÜëÉäå=páÉ= ÇáÉ=i~ãéÉ=~ìëK...
- Page 111 sÉêïÉåÇÉå=ÇÉê=cÉêåÄÉÇáÉåìåÖ ã∏ÖäáÅÜÉêïÉáëÉ=ÇÉê=e~êÇï~êÉJ^ëëáëíÉåíK=báåòÉäÜÉáíÉå=òìã=i~ÇÉå=ÇÉê= êáÅÜíáÖÉå=rp_JqêÉáÄÉê=ÑáåÇÉå=páÉ=~ìÑ=pÉáíÉ=NP aáÉ=cÉêåÄÉÇáÉåìåÖ=îÉêïÉåÇÉí=òïÉá=EOF=áã=iáÉÑÉêìãÑ~åÖ=ÉåíÜ~äíÉåÉ= _~ííÉêáÉå=îçã=qóé=^^K=páÉ=â∏ååÉå=ÉáåÑ~ÅÜ=ÉáåÖÉëÉíòí=ïÉêÇÉåK=båíÑÉêåÉå= páÉ=Ç~òì=ÇáÉ=ÜáåíÉêÉ=^ÄÇÉÅâìåÖ=ÇÉê=cÉêåÄÉÇáÉåìåÖI=êáÅÜíÉå=páÉ=ÇáÉ=mäìëJ= ìåÇ=jáåìëéçäÉ=ÇÉê=_~ííÉêáÉå=~ìëI=ìåÇ=ëÅÜáÉÄÉå=páÉ=ëáÉ=~å=áÜêÉå=mä~íòK= _êáåÖÉå=páÉ=ÇáÉ=^ÄÇÉÅâìåÖ=Ç~åå=ïáÉÇÉê=~åK W=_Éáã=bêëÉíòÉå=ÇÉê=_~ííÉêáÉå=Ç~ê~ìÑ=~ÅÜíÉåI=åìê=ÇáÉ=_~ííÉêáÉëçêíÉ= òì=îÉêïÉåÇÉåI=ÇáÉ=ãáí=ÇÉã=mêçàÉâíçê=ÖÉäáÉÑÉêí=ïìêÇÉK=^åÇÉêåÑ~ääë=â~åå=ÇáÉ= cÉêåÄÉÇáÉåìåÖ=ëÅÜïÉê=ÄÉëÅÜ®ÇáÖí=ïÉêÇÉåK=aáÉ=_~ííÉêáÉå=ìãïÉäíÖÉêÉÅÜí= ÉåíëçêÖÉåK=rã=ÇáÉ=cÉêåÄÉÇáÉåìåÖ=òì=îÉêïÉåÇÉåI=êáÅÜíÉå=páÉ=ëáÉ=~ìÑ=ÇÉå= mêçàÉâíáçåëÄáäÇëÅÜáêã=çÇÉê=~ìÑ=ÇÉå=mêçàÉâíçê=EåáÅÜí=~ìÑ=ÇÉå=`çãéìíÉêFK=aáÉ= çéíáã~äÉ=_ÉíêáÉÄëÉåíÑÉêåìåÖ=ÄÉíê®Öí=ìåÖÉÑ®Üê=QIR=ãK tÉåå=páÉ=ÇáÉ= =~ìÑ=ÇÉê=cÉêåÄÉÇáÉåìåÖ=ÇêΩÅâÉåI=ïÉåå=ëáÅÜ=ÇáÉ= kÉíòí~ëíÉ=ÇÉë=mêçàÉâíçêë=áå=ÇÉê=mçëáíáçå=łlÑÑ =ÄÉÑáåÇÉíI=ïáêÇ=ÇÉê=mêçàÉâíçê= åáÅÜí=ÖÉëí~êíÉíK=páÉ=ãΩëëÉå=ÇáÉ=kÉíòí~ëíÉ=ÇÉë=mêçàÉâíçêë=~ìÑ=łlå =ëÅÜ~äíÉåI= ìã=ÇÉå=mêçàÉâíçê=ãáí=ÇÉê=cÉêåÄÉÇáÉåìåÖ=~âíáîáÉêÉå=òì=â∏ååÉåK tÉåå=ÇÉê=mêçàÉâíçê=ä®ìÑíI=â∏ååÉå=páÉ=ÇáÉ=kÉíòí~ëíÉ=ÇÉê=cÉêåÄÉÇáÉåìåÖ= √ sÉêÖÉïáëëÉêå=páÉ=ëáÅÜI=Ç~ëë=ÇáÉ=_~ííÉêáÉå=êáÅÜíáÖ=áåëí~ääáÉêí=ìåÇ=åáÅÜí= îÉêïÉåÇÉåI=ìã=ÇÉå=mêçàÉâíçê=~ÄòìëÅÜ~äíÉå=E^ÄëÅÜ~äíáåÑçêã~íáçåÉå=ÑáåÇÉå= äÉÉê=ëáåÇK páÉ=~ìÑ=pÉáíÉ NVFK √ sÉêÖÉïáëëÉêå=páÉ=ëáÅÜI=Ç~ëë=ÇáÉ=cÉêåÄÉÇáÉåìåÖ=~ìÑ=ÇÉå=mêçàÉâíçê=çÇÉê= aêΩÅâÉå=páÉ=ÇáÉ=q~ëíÉ= =~ìÑ=ÇÉê=cÉêåÄÉÇáÉåìåÖI=ìã=Ç~ë=jÉåΩëóëíÉã=ÇÉë= ÇÉå=_áäÇëÅÜáêã=ìåÇ=åáÅÜí=~ìÑ=ÇÉå=`çãéìíÉê=ÖÉêáÅÜíÉí=áëí=ìåÇ=ëáÅÜ= mêçàÉâíçêë=òì=∏ÑÑåÉåK=páÉ=â∏ååÉå=ãáíÜáäÑÉ=ÇÉê=mÑÉáäí~ëíÉå=å~îáÖáÉêÉå=ìåÇ=ÇáÉ= áååÉêÜ~äÄ=ÇÉê=_ÉíêáÉÄëêÉáÅÜïÉáíÉ=îçå=QIR=ã=ÄÉÑáåÇÉíK q~ëíÉ=ł =ÇêΩÅâÉåI=ìã=cìåâíáçåÉå=~ìëòìï®ÜäÉå=çÇÉê=jÉåΩÉáåëíÉääìåÖÉå= √ tÉåå=páÉ=Ç~ë=sçêêΩÅâÉå=îçå=mçïÉêmçáåíJaá~ë=îçêëÉÜÉåI=ãΩëëÉå=páÉ= òì=®åÇÉêåK=tÉáíÉêÉ=fåÑçêã~íáçåÉå=ΩÄÉê=ÇáÉ=jÉåΩë=ÑáåÇÉå=páÉ=~ìÑ=pÉáíÉ PMK ëáÅÜÉêëíÉääÉåI=Ç~ëë=Ç~ë=rp_Jh~ÄÉä=~åÖÉëÅÜäçëëÉå=áëíK=píÉääÉå=páÉ=ÄÉá= sÉêïÉåÇìåÖ=ÉáåÉë=rp_Jh~ÄÉäë=ëáÅÜÉêI=Ç~ëë=ÇáÉ=êáÅÜíáÖÉå=qêÉáÄÉê= aáÉ=cÉêåÄÉÇáÉåìåÖ=îÉêÑΩÖí=~ìÅÜ=ΩÄÉê=q~ëíÉå=òìã=...
- Page 112 rã=ÇáÉ=i~ìíëéêÉÅÜÉê=ÇÉë=mêçàÉâíçêë=òì=îÉêïÉåÇÉåI=ëÅÜäáÉ≈Éå=páÉ=ÇáÉ=nìÉääÉ= ^ìÇáçâ~ÄÉä=~åëÅÜäáÉ≈Éå ~å=ÇÉå=^ìÇáç=få=ÇÉë=mêçàÉâíçêë=~åK=báåòÉäÜÉáíÉå=òìê=sÉêïÉåÇìåÖ=ÇÉë= ^ìÇáç~Ç~éíÉêë=ÑáåÇÉå=páÉ=~ìÑ=pÉáíÉ NRK aêΩÅâÉå=páÉ=ÇáÉ=q~ëíÉ=sçäìãÉ=~ìÑ=ÇÉã=q~ëíÉåÑÉäÇ=çÇÉê=ÇÉê=cÉêåÄÉÇáÉåìåÖ= òìê=báåëíÉääìåÖ=ÇÉê=i~ìíëí®êâÉK rã=ÇÉå=qçå=~ÄòìëÅÜ~äíÉåI=ÇêΩÅâÉå=páÉ=ÇáÉ=q~ëíÉ=jìíÉ=~ìÑ=ÇÉê= cÉêåÄÉÇáÉåìåÖK= cÉÜäÉêÄÉÜÉÄìåÖ=ÑΩê=^ìÇáç c~ääë=âÉáå=qçå=òì=Ü∏êÉå=áëíI=ΩÄÉêéêΩÑÉå=páÉ=ÑçäÖÉåÇÉëW i~ìíëí®êâÉ=ÉáåëíÉääÉå √ sÉêÖÉïáëëÉêå=páÉ=ëáÅÜI=Ç~ëë=Ç~ë=^ìÇáçâ~ÄÉä=~åÖÉëÅÜäçëëÉå=áëíK √ sÉêÖÉïáëëÉêå=páÉ=ëáÅÜI=Ç~ëë=ÇÉê=qçå=åáÅÜí=~ÄÖÉëÅÜ~äíÉí=áëí=EÇêΩÅâÉå=páÉ= ÇáÉ=q~ëíÉ=jìíÉ=~ìÑ=ÇÉê=cÉêåÄÉÇáÉåìåÖFK= √ sÉêÖÉïáëëÉêå=páÉ=ëáÅÜI=Ç~ëë=ÇáÉ=i~ìíëí®êâÉ=ÜçÅÜ=ÖÉåìÖ=ÉáåÖÉëíÉääí=áëíK= aêΩÅâÉå=páÉ=ÇáÉ=sçäìãÉ=~ìÑ=ÇÉã=q~ëíÉåÑÉäÇ=çÇÉê=~ìÑ=ÇÉê= cÉêåÄÉÇáÉåìåÖK √ sÉêÖÉïáëëÉêå=páÉ=ëáÅÜI=Ç~ëë=ÇáÉ=êáÅÜíáÖÉ=nìÉääÉ=~âíáîáÉêí=áëíK √ píÉääÉå=páÉ=ÇáÉ=^ìÇáçèìÉääÉ=ÉáåK √ tÉåå=Éáå=sáÇÉç=~ÄÖÉëéáÉäí=ïáêÇI=îÉêÖÉïáëëÉêå=páÉ=ëáÅÜI=Ç~ëë=ÇáÉ= táÉÇÉêÖ~ÄÉ=åáÅÜí=~åÖÉÜ~äíÉå=ïìêÇÉK aáÉ=ãÉáëíÉå=q~ëíÉå=ïÉêÇÉå=áå=~åÇÉêÉå=^ÄëÅÜåáííÉå=ÇÉí~áääáÉêí=ÄÉëÅÜêáÉÄÉåK= bë=ÑçäÖí=ÉáåÉ=âìêòÉ=cìåâíáçåëΩÄÉêëáÅÜíW jÉåì=Ó=£ÑÑåÉí=ÇáÉ=_áäÇëÅÜáêããÉåΩë=EpÉáíÉ PMFK pÉäÉÅí=Ó=_Éëí®íáÖí=ÇáÉ=jÉåΩ~ìëï~Üä=EpÉáíÉ PMFK jÉåΩå~îáÖ~íáçåëJ í~ëíÉå mÑÉáäí~ëíÉå=Ó=k~îáÖ~íáçå=ÇìêÅÜ=ÇáÉ=jÉåΩë=ìåÇ=sçêåÉÜãÉå=îçå= báåëíÉääìåÖÉå=EpÉáíÉ PMFK ^ìíç=fã~ÖÉ=Ó=pÉíòí=ÇÉå=mêçàÉâíçê=~ìÑ=ÇáÉ=nìÉääÉ=òìêΩÅâK mêÉëÉíë=Ó=aìêÅÜä®ìÑí=ÇáÉ=îÉêÑΩÖÄ~êÉå=sçêÉáåëíÉääìåÖÉå=EpÉáíÉ...
- Page 113 jÉÜêÉêÉ=îÉêÑΩÖÄ~êÉ=cìåâíáçåÉå=ÉêäÉáÅÜíÉå=ÇáÉ=mê®ëÉåí~íáçåÉåK=bë=ÑçäÖí=Éáå= tÉåå=ÇÉê=`çãéìíÉê=êáÅÜíáÖ=~åÖÉëÅÜäçëëÉå=áëí=ìåÇ=Ç~ë=`çãéìíÉêÄáäÇ=~ìÑ= §ÄÉêÄäáÅâK=báåòÉäÜÉáíÉå=ÑáåÇÉå=páÉ=áå=ÇÉå=jÉåΩ~ÄëÅÜåáííÉåK ÇÉã=_áäÇëÅÜáêã=~åÖÉòÉáÖí=ïáêÇI=â∏ååÉå=páÉ=Ç~ë=_áäÇ=ãáíÜáäÑÉ=ÇÉê= _áäÇëÅÜáêããÉåΩë=çéíáãáÉêÉåK=^ääÖÉãÉáåÉ=fåÑçêã~íáçåÉå=òìê=sÉêïÉåÇìåÖ= √ páÉ=â∏ååÉå=ÇÉê=bÑÑÉâí~ëíÉ=~ìÑ=ÇÉê=cÉêåÄÉÇáÉåìåÖ=ãÉÜêÉêÉ=cìåâíáçåÉå= ÇÉê=jÉåΩë=ÑáåÇÉå=páÉ=~ìÑ=pÉáíÉ PMK òìïÉáëÉåK=aáÉ=pí~åÇ~êÇÉáåëíÉääìåÖ=áëí=łfåÑç =ìåÇ=òÉáÖí=fåÑçêã~íáçåÉå= ΩÄÉê=ÇÉå=mêçàÉâíçê=ìåÇ=ÇáÉ=~âíìÉääÉ=nìÉääÉ=~åK=páÉ=â∏ååÉå=ìåíÉê=ÇÉå= √ píÉääÉå=páÉ=hÉóëíçåÉI=hçåíê~ëí=ìåÇ=eÉääáÖâÉáí=áã=_áäÇãÉåΩ=Éáå= cìåâíáçåÉå=łiÉÉê I=łpíìãã I=ł^ëéâíê~íÉ I=łnìÉääÉ I=ł^ìíçJ_áäÇ I= EpÉáíÉ PNFK= ł_áäÇ=~åÜ~äíÉå I=łwççã =ìåÇ=łfåÑç =~ìëï®ÜäÉåK=báåòÉäÜÉáíÉå=ÑáåÇÉå= √ ûåÇÉêå=páÉ=ÇáÉ=^ëéÉâíê~íÉK=t®ÜäÉå=páÉ=ÇáÉ=ÑΩê=ÇáÉ=báåÖ~ÄÉèìÉääÉ=~ã= páÉ=~ìÑ=pÉáíÉ PRK=aáÉ=cìåâíáçå=ł_áäÇ=~åÜ~äíÉå =Éêä~ìÄí=fÜåÉåI=Ç~ë= ÄÉëíÉå=ÖÉÉáÖåÉíÉ=léíáçå=EpÉáíÉ PNFK ~åÖÉòÉáÖí=_áäÇ=~åòìÜ~äíÉåK=a~ë=áëí=åΩíòäáÅÜI=ïÉåå=páÉ=ûåÇÉêìåÖÉå=~ã= √ píÉääÉå=páÉ=pÅÜ®êÑÉ=çÇÉê=c~êÄíÉãéÉê~íìê=áã=jÉåΩ=łbêïÉáíÉêí =Éáå= `çãéìíÉê=îçêåÉÜãÉå=ã∏ÅÜíÉåI=çÜåÉ=Ç~ëë=fÜêÉ=wìëÅÜ~ìÉê=ÇáÉëÉ=ëÉÜÉå= EpÉáíÉ PPFK â∏ååÉåK=jáíÜáäÑÉ=ÇÉë=j~ëâÉåÉÑÑÉâíÉë=â∏ååÉå=páÉ=ÉáåÉå=qÉáä=ÇÉë=_áäÇë= ãáí=ÉáåÉã=ëÅÜï~êòÉå=sçêÜ~åÖ=îÉêÇÉÅâÉåK √...
- Page 114 tÉåå=Ç~ë=sáÇÉçÖÉê®í=êáÅÜíáÖ=~åÖÉëÅÜäçëëÉå=áëí=ìåÇ=Ç~ë=_áäÇ=~ìÑ=ÇÉã= páÉ=â∏ååÉå=ÇÉå=mêçàÉâíçê=fÜêÉå=ëéÉòáÉääÉå=^åÑçêÇÉêìåÖÉå=~åé~ëëÉåK= _áäÇëÅÜáêã=~åÖÉòÉáÖí=ïáêÇI=â∏ååÉå=páÉ=Ç~ë=_áäÇ=ãáíÜáäÑÉ=ÇÉê= báåòÉäÜÉáíÉå=ΩÄÉê=ÇáÉëÉ=cìåâíáçåÉå=ÑáåÇÉå=~ìÑ=pÉáíÉ PQ=Äáë=pÉáíÉ PSK _áäÇëÅÜáêããÉåΩë=çéíáãáÉêÉåK=^ääÖÉãÉáåÉ=fåÑçêã~íáçåÉå=òìê=sÉêïÉåÇìåÖ= √ ^âíáîáÉêÉå=ÇÉë=jçÇìë=łeáåíÉå =áã=jÉåΩ=báåëíÉääìåÖÉå[póëíÉã=ÑΩê= ÇÉê=jÉåΩë=ÑáåÇÉå=páÉ=~ìÑ=pÉáíÉ PMK êΩÅâï®êíáÖÉ=mêçàÉâíáçåK √ píÉääÉå=páÉ=hÉóëíçåÉI=hçåíê~ëíI=eÉääáÖâÉáíI=c~êÄÉ=çÇÉê=c~êÄíçå=áã= √ ^âíáîáÉêÉå=ÇÉë=jçÇìë=łaÉÅâÉåÄÉÑÉëíáÖìåÖ =áã=jÉåΩ= _áäÇãÉåΩ=Éáå=EpÉáíÉ PNFK= báåëíÉääìåÖÉå[póëíÉã=ÑΩê=ÉáåÉ=aÉÅâÉåÄÉÑÉëíáÖìåÖK= √ ûåÇÉêå=páÉ=ÇáÉ=^ëéÉâíê~íÉK=t®ÜäÉå=páÉ=ÇáÉ=ÑΩê=ÇáÉ=báåÖ~ÄÉèìÉääÉ=~ã= √ ^ìëï~Üä=ÇÉê=nìÉääÉI=ÇáÉ=ÇÉê=mêçàÉâíçê=å~ÅÜ=ÇÉã=pí~êí=òìÉêëí=~ìÑ=Éáå= ÄÉëíÉå=ÖÉÉáÖåÉíÉ=léíáçå=EpÉáíÉ PNFK ~âíáîÉë=sáÇÉçëáÖå~ä=ΩÄÉêéêΩÑíK= √ aáÉ=bÑÑÉâíí~ëíÉ=ÇÉê=cÉêåÄÉÇáÉåìåÖ=â~åå=ãáí=ãÉÜêÉêÉå=cìåâíáçåÉå= √ ^ìëï~Üä=ÇÉê=cìåâíáçå=ÑΩê=ÇáÉ=bÑÑÉâíí~ëíÉ=~ìÑ=ÇÉê=cÉêåÄÉÇáÉåìåÖK= éêçÖê~ããáÉêí=ïÉêÇÉåK=aáÉ=pí~åÇ~êÇÉáåëíÉääìåÖ=áëí=łfåÑç =ìåÇ=òÉáÖí= √ báåJ=çÇÉê=^ìëëÅÜ~äíÉå=ÇÉê=^åòÉáÖÉãÉäÇìåÖÉå=ÇÉë=mêçàÉâíçêëK fåÑçêã~íáçåÉå=ΩÄÉê=ÇÉå=mêçàÉâíçê=ìåÇ=ÇáÉ=~âíìÉääÉ=nìÉääÉ=~åK=páÉ= √ báåëÅÜ~äíÉå=páÉ=ÇáÉ=píêçãëé~êÑìåâíáçåK= â∏ååÉå=ìåíÉê=ÇÉå=cìåâíáçåÉå=łiÉÉê I=łpíìãã I=ł^ëéÉâíê~íÉ I= łnìÉääÉ...
- Page 115 e~ìéíãÉåΩ k~îáÖ~íáçåëí~ëíÉå= aêΩÅâÉå=páÉ=ÇáÉ=q~ëíÉ=jÉåì=~ìÑ=ÇÉã=q~ëíÉåÑÉäÇ=çÇÉê=ÇÉê=cÉêåÄÉÇáÉåìåÖI= ÇÉã=q~ëíÉåÑÉäÇ ìã=ÇáÉ=jÉåΩë=òì=∏ÑÑåÉåK=EaáÉ=jÉåΩë=ïÉêÇÉå=å~ÅÜ=SM=pÉâìåÇÉå= ~ìíçã~íáëÅÜ=ÖÉëÅÜäçëëÉåI=ïÉåå=âÉáå=q~ëíÉåÇêìÅâ=ÉêÑçäÖíKF=a~ë=e~ìéíãÉåΩ= ïáêÇ=~åÖÉòÉáÖíK=sÉêïÉåÇÉå=páÉ=ÇáÉ=mÑÉáäí~ëíÉåI=ìã=Ç~ë=ÖÉïΩåëÅÜíÉ= råíÉêãÉåΩ=òì=ï®ÜäÉåI=ìåÇ=ÇêΩÅâÉå=páÉ=Ç~åå=~ìÑ=ÇáÉ=q~ëíÉ=pÉäÉÅíK= rã=ÉáåÉ=jÉåΩÉáåëíÉääìåÖ=òì=®åÇÉêåI=ï®ÜäÉå=páÉ=ÇáÉëÉ=~ìëI=ìåÇ=ÇêΩÅâÉå=páÉ= ~ìÑ=pÉäÉÅíK=píÉääÉå=páÉ=ÇÉå=tÉêí=Ç~åå=ãáíÜáäÑÉ=ÇÉê=mÑÉáäí~ëíÉå=ÉáåI=ï®ÜäÉå=páÉ= ÉáåÉ=léíáçå=ΩÄÉê=ÇáÉ=léíáçåëí~ëíÉåI=çÇÉê=ëÅÜ~äíÉå=páÉ=cìåâíáçåÉå=ìåíÉê= sÉêïÉåÇìåÖ=ÇÉê=hçåíêçääâ®ëíÅÜÉå=Éáå=çÇÉê=~ìëK=aêΩÅâÉå=páÉ=~ìÑ=pÉäÉÅíI=ìã= ÇáÉ=ûåÇÉêìåÖÉå=òì=ÄÉëí®íáÖÉåK=sÉêïÉåÇÉå=páÉ=ÇáÉ=mÑÉáäí~ëíÉåI=ìã=òì=ÉáåÉê= ~åÇÉêÉå=báåëíÉääìåÖ=òì=å~îáÖáÉêÉåK=tÉåå=páÉ=ãáí=ÇÉå=báåëíÉääìåÖÉå=ÑÉêíáÖ= báåëíÉääìåÖëJ _áäÇJ ëáåÇI=å~îáÖáÉêÉå=páÉ=òìê=léíáçå=ł_ÉÉåÇÉå I=ìåÇ=ÇêΩÅâÉå=páÉ=pÉäÉÅíI=ìã= ãÉåΩ ãÉåΩ òìã=îçêÜÉêáÖÉå=jÉåΩ=òìêΩÅâòìâÉÜêÉåK=páÉ=â∏ååÉå=àÉÇÉêòÉáí=~ìÑ=jÉåì= mìåâíÉ ÇêΩÅâÉåI=ìã=ÇáÉ=jÉåΩë=òì=ëÅÜäáÉ≈ÉåK= sçê=ÇÉå=jÉåΩå~ãÉå=ïÉêÇÉå=mìåâíÉ=~åÖÉòÉáÖíK=aáÉ=^åò~Üä=ÇÉê=mìåâíÉ= ïÉáëí=~ìÑ=ÇáÉ=jÉåΩÉÄÉåÉ=Üáå=ìåÇ=êÉáÅÜí=îçå=Éáåë=EÇ~ë=e~ìéíãÉåΩF=Äáë=îáÉê= EÇ~ë=íáÉÑëíÉ=råíÉêãÉåΩFK= aáÉ=jÉåΩë=ëáåÇ=å~ÅÜ=kìíòìåÖ=ÖêìééáÉêíW √ a~ë=_áäÇãÉåΩ=ÄáÉíÉí=cìåâíáçåÉå=òìê=_áäÇÉáåëíÉääìåÖK √ a~ë=báåëíÉääìåÖëãÉåΩ=Éêã∏ÖäáÅÜí=ÇáÉ=ûåÇÉêìåÖ=îçå=báåëíÉääìåÖÉåI= ÇáÉ=åáÅÜí=Ü®ìÑáÖ=îÉê®åÇÉêí=ïÉêÇÉåK fåÑçãÉåΩ √ a~ë=jÉåΩ=łfåÑç =òÉáÖí=ëÅÜêÉáÄÖÉëÅÜΩíòíÉ=fåÑçêã~íáçåÉå=ΩÄÉê=ÇÉå= mêçàÉâíçê=ìåÇ=ÇáÉ=nìÉääÉ=~åK= ^ÄÜ®åÖáÖ=Ç~îçåI=ïÉäÅÜÉ=nìÉääÉ=~åÖÉëÅÜäçëëÉå=áëíI=ëáåÇ=ÄÉëíáããíÉ= jÉåΩçéíáçåÉå=ã∏ÖäáÅÜÉêïÉáëÉ=åáÅÜí=ëáÅÜíÄ~ê=çÇÉê=~ìëÖÉÄäÉåÇÉíK= _ÉáëéáÉäëïÉáëÉ=áëí=łpÅÜ®êÑÉ =åìê=ÑΩê=sáÇÉçèìÉääÉå=îÉêÑΩÖÄ~ê=ìåÇ=áëí=åáÅÜí= ëáÅÜíÄ~êI=ïÉåå=ÉáåÉ=`çãéìíÉêèìÉääÉ=~âíáî=áëíK=jÉåΩçéíáçåÉå=ëáåÇ=åìê=Ç~åå= ~ÄÖÉÄäÉåÇÉíI=ïÉåå=ÇáÉ=nìÉääÉ=~ìëÖÉï®Üäí=ïìêÇÉI=~ÄÉê=âÉáå=páÖå~ä= îçêÜ~åÇÉå=áëíK=tÉåå=ÇÉê=mêçàÉâíçê=ÄÉáëéáÉäëïÉáëÉ=~ìÑ=ÉáåÉ=sáÇÉçèìÉääÉ=...
- Page 116 _áäÇãÉåΩ _áäÇãÉåΩ rã=ÇáÉ=ÑçäÖÉåÇÉå=báåëíÉääìåÖÉå=òì=îÉê®åÇÉêåI=ï®ÜäÉå=páÉ=ÇáÉ=báåëíÉääìåÖ= ~ìëI=ìåÇ=ÇêΩÅâÉå=páÉ=~ìÑ=pÉäÉÅíK=ûåÇÉêå=páÉ=ÇáÉ=tÉêíÉ=ãáíÜáäÑÉ=ÇÉê= mÑÉáäí~ëíÉåI=ìåÇ=ÇêΩÅâÉå=páÉ=ÉêåÉìí=~ìÑ=pÉäÉÅíI=ìã=ÇáÉ=ûåÇÉêìåÖÉå=òì= ΩÄÉêåÉÜãÉåK qê~éÉòâçêêÉâíìêW=sÉêíáâ~äÉ=_áäÇÉáåëíÉääìåÖX=ã~ÅÜí=Ç~ë=_áäÇ=èì~Çê~íáëÅÜÉêK= páÉ=â∏ååÉå=hÉóëíçåÉ=~ìÅÜ=ΩÄÉê=Ç~ë=q~ëíÉåÑÉäÇ=ÉáåëíÉääÉåK hçåíê~ëíW=hçåíêçääáÉêí=ÇÉå=råíÉêëÅÜáÉÇ=òïáëÅÜÉå=ÇÉã=ÜÉääëíÉå=ìåÇ= ÇìåâÉäëíÉå=_áäÇÄÉêÉáÅÜ=ìåÇ=®åÇÉêí=ÇáÉ=jÉåÖÉ=îçå=pÅÜï~êò=ìåÇ=tÉá≈=áã= hÉóëíçåÉ=ÉêÜ∏ÜÉå hÉóëíçåÉ=îÉêêáåÖÉêå _áäÇK eÉääáÖâÉáíW=ûåÇÉêí=ÇáÉ=_áäÇáåíÉåëáí®íK c~êÄÉW=ûåÇÉêí=Éáå=sáÇÉçÄáäÇ=îçå=pÅÜï~êòïÉá≈=Äáë=òì=îçääëí®åÇáÖ= ÖÉë®ííáÖíÉå=c~êÄÉåK=aáÉ=c~êÄÉáåëíÉääìåÖ=Öáäí=åìê=ÑΩê=sáÇÉçèìÉääÉåK c~êÄíçåW=ûåÇÉêí=ÇáÉ=êçíJÖêΩå=c~êÄÄ~ä~åÅÉ=îçå=kqp`JsáÇÉçÄáäÇÉêåK=aáÉ= c~êÄíçåÉáåëíÉääìåÖ=Öáäí=åìê=ÑΩê=kqp`JsáÇÉçèìÉääÉåK ^ëéÉâíê~íÉW=aáÉ=^ëéÉâíê~íÉ=áëí=Ç~ë=sÉêÜ®äíåáë=îçå=_áäÇÄêÉáíÉ=òì=_áäÇÜ∏ÜÉK= cÉêåëÉÜÄáäÇëÅÜáêãÉ=îÉêïÉåÇÉå=áå=ÇÉê=oÉÖÉä=QWPK=eaqs=ìåÇ=ÇáÉ=ãÉáëíÉå= asaë=îÉêïÉåÇÉå=NSWVK=aáÉ=pí~åÇ~êÇÉáåëíÉääìåÖ=áëí=QWPK= t®ÜäÉå=páÉ=łk~íáîÉ I=ìã=ÇáÉ=ìåãçÇáÑáòáÉêíÉ=^ìëÖ~ÄÉ=çÜåÉ=ÉáåÉ= dê∏≈Éå®åÇÉêìåÖ=ÇìêÅÜ=ÇÉå=mêçàÉâíçê=~åòìòÉáÖÉåK t®ÜäÉå=páÉ=łNSWV I=ìã=îÉêÄÉëëÉêíÉ=_êÉáíï~åÇJasaë=òì=ÄÉíê~ÅÜíÉåK= ^ëéÉâíê~íÉ tÉáíÉêÉ=fåÑçêã~íáçåÉå=òìê=^ëéÉâíê~íÉ=ÑáåÇÉå=páÉ==~ìÑ=pÉáíÉ NQK...
- Page 117 sçêÉáåëíÉääìåÖÉåW=aáÉ=îçêÜ~åÇÉåÉå=sçêÉáåëíÉääìåÖÉå=çéíáãáÉêÉå=ÇÉå= mêçàÉâíçê=òìê=^åòÉáÖÉ=îçå=`çãéìíÉêJmê®ëÉåí~íáçåÉåI=cçíçÖê~ÑáÉåI= cáäãÄáäÇÉêå=ìåÇ=sáÇÉçÄáäÇÉêåK=cáäãã~íÉêá~ä=ëí~ããí=ìêëéêΩåÖäáÅÜ=îçå= cáäãâ~ãÉê~ëI=ïáÉ=òK_K=Éáå=háåçÑáäãK=sáÇÉçã~íÉêá~ä=ëí~ããí=îçå= sçêÉáåëíÉääìåÖÉå sáÇÉçâ~ãÉê~ëI=òK_K=ÉáåÉ=cÉêåëÉÜëÜçï=çÇÉê=Éáå=péçêíÉêÉáÖåáëK=páÉ=â∏ååÉå= ÇáÉëÉ=sçêÉáåëíÉääìåÖ=~åÑ®åÖäáÅÜ=îÉêïÉåÇÉå=ìåÇ=ëáÉ=ÑΩê=àÉÇÉ=nìÉääÉ=åçÅÜ= ïÉáíÉê=çéíáãáÉêÉåK=fÜêÉ=ÄÉåìíòÉêÇÉÑáåáÉêíÉå=báåëíÉääìåÖÉå=ïÉêÇÉå=~äë=qÉáä= _ÉåìíòÉêJ ÉáåëíÉääìåÖÉå ÇÉê=sçêÉáåëíÉääìåÖÉå=ÑΩê=àÉÇÉ=nìÉääÉ=ÖÉëéÉáÅÜÉêíK=rã=ÇáÉ=ïÉêâëÉáíáÖÉå= ëéÉáÅÜÉêå pí~åÇ~êÇÉáåëíÉääìåÖÉå=ïáÉÇÉêÜÉêòìëíÉääÉåI=ï®ÜäÉå=páÉ= łtÉêâëÉáåëíÉääìåÖÉå =áã=jÉåΩ=báåëíÉääìåÖÉå[pÉêîáÅÉ=EpÉáíÉ PSFK= a~êΩÄÉê=Üáå~ìë=áëí=ÉáåÉ=ÄÉåìíòÉêÇÉÑáåáÉêÄ~êÉ=sçêÉáåëíÉääìåÖ=îÉêÑΩÖÄ~êK=rã= ÉáåÉ=sçêÉáåëíÉääìåÖ=ÑΩê=ÇáÉ=~âíìÉääÉ=nìÉääÉ=ÉáåòìëíÉääÉåI=é~ëëÉå=páÉ=òìÉêëí= Ç~ë=_áäÇ=~åK=t®ÜäÉå=páÉ=Ç~åå==łbáåëíÉääìåÖÉå=ëéÉáÅÜÉêå =áã=jÉåΩ= łsçêÉáåëíÉääìåÖÉå I=ìåÇ=ï®ÜäÉå=páÉ=łg~ K=páÉ=â∏ååÉå=ÇáÉëÉ=báåëíÉääìåÖÉå= ëé®íÉê=ïáÉÇÉêÜÉêëíÉääÉåI=áåÇÉã=páÉ=ÇáÉ=sçêÉáåëíÉääìåÖ=łrëÉê=N =~ìëï®ÜäÉåK=...
- Page 118 a~ë=jÉåΩ=łbêïÉáíÉêí pÅÜ®êÑÉW=Eåìê=sáÇÉçèìÉääÉåF=ûåÇÉêí=ÇáÉ=o~åÇëÅÜ®êÑÉ=ÉáåÉë=sáÇÉçÄáäÇÉëK= jÉåΩ=łbêïÉáíÉêí t®ÜäÉå=páÉ=ÉáåÉ=báåëíÉääìåÖ=ÑΩê=ÇáÉ=pÅÜ®êÑÉK pÅÜ®êÑÉ c~êÄíÉãéÉê~íìêW=ûåÇÉêí=ÇáÉ=fåíÉåëáí®í=ÇÉê=c~êÄÉåK=páÉ=â∏ååÉå=ÉáåÉå= ~ìÑÖÉÑΩÜêíÉå=tÉêí=~ìëï®ÜäÉåK c~êÄíÉãéÉê~íìê c~êÄâçåíêçääÉW=aáÉëÉ=léíáçå=Éêä~ìÄí=áåÇáîáÇìÉääÉ=^åé~ëëìåÖ=ÇÉê=fåíÉåëáí®í= ÑΩê=ÇáÉ=êçíÉåI=ÖêΩåÉå=ìåÇ=Ää~ìÉå=c~êÄÉåK sáÇÉçëí~åÇ~êÇW=tÉåå=ÇáÉ=léíáçå=ł^ìíç =~ìëÖÉï®Üäí=áëíI=îÉêëìÅÜí=ÇÉê= c~êÄâçåíêçääÉ mêçàÉâíçêI=ÇÉå=sáÇÉçëí~åÇ~êÇ=~ìëÖÉÜÉåÇ=îçã=ÉãéÑ~åÖÉåÉå= báåÖ~åÖëëáÖå~ä=~ìíçã~íáëÅÜ=òì=ÄÉëíáããÉåK=EaÉê=sáÇÉçëí~åÇ~êÇJléíáçåÉå= ëáåÇ=ã∏ÖäáÅÜÉêïÉáëÉ=ìåíÉêëÅÜáÉÇäáÅÜI=~ÄÜ®åÖáÖ=Ç~îçåI=áå=ïÉäÅÜÉã=qÉáä=ÇÉê= tÉäí=páÉ=ëáÅÜ=ÄÉÑáåÇÉåKF=tÉåå=ÇÉê=mêçàÉâíçê=ÇÉå=êáÅÜíáÖÉå=pí~åÇ~êÇ=åáÅÜí= ÑÉëíëíÉääÉå=â~ååI=ëÉÜÉå=ÇáÉ=c~êÄÉå=ã∏ÖäáÅÜÉêïÉáëÉ=åáÅÜí=êáÅÜíáÖ=~ìëI=çÇÉê= Ç~ë=_áäÇ=áëí=îÉêòÉêêíK=c~ääë=Ç~ë=ÇÉê=c~ää=áëíI=ÄÉëíáããÉå=páÉ=ÇÉå=sáÇÉçëí~åÇ~êÇ= ã~åìÉääI=áåÇÉã=páÉ=áã=jÉåΩ=łsáÇÉçëí~åÇ~êÇ =ÇáÉ=léíáçå=łkqp` I=łm^i = çÇÉê=łpb`^j =~ìëï®ÜäÉåK lîÉêëÅ~åW=Eåìê=sáÇÉçèìÉääÉåF=båíÑÉêåí=pí∏êìåÖÉå=áã=sáÇÉçÄáäÇK sáÇÉçëí~åÇ~êÇ aáÉ=ÑçäÖÉåÇÉå=îáÉê=EQF=léíáçåÉå=ëáåÇ=åìê=ÑΩê=`çãéìíÉêèìÉääÉå=îÉêÑΩÖÄ~êW= mÜ~ëÉW=píÉääí=ÇáÉ=Üçêáòçåí~äÉ=mÜ~ëÉ=ÉáåÉê=`çãéìíÉêèìÉääÉ=ÉáåK däÉáÅÜä~ìÑW=píÉääí=sÉêíáâ~äJpÅ~å=ÉáåÉê=`çãéìíÉêèìÉääÉ=ÉáåK eçêáòçåí~äÉLsÉêíáâ~äÉ=mçëáíáçåW=píÉääí=ÇáÉ=mçëáíáçå=ÉáåÉê=`çãéìíÉêèìÉääÉ=ÉáåK...
- Page 119 báåëíÉääìåÖëãÉåΩ báåëíÉääìåÖëãÉåΩ ^ìÇáçW=bêä~ìÄí=ÇáÉ=báåëíÉääìåÖ=ÇÉê=i~ìíëí®êâÉ=ÑΩê=ÇÉå=áåíÉêåÉå= i~ìíëéêÉÅÜÉêK=báåëíÉääìåÖÉå=â∏ååÉå=~ìÅÜ=ΩÄÉê=Ç~ë=q~ëíÉåÑÉäÇ=ÇÉë= ^ìÇáç mêçàÉâíçêë=çÇÉê=ÇáÉ=cÉêåÄÉÇáÉåìåÖ=îçêÖÉåçããÉå=ïÉêÇÉåK nìÉääÉåW=aáÉ=pí~êíèìÉääÉ=äÉÖí=ÑÉëíI=ïÉäÅÜÉ=nìÉääÉ=ÇÉê=mêçàÉâíçê=å~ÅÜ=ÇÉã= pí~êí=òìÉêëí=~ìÑ=Éáå=~âíáîÉë=sáÇÉçëáÖå~ä=ΩÄÉêéêΩÑíK=tÉåå=ÇáÉ=léíáçå=^ìíçJ nìÉääÉ=~âíáîáÉêí=áëíI=ëìÅÜí=ÇÉê=mêçàÉâíçê=ÇáÉ=~âíáîÉ=nìÉääÉ=~ìíçã~íáëÅÜ=ìåÇ= ΩÄÉêéêΩÑí=Ç~ÄÉá=òìÉêëí=ÇáÉ=pí~êíèìÉääÉK=aáÉ=îÉêÑΩÖÄ~êÉå=léíáçåÉå=ëáåÇ= nìÉääÉå ł`çãéìíÉê=N =ÑΩê=ÉáåÉ=`çãéìíÉêèìÉääÉ=ëçïáÉ=łsáÇÉç=N =EÑΩê=pJsáÇÉçF=ìåÇ= pí~êíJ łsáÇÉç=O =EÑΩê=`çãéçëáíÉJsáÇÉçF=ÑΩê=sáÇÉçèìÉääÉåK=tÉåå=ÇáÉ=léíáçå=åáÅÜí= èìÉääÉ ~âíáîáÉêí=áëíI=îÉêïÉåÇÉí=ÇÉê=mêçàÉâíçê=ëí~åÇ~êÇã®≈áÖ=ÇáÉ=~äë=pí~êíèìÉääÉ= ~ìëÖÉï®ÜäíÉ=nìÉääÉK=rã=ÉáåÉ=~åÇÉêÉ=nìÉääÉ=~åòìòÉáÖÉåI=ãìëë=ÇáÉëÉ= ã~åìÉää=~ìëÖÉï®Üäí=ïÉêÇÉåI=áåÇÉã=páÉ=ÇáÉ=q~ëíÉ=`çãéìíÉê=çÇÉê=sáÇÉç= ~ìÑ=ÇÉê=cÉêåÄÉÇáÉåìåÖ=çÇÉê=~ìÑ=ÇÉã=q~ëíÉåÑÉäÇ=ÇêΩÅâÉåK póëíÉãW=eáåíÉå=âÉÜêí=Ç~ë=_áäÇ=ìãI=ëçÇ~ëë=páÉ=îçå=ÜáåíÉê=ÉáåÉã= ÇìêÅÜä®ëëáÖÉå=_áäÇëÅÜáêã=éêçàáòáÉêÉå=â∏ååÉåK=aÉÅâÉåãçåí~ÖÉ=ëíÉääí=Ç~ë= _áäÇ=~ìÑ=ÇÉå=hçéÑI=ëçÇ~ëë=îçå=ÉáåÉã=~å=ÇÉê=aÉÅâÉ=ÄÉÑÉëíáÖíÉå=mêçàÉâíçê= póëíÉããÉåΩ éêçàáòáÉêí=ïÉêÇÉå=â~ååK=jÉäÇìåÖÉå=~åòK=òÉáÖí=pí~íìëãÉäÇìåÖÉå=EòK_K= łpìÅÜÉå =çÇÉê=łpíìãã F=áå=ÇÉê=äáåâÉå=ìåíÉêÉå=bÅâÉ=ÇÉë=_áäÇëÅÜáêãë=~åK= _áäÇëÅÜáêãëÅÜìíò kka=îÉêÜáåÇÉêíI=Ç~ëë=ÇÉê=_áäÇëÅÜáêãëÅÜìíò=~ìÑ=kçíÉÄççâJ`çãéìíÉêå= ~âíáîáÉêí=ïáêÇI=ïÉåå=Éáå=rp_Jh~ÄÉä=~åÖÉëÅÜäçëëÉå=áëíK=píêçã=ëé~êÉå= ëÅÜ~äíÉí=ÇáÉ=i~ãéÉ=~ìíçã~íáëÅÜ=~ìëI=ïÉåå=OM=jáåìíÉå=ä~åÖ=âÉáå=páÖå~ä= îçêÜ~åÇÉå=áëíK=k~ÅÜ=òÉÜå=ïÉáíÉêÉå=jáåìåíÉå=çÜåÉ=páÖå~ä=ëÅÜ~äíÉí=ëáÅÜ=ÇÉê= mêçàÉâíçê=~Ä=ìåÇ=â~åå=~ìëÖÉëÅÜ~äíÉí=ïÉêÇÉåK=c~ääë=îçê=ÇÉã=^ÄëÅÜ~äíÉå=ÇÉë= mêçàÉâíçêë=Éáå=~âíáîÉë=páÖå~ä=ÉêÑçäÖíI=ïáêÇ=Éáå=_áäÇ=~åÖÉòÉáÖíK=aÉê= _áäÇëÅÜáêãëÅÜìíò=áëí=ÇÉ~âíáîáÉêíI=ïÉåå=ÇáÉ=píêçãëé~êÑìåâíáçå=ÉáåÖÉëÅÜ~äíÉí= áëíK=_áäÇëÅÜáêãëÅÜìíò=ÄäÉåÇÉí=~ìíçã~íáëÅÜ=ÉáåÉå=ëÅÜï~êòÉå=_áäÇëÅÜáêã=ÉáåI= ïÉåå=ÑΩê=ÉáåÉ=~åÖÉÖÉÄÉåÉ=^åò~Üä=îçå=jáåìíÉå=âÉáå=páÖå~ä=ÉãéÑ~åÖÉå= ïáêÇK=a~ë=_áäÇ=âÉÜêí=òìêΩÅâI=ïÉåå=ÉáåÉ=~âíáîÉ=nìÉääÉ=ÑÉëíÖÉëíÉääí=çÇÉê=ÉáåÉ= q~ëíÉ=~ìÑ=ÇÉê=cÉêåÄÉÇáÉåìåÖ=çÇÉê=ÇÉã=q~ëíÉåÑÉäÇ=ÖÉÇêΩÅâí=ïáêÇK=...
- Page 120 pí~êíJiçÖçW=bêã∏ÖäáÅÜí=ÄÉáã=pí~êí=ÇáÉ=^åòÉáÖÉ=ÉáåÉë=äÉÉêÉå=_áäÇëÅÜáêãë= ~åëíÉääÉ=ÇÉë=pí~åÇ~êÇÄáäÇëÅÜáêãëI=ïÉåå=âÉáåÉ=nìÉääÉ=Éêâ~ååí=ïáêÇK= pí~êíJiçÖç iÉÉêÉê=_áäÇëÅÜáêãW=iÉÖí=ÑÉëíI=ïÉäÅÜÉ=c~êÄÉ=~åÖÉòÉáÖí=ïáêÇI=ïÉåå=páÉ=ÇáÉ= iÉÉêÉê=_áäÇëÅÜáêã q~ëíÉ=łiÉÉê =~ìÑ=ÇÉê=cÉêåÄÉÇáÉåìåÖ=ÇêΩÅâÉåK bÑÑÉâíí~ëíÉW=bêä~ìÄí=ÇáÉ=wìïÉáëìåÖ=ìåíÉêëÅÜáÉÇäáÅÜÉê=cìåâíáçåÉå=~å=ÇáÉ= q~ëíÉ=bÑÑÉâí=~ìÑ=ÇÉê=cÉêåÄÉÇáÉåìåÖI=ëçÇ~ëë=páÉ=ÇáÉ=ÉåíëéêÉÅÜÉåÇÉ=cìåâíáçå= ëÅÜåÉää=~ìëÑΩÜêÉå=â∏ååÉåK=t®ÜäÉå=páÉ=ÇÉå=bÑÑÉâí=~ìëI=ìåÇ=ÇêΩÅâÉå=páÉ= Ç~åå=~ìÑ=pÉäÉÅíK √ iÉÉêW=wÉáÖí=ÉáåÉå=äÉÉêÉå=_áäÇëÅÜáêã=~åK √ píìããW=pÅÜ~äíÉí=ÇÉå=qçå=~ÄK √ ^ëéÉâíê~íÉW=pÅÜ~äíÉí=òïáëÅÜÉå=QWPI=NSWV=ìåÇ=łk~íáîÉ =ìã=EëáÉÜÉ= pÉáíÉ NQ=ìåÇ=pÉáíÉ PNFK=_Éá=báåëíÉääìåÖ=~äë=bÑÑÉâíí~ëíÉ=â~åå=ÇáÉ= ^ëéÉâíê~íÉ=ÑΩê=asaë=ÖÉ®åÇÉêí=ïÉêÇÉåK √ nìÉääÉW=aìêÅÜä®ìÑí=å~ÅÜÉáå~åÇÉê=~ääÉ=îÉêÑΩÖÄ~êÉå=nìÉääÉåK √ ^ìíçJ_áäÇW=pÉíòí=ÇÉå=mêçàÉâíçê=~ìÑ=ÇáÉ=nìÉääÉ=òìêΩÅâ=EpÉáíÉ OTFK= √ _áäÇ=~åÜ~äíÉåW=e®äí=Ç~ë=éêçàáòáÉêíÉ=_áäÇ=~åK= √ wççãW=bêä~ìÄí=ÇáÉ=sÉêÖê∏≈ÉêìåÖ=ÉáåÉë=_áäÇ~ÄëÅÜåáííÉëK=aêΩÅâÉå=páÉ= ~ìÑ=bÑÑÉâí=ìåÇ=Ç~åå=~ìÑ=ÇáÉ=äáåâÉ=j~ìëí~ëíÉI=ìã=Ç~ë=_áäÇ=òì= îÉêÖê∏≈ÉêåK=sÉêïÉåÇÉå=páÉ=ÇáÉ=`ìêëçêâçåíêçääÉI=ìã=Ç~ë=îÉêÖê∏≈ÉêíÉ= _áäÇ=òì=ÇêÉÜÉåK=aêΩÅâÉå=páÉ=~ìÑ=ÇáÉ=êÉÅÜíÉ=j~ìëí~ëíÉI=ìã=ÇáÉ= sÉêÖê∏≈ÉêìåÖ=òì=îÉêêáåÖÉêåK=aêΩÅâÉå=páÉ=ÉêåÉìí=~ìÑ=bÑÑÉâíI=ìã=ÇáÉ= wççãÑìåâíáçå=~åòìÜ~äíÉå=ìåÇ=òìê=kçêã~äÖê∏≈É=òìêΩÅâòìâÉÜêÉåK √ fåÑçW=ÇáÉ=pí~åÇ~êÇÑìåâíáçåK=£ÑÑåÉí=Éáå=cÉåëíÉê=ãáí=fåÑçêã~íáçåÉå=ΩÄÉê= mêçàÉâíçê=ìåÇ=nìÉääÉK=...
- Page 121 W=bêã∏ÖäáÅÜí=ÇáÉ=^ìëï~Üä=ÉáåÉê=péê~ÅÜÉ=ÑΩê=ÇáÉ=_áäÇëÅÜáêã~åòÉáÖÉK W=rã=ÇáÉëÉ=cìåâíáçåÉå=òì=ÄÉåìíòÉåI=ï®ÜäÉå=páÉ=ëáÉ=~ìëI=ìåÇ= ÇêΩÅâÉå=páÉ=~ìÑ= W=pÉíòí=~ääÉ=báåëíÉääìåÖÉå=~ìÑ=ÇáÉ=pí~åÇ~êÇïÉêíÉ= òìêΩÅâK W=pÉíòí=ÇáÉ=_ÉíêáÉÄëÇ~ìÉê=ÇÉê=i~ãéÉ=áã=fåÑçãÉåΩ= ~ìÑ=kìää=òìêΩÅâK=qìå=páÉ=Ç~ë=åìê=å~ÅÜ=ÇÉã=^ìëïÉÅÜëÉäå=ÇÉê=i~ãéÉK= W=kìê=òìê=sÉêïÉåÇìåÖ=ÇìêÅÜ=~ìíçêáëáÉêíÉë= t~êíìåÖëéÉêëçå~äK W=wÉáÖí=fåÑçêã~íáçåÉå=ΩÄÉê=ÇÉå=mêçàÉâíçê=ìåÇ=ÇáÉ=~âíáîÉ=nìÉääÉ=~åK=aáÉ= ^åòÉáÖÉ=ÇÉë=fåÑçÑÉåëíÉêë=áëí=ÇáÉ=pí~åÇ~êÇÑìåâíáçå=ÇÉê=bÑÑÉâíí~ëíÉK...
- Page 122 oÉáåáÖÉå=ÇÉê=iáåëÉ sÉêïÉåÇÉå=páÉ=Éáå=åáÅÜí=ëÅÜÉìÉêåÇÉë=oÉáåáÖìåÖëãáííÉä=ÑΩê= h~ãÉê~äáåëÉå=ãáí=ÉáåÉã=ïÉáÅÜÉåI=íêçÅâÉåÉå=qìÅÜK √ sÉêãÉáÇÉå=páÉ=ÇáÉ=sÉêïÉåÇìåÖ=îçå=ΩÄÉêã®≈áÖ=îáÉä=oÉáåáÖìåÖëãáíJ íÉäI=ìåÇ=îÉêïÉåÇÉå=páÉ=Ç~ë=oÉáåáÖìåÖëãáííÉä=åáÅÜí=ÇáêÉâí=~ìÑ=ÇÉê= iáåëÉK=pÅÜÉìÉêãáííÉäI=i∏ëìåÖëãáííÉä=çÇÉê=~åÇÉêÉ=`ÜÉãáâ~äáÉå= â∏ååíÉå=ÇáÉ=iáåëÉ=òÉêâê~íòÉåK táëÅÜÉå=páÉ=ÇáÉ=iáåëÉ=ãáí=ÇÉã=oÉáåáÖìåÖëíìÅÜ=ìåíÉê=sÉêïÉåÇìåÖ= âêÉáëÑ∏êãáÖÉê=_ÉïÉÖìåÖÉå=îçêëáÅÜíáÖ=~ÄK=tÉåå=páÉ=åáÅÜí=ÄÉ~ÄëáÅÜíáÖÉåI= ÇÉå=mêçàÉâíçê=ëçÑçêí=òì=îÉêïÉåÇÉåI=ÄêáåÖÉå=páÉ=ÇáÉ=iáåëÉå~ÄÇÉÅâìåÖ= ïáÉÇÉê=~åK ^ìëïÉÅÜëÉäå=ÇÉê=mêçàÉâíáçåëä~ãéÉ aáÉ=_ÉíêáÉÄëÇ~ìÉê=ÇÉê=i~ãéÉ=áã=fåÑçãÉåΩ=ÖáÄí=ÇáÉ=^åò~Üä=ÇÉê=_ÉíêáÉÄëJ ëíìåÇÉå=ÑΩê=ÇáÉ=i~ãéÉ=~åK=k~ÅÜ=PVUM=píìåÇÉå=ÉêëÅÜÉáåí=ÇáÉ=k~ÅÜêáÅÜí= łi~ãéÉ=~ìëïÉÅÜëÉäå =ÄÉá=àÉÇÉã=pí~êí=~ìÑ=ÇÉã=_áäÇëÅÜáêãK=tÉåå=ÇáÉ=j~ñáJ PM=jáåìíÉå= ã~äò~Üä=îçå=QMMM=píìåÇÉå=ÉêêÉáÅÜí=ïáêÇI=ÖÉÜí=ÇáÉ=i~ãéÉ=åáÅÜí=~åK=få= ~Äï~êíÉå ÇáÉëÉã=c~ää=ãΩëëÉå=páÉ=ÇáÉ=i~ãéÉ=~ìëïÉÅÜëÉäå=ìåÇ=ÇáÉ=i~ãéÉåëíìåÇÉå= Ç~åå=òìêΩÅâëÉíòÉåK=aêΩÅâÉå=páÉ=Ç~òì=ÄÉáÇÉ=i~ìíëí®êâÉí~ëíÉå=~ìÑ=ÇÉã=q~ëJ íÉåÑÉäÇ=ÖäÉáÅÜòÉáíáÖ=ìåÇ=Ü~äíÉå=páÉ=ëáÉ=NM=pÉâìåÇÉå=ä~åÖ=ÖÉÇêΩÅâíK= efktbfp pÅÜ~äíÉå=páÉ=ÇÉå=mêçàÉâíçê=~ìëI=ìåÇ=òáÉÜÉå=páÉ=Ç~ë=kÉíòâ~ÄÉä=~ÄK= t~êíÉå=páÉ=PM=jáåìíÉåI=Ç~ãáí=ÇÉê=mêçàÉâíçê=îçääëí®åÇáÖ=~ÄâΩÜäÉå=â~ååK i~ãéÉå~ÄÇÉÅâìåÖ iÉÖÉå=páÉ=ÇÉå=mêçàÉâíçê=~ìÑ=ÇáÉ=pÉáíÉI=ëçÇ~ëë=ÇáÉ=i~ãéÉå~ÄÇÉÅâìåÖ= fÜåÉå=òìÖÉïÉåÇÉí=áëíK=båíÑÉêåÉå=páÉ=ÇáÉ=i~ãéÉå~ÄÇÉÅâìåÖ=ìåíÉê= sÉêïÉåÇìåÖ=ÉáåÉë=Ñä~ÅÜÉå=pÅÜê~ìÄÉåòáÉÜÉêë=îçêëáÅÜíáÖ=~ìë=ÇÉã= mêçàÉâíçêK=pÉíòÉå=páÉ=ÇÉå=pÅÜê~ìÄÉåòáÉÜÉê=Ç~ÄÉá=áå=ÇÉê=iΩÅâÉ=òïáëÅÜÉå= ÇÉã=çÄÉêÉå=o~åÇ=ÇÉê=^ÄÇÉÅâìåÖ=ìåÇ=ÇÉã=mêçàÉâíçê=~åK...
- Page 123 i∏ëÉå=pÉá=ÇáÉ=pÅÜê~ìÄÉåI=ãáí=ÇÉåÉå=Ç~ë=i~ãéÉåÖÉÜ®ìëÉ=~ã=mêçàÉâíçê= i~ãéÉåJ ÄÉÑÉëíáÖí=áëíK ëíÉÅâÉê qêÉååÉå=páÉ=ÇÉå=i~ãéÉåëíÉÅâÉê=îçã=mêçàÉâíçêK=aêΩÅâÉå=páÉ=Ç~òì= i~ãéÉåâ~ÄÉä ~ìÑ=ÇáÉ=e~äíÉêìåÖ=ÇÉë=píÉÅâÉêë=ìåÇ=òáÉÜÉå=páÉ=îçêëáÅÜíáÖ=~ã=píÉÅâÉêK t^okrkdW rã=sÉêÄêÉååìåÖÉå=òì=îÉêãÉáÇÉåI=ä~ëëÉå=páÉ=ÇÉå=mêçàÉâíçê=ãáåÇÉëJ íÉåë=PM=jáåìíÉå=ä~åÖ=~ìëâΩÜäÉåI=ÄÉîçê=páÉ=ÇáÉ=i~ãéÉ=ÉêëÉíòÉåK i~ëëÉå=páÉ=Ç~ë=i~ãéÉåÖÉÜ®ìëÉ=åáÅÜí=Ñ~ääÉå=ìåÇ=ÄÉêΩÜêÉå=páÉ=ÇáÉ= dä~ëÄáêåÉ=åáÅÜí>=a~ë=dä~ë=â∏ååíÉ=òÉêÄêÉÅÜÉå=ìåÇ=òì=sÉêäÉíòìåÖÉå= i~ãéÉåJ ÑΩÜêÉåK ÖÉÜ®ìëÉ pÉáÉå=páÉ=ÄÉáã=båíÑÉêåÉå=ÇÉë=i~ãéÉåÖÉÜ®ìëÉë=ëÉÜê=îçêëáÅÜíáÖK=få= ÇÉã=ìåï~ÜêëÅÜÉáåäáÅÜÉå=c~ääI=Ç~ëë=ÇáÉ=_áêåÉ=òÉêÄêáÅÜíI=â∏ååÉå= âäÉáåÉ=dä~ëÑê~ÖãÉåíÉ=~ìÑíêÉíÉåK=a~ë=i~ãéÉåÖÉÜ®ìëÉ=áëí=ëç= ÉåíïçêÑÉåI=Ç~ëë=Éë=ÇáÉëÉ=cê~ÖãÉåíÉ=òìêΩÅâ=Ü®äíI=ëÉáÉå=páÉ=ÄÉáã= båíÑÉêåÉå=ÇÉë=i~ãéÉåÖÉÜ®ìëÉë=~ÄÉê=îçêëáÅÜíáÖK pÅÜê~ìÄÉ i~ãéÉåâ~ÄÉä båíÑÉêåÉå=páÉ=Ç~ë=i~ãéÉåÖÉÜ®ìëÉ=îçêëáÅÜíáÖK=båíëçêÖÉå=páÉ=ÇáÉ=i~ãéÉ= píÉÅâÉê ìåíÉê=_É~ÅÜíìåÖ=ÇÉê=òìíêÉÑÑÉåÇÉå=rãïÉäíîçêëÅÜêáÑíÉåK= sÉêêáÉÖÉäìåÖ fåëí~ääáÉêÉå=páÉ=Ç~ë=åÉìÉ=i~ãéÉåÖÉÜ®ìëÉ=ìåÇ=òáÉÜÉå=páÉ=ÇáÉ=pÅÜê~ìÄÉå=~åK píÉÅâÉå=páÉ=ÇÉå=i~ãéÉåëíÉÅâÉê=ïáÉÇÉê=áå=ÇÉå=mêçàÉâíçêK=aáÉ= i~ãéÉåJ sÉêêáÉÖÉäìåÖ=ëçääíÉ=Éáåê~ëíÉåI=ïÉåå=ÇÉê=píÉÅâÉê=îçääëí®åÇáÖ=ÉáåÖÉëíÉÅâí= pÅÜê~ìÄÉ ÖÉÜ®ìëÉ ïáêÇK _êáåÖÉå=páÉ=ÇáÉ=i~ãéÉå~ÄÇÉÅâìåÖ=ïáÉÇÉê=~åK píÉÅâÉå=páÉ=Ç~ë=kÉíòâ~ÄÉä=ÉáåI=ìåÇ=ÇêΩÅâÉå=páÉ=ÇáÉ=mçïÉêI=ìã=ÇÉå= mêçàÉâíçê=ïáÉÇÉê=ÉáåòìëÅÜ~äíÉåK rã=ÇÉå=_ÉíêáÉÄëëíìåÇÉåò®ÜäÉê=ÇÉê=i~ãéÉ=òìêΩÅâòìëÉíòÉåI=å~îáÖáÉêÉå= páÉ=òìã=jÉåΩ=báåëíÉääìåÖÉå[pÉêîáÅÉI=ìåÇ=ï®ÜäÉå=páÉ=i~ãéÉ= pÉêîáÅÉãÉåΩ òìêΩÅâëÉíòÉåK=báåòÉäÜÉáíÉå=ÑáåÇÉå=páÉ=~ìÑ=pÉáíÉ PSK...
- Page 124 oÉáåáÖÉå=ÇÉê=i~ãéÉåÖÉÜ®ìëÉÑáäíÉê få=ëÅÜãìíòáÖÉå=çÇÉê=ëí~ìÄáÖÉå=rãÖÉÄìåÖÉå=â∏ååÉå=ÇáÉ=òïÉá=pí~ìÄÑáäíÉê= i~ãéÉåÖÉÜ®ìëÉ ÇÉë=i~ãéÉåÖÉÜ®ìëÉë=îÉêëíçéÑÉå=ìåÇ=òì=ÜçÜÉå=qÉãéÉê~íìêÉå=ìåÇ= îçêòÉáíáÖÉã=i~ãéÉåîÉêë~ÖÉå=ÑΩÜêÉåK=báåÉ=êçìíáåÉã®≈áÖÉ=t~êíìåÖ=ìåÇ=Ç~ë= båíÑÉêåÉå=îçå=pí~ìÄ=îçå=ÇÉå=cáäíÉêå=îÉêêáåÖÉêí=ÇáÉ=_ÉíêáÉÄëíÉãéÉê~íìê=ÇÉê= wïÉá=cáäíÉê i~ãéÉ=ìåÇ=îÉêä®åÖÉêí=ÇáÉ=iÉÄÉåëÇ~ìÉêK=wìê=j~ñáãáÉêìåÖ=ÇÉê= i~ãéÉ EàÉ=ÉáåÉê=~ìÑ iÉÄÉåëÇ~ìÉê=ÇÉê=i~ãéÉ=ëçääíÉå=ÇáÉ=cáäíÉê=~ääÉ=ORM=píìåÇÉå=ÖÉêÉáåáÖí= ÄÉáÇÉå=pÉáíÉå=ÇÉë i~ãéÉåÖÉÜ®ìëÉë ïÉêÇÉåK= båíÑÉêåÉå=páÉ=Ç~ë=i~ãéÉåÖÉÜ®ìëÉK= råíÉêëìÅÜÉå=páÉ=ÇáÉ=pí~ìÄÑáäíÉê=ÇÉë=i~ãéÉåÖÉÜ®ìëÉëK=sÉêïÉåÇÉå=páÉ= ÖÖÑK=ÉáåÉå=pí~ìÄë~ìÖÉê=~ìÑ=ÇÉê=åáÉÇêáÖëíÉå=píìÑÉI=ìã=ÇáÉ=cáäíÉê=òì= êÉáåáÖÉåK=^ÅÜíÉå=páÉ=Ç~ê~ìÑI=ÄÉáã=oÉáåáÖÉå=ÇÉê=cáäíÉê=âÉáåÉ=áåíÉêåÉå= hçãéçåÉåíÉå=òì=ÄÉëÅÜ®ÇáÖÉåK _êáåÖÉå=páÉ=i~ãéÉåÖÉÜ®ìëÉ=ìåÇ=i~ãéÉå~ÄÇÉÅâìåÖ=ïáÉÇÉê=~åK aÉê=mêçàÉâíçê=îÉêÑΩÖí=ΩÄÉê=ÉáåÉ=páÅÜÉêÜÉáíëëéÉêêÉ=òìã=báåë~íò=ãáí=ÉáåÉã=m`= dì~êÇá~å=h~ÄÉäëéÉêêëóëíÉãK=c~ääë=páÉ=Éáå=m`=dì~êÇá~åJh~ÄÉäëéÉêêëóëíÉã= îÉêïÉåÇÉåI=ëÅÜä~ÖÉå=páÉ=ÄáííÉ=ÑΩê=_ÉíêáÉÄë~åïÉáëìåÖÉå=áå=ÇÉå=ãáí=ÇÉã= póëíÉã=ÖÉäáÉÑÉêíÉå=fåÑçêã~íáçåÉå=å~ÅÜK páÅÜÉêÜÉáíëëéÉêêÉ...
- Page 125 wìÄÉÜ∏ê pí~åÇ~êÇJwìÄÉÜ∏ê péÉòáÑáâ~íáçåÉå Eáã=iáÉÑÉêìãÑ~åÖ=ÇÉë= mêçàÉâíçêë=ÉåíÜ~äíÉåF ° qÉãéÉê~íìê sÉêë~åÇâ~êíçå=Eãáí=sÉêé~ÅâìåÖF NM=Äáë=QM= `=~ìÑ=jÉÉêÉëÜ∏ÜÉ ° _ÉíêáÉÄ NM=Äáë=PR= `=~ìÑ=ÉáåÉê=e∏ÜÉ=îçå=PKMQU=ã qê~ÖÉí~ëÅÜÉ ° káÅÜí=áã=_ÉíêáÉÄ JOM=Äáë=SM= `çãéìíÉêâ~ÄÉä=NIU=ã ^ìÇáçâ~ÄÉä=NIU=ã e∏ÜÉåä~ÖÉ=_ÉíêáÉÄ M=Äáë=PKMQU=ã o`^JòìJPIRãã=^ìÇáç~Ç~éíÉê káÅÜí=áã=_ÉíêáÉÄ M=Äáë=SKMVS=ã pJsáÇÉçJh~ÄÉä=EQ=ãF kÉíòâ~ÄÉä=E~ÄÜ®åÖáÖ=îçã=i~åÇF iìÑíÑÉìÅÜíáÖâÉáí=_ÉíêáÉÄ= NMB=Äáë=VRB=êÉä~íáîÉ=cÉìÅÜíáÖâÉáíI=åáÅÜí= cÉêåÄÉÇáÉåìåÖ=ìåÇ=_~ííÉêáÉå âçåÇÉåëáÉêÉåÇ káÅÜí=áã=_ÉíêáÉÄ NMB=Äáë=VMB=êÉä~íáîÉ=cÉìÅÜíáÖâÉáíI=åáÅÜí= mêçàÉâíáçåëä~ãéÉåÖÉÜ®ìëÉ=Eáã= âçåÇÉåëáÉêÉåÇ mêçàÉâíçêF iáåëÉå~ÄÇÉÅâìåÖ PNU=ñ=OQV=ñ=NNQ=ãã ^ÄãÉëëìåÖÉå pÅÜåÉääëí~êíJh~êíÉ _ÉåìíòÉê~åäÉáíìåÖ...
- Page 126 mêçàáòáÉêíÉ=_áäÇÖê∏≈É oçíÉ=ibaJ^åòÉáÖÉ=ìåÇ=mêçàÉâíçêÑÉÜäÉê c~ääë=ÇÉê=mêçàÉâíçê=åáÅÜí=êáÅÜíáÖ=ÑìåâíáçåáÉêí=ìåÇ=ÇáÉ=iba=êçí=ÄäáåâíI=ëìÅÜÉå= páÉ=áå=q~ÄÉääÉ=P=å~ÅÜ=ÉáåÉê=ã∏ÖäáÅÜÉå=rêë~ÅÜÉK=wïáëÅÜÉå=_äáåâòóâäÉå=ÖáÄí= Éë=àÉïÉáäë=òïÉá=pÉâìåÇÉå=ä~åÖÉ=m~ìëÉåK q~ÄÉääÉ=PW= oçíÉ=ibaJ bêâä®êìåÖ =aá~Öçå~äÉ= _áäÇëÅÜáêã~Äëí~åÇ ^åòÉáÖÉ _áäÇJ ëÅÜáêãÖê∏≈É= j~ñáã~ä~ÄJ jáåáã~ä~ÄJ _äáåâí=Éáåã~ä=ENF aáÉ=i~ãéÉ=ÖÉÜí=å~ÅÜ=ÑΩåÑ=ERF=sÉêëìÅÜÉå=åáÅÜí=~åK= EãF _áäÇÄêÉáíÉ=EãF ëí~åÇ=EãF ëí~åÇ=EãF §ÄÉêéêΩÑÉå=páÉ=ÇáÉ=i~ãéÉ=ìåÇ=ÇáÉ=^ÄÇÉÅâìåÖ=~ìÑ=äçëÉ= sÉêÄáåÇìåÖÉåK _äáåâí=òïÉáã~ä=EOF aáÉ=_ÉíêÉáÄëëíìåÇÉå=ÇÉê=i~ãéÉ=Ü~ÄÉå=ÇáÉ=ã~ñáã~äÉ= iÉÄÉåëÇ~ìÉê=ΩÄÉêëÅÜêáííÉåK=tÉÅÜëÉäå=páÉ=ÇáÉ=i~ãéÉ= ~ìëI=ìåÇ=ëÉíòÉå=páÉ=ÇÉå=_ÉíêáÉÄëëíìåÇÉåò®ÜäÉê=òìêΩÅâK _äáåâí=ÇêÉáã~ä=EPF aÉê=mêçàÉâíçê=ïìêÇÉ=~ÄÖÉëÅÜ~äíÉíK=§ÄÉêéêΩÑÉå=páÉI=çÄ= ÇáÉ=i~ãéÉå~ÄÇÉÅâìåÖ=ÖÉ∏ÑÑåÉí=áëíK=c~ääë=ÇáÉ=^ÄÇÉÅâìåÖ= ÖÉëÅÜäçëëÉå=áëíI=ëÅÜ~äíÉå=páÉ=ÇÉå=mêçàÉâíçê=~ìë=ìåÇ= ï~êíÉå=páÉ=ÉáåÉ=jáåìíÉK=pÅÜ~äíÉå=páÉ=ÇÉå=mêçàÉâíçê= Ç~åå=ïáÉÇÉê=ÉáåK=c~ääë=ÇáÉ=i~ãéÉ=å~ÅÜ=ÉáåÉê=jáåìíÉ= åáÅÜí=~ìÑäÉìÅÜíÉíI=ÉêëÉíòÉå=páÉ=ëáÉK= _äáåâí=îáÉêã~ä=EQF aÉê=sÉåíáä~íçê=Ü~í=îÉêë~ÖíK= _äáåâí=ÑΩåÑã~ä=ERF aÉê=mêçàÉâíçê=áëí=ΩÄÉêÜáíòíK=§ÄÉêéêΩÑÉå=páÉ=Ç~ë=dÉê®í= ~ìÑ=ÉáåÉ=ÄäçÅâáÉêíÉ=iΩÑíìåÖë∏ÑÑåìåÖK=...
- Page 127 j~êÅ~ë=ÅçãÉêÅá~äÉë ^ÇîÉêíÉåÅá~=ÇÉ=ä~=`çãáëáµå=cÉÇÉê~ä=ÇÉ=`çãìåáÅ~ÅáçåÉë=EcÉÇÉê~ä=`çããìåáÅ~íáçåë=`çããáëáçåI=c``F `~å~Ç• `ÉêíáÑáÅ~ÅáçåÉë=ÇÉ=ëÉÖìêáÇ~Ç...
- Page 128 `çåíÉåáÇç pá=íáÉåÉ=ÉñéÉêáÉåÅá~=Éå=ä~=ÅçåÑáÖìê~Åáµå=ÇÉ=ëáëíÉã~ë=ÇÉ=éêçóÉÅÅáµåI=ìíáäáÅÉ=ä~= í~êàÉí~=fåáÅáç=o•éáÇç=áåÅäìáÇ~K=m~ê~=çÄíÉåÉê=ÇÉí~ääÉë=ÅçãéäÉíçë=ëçÄêÉ=ŵãç= fåíêçÇìÅÅáµå= mçëáÅáµå=ÇÉä=éêçóÉÅíçê= ÅçåÉÅí~ê=ó=çéÉê~ê=Éä=éêçóÉÅíçêI=ÅçåëìäíÉ=ÉëíÉ=j~åì~ä=ÇÉ=ìëçK= dì∞~=ÇÉ=ÅçåÉÅí~ÇçêÉë=ÇÉä=éêçóÉÅíçê=ó=äçë=Çáëéçëáíáîçë `çåÉñáçåÉë=~=ìå~=Åçãéìí~Ççê~ `çåëáÇÉê~ÅáçåÉë=áãéçêí~åíÉë=ëçÄêÉ=ä~=çéÉê~Åáµå `çåÉñáçåÉë=ÇÉ=îáÇÉç kç=ÅçäçèìÉ=Éä=éêçóÉÅíçê=ëçÄêÉ=ìå=ã~åíÉä=ÇÉ=ãÉë~=ì=çíêçë=í~éÉíÉë=Ää~åÇçë= `çåÉñáµå=~=ìå~=Åçãéìí~Ççê~= èìÉ=éìÉÇ~å=ÄäçèìÉ~ê=ä~ë=ê~åìê~ë=ÇÉ=îÉåíáä~Åáµå=~åíÉêáçêÉë=ç=éçëíÉêáçêÉëK=kç= `çåÉñáçåÉë=êÉèìÉêáÇ~ë=~=ìå~=Åçãéìí~Ççê~= `çåÉñáçåÉë=çéÅáçå~äÉë=~=ìå~=Åçãéìí~Ççê~= ìíáäáÅÉ=ìå~=áåëí~ä~Åáµå=ÇÉ=íÉÅÜç=åç=~éêçÄ~Ç~K=bå=Éä=Å~ëç=áãéêçÄ~ÄäÉ=ÇÉ=èìÉ= sáëì~äáò~Åáµå=ÇÉ=ìå~=áã~ÖÉå=ÇÉ=ä~=Åçãéìí~Ççê~= ëÉ=ÑìåÇ~=ìå~=ÄçãÄáää~I=äáãéáÉ=ÄáÉå=Éä=•êÉ~=ÇÉä~åíÉ=ÇÉä=éêçóÉÅíçê=ó=ÇÉëÉÅÜÉ= ^àìëíÉ=ÇÉ=ä~=áã~ÖÉå= íçÇçë=äçë=ÉäÉãÉåíçë=ÅçãÉëíáÄäÉë=èìÉ=ëÉ=ÉåÅìÉåíêÉå=Éå=Éë~=òçå~K rëç=ÇÉä=éêçóÉÅíçê=Åçå=táåÇçïë=VU=éçê=éêáãÉê~=îÉò= `µãç=ÅçåÉÅí~ê=~=ìå=Çáëéçëáíáîç=ÇÉ=îáÇÉç= `çåÉñáçåÉë=~=Çáëéçëáíáîçë=ÇÉ=îáÇÉç= `çåÉñáµå=ÇÉ=îáÇÉç=ÅçãéìÉëíç= `çåÉñáµå=pJîáÇÉç= `çåÉñáµå=ÇÉ=îáÇÉç=ÇÉ=ÅçãéçåÉåíÉ= `çåÉñáµå=sd^= sáëì~äáò~Åáµå=ÇÉ=îáÇÉç= ^àìëíÉ=ÇÉ=ä~=áã~ÖÉå= `µãç=é~ê~ê=ÇÉä=éêçóÉÅíçê= `µãç=ëçäìÅáçå~ê=éêçÄäÉã~ë=ÇÉ=ÅçåÑáÖìê~Åáµå= rëç=ÇÉä=Åçåíêçä=êÉãçíç= rëç=ÇÉä=~ìÇáç= kç=ÅçäçèìÉ=çÄàÉíçë=Éå rëç=ÇÉ=äçë=ÄçíçåÉë=ÇÉä=íÉÅä~Çç=åìã¨êáÅç= Éëí~=òçå~=ÇÉä~åíÉ léíáãáò~Åáµå=ÇÉ=áã•ÖÉåÉë=ÇÉ=Åçãéìí~Ççê~= ÇÉä=éêçóÉÅíçê `~ê~ÅíÉê∞ëíáÅ~ë=ÇÉ=éêÉëÉåí~Åáµå= léíáãáò~Åáµå=ÇÉ=áã•ÖÉåÉë=ÇÉ=îáÇÉç= mÉêëçå~äáò~Åáµå=ÇÉä=éêçóÉÅíçê= rëç=ÇÉ=äçë=ãÉå∫ë= jÉå∫=fã~ÖÉå=...
- Page 129 pì=åìÉîç=éêçóÉÅíçê=ÇáÖáí~ä=Éë=Ñ•Åáä=ÇÉ=ÅçåÉÅí~êI=ìíáäáò~ê=ó=ã~åíÉåÉêK=bë=ìå= éêçóÉÅíçê=ÉñÅÉéÅáçå~ä=í~åíç=é~ê~=ëì=ìëç=Éå=ä~=çÑáÅáå~=Åçãç=é~ê~=Éä= ÉåíêÉíÉåáãáÉåíç=Éå=Éä=ÜçÖ~êK=bä=éêçóÉÅíçê=ÇáÖáí~ä=Éë=Åçãé~íáÄäÉ=Åçå=ìå~=Öê~å= î~êáÉÇ~Ç=ÇÉ=Åçãéìí~Ççê~ë=ó=Çáëéçëáíáîçë=ÇÉ=îáÇÉçI=áåÅäìóÉåÇçW √ i~=ã~óçê∞~=ÇÉ=ä~ë=Öê~Ä~ÇçêÉë=ÇÉ=îáÇÉç=Es`oFI=êÉéêçÇìÅíçêÉë=ÇÉ=ÇáëÅçë= ÇÉ=îáÇÉç=ÇáÖáí~ä=EasaF=EéêçÖêÉëáîçë=ó=ÉåíêÉä~ò~ÇçëFI=ÑìÉåíÉë=eaqs= EíÉäÉîáëáµå=ÇÉ=~äí~=ÇÉÑáåáÅáµåF=EÑçêã~íçë=eaqs=NMUMáI=NMPRá==ó=TOMmFI= ëáåíçåáò~ÇçêÉë=ÇÉ=íÉäÉîáëáµå=ó=ë~íÉäáí~äÉëI=îáÇÉç=Å•ã~ê~ëI=àìÉÖçë=ÇÉ= îáÇÉç=ó=êÉéêçÇìÅíçêÉë=ÇÉ=ÇáëÅçë=ä•ëÉêK √ `çãéìí~Ççê~ë=Åçãé~íáÄäÉë=Åçå=f_jI=áåÅäìóÉåÇç=Åçãéìí~Ççê~ë= éçêí•íáäÉëI=Ü~ëí~=ìå~=êÉëçäìÅáµå=ÇÉ=NMOQñTSUK ∆ ∆ ∆ √ `çãéìí~Ççê~ë=j~ÅáåíçëÜ =ó=mçïÉê_ççâ =ÇÉ=^ééäÉ =Ü~ëí~=ìå~= êÉëçäìÅáµå=NMOQñTSUK bä=éêçóÉÅíçê=éçëÉÉ=ìå~=êÉëçäìÅáµå=êÉ~ä=psd^=ÇÉ=UMMñSMM=ó=Éëí•=Éèìáé~Çç= Åçå=äçë=ëáÖìáÉåíÉë=~ÅÅÉëçêáçë=Éëí•åÇ~êW= oÉÖáëíêÉ=ëì=éêçóÉÅíçê=Éå=ä∞åÉ~=Éå=ïïïKáåÑçÅìëKÅçãLëÉêîáÅÉLêÉÖáëíÉê=é~ê~= êÉÅáÄáê=~Åíì~äáò~ÅáçåÉë=ÇÉä=éêçÇìÅíçI=~åìåÅáçë=É=áåÅÉåíáîçë=ÇÉ=êÉÖáëíêçK=...
- Page 130 m~ê~=ÇÉíÉêãáå~ê=ǵåÇÉ=éçëáÅáçå~ê=Éä=éêçóÉÅíçêI=ÅçåëáÇÉêÉ=Éä=í~ã~¥ç=ó=ä~= Ñçêã~=ÇÉ=ëì=é~åí~ää~I=ä~=ìÄáÅ~Åáµå=ÇÉ=äçë=ÉåÅÜìÑÉë=Éä¨ÅíêáÅçë=ó=ä~=Çáëí~åÅá~= ÉåíêÉ=Éä=éêçóÉÅíçê=ó=Éä=êÉëíç=ÇÉä=ÉèìáéçK=eÉ=~èì∞=~äÖìåçë=äáåÉ~ãáÉåíçë= ÖÉåÉê~äÉëW NV=éáÉë=ERIU=ãF √ `çäçèìÉ=Éä=éêçóÉÅíçê=ëçÄêÉ=ìå~=ëìéÉêÑáÅáÉ=éä~å~I=ÇÉ=ã~åÉê~=èìÉ=ÑçêãÉ= TIR=éáÉë=EOIP=ãF ìå=•åÖìäç=êÉÅíç=Åçå=ä~=é~åí~ää~K=bä=éêçóÉÅíçê=ÇÉÄÉ=Éëí~ê=~=ìå~=Çáëí~åÅá~= QIU=éáÉë=ENIR=ãF= åç=ãÉåçê=ÇÉ=QIV=éáÉë=ENIQV=ãF=ÇÉ=ä~=é~åí~ää~=ÇÉ=éêçóÉÅÅáµåK √ `çäçèìÉ=Éä=éêçóÉÅíçê=~=ãÉåçë=ÇÉ=NM=éáÉë=EP=ãF=ÇÉ=ä~=ÑìÉåíÉ=ÇÉ= ~äáãÉåí~Åáµå=ó=~=ãÉåçë=ÇÉ=S=éáÉë=ENIU=ãF=ÇÉä=Çáëéçëáíáîç=ÇÉ=îáÇÉç=E~= ãÉåçë=èìÉ=ÅçãéêÉ=Å~ÄäÉë=ÇÉ=éêçäçåÖ~ÅáµåFK=m~ê~=~ëÉÖìê~ê=Éä=~ÅÅÉëç= ~ÇÉÅì~Çç=~=äçë=Å~ÄäÉëI=åç=ÅçäçèìÉ=Éä=éêçóÉÅíçê=~=ãÉåçë=ÇÉ=S=éìäÖ~Ç~ë= EMINR=ãF=ÇÉ=Çáëí~åÅá~=ÇÉ=ä~=é~êÉÇ=ì=çíêç=çÄàÉíçK √ mçëáÅáçåÉ=Éä=éêçóÉÅíçê=~=ä~=Çáëí~åÅá~=ÇÉëÉ~Ç~=ÇÉ=ä~=é~åí~ää~K=i~=Çáëí~åÅá~= ÇÉä=äÉåíÉ=ÇÉä=éêçóÉÅíçê=~=ä~=é~åí~ää~I=ä~=ÅçåÑáÖìê~Åáµå=ÇÉä=~ìãÉåíç=ÇÉ= áã~ÖÉå=ÇÉ=NM=éáÉë= äÉåíÉ=ó=Éä=Ñçêã~íç=ÇÉ=îáÇÉç=ÇÉíÉêãáå~å=Éä=í~ã~¥ç=ÇÉ=ä~=áã~ÖÉå= žåÖìäç=ÇÉ=éêçóÉÅÅáµå=Éå= EP=ãF=ÇÉ=~äíç éêçóÉÅí~Ç~K=i~=áäìëíê~Åáµå=Éå=ä~=é~êíÉ=ëìéÉêáçê=ÇÉêÉÅÜ~=ãìÉëíê~=íêÉë= ãçÇç=QWP=EéêÉÇÉíÉêãáå~ÇçF í~ã~¥çë=ÇÉ=áã•ÖÉåÉë=éêçóÉÅí~Ç~ëK=m~ê~=çÄíÉåÉê=ã•ë=áåÑçêã~Åáµå= ~ÅÉêÅ~=ÇÉä=äçë=í~ã~¥çë=ÇÉ=ä~ë=áã•ÖÉåÉë=~=ÇáÑÉêÉåíÉë=Çáëí~åÅá~ëI=ÅçåëìäíÉ= q~ã~¥ç=ÇÉ=ä~=áã~ÖÉå=éêçóÉÅí~Ç~Ò=Éå=ä~=é•Öáå~ QNK √ i~=áã~ÖÉå=ë~äÉ=ÇÉä=éêçóÉÅíçê=~=ìå=ÇÉíÉêãáå~Çç=•åÖìäçK=bä= ÇÉëÅÉåíê~ãáÉåíç=ÇÉ=ä~=áã~ÖÉå=Éë=ÇÉä=NNOIOB=Åì~åÇç=Éä=éêçóÉÅíçê=Éëí•= Éå=Éä=ãçÇç=QWP=EãçÇç=éêÉÇÉíÉêãáå~ÇçF=bëíç=ëáÖåáÑáÅ~=èìÉ=ëá=íáÉåÉ=ìå~= áã~ÖÉå=ÇÉ=NM=éáÉë=EP=ãF=ÇÉ=~äíçI=ä~=é~êíÉ=áåÑÉêáçê=ÇÉ=ä~=ãáëã~=Éëí~ê•= é~êíÉ=áåÑÉêáçê= NIOO=éáÉë=EPT=ÅãF=éçê=ÉåÅáã~=ÇÉä=ÅÉåíêç=ÇÉä=äÉåíÉK= ÅÉåíêç=ÇÉä=äÉåíÉ ÇÉ=ä~=áã~ÖÉå √ bä=ÇÉëÅÉåíê~ãáÉåíç=ÇÉ=ä~=áã~ÖÉå=Éë=ÇÉä=NPOIVB=Åì~åÇç=Éä=éêçóÉÅíçê=Éëí•= NIOO=éáÉë=EPT=ÅãF= Éå=Éä=ãçÇç=NSWVK=bëíç=ëáÖåáÑáÅ~=èìÉ=ëá=íáÉåÉ=ìå~=áã~ÖÉå=ÇÉ=NM=éáÉë=EP=ãF=...
- Page 131 iç=ëáÖìáÉåíÉ=äÉ=~óìÇ~ê•=~=ÉåÅçåíê~ê=äçë=ÅçåÉÅí~ÇçêÉë=èìÉ=äÉ=ÅçåîáÉåÉ=ìíáäáò~ê=é~ê~=çÄíÉåÉê=ä~=ãÉàçê=êÉëçäìÅáµå=éçëáÄäÉ=ÇÉ=ëìë=Çáëéçëáíáîçë=ÇÉ=Éåíê~Ç~I=í~äÉë= Åçãç=Åçãéìí~Ççê~ëI=Öê~Ä~ÇçêÉë=ÇÉ=îáÇÉç=Éëí•åÇ~ê=Es`oFI=êÉéêçÇìÅíçêÉë=ÇÉ=ÇáëÅçë=ÇÉ=îáÇÉç=ÇáÖáí~ä=EasaF=EéêçÖêÉëáîçë=ó=ÉåíêÉä~ò~ÇçëFI=ÑìÉåíÉë=ÇÉ= íÉäÉîáëáµå=ÇÉ=~äí~=ÇÉÑáåáÅáµå=EeaqsF=EÑçêã~íçë=eaqs=NMUMáI=NMPRá=ó=TOMmFI=ëáåíçåáò~ÇçêÉë=ÇÉ=íÉäÉîáëáµå=ó=ë~íÉäáí~äÉëI=Å•ã~ê~ë=ÇáÖáí~äÉëI=àìÉÖçë=ÇÉ=îáÇÉç= EéêçÖêÉëáîçë=ó=ÉåíêÉä~ò~ÇçëF=ó=êÉéêçÇìÅíçêÉë=ÇÉ=ÇáëÅçë=ä•ëÉêK `çåÉñáçåÉë=~=ìå~=Åçãéìí~Ççê~ i~ë=ÅçåÉñáçåÉë=~=ìå~=Åçãéìí~Ççê~=áåîçäìÅê~å=ÅçåÉÅí~ê=Éä=Å~ÄäÉ=ÇÉ=Åçãéìí~Ççê~=áåÅäìáÇç=Åçå=Éä=éêçóÉÅíçê=ÇÉëÇÉ=ìå~=Åçãéìí~Ççê~=~=ä~=Éåíê~Ç~=`çãéìíÉê= fåK=i~ë=ÅçåÉñáçåÉë=çéÅáçå~äÉë=áåÅäìóÉå=ÅçåÉÅí~ê=Éä=Å~ÄäÉ=ÇÉ=~ìÇáç=ó=îáÇÉç=áåÅäìáÇç=ÇÉëÇÉ=ä~=Åçãéìí~Ççê~=~ä=éêçóÉÅíçêI=ÅçåÉÅí~ê=Éä=ãçåáíçê=ÇÉ=ä~= Åçãéìí~Ççê~=~ä=éêçóÉÅíçê=ó=ÅçåÉÅí~ê=ìå=Å~ÄäÉ=rp_=Eåç=áåÅäìáÇçF=ÇÉëÇÉ=ä~=Åçãéìí~Ççê~=~ä=éêçóÉÅíçê=é~ê~=~î~åò~ê=ä~ë=íê~åëé~êÉåÅá~ë=Éå=ä~=éêÉëÉåí~Åáµå=ÇÉ= mçïÉêmçáåí»K=`çåëìäíÉ=ä~=é•Öáå~ V=é~ê~=çÄíÉåÉê=áåÑçêã~Åáµå=ÇÉ=ÅçåÑáÖìê~Åáµå=ÇÉ=ä~=Åçãéìí~Ççê~=ó=Éä=éêçóÉÅíçêK `çåÉñáçåÉë=ÇÉ=îáÇÉç bä=éêáãÉê=é~ëç=é~ê~=ÅçåÉÅí~ê=Éä=îáÇÉç=Éë=ÇÉÅáÇáê=èì¨=íáéç=ÇÉ=ÅçåÉÅí~Ççê=ÇÉ=ë~äáÇ~=ÇÉëÉ~=ÉåÅÜìÑ~ê=~ä=éêçóÉÅíçêK=pá=íáÉåÉ=ã•ë=ÇÉ=ìå~=ë~äáÇ~I=ëÉäÉÅÅáçåÉ=ä~=ÇÉ= ã~óçê=Å~äáÇ~Ç=ìíáäáò~åÇç=ä~=ëáÖìáÉåíÉ=ÉëÅ~ä~I=ÇçåÇÉ=N=Éë=ä~=ã~óçê=Å~äáÇ~Ç=ó=PI=ä~=ãÉåçêW sáÇÉç=ÇÉ=ÅçãéçåÉåíÉ pJîáÇÉç sáÇÉç=ÅçãéìÉëíç pá=éä~åÉ~=ÅçåÉÅí~ê=Éä=éêçóÉÅíçê=~=ÑìÉåíÉë=ÇÉ=eaqsI=ÇÉÄÉ=ìíáäáò~ê=Éä=ÅçåÉÅí~Ççê=Esd^F=ÇÉ=Åçãéìí~Ççê~=ÇÉä=éêçóÉÅíçêI=ÉíáèìÉí~Çç=sáÇÉç=få=Ebåíê~Ç~=ÇÉ=îáÇÉçFK= kç=çäîáÇÉ=èìÉ=ä~ë=ÑìÉåíÉë=ÇÉ=eaqs=ó=éêçÖêÉëáî~ë=ëµäç=ëÉ=ÇÉÄÉå=éêçÅÉë~ê=~=íê~î¨ë=ÇÉä=ÅçåÉÅí~Ççê=sd^=ÇÉä=éêçóÉÅíçêK=bä=éìÉêíç=pJîáÇÉç=åç=ÑìåÅáçå~=Åçå= ÑìÉåíÉë=éêçÖêÉëáî~ëI=áåÅäìëç=Åçå=ìå=~Ç~éí~Ççê=ÇÉ=îáÇÉç=ÇÉ=ÅçãéçåÉåíÉ=~=pJîáÇÉçK=`çå=ÑìÉåíÉë=éêçÖêÉëáî~ëI=ëÉ=ÇÉÄÉ=ìíáäáò~ê=ìå=~Ç~éí~Ççê=ÇÉ=îáÇÉç=ÇÉ= ÅçãéçåÉåíÉ=~=sbp^K=káåÖìåç=ÇÉ=Éëíçë=~Ç~éí~ÇçêÉë=ëÉ=áåÅäìóÉå=Åçå=Éä=éêçóÉÅíçê=ó=ëÉ=éìÉÇÉå=Åçãéê~ê=~=íê~î¨ë=ÇÉ=çíêçë=Ñ~ÄêáÅ~åíÉëK ÅçåÉÅí~ÇçêÉë=ÇÉ= Éåíê~Ç~=ÇÉä=éêçóÉÅíçê ãçåáíçê ÅçãéìíÉê=áå pJîáÇÉç îáÇÉç=áå ~ìÇáç=áå Eë~äáÇ~F EÑìÉåíÉë eaqs=ó éêçÖêÉëáî~ëF...
- Page 132 båÅÜìÑÉ=~ä= pá=ëì= `çãé~íáÄáäáÇ~Ç= ÅçåÉÅí~Ççê=ÇÉä= m~ê~=çÄíÉåÉê=fåëíêìÅÅáçåÉë= aáëéçëáíáîç=ÇÉ=îáÇÉç ÅçåÉÅí~Ççê=ÇÉ= `çãÉåí~êáçë Åçå=îáÇÉç éêçóÉÅíçê= ÇÉ=ÅçåÑáÖìê~ÅáµåI=ÅçåëìäíÉ Çáëéçëáíáîçë=Éë ÉíáèìÉí~Çç cçêã~íçë=kqp`I= sáÇÉç=ÅçãéìÉëíç sáÇÉç=ÅçãéìÉëíç `çåÉñáµå=ÇÉ=îáÇÉç=ÅçãéìÉëíç= m^i=ó=pb`^j ç=pJîáÇÉç ç=pJîáÇÉç Éå=ä~=é•Öáå~=NR bãáëáµå=ÇÉ=íÉäÉîáëáµå=Åçã∫å= `çåÉñáµå=pJîáÇÉç=Éå=ä~=é•Öáå~=NR= Eåç=ÇÉ=eaqsF=éçêW=Å~ÄäÉI= Å~ÄäÉ=ÇáÖáí~äI=íÉäÉîáëáµå= `çãéçåÉåíÉ=QUMá sáÇÉç=ÇÉ= pJîáÇÉç=~=íê~î¨ë=ÇÉ=ìå= kç=é~ê~=ÑìÉåíÉë= `çåÉñáµå=ÇÉ=îáÇÉç=ÇÉ= ë~íÉäáí~äI=asa=ç=s`o= ÅçãéçåÉåíÉ ~Ç~éí~Ççê=ÇÉ=îáÇÉç= éêçÖêÉëáî~ë=EÉë=ÇÉÅáêI= ÅçãéçåÉåíÉ=Éå=ä~=é•Öáå~=NS ÇÉ=ÅçãéçåÉåíÉ=~= ÇÉ=eaqsFK=sÉ~=ä~= pJîáÇÉç é•Öáå~=ëáÖìáÉåíÉK cçêã~íçë=kqp`I= sáÇÉç=ÅçãéìÉëíç...
- Page 133 båÅÜìÑÉ=~ä= pá=ëì= `çãé~íáÄáäáÇ~Ç= ÅçåÉÅí~Ççê=ÇÉä= m~ê~=çÄíÉåÉê=fåëíêìÅÅáçåÉë= aáëéçëáíáîç=ÇÉ=îáÇÉç ÅçåÉÅí~Ççê=ÇÉ= `çãÉåí~êáçë Åçå=îáÇÉç éêçóÉÅíçê= ÇÉ=ÅçåÑáÖìê~ÅáµåI=ÅçåëìäíÉ Çáëéçëáíáîçë=Éë ÉíáèìÉí~Çç NMUMáI=TOMé `çãéìíÉê=få kç=é~ê~= `çåÉñáµå=sd^=Éå=ä~=é•Öáå~=NS qÉäÉîáëáµå=ÇÉ=~äí~=ÇÉÑáåáÅáµå= `çãéçåÉåíÉ=QUMá EeaqsF EqÉäÉîáëáµå=ÇÉ=~äí~= ÇÉÑáåáÅáµåF `çãéçåÉåíÉ=QUMé sáÇÉç=ÇÉ= `çãéìíÉê=få= kç=é~ê~= `çåÉñáµå=ÇÉ=îáÇÉç=ÇÉ= baqs ÅçãéçåÉåíÉ EãÉÇá~åíÉ=ìå= `çãéçåÉåíÉ=QUMá ÅçãéçåÉåíÉ=Éå=ä~=é•Öáå~=NS EqÉäÉîáëáµå=ÇÉ=ÇÉÑáåáÅáµå= ~Ç~éí~Ççê=ÇÉ=îáÇÉç= ëìéÉêáçêF ÇÉ=ÅçãéçåÉåíÉ=~= sbp^F NMUMáI=TOMé `çãéìíÉê=få `çåÉñáµå=sd^=Éå=ä~=é•Öáå~=NS `çãéçåÉåíÉ=QUMé...
- Page 134 ÅçåÉÅíÉ=Éä=Å~ÄäÉ=ÇÉ=ä~=Åçãéìí~Ççê~ `çåÉñáçåÉë=êÉèìÉêáÇ~ë=~=ìå~=Åçãéìí~Ççê~ `çåÉÅíÉ=ìå=ÉñíêÉãç=ÇÉä=Å~ÄäÉ=ÇÉ=ä~=Åçãéìí~Ççê~=EÅçåëìäíÉ=ä~=é•Öáå~ NQ=é~ê~= çÄíÉåÉê=áåÑçêã~Åáµå=ëçÄêÉ=ä~=ÅçåÉñáµå=~=Çáëéçëáíáîçë=ÇÉ=îáÇÉçF=~ä=ÅçåÉÅí~J Ççê=~òìä=çëÅìêç=`çãéìíÉê=få=Ebåíê~Ç~=ÇÉ=Åçãéìí~Ççê~F=ÇÉä=éêçóÉÅíçêK= `çåÉÅíÉ=Éä=çíêç=ÉñíêÉãç=~ä=éìÉêíç=ÇÉ=îáÇÉç=ÇÉ=ä~=Åçãéìí~Ççê~K=pá=Éëí•=ìíáäáJ ò~åÇç=ìå=Éèìáéç=ÇÉ=ÉëÅêáíçêáçI=éêáãÉêç=ÇÉÄÉê•=ÇÉëÅçåÉÅí~ê=Éä=Å~ÄäÉ=ÇÉä= ãçåáíçê=ÇÉä=éìÉêíç=ÇÉ=îáÇÉç=ÇÉ=ä~=Åçãéìí~Ççê~K= =ÅçåÉÅíÉ=Éä=Å~ÄäÉ=ÇÉ=~äáãÉåí~Åáµå `çåÉÅíÉ=Éä=Å~ÄäÉ=ÇÉ=~äáãÉåí~Åáµå=åÉÖêç=~ä=ÅçåÉÅí~Ççê=mçïÉê=E^äáãÉåí~ÅáµåF= ~ä=Åçëí~Çç=ÇÉä=éêçóÉÅíçê=ó=~=ìå=íçã~ÅçêêáÉåíÉK klq^W=páÉãéêÉ=ìíáäáÅÉ=Éä=Å~ÄäÉ=ÇÉ=~äáãÉåí~Åáµå=ëìãáåáëíê~Çç=Åçå=Éä= éêçóÉÅíçêK= ÅçåÉÅíÉ=Éä=Å~ÄäÉ=ÇÉ=~ìÇáç `çåÉñáçåÉë=çéÅáçå~äÉë=~=ìå~=Åçãéìí~Ççê~ m~ê~=èìÉ=ëì=éêÉëÉåí~Åáµå=íÉåÖ~=ëçåáÇçI=ÅçåÉÅíÉ=Éä=Å~ÄäÉ=ÇÉ=~ìÇáç=~=ëì= Åçãéìí~Ççê~=ó=~ä=ÅçåÉÅí~Ççê=^ìÇáç=få=Ebåíê~Ç~=ÇÉ=~ìÇáçF=ÇÉä=éêçóÉÅíçêK= ÅçåÉÅíÉ=Éä=Å~ÄäÉ=ÇÉä=ãçåáíçê pá=Éëí•=ìíáäáò~åÇç=ìå=Éèìáéç=ÇÉ=ÉëÅêáíçêáç=ó=ÇÉëÉ~=îÉê=ä~=áã~ÖÉå=Éå=ä~= é~åí~ää~=ÇÉä=ãáëãç=~ÇÉã•ë=ÇÉ=Éå=ä~=é~åí~ää~=ÇÉ=éêçóÉÅÅáµåI=ÅçåÉÅíÉ=Éä=Å~ÄäÉ= ÇÉä=ãçåáíçê=ÇÉ=ä~=Åçãéìí~Ççê~=~ä=ÅçåÉÅí~Ççê=jçåáíçê=çìí=Ep~äáÇ~=ÇÉä= ãçåáíçêF=ÇÉä=éêçóÉÅíçêK ÅçåÉÅíÉ=Éä=Å~ÄäÉ=rp_ m~ê~=~î~åò~ê=Çá~éçëáíáî~ë=Éå=ìå~=éêÉëÉåí~Åáµå=ÇÉ=mçïÉêmçáåí=ìíáäáò~åÇç=Éä= Åçåíêçä=êÉãçíçI=ÉåÅÜìÑÉ=Éä=ÅçåÉÅí~Ççê=rp_=ÇÉä=Å~ÄäÉ=ÇÉ=ä~=Åçãéìí~Ççê~=Éå= Éä=ÅçåÉÅí~Ççê=rp_=ÇÉä=ê~íµå=Éå=ëì=Åçãéìí~Ççê~K=içë=Åçåíêçä~ÇçêÉë=rp_= ÇÉÄÉå=Éëí~ê=áåëí~ä~Ççë=é~ê~=ìíáäáò~ê=ä~=ÑìåÅáçå~äáÇ~Ç=rp_K=m~ê~=çÄíÉåÉê=ã•ë= áåÑçêã~ÅáµåI=ÅçåëìäíÉ=ä~=é•Öáå~ NPK...
- Page 135 êÉíáêÉ=ä~=í~é~=ÇÉä=äÉåíÉ oÉíáêÉ=ä~=í~é~=ÇÉä=äÉåíÉK jìÉî~=Éä=áåíÉêêìéíçê=mçïÉê=EbåÅÉåÇáÇçF=~ä=Åçëí~Çç=ÇÉä=éêçóÉÅíçê=~=ä~= ãìÉî~=Éä=áåíÉêêìéíçê=ÇÉ=ÉåÅÉåÇáÇç éçëáÅáµå=lå=EbåÅÉåÇáÇçFK bä=iba=ÇÉëíÉää~=Éå=Åçäçê=îÉêÇÉ=ó=ëÉ=ÉåÅáÉåÇÉå=äçë=îÉåíáä~ÇçêÉëK=`ì~åÇç=ä~= ä•ãé~ê~=ëÉ=ÉåÅáÉåÇÉI=~é~êÉÅÉ=ä~=é~åí~ää~=ÇÉ=áåáÅáç=ó=Éä=iba=èìÉÇ~= áäìãáå~Çç=Éå=Åçäçê=îÉêÇÉ=Åçåëí~åíÉK=mìÉÇÉ=íê~åëÅìêêáê=~éêçñáã~Ç~ãÉåíÉ= ìå=ãáåìíç=Ü~ëí~=èìÉ=ä~=áã~ÖÉå=äçÖêÉ=Éä=Äêáääç=ÅçãéäÉíçK= \fikç=~é~êÉÅÉ=ä~=é~åí~ää~=ÇÉ=áåáÅáç\=lÄíÉåÖ~=~óìÇ~=Éå=ä~=é•Öáå~ NVK båÅáÉåÇ~=ä~=Åçãéìí~Ççê~K ÉåÅáÉåÇ~=ä~=Åçãéìí~Ççê~ i~=áã~ÖÉå=ÇÉ=ä~=Åçãéìí~Ççê~=ÇÉÄÉ=~é~êÉÅÉê=Éå=ä~=é~åí~ää~=ÇÉ=éêçóÉÅÅáµåK= aÉ=äç=Åçåíê~êáçI=éêÉëáçåÉ=Éä=Äçíµå=`çãéìíÉê=E`çãéìí~Ççê~F=Éå=Éä=íÉÅä~Çç= åìã¨êáÅç=ÇÉä=éêçóÉÅíçêK= pá=ëì=Åçãéìí~Ççê~=ÅìÉåí~=Åçå=táåÇçïë=VU=Åçãç=ëáëíÉã~=çéÉê~íáîçI= ÅçåëìäíÉ= rëç=ÇÉä=éêçóÉÅíçê=Åçå=táåÇçïë=VU=éçê=éêáãÉê~=îÉòÒ=Éå=ä~= é•Öáå~ NO=é~ê~=çÄíÉåÉê=áåÑçêã~Åáµå=ëçÄêÉ=Éä=éêçÅÉëç=ÇÉ=áåëí~ä~Åáµå=ÇÉä= Åçåíêçä~ÇçêK ^ëÉÖ∫êÉëÉ=ÇÉ=èìÉ=Éä=éìÉêíç=ÇÉ=îáÇÉç=ÉñíÉêåç=ÇÉ=ä~=Åçãéìí~Ççê~=éçêí•íáä= ~ÅíáîÉ=Éä=éìÉêíç=ÉñíÉêåç=ÇÉ=ä~=Åçãéìí~Ççê~=éçêí•íáä Éëí¨=~Åíáî~ÇçK= jìÅÜ~ë=Åçãéìí~Ççê~ë=éçêí•íáäÉë=åç=ÉåÅáÉåÇÉå=Éä=éìÉêíç=ÇÉ=îáÇÉç=ÉñíÉêåç= ~ìíçã•íáÅ~ãÉåíÉ=Åì~åÇç=ëÉ=ÅçåÉÅí~=ìå=éêçóÉÅíçêK=mçê=äç=ÖÉåÉê~äI=ëÉ=ìíáäáò~= ìå~=ÅçãÄáå~Åáµå=ÇÉ=íÉÅä~ë=Åçãç=ck=H=cR=é~ê~=ÉåÅÉåÇÉê=ó=~é~Ö~ê=ä~= îáëì~äáò~Åáµå=ÉñíÉêå~K=`çåëìäíÉ=ä~=ÇçÅìãÉåí~Åáµå=ÇÉ=ëì=Åçãéìí~Ççê~= éçêí•íáä=é~ê~=çÄíÉåÉê=áåÑçêã~Åáµå=~ÅÉêÅ~=ÇÉ=Éëí~=ÅçãÄáå~Åáµå=ÇÉ=íÉÅä~ëK= \fikç=~é~êÉÅÉ=ä~=áã~ÖÉå=Éå=ëì=Åçãéìí~Ççê~=éçêí•íáä\=mêÉëáçåÉ=Éä= Äçíµå=^ìíç=fã~ÖÉ==E^ìíç=áã~ÖÉåF=Éå=Éä=íÉÅä~Çç=åìã¨êáÅçK=lÄíÉåÖ~= ~óìÇ~=Éå=ä~=é•Öáå~ OMK=...
- Page 136 ^àìëíÉ=ÇÉ=ä~=áã~ÖÉå ~àìëíÉ=ä~=~äíìê~ pá=Éë=åÉÅÉë~êáçI=~àìëíÉ=ä~=~äíìê~=ÇÉä=éêçóÉÅíçê=éêÉëáçå~åÇç=Éä=Äçíµå=ÇÉ= ÇÉëÉåÖ~åÅÜÉ=é~ê~=ÉñíÉåÇÉê=Éä=éáÉK= ÖáêÉ pá=Éë=åÉÅÉë~êáçI=ÖáêÉ=Éä=éáÉ=åáîÉä~Ççê=ìÄáÅ~Çç=Éå=ä~=é~êíÉ=éçëíÉêáçê=ÇÉä= Éä=éáÉ éêçóÉÅíçêK ÉäÉî~Ççê éáÉ bîáíÉ=ÅçäçÅ~ê=ä~ë=ã~åçë=ÅÉêÅ~=ÇÉ=ä~=îÉåíáä~Åáµå=ÇÉ=~áêÉ=Å~äáÉåíÉ=Éå=ä~=é~êíÉ= ÉäÉî~Ççê Äçíµå=ÇÉ=ÇÉëÉåÖ~åÅÜÉ Ñêçåí~ä=ÇÉä=éêçóÉÅíçêK mçëáÅáçåÉ=Éä=éêçóÉÅíçê=~=ä~=Çáëí~åÅá~=ÇÉëÉ~Ç~=ÇÉ=ä~=é~åí~ää~I=~=ìå=•åÖìäç=ÇÉ= ~àìëíÉ=ä~=Çáëí~åÅá~ VM=Öê~Ççë=êÉëéÉÅíç=ÇÉ=ä~=ãáëã~K= `çåëìäíÉ=ä~=í~Ää~=Éå=ä~=é•Öáå~ QN=é~ê~=çÄíÉåÉê=ìå~=äáëí~=ÇÉ=í~ã~¥çë=ÇÉ= é~åí~ää~=ó=Çáëí~åÅá~ëK ^àìëíÉ=Éä=~ìãÉåíç=ÇÉä=äÉåíÉ=ç=Éä=ÑçÅçK ~àìëíÉ=Éä=~ìãÉåíç=ÇÉ=äÉåíÉ=ó=Éä=ÑçÅç ÑçÅç ~ìãÉåíç= E~åáääç=ÑáåçF E~åáääç=ÖêìÉëçF pá=ä~=áã~ÖÉå=åç=Éë=Åì~Çê~Ç~I=~àìëíÉ=ä~=ÅçêêÉÅÅáµå=íê~éÉòçáÇ~ä=ìíáäáò~åÇç=äçë= ~àìëíÉ=ä~=ÅçêêÉÅÅáµå=íê~éÉòçáÇ~ä ÄçíçåÉë=ÇÉä=íÉÅä~Çç=åìã¨êáÅçK= mêÉëáçåÉ=Éä=Äçíµå=hÉóëíçåÉ=E`çêêÉÅÅáµå=íê~éÉòçáÇ~äF=ëìéÉêáçê=é~ê~=êÉÇìÅáê= ä~=é~êíÉ=ëìéÉêáçê=ÇÉ=ä~=áã~ÖÉåK=mêÉëáçåÉ=Éä=Äçíµå=hÉóëíçåÉ==áåÑÉêáçê=é~ê~= êÉÇìÅáê=ä~=é~êíÉ=áåÑÉêáçêK ^àìëíÉ=Éä=Åçåíê~ëíÉ=ç=Éä=Äêáääç=Éå=Éä=ãÉå∫=fã~ÖÉåK= `çåëìäíÉ=ä~=é•Öáå~ PN=é~ê~=çÄíÉåÉê=~óìÇ~=ëçÄêÉ=Éëíçë=ãÉå∫ë=ÇÉ=~àìëíÉK...
- Page 137 rëç=ÇÉä=éêçóÉÅíçê=Åçå=táåÇçïë=VU=éçê=éêáãÉê~=îÉò i~=éêáãÉê~=îÉò=èìÉ=ÅçåÉÅíÉ=ìå~=Åçãéìí~Ççê~=Åçå=táåÇçïë=VU=~ä=éêçóÉÅíçêI= Éä=Éèìáéç=êÉÅçåçÅÉê•=~ä=éêçóÉÅíçê=Åçãç= åìÉîç=Ü~êÇï~êÉÒ=ó=~é~êÉÅÉê•=Éä= ^ëáëíÉåíÉ=é~ê~=~ÖêÉÖ~ê=åìÉîç=ÅçãéçåÉåíÉ=ÇÉ=Ü~êÇï~êÉK=páÖ~=Éëí~ë= áåëíêìÅÅáçåÉë=é~ê~=ìíáäáò~ê=Éä=^ëáëíÉåíÉ=é~ê~=Å~êÖ~ê=Éä=Åçåíêçä~Ççê=~ÇÉÅì~Çç= EèìÉ=ÑìÉ=áåëí~ä~Çç=Åçå=ëì=ëáëíÉã~=çéÉê~íáîç=táåÇçïëFK pá=Éä=ëáëíÉã~=çéÉê~íáîç=ÇÉ=ëì=Åçãéìí~Ççê~=Éë=táåÇçïë=OMMM=ç=táåÇçïë= jbI=çãáí~=Éëíçë=é~ëçë=ó=î~ó~=~= ^àìëíÉ=ÇÉ=ä~=áã~ÖÉåÒ=Éå=ä~=é•Öáå~ NNK e~Ö~=ÅäáÅ=Éå=páÖìáÉåíÉ=é~ê~=ÅçãÉåò~ê=~=ÄìëÅ~ê=Éä=Åçåíêçä~ÇçêK Ä Ä ^ëÉÖ∫êÉëÉ=ÇÉ=èìÉ=ä~=Ñê~ëÉ= _ìëÅ~ê=Éä=ãÉàçê=Åçåíêçä~ÇçêÒ=Éëí¨=ëÉäÉÅÅáçå~Ç~= ó=Ü~Ö~=ÅäáÅ=Éå=páÖìáÉåíÉK Å Å aÉë~ÅíáîÉ=íçÇ~ë=ä~ë=Å~ëáää~ë=ëÉäÉÅÅáçå~Ç~ë=ó=Ü~Ö~=ÅäáÅ=Éå=páÖìáÉåíÉK= táåÇçïë=äçÅ~äáò~ê•=Éä=Åçåíêçä~Ççê=~ìíçã•íáÅ~ãÉåíÉK=pá=ÉëíÉ=Åçåíêçä~Ççê= Ü~=ëáÇç=Éäáãáå~ÇçI=îìÉäî~=~=Å~êÖ~êäç=ìíáäáò~åÇç=Éä=`a=ÇÉ=ëì=ëáëíÉã~= çéÉê~íáîç=táåÇçïëK Ç `ì~åÇç=táåÇçïë=ÉåÅìÉåíêÉ=Éä=Åçåíêçä~ÇçêI=Éëí~ê•=äáëíç=é~ê~=áåëí~ä~êäçK= Ç e~Ö~=ÅäáÅ=Éå=páÖìáÉåíÉK...
- Page 138 lãáí~=Éëí~=é•Öáå~=ëá=åç=ÅçåÉÅíµ=ìå=Å~ÄäÉ=ÇÉ=ê~íµå=rp_K m~ê~=táåÇçïë=VUW √ pá=ÅçåÉÅíµ=Éä=Å~ÄäÉ=rp_I=Éä=^ëáëíÉåíÉ=é~ê~=~ÖêÉÖ~ê=åìÉîç=ÅçãéçåÉåíÉ= ÇÉ=Ü~êÇï~êÉ=~é~êÉÅÉê•=åìÉî~ãÉåíÉK=içë=Åçåíêçä~ÇçêÉë=ÇÉÄÉå=Éëí~ê= áåëí~ä~Ççë=é~ê~=ìíáäáò~ê=ä~=ÑìåÅáçå~äáÇ~Ç=rp_K= √ bä=^ëáëíÉåíÉ=ëÉ=áåáÅá~=íêÉë=îÉÅÉëK= i~=éêáãÉê~=îÉòI=ÇÉíÉÅí~=ìå=Çáëéçëáíáîç=ÅçãéìÉëíç=rp_K= i~=ëÉÖìåÇ~=îÉòI=ìå=Çáëéçëáíáîç=ÇÉ=áåíÉêÑ~ò=Üìã~å~=rp_=Eé~ê~=Éä= íÉÅä~ÇçFK= i~=íÉêÅÉê~=îÉòI=ìå=Çáëéçëáíáîç=ÇÉ=áåíÉêÑ~ò=Üìã~å~=rp_=Eé~ê~=Éä=ê~íµåFK= m~ê~=táåÇçïë=OMMMI=táåÇçïë=jb=ó=táåÇçïë=umW √ içë=Åçåíêçä~ÇçêÉë=rp_=ëÉ=áåëí~ä~å=~ìíçã•íáÅ~ãÉåíÉK=...
- Page 139 ëçå=ä~ë=Å~à~ë=ÇÉ=Å~ÄäÉ=ÇáÖáí~äI=äçë=Öê~Ä~ÇçêÉë=ÇÉ=îáÇÉç=Es`oFI=äçë=Öê~Ä~ÇçêÉë= ÇÉ=îáÇÉç=ÇáÖáí~ä=ó=ä~ë=Å~à~ë=ÇÉ=íÉäÉîáëáµå=ë~íÉäáí~äK=_•ëáÅ~ãÉåíÉI=Åì~äèìáÉê= mìÉÇÉ=ÅçåÉÅí~ê=Öê~Ä~ÇçêÉë=ÇÉ=îáÇÉç=Es`oFI=êÉéêçÇìÅíçêÉë=ÇÉ=ÇáëÅçë=ÇÉ= Çáëéçëáíáîç=èìÉ=éìÉÇ~=Å~ãÄá~ê=ÇÉ=Å~å~ä=Éë=ÅçåëáÇÉê~Çç=ìå=ëáåíçåáò~ÇçêK îáÇÉç=ÇáÖáí~ä=EasaFI=îáÇÉç=Å•ã~ê~ëI=Å•ã~ê~ë=ÇáÖáí~äÉëI=àìÉÖçë=ÇÉ=îáÇÉçI= êÉÅÉéíçêÉë=ÇÉ=íÉäÉîáëáµå=ÇÉ=~äí~=ÇÉÑáåáÅáµå=EeaqsF=ó=ëáåíçåáò~ÇçêÉë=ÇÉ=qs=~ä= éêçóÉÅíçêK=q~ãÄá¨å=ÅìÉåí~=Åçå=ìå~=Éåíê~Ç~=ÇÉ=~ìÇáçK=mìÉÇÉ=ÅçåÉÅí~ê=Éä= é~åí~ää~=QWP é~åí~ää~=NSWV ëçåáÇç=ÇáêÉÅí~ãÉåíÉ=~ä=éêçóÉÅíçêI=ìíáäáò~åÇç=Éä=~äí~îçò=áåÅçêéçê~ÇçI=ç=ÄáÉå= ÅçåÉÅí~êäç=~ä=êÉÅÉéíçê=ÇÉ=ëì=Éëí¨êÉç=é~ê~=çÄíÉåÉê=Éä=ëçåáÇç=ÇÉ=ëìë=éêçéáçë= ~äí~îçÅÉëK ^åíÉë=ÇÉ=ÅçåÉÅí~ê=Éä=éêçóÉÅíçêI=ÇÉÄÉ=ÇÉÅáÇáê=èì¨=~ëéÉÅíç=áã~ÖÉå=ÇÉëÉ~= kç=ìíáäáò~ê ãçÇç=QWP ìíáäáò~êK=mìÉÇÉ=~ÅÅÉÇÉê=~ä=~àìëíÉ=ÇÉä=^ëéÉÅíç=fã~ÖÉå=ÇÉä=éêçóÉÅíçê=~=íê~î¨ë= ÇÉä=jÉå∫=ÇÉä=ãáëãçK=`çåëìäíÉ=ä~=é•Öáå~ PN=é~ê~=çÄíÉåÉê=ã•ë=áåÑçêã~ÅáµåK bä=~ëéÉÅíç=áã~ÖÉå=Éë=ä~=éêçéçêÅáµå=ÇÉä=~åÅÜç=ÇÉ=ä~=áã~ÖÉå=Åçå=êÉëéÉÅíç=~=ëì= ~äíìê~K=mçê=äç=ÖÉåÉê~äI=ä~ë=é~åí~ää~ë=ÇÉ=íÉäÉîáëáµå=ëçå=QWPI=Éä=î~äçê= éêÉÇÉíÉêãáå~Çç=é~ê~=ÉëíÉ=éêçóÉÅíçêK=içë=êÉÅÉéíçêÉë=ÇÉ=íÉäÉîáëáµå=ÇÉ=~äí~= ÇÉÑáåáÅáµå=EeaqsF=ó=ä~=ã~óçê∞~=ÇÉ=äçë=êÉéêçÇìÅíçêÉë=ÇÉ=ÇáëÅçë=ÇÉ=îáÇÉç= ÇáÖáí~ä=EasaF=ëçå=NSWVK=pá=éä~åÉ~=éêçóÉÅí~ê=Éå=ìå~=é~åí~ää~I=Éä=í~ã~¥ç=ó=ä~= Ñçêã~=ÇÉ=ä~=ãáëã~=êÉëçäîÉê•å=Éëí~=ÅìÉëíáµåK=pá=éä~åÉ~=éêçóÉÅí~ê=ëçÄêÉ=ìå~= é~êÉÇ=Éå=Ää~åÅçI=åç=íÉåÇê•=êÉëíêáÅÅáçåÉë=Éå=Åì~åíç=~ä=í~ã~¥ç=ÇÉ=ä~=é~åí~ää~K= iç=èìÉ=éä~åÉÉ=éêçóÉÅí~ê=í~ãÄá¨å=éìÉÇÉ=~óìÇ~êäÉ=~=ÇÉÅáÇáê=ÉåíêÉ=QWP=ó=NSWVK= ãçÇç=NSWV i~=ã~óçê∞~=ÇÉ=äçë=ÉëéÉÅí•Åìäçë=ÇÉ=íÉäÉîáëáµå=ëçå=QWPI=ãáÉåíê~ë=èìÉ=ä~= ã~óçê∞~=ÇÉ=ä~ë=éÉä∞Åìä~ë=ëçå=NSWVK pá=íáÉåÉ=ìå~=é~åí~ää~=NSWVI=ÇÉÄÉ=ëÉäÉÅÅáçå~ê=ìå=~ëéÉÅíç=áã~ÖÉå=ÇÉ=NSWV=é~ê~= éÉä∞Åìä~ë=~å~ãµêÑáÅ~ë=ç=eaqsI=ó=oÉ~ä=é~ê~=ÅçåíÉåáÇç=QWPK=pá=íáÉåÉ=ìå~= é~åí~ää~=QWPI=í~ãÄá¨å=ÇÉÄÉ=ìíáäáò~ê=NSWV=é~ê~=éÉä∞Åìä~ë=~å~ãµêÑáÅ~ë=ç=eaqsI= éÉêç=íáÉåÉ=ä~=çéÅáµå=ÇÉ=ìíáäáò~ê=QWP=Eé~ê~=ääÉå~ê=ä~=é~åí~ää~F=ç=oÉ~ä=Eé~ê~=ìå= ã~éÉç=ÇáêÉÅíç=ÇÉ=é∞ñÉäÉëF=é~ê~=ÅçåíÉåáÇç=QWPK=qÉåÖ~=Éå=ÅìÉåí~=èìÉ=ä~ë= éÉä∞Åìä~ë=~å~ãµêÑáÅ~ë=ëµäç=ëÉ=îÉê•å=ÅçêêÉÅí~ãÉåíÉ=ëá=ä~=ë~äáÇ~=ÇÉä= êÉéêçÇìÅíçê=ÇÉ=ÇáëÅçë=ÇÉ=îáÇÉç=ÇáÖáí~ä=EasaF=Éëí•=ÅçåÑáÖìê~Ç~=é~ê~= íÉäÉîáëáµå=NSWVK= jçÇç=oÉ~ä= Ekqp`= mìÉÇÉ=ÅçåÉÅí~ê=Éä=éêçóÉÅíçê=~=ä~=ã~óçê∞~=ÇÉ=äçë=Çáëéçëáíáîçë=ÇÉ=îáÇÉç=èìÉ= ∫åáÅ~ãÉåíÉF íÉåÖ~å=Å~é~ÅáÇ~Ç=ÇÉ=ë~äáÇ~=ÇÉ=îáÇÉçK=kç=éìÉÇÉ=ÅçåÉÅí~ê=ÇáêÉÅí~ãÉåíÉ=Éä= Å~ÄäÉ=Åç~ñá~ä=èìÉ=Éåíê~=Éå=ëì=Å~ë~=ÇÉ=ìå~=Åçãé~¥∞~=ÇÉ=Å~ÄäÉ=ç=ë~íÉäáí~äI=ä~=...
- Page 140 `çåÉñáµå=ÇÉ=îáÇÉç=ÅçãéìÉëíç båÅÜìÑÉ=Éä=ÅçåÉÅí~Ççê=~ã~êáääç=ÇÉä=Å~ÄäÉ=ÇÉ=îáÇÉç=ÅçãéìÉëíç=Eåç=áåÅäìáÇçF= Éå=Éä=ÅçåÉÅí~Ççê=ÇÉ=ë~äáÇ~=ÇÉ=îáÇÉç=ÇÉä=Çáëéçëáíáîç=ÇÉ=îáÇÉçK=båÅÜìÑÉ=Éä=çíêç= ÅçåÉÅíÉ=Éä=Å~ÄäÉ=ÇÉ=îáÇÉç=ó=ÇÉ=~ìÇáç= ÅçåÉÅí~Ççê=~ã~êáääç=Éå=Éä=ÅçåÉÅí~Ççê=~ã~êáääç=sáÇÉç=få=ÇÉä=éêçóÉÅíçêK= E~=íê~î¨ë=ÇÉä=~Ç~éí~Ççê=ÇÉ=~ìÇáçF båÅÜìÑÉ=Éä=ÅçåÉÅí~Ççê=ÇÉä=~Ç~éí~Ççê=ÇÉ=~ìÇáç=Ää~åÅç=áåÅäìáÇç=Éå=Éä= ÅçåÉÅí~Ççê=ÇÉ=ë~äáÇ~=ÇÉ=~ìÇáç=áòèìáÉêÇç=ÇÉ=ëì=Çáëéçëáíáîç=ÇÉ=îáÇÉçX=ÉåÅÜìÑÉ= Éä=ÅçåÉÅí~Ççê=êçàç=ÇÉä=~Ç~éí~Ççê=ÇÉ=~ìÇáç=Éå=Éä=ÅçåÉÅí~Ççê=ÇÉ=ë~äáÇ~=ÇÉ= ~ìÇáç=ÇÉêÉÅÜç=ÇÉä=Çáëéçëáíáîç=ÇÉ=îáÇÉçK=båÅÜìÑÉ=Éä=Å~ÄäÉ=ÇÉ=~ìÇáç=áåÅäìáÇç= Éå=Éä=ÅçåÉÅí~Ççê=åÉÖêç=ÇÉä=~Ç~éí~Ççê=ÇÉ=~ìÇáçK=båÅÜìÑÉ=Éä=çíêç=ÉñíêÉãç=ÇÉä= Å~ÄäÉ=ÇÉ=~ìÇáç=Éå=Éä=ÅçåÉÅí~Ççê=~òìä=^ìÇáç=få=ÇÉä=éêçóÉÅíçêK= oÉÅìÉêÇÉ=èìÉ=ä~=ë~äáÇ~=ÇÉ=îáÇÉç=ÇÉëÇÉ=ÅçåÉñáçåÉë=ÅçãéìÉëí~ë=åç=ëçå=ÇÉ= ~äí~=íÉÅåçäçÖ∞~=Åçãç=ä~ë=ë~äáÇ~ë=pJîáÇÉç=ç=ÇÉ=ÅçãéçåÉåíÉK `çåÉñáµå=pJîáÇÉç pá=ëì=Çáëéçëáíáîç=ÇÉ=îáÇÉç=ÅìÉåí~=Åçå=ìå=ÅçåÉÅí~Ççê=êÉÇçåÇç=ÇÉ=Åì~íêç= éìåí~ëI=ÉåÅÜìÑÉ=ìå=Å~ÄäÉ=ÇÉ=pJîáÇÉç=Éå=Éä=ÅçåÉÅí~Ççê=ÇÉ=pJîáÇÉç=ÇÉ=ëì= Çáëéçëáíáîç=ÇÉ=îáÇÉç=ó=Éå=Éä=ÅçåÉÅí~Ççê=pJîáÇÉç==ÇÉä=éêçóÉÅíçêK=ríáäáÅÉ=Éä= ÅçåÉÅíÉ=äçë=Å~ÄäÉ=ÇÉ=pJîáÇÉç=ó=ÇÉ=~ìÇáç= Å~ÄäÉ=ó=Éä=~Ç~éí~Ççê=ÇÉ=~ìÇáç=Åçãç=ëÉ=Ü~=ãÉåÅáçå~Çç=~åíÉêáçêãÉåíÉ E~=íê~î¨ë=ÇÉä=~Ç~éí~Ççê=ÇÉ=~ìÇáçF oÉÅìÉêÇÉ=èìÉ=ä~=ë~äáÇ~=ÇÉ=pJîáÇÉç=Éë=ÇÉ=ã~óçê=Å~äáÇ~Ç=èìÉ=Éä=îáÇÉç= ÅçãéìÉëíçI=éÉêç=åç=í~å=~äí~=Åçãç=Éä=îáÇÉç=ÇÉ=ÅçãéçåÉåíÉK=...
- Page 141 `çåÉñáµå=ÇÉ=îáÇÉç=ÇÉ=ÅçãéçåÉåíÉ= ÅçåÉÅíÉ=äçë=Å~ÄäÉë=ÇÉ=ÅçãéçåÉåíÉ=ãÉÇá~åíÉ= pá=ëì=Çáëéçëáíáîç=ÇÉ=îáÇÉç=ÅìÉåí~=Åçå=ÅçåÉÅí~ÇçêÉë=ÇÉ=ÅçãéçåÉåíÉI= Éä=~Ç~éí~Ççê=ÇÉ=îáÇÉç=ÇÉ=ÅçãéçåÉåíÉ=~= ìíáä∞ÅÉäçë=é~ê~=Éä=çéÅáçå~ä=~Ç~éí~Ççê=ÇÉ=pJîáÇÉç=ç=Éä=ÅçãéçåÉåíÉ=çéÅáçå~ä=~ä= pJîáÇÉç=ó=äçë=Å~ÄäÉë=ÇÉ=~ìÇáç=ãÉÇá~åíÉ= ~Ç~éí~Ççê=ÇÉ=sbp^=Eé~ê~=ea=ó=ä~ë=ÑìÉåíÉë=éêçÖêÉëáî~ëFK=båÅÜìÑÉ=Éä=Å~ÄäÉ= Éä=~Ç~éí~Ççê=ÇÉ=~ìÇáç= ÇÉ=ÅçãéçåÉåíÉ=~ä=Çáëéçëáíáîç=ÇÉ=îáÇÉçK=båÅÜìÑÉ=Éä=çíêç=ÉñíêÉãç=ÇÉä=Å~ÄäÉ= ç= ãÉÇá~åíÉ=Éä=~Ç~éí~Ççê=ÇÉ=îáÇÉç=ÇÉ=ÅçãJ ÅçãéçåÉåíÉ=Éå=Éä=~Ç~éí~Ççê=ó=ÉåÅÜìÑÉ=Éä=~Ç~éí~Ççê=Éå=Éä=pJîáÇÉç=ÇÉä= éçåÉåíÉ=~=sbp^=ó=Éä=~Ç~éí~Ççê=ÇÉ=~ìÇáç= éêçóÉÅíçê=Eé~ê~=Éä=pJîáÇÉçF=ç=Éä=`çãéìíÉê=få=Eé~ê~=sbp^F=ÅçåÉÅíçêK=ríáäáÅÉ= sáÇÉç=ÇÉ= Éä=~Ç~éí~Ççê=ÇÉ=~ìÇáç=Åçãç=ëÉ=ãÉåÅáçåµ=Éå=ä~=é•Öáå~=~åíÉêáçêK ÅçãéçåÉåíÉ=~=sbp^ i~=ÅçåÉñáµå=ÇÉ=ÅçãéçåÉåíÉ=çÑêÉÅÉ=ä~=ã~óçê=Å~äáÇ~Ç=ÇÉ=îáÇÉçK sáÇÉç=ÇÉ= ÅçãéçåÉåíÉ=~=pJîáÇÉç `çåÉñáµå=sd^ ÅçåÉÅíÉ=Éä=Å~ÄäÉ=sd^=ó Éä=Å~ÄäÉ=ÇÉ=~ìÇáç=~=íê~î¨ë= pá=ëì=Çáëéçëáíáîç=ÇÉ=îáÇÉç=ÅìÉåí~=Åçå=ìå~=ë~äáÇ~=sd^=ÇÉ=NR=é~íáää~ëI=ÉåÅÜìÑÉ= ÇÉä=~Ç~éí~Ççê=ÇÉ=~ìÇáç ìå=ÉñíêÉãç=ÇÉä=Å~ÄäÉ=ÇÉ=ä~=Åçãéìí~Ççê~=áåÅäìáÇç=~ä=ÅçåÉÅí~Ççê=sd^=ÇÉ=ëì= ÑìÉåíÉ=ÇÉ=îáÇÉçK=bëíÉ=ÅçåÉÅí~Ççê=éìÉÇÉ=Éëí~ê=ÉíáèìÉí~Çç= qç=jçåáíçêÒ=E~ä= ãçåáíçêF=Éå=ä~=ÑìÉåíÉ=ÇÉ=îáÇÉçK=båÅÜìÑÉ=Éä=çíêç=ÉñíêÉãç=ÇÉä=Å~ÄäÉ=Éå=Éä= ÅçåÉÅí~Ççê=`çãéìíÉê=få=ÇÉä=éêçóÉÅíçêK ríáäáÅÉ=Éä=~Ç~éí~Ççê=ÇÉ=~ìÇáç=Åçãç=ëÉ=ãÉåÅáçåµ=Éå=ä~=é•Öáå~=~åíÉêáçêK =ÅçåÉÅíÉ=Éä=Å~ÄäÉ=ÇÉ=~äáãÉåí~Åáµå `çåÉÅíÉ=Éä=Å~ÄäÉ=ÇÉ=~äáãÉåí~Åáµå=~ä=ÅçåÉÅí~Ççê=mçïÉê=~ä=Åçëí~Çç=ÇÉä= éêçóÉÅíçê=ó=~=ìå=íçã~ÅçêêáÉåíÉK klq^W=páÉãéêÉ=ìíáäáÅÉ=Éä=Å~ÄäÉ=ÇÉ=~äáãÉåí~Åáµå=ëìãáåáëíê~Çç=Åçå=Éä= éêçóÉÅíçêK=...
- Page 142 êÉíáêÉ=ä~=í~é~=ÇÉä=äÉåíÉ oÉíáêÉ=ä~=í~é~=ÇÉä=äÉåíÉK jìÉî~=Éä=áåíÉêêìéíçê=mçïÉê=~ä=Åçëí~Çç=ÇÉä=éêçóÉÅíçê=~=ä~=éçëáÅáµå=låK ãìÉî~=Éä=áåíÉêêìéíçê=ÇÉ=ÉåÅÉåÇáÇç bä=iba=ÇÉëíÉää~=Éå=Åçäçê=îÉêÇÉ=ó=ëÉ=ÉåÅáÉåÇÉå=äçë=îÉåíáä~ÇçêÉëK=`ì~åÇç=ä~= ä•ãé~ê~=ëÉ=ÉåÅáÉåÇÉI=~é~êÉÅÉ=ä~=é~åí~ää~=ÇÉ=áåáÅáç=ó=Éä=iba=èìÉÇ~= áäìãáå~Çç=Éå=Åçäçê=îÉêÇÉ=Åçåëí~åíÉK=mìÉÇÉ=íê~åëÅìêêáê=~éêçñáã~Ç~ãÉåíÉ= ìå=ãáåìíç=Ü~ëí~=èìÉ=ä~=áã~ÖÉå=äçÖêÉ=Éä=Äêáääç=ÅçãéäÉíçK= fikç=~é~êÉÅÉ=ä~=é~åí~ää~=ÇÉ=áåáÅáç\=lÄíÉåÖ~=~óìÇ~=Éå=ä~=é•Öáå~ NVK `çåÉÅíÉ=ó=ÉåÅáÉåÇ~=Éä=Çáëéçëáíáîç=ÇÉ=îáÇÉçK ÉåÅáÉåÇ~=Éä=Çáëéçëáíáîç=ÇÉ=îáÇÉç i~=áã~ÖÉå=ÇÉä=ãáëãç=ÇÉÄÉ=~é~êÉÅÉê=Éå=ä~=é~åí~ää~=ÇÉ=éêçóÉÅÅáµåK=aÉ=äç= Åçåíê~êáçI=éêÉëáçåÉ=Éä=Äçíµå=sáÇÉç=Éå=Éä=íÉÅä~Çç=åìã¨êáÅçK= fi=kç=~é~êÉÅÉ=åáåÖìå~=áã~ÖÉå\=lÄíÉåÖ~=~óìÇ~=Éå=ä~=é•Öáå~ OPK ^àìëíÉ=ÇÉ=ä~=áã~ÖÉå ~àìëíÉ=ä~=~äíìê~ ^àìëíÉ=ä~=~äíìê~=ÇÉä=éêçóÉÅíçê=éêÉëáçå~åÇç=Éä=Äçíµå=ÇÉ=ÇÉëÉåÖ~åÅÜÉ=é~ê~= ÉñíÉåÇÉê=Éä=éáÉK= ÖáêÉ pá=Éë=åÉÅÉë~êáçI=ÖáêÉ=Éä=éáÉ=åáîÉä~Ççê=ìÄáÅ~Çç=Éå=ä~=é~êíÉ=éçëíÉêáçê=ÇÉä= Éä=éáÉ éáÉ éêçóÉÅíçêK= åáîÉä~Ççê ÉäÉî~Ççê Äçíµå=ÇÉ=ÇÉëÉåÖ~åÅÜÉ mçëáÅáçåÉ=Éä=éêçóÉÅíçê=~=ä~=Çáëí~åÅá~=ÇÉëÉ~Ç~=ÇÉ=ä~=é~åí~ää~I=~=ìå=•åÖìäç=ÇÉ= ~àìëíÉ=ä~=Çáëí~åÅá~ VM=Öê~Ççë=êÉëéÉÅíç=ÇÉ=ä~=ãáëã~K= `çåëìäíÉ=ä~=í~Ää~=Éå=ä~=é•Öáå~ QN=é~ê~=çÄíÉåÉê=ìå~=äáëí~=ÇÉ=í~ã~¥çë=ÇÉ= é~åí~ää~=ó=Çáëí~åÅá~ë=ÇÉëÇÉ=ä~=é~åí~ää~K...
- Page 143 ^àìëíÉ=Éä=~ìãÉåíç=ÇÉ=äÉåíÉ=ó=Éä=ÑçÅçK ~àìëíÉ=Éä=~ìãÉåíç=ÇÉ=äÉåíÉ=ó=Éä=ÑçÅç ÑçÅç ~ìãÉåíç= E~åáääç=ÑáåçF =E~åáääç=ÖêìÉëçF pá=ä~=áã~ÖÉå=åç=Éë=Åì~Çê~Ç~I=~àìëíÉ=ä~=ÅçêêÉÅÅáµå=íê~éÉòçáÇ~ä=ìíáäáò~åÇç=äçë= ~àìëíÉ=ä~=ÅçêêÉÅÅáµå=íê~éÉòçáÇ~ä ÄçíçåÉë=ÇÉä=íÉÅä~Çç=åìã¨êáÅçK=mêÉëáçåÉ=Éä=Äçíµå=hÉóëíçåÉ=ëìéÉêáçê=é~ê~= êÉÇìÅáê=ä~=é~êíÉ=ëìéÉêáçê=ÇÉ=ä~=áã~ÖÉåK=mêÉëáçåÉ=Éä=Äçíµå=hÉóëíçåÉ==áåÑÉêáçê= é~ê~=êÉÇìÅáê=ä~=é~êíÉ=áåÑÉêáçêK ^àìëíÉ=Éä=îçäìãÉå=Éå=Éä=íÉÅä~Çç=åìã¨êáÅç=ç=Éä=Åçåíêçä=êÉãçíçK ~àìëíÉ=Éä=îçäìãÉå ^àìëíÉ=Éä=Åçåíê~ëíÉI=Éä=ÄêáääçI=Éä=ÅçäçêI=Éä=íáåíÉ=ç=Éä=~ëéÉÅíç=áã~ÖÉå=Éå=Éä=ãÉå∫= çéÅáçåÉë=ÇÉ=~àìëíÉ=Éå=Éä=ãÉå∫=fã~ÖÉå fã~ÖÉåK=`çåëìäíÉ=ä~=é•Öáå~ PN=é~ê~=çÄíÉåÉê=~óìÇ~=ëçÄêÉ=äçë=ãÉå∫ë=ó=Éëíçë= áåÅäìóÉåÇç=Éä=^ëéÉÅíç=áã~ÖÉå ~àìëíÉëK bå=Åì~åíç=~ä=^ëéÉÅíç=áã~ÖÉåI=íÉåÖ~=Éå=ÅìÉåí~=èìÉ=äçë=êÉéêçÇìÅíçêÉë=ÇÉ= asa=ëÉ=ÇÉÄÉå=ÅçåÑáÖìê~ê=Éå=NSWV=é~ê~=îÉê=ìå~=áã~ÖÉå=ÇÉ=ãÉàçê=Å~äáÇ~ÇK= m~ê~=çÄíÉåÉê=ã•ë=áåÑçêã~Åáµå=~ÅÉêÅ~=ÇÉä=^ëéÉÅíç=áã~ÖÉåI=ÅçåëìäíÉ=ä~= é•Öáå~ NQK...
- Page 144 bä=éêçóÉÅíçê=ãìÉëíê~=~ìíçã•íáÅ~ãÉåíÉ=ìå~=é~åí~ää~=åÉÖê~=ëá=åç=ÇÉíÉÅí~=ìå~= pá=ä~=áã~ÖÉå=~é~êÉÅÉ=ÅçêêÉÅí~ãÉåíÉ=Éå=ä~=é~åí~ää~I=é~ëÉ=~=ä~=ëáÖìáÉåíÉ= ÑìÉåíÉ=~Åíáî~=Çìê~åíÉ=PM=ãáåìíçëK=bëí~=é~åí~ää~=åÉÖê~=~óìÇ~=~=éêÉëÉêî~ê=ä~= ëÉÅÅáµåK=aÉ=äç=Åçåíê~êáçI=ëçäìÅáçåÉ=Éä=éêçÄäÉã~=ÇÉ=ÅçåÑáÖìê~ÅáµåK= îáÇ~=∫íáä=ÇÉä=éêçóÉÅíçêK=i~=áã~ÖÉå=îìÉäîÉ=Åì~åÇç=ëÉ=ÇÉíÉÅí~=ìå~=ÑìÉåíÉ= bä=iba==Éå=ä~=é~êíÉ=ëìéÉêáçê=ÇÉä=éêçóÉÅíçê=áåÇáÅ~=Éä=Éëí~Çç=ÇÉä=ãáëãç=ó= ~Åíáî~=ç=~ä=éêÉëáçå~ê=ìå=Äçíµå=ÇÉä=Åçåíêçä=êÉãçíç=ç=ÇÉä=íÉÅä~Çç=åìã¨êáÅçK éìÉÇÉ=~óìÇ~êäÉ=~=ëçäìÅáçå~ê=éêçÄäÉã~ëK= dì~êÇ~ê=é~åí~ää~ q~Ää~=NW=`çãéçêí~ãáÉåíç=ó=ëáÖåáÑáÅ~Çç=ÇÉä=iba rëíÉÇ=éìÉÇÉ=Ü~ÅÉê=èìÉ=ä~=é~åí~ää~=åÉÖê~=~é~êÉòÅ~=ÇÉëéì¨ë=ÇÉ=ìå=å∫ãÉêç= éêÉÉëí~ÄäÉÅáÇç=ÇÉ=ãáåìíçë=~Åíáî~åÇç=ä~=Å~ê~ÅíÉê∞ëíáÅ~=pÅêÉÉå=p~îÉ=Éå=Éä= `çäçê=ó=Åçãéçêí~ãáÉåíç=ÇÉä=iba páÖåáÑáÅ~Çç ãÉåì=`çåÑáÖìê~Åáµå=[=páëíÉã~K=`çåëìäíÉ=ä~=é•Öáå~ PQK îÉêÇÉ=Åçåëí~åíÉ bä=áåíÉêêìéíçê=ëÉ=Ü~=éìÉëíç=Éå=éçëáÅáµå=ÇÉ= ^Üçêêç=ÇÉ=ÉåÉêÖ∞~ ÉåÅÉåÇáÇç=ó=ëÉ=Ü~=áåáÅá~Çç=Éä=ëçÑíï~êÉK=pÉ= bä=éêçóÉÅíçê=í~ãÄá¨å=ÅìÉåí~=Åçå=ìå~=Å~ê~ÅíÉê∞ëíáÅ~=ÇÉ=^Üçêêç=ÇÉ=ÉåÉêÖ∞~= ~é~Öµ=Éä=éêçóÉÅíçê=ëÉ=~é~Öµ=ÇÉëÇÉ=Éä= èìÉ=~é~Ö~=ä~=ä•ãé~ê~=~ìíçã•íáÅ~ãÉåíÉ=ëá=åç=ëÉ=ÇÉíÉÅí~å=ÑìÉåíÉë=~Åíáî~ë=åá= Åçåíêçä=êÉãçíçK Éä=ìëì~êáç=êÉ~äáò~=áåíÉê~ÅÅáçåÉë=Åçå=Éä=éêçóÉÅíçê=Çìê~åíÉ=OM=ãáåìíçëK=bëí~= îÉêÇÉ=áåíÉêãáíÉåíÉ pÉ=Ü~=éêÉëáçå~Çç=Éä=áåíÉêêìéíçê=ÇÉ= Å~ê~ÅíÉê∞ëíáÅ~=ëÉ=ÉåÅìÉåíê~=~é~Ö~Ç~=ÇÉ=ã~åÉê~=éêÉÇÉíÉêãáå~Ç~K=`çåëìäíÉ=ä~= ÉåÅÉåÇáÇç=ó=ëÉ=Éëí•=áåáÅá~åÇç=Éä=ëçÑíï~êÉI=ç= é•Öáå~ PQK ÄáÉå=Éä=éêçóÉÅíçê=ëÉ=Éëí•=~é~Ö~åÇç=ó=äçë= `µãç=~é~Ö~ê=Éä=éêçóÉÅíçê îÉåíáä~ÇçêÉë=ÑìåÅáçå~å=é~ê~=ÉåÑêá~ê=ä~= mìÉÇÉ=~é~Ö~ê=Éä=éêçóÉÅíçê=ëáãéäÉãÉåíÉ=ãçîáÉåÇç=Éä=áåíÉêêìéíçê=ÇÉ= ä•ãé~ê~K ÉåÅÉåÇáÇç=Ü~Åá~=ä~=éçëáÅáµå=lÑÑ=E~é~Ö~ÇçFK êçàç=áåíÉêãáíÉåíÉ e~=çÅìêêáÇç=ìå=Ñ~ääç=ÇÉä=îÉåíáä~Ççê=ç=ä~= ä•ãé~ê~K=sÉêáÑáèìÉ=èìÉ=ä~ë=îÉåíáä~ÅáçåÉë=åç= q~ãÄá¨å=éìÉÇÉ=éêÉëáçå~ê=Éä=Äçíµå=mçïÉê=ÇÉä=Åçåíêçä=êÉãçíç=é~ê~=~é~Ö~ê=Éä= ÅçåëìäíÉ=ä~=é•Öáå~ QN=é~ê~=çÄíÉåÉê=ã•ë= Éëí¨å=ÄäçèìÉ~Ç~ë=EÅçåëìäíÉ=ä~=é•Öáå~ ORFK=...
- Page 145 mêçÄäÉã~ pçäìÅáµå oÉëìäí~Çç ÉåÅÜìÑÉ=Éä=Å~ÄäÉ=ÇÉ=~äáãÉåí~Åáµå=Éå=Éä= áã~ÖÉå=ÅçêêÉÅí~ åç=~é~êÉÅÉ=ä~=é~åí~ää~=ÇÉ=áåáÅáç Åçëí~Çç=áòèìáÉêÇç=ÇÉä=éêçóÉÅíçê êÉíáêÉ=ä~=í~é~=ÇÉä=äÉåíÉ ãìÉî~=Éä=áåíÉêêìéíçê=ÇÉ=ÉåÅÉåÇáÇç ãìÉî~=Éä=áåíÉêêìéíçê= ÇÉ=ÉåÅÉåÇáÇç=Éå=Éä=Åçëí~Çç ëÉ=éêçóÉÅí~=ä~=áã~ÖÉå=ÇÉ=ä~=Åçãéìí~Ççê~ éêÉëáçåÉ=Éä=Äçíµå=ÇÉ=ä~=Åçãéìí~Ççê~= ëµäç=~é~êÉÅÉ=ä~=é~åí~ää~=ÇÉ=áåáÅáç ~ÅíáîÉ=Éä=éìÉêíç=ÉñíÉêåç=ÇÉ=ä~=Åçãéìí~Ççê~= éçêí•íáä êÉáåáÅáÉ=ä~= Åçãéìí~Ççê~= éçêí•íáä...
- Page 146 mêçÄäÉã~ pçäìÅáµå oÉëìäí~Çç åç=~é~êÉÅÉ=ä~=áã~ÖÉå=ÇÉ=ä~=Åçãéìí~Ççê~I=ëµäç=ä~ë= çéêáã~=Éä=Äçíµå=~ìíç=áã~ÖÉ=Éå=Éä=íÉÅä~Çç= ëÉ=éêçóÉÅí~=ä~=áã~ÖÉå=ÇÉ=ä~=Åçãéìí~Ççê~ é~ä~Äê~ë= pÉ¥~ä=ÑìÉê~=ÇÉ=ê~åÖçÒ= åìã¨êáÅç ~àìëíÉ=ä~=îÉäçÅáÇ~Ç=ÇÉ=êÉÖÉåÉê~Åáµå=Éå=m~åÉä ÇÉ=Åçåíêçä=[=m~åí~ää~=[=`çåÑáÖìê~Åáµå=[= ^î~åò~Çç=[=^Ç~éí~Ççê=Eä~=ìÄáÅ~Åáµå=î~ê∞~= ëÉÖ∫å=Éä=ëáëíÉã~=çéÉê~íáîçF èìáò•=ÇÉÄ~=ÅçåÑáÖìê~ê=ìå~=êÉëçäìÅáµå ÇáÑÉêÉåíÉ=Éå=ëì=Åçãéìí~Ççê~I=Åçãç=ëÉ= áäìëíê~=Éå=Éä=ëáÖìáÉåíÉ=éêçÄäÉã~I= áã~ÖÉå= Äçêêçë~=ç=Åçêí~Ç~Ò...
- Page 147 mêçÄäÉã~ pçäìÅáµå oÉëìäí~Çç ÅçåÑáÖìêÉ=ä~=êÉëçäìÅáµå=ÇÉ=îáëì~äáò~Åáµå=ÇÉ= áã~ÖÉå=Åä~ê~=ó=åç=Åçêí~Ç~ áã~ÖÉå=Äçêêçë~=ç=Åçêí~Ç~= ä~=Åçãéìí~Ççê~=Éå=ä~=êÉëçäìÅáµå=êÉ~ä=ÇÉä= éêçóÉÅíçê=EfåáÅáç=[=`çåÑáÖìê~Åáµå=[=m~åÉä= ÇÉ=Åçåíêçä=[=m~åí~ää~=[=ÑáÅÜ~=`çåÑáÖìê~ÅáµåK pÉäÉÅÅáçåÉ=UMMñSMMK Éå=ìå~= Åçãéìí~Ççê~= éçêí•íáäI=ÇÉë~ÅíáîÉ Éä=ãçåáíçê=ç= ÉåÅáÉåÇ~=Éä=ãçÇç= ÇÉ=îáëì~äáò~Åáµå= ÇçÄäÉK ãìÉî~=Éä=éêçóÉÅíçêI=~àìëíÉ=Éä=~ìãÉåíç=ÇÉ= ä~=áã~ÖÉå=åç=Éëí•=ÅÉåíê~Ç~=Éå=ä~=é~åí~ää~ áã~ÖÉå=ÅçêêÉÅí~ äÉåíÉI=~àìëíÉ=ä~=~äíìê~ ~àìëíÉ=ä~=éçëáÅáµå= Üçêáòçåí~ä=ç=îÉêíáÅ~ä= Éå=Éä=ãÉå∫=fã~ÖÉå=[ = ^î~åò~Çç...
- Page 148 mêçÄäÉã~ pçäìÅáµå oÉëìäí~Çç ä~=áã~ÖÉå=åç=Éë=Åì~Çê~Ç~ ~àìëíÉ=ä~=ÅçêêÉÅÅáµå=íê~éÉòçáÇ~ä=Éå=Éä= áã~ÖÉå=Åì~Çê~Ç~ íÉÅä~Çç=åìã¨êáÅç ~àìëíÉ=káíáÇÉò=E∫åáÅ~ãÉåíÉ=ÑìÉåíÉë=ÇÉ= áã~ÖÉå=ÅçêêÉÅí~ ä~=áã~ÖÉå=åç=Éë=å∞íáÇ~ îáÇÉçF=Éå=Éä=ãÉå∫=fã~ÖÉå=[=^î~åò~Çç ä~=áã~ÖÉå=åç=Å~ÄÉ=Éå=ìå~=é~åí~ää~=ÇÉ=QWP=µ=NSWV Å~ãÄáÉ=Éä=~ëéÉÅíç=áã~ÖÉå=~=QWP=µ=NSWV=Éå=Éä= áã~ÖÉå=ÅçêêÉÅí~ ãÉå∫=fã~ÖÉå=[=^ëéÉÅíç=fã~ÖÉå...
- Page 149 mêçÄäÉã~ pçäìÅáµå oÉëìäí~Çç ~é~ÖìÉ=jçåí~àÉ=~ä=íÉÅÜç=Éå=Éä=ãÉå∫= áã~ÖÉå=ÅçêêÉÅí~ ä~=áã~ÖÉå=Éëí•=~ä=êÉî¨ë `çåÑáÖìê~Åáµå=[=páëíÉã~ áã~ÖÉå=ÅçêêÉÅí~ ~é~ÖìÉ=oÉ~ê=EmçëíÉêáçêF=Éå=Éä=ãÉå∫= ä~=áã~ÖÉå=Éëí•=áåîÉêíáÇ~=ÇÉ=áòèìáÉêÇ~=~=ÇÉêÉÅÜ~ `çåÑáÖìê~Åáµå=[=páëíÉã~ ~àìëíÉ=Éä=ÅçäçêI=Éä=íáåíÉI=ä~=íÉãéÉê~íìê~=ÇÉä= áã~ÖÉå=ÅçêêÉÅí~ äçë=ÅçäçêÉë=éêçóÉÅí~Ççë=åç=ÅçáåÅáÇÉå=Åçå=ä~=ÑìÉåíÉ ÅçäçêI=Éä=Äêáääç=ó=Éä=Åçåíê~ëíÉ=Éå=äçë=ãÉå∫ë COLOR COLOR...
- Page 150 mêçÄäÉã~ pçäìÅáµå oÉëìäí~Çç ä~=ä•ãé~ê~=ëÉ=ÉåÅáÉåÇÉ ä~=ä•ãé~ê~=åç=ëÉ=ÉåÅáÉåÇÉI=Éä=iba=ÇÉëíÉää~=Éå=êçàç îÉêáÑáèìÉ=èìÉ=ä~ë=îÉåíáä~ÅáçåÉë=åç=Éëí¨å= ÄäçèìÉ~Ç~ëI=~é~ÖìÉ=Éä=éêçóÉÅíçê=ó=ÇÉàÉ=èìÉ= ëÉ=ÉåÑê∞É=Çìê~åíÉ=ìå=ãáåìíç= ëá=Éä=Åçåí~Ççê=ÇÉ=Üçê~ë=ÇÉ=ìëç=ÇÉ=ä~=ä•ãé~ê~= ~ä=áåáÅáç=~é~êÉÅÉ=Éä=ãÉåë~àÉ= `Ü~åÖÉ=ä~ãéÒ= ä~=ä•ãé~ê~=ëÉ=ÉåÅáÉåÇÉ Éë=ã•ë=ÇÉ=PIMMMJQIMMMI=ÉåíçåÅÉë=ÇÉÄÉ= EÅ~ãÄá~ê=ä•ãé~ê~F=çä~=ä•ãé~ê~=åç=ëÉ=ÉåÅáÉåÇÉ=ó=Éä= êÉÉãéä~ò~ê=ä~=ä•ãé~ê~=EÅçåëìäíÉ=ä~= iba=ÇÉëíÉää~=Éå=êçàç é•Öáå~ PTF îÉêáÑáèìÉ=ä~ë=Üçê~ë= ÇÉ=ìëç=ÇÉ=ä~=ä•ãé~ê~= mêáåÅáé~ä=[= ^ÅÉêÅ~=ÇÉ êÉÉãéä~ÅÉ= ä~=ä•ãé~ê~...
- Page 151 rëç=ÇÉä=Åçåíêçä=êÉãçíç içë=ÄçíçåÉë=mêÉîáçìë=E^åíÉêáçêF=ó=kÉñí=EpáÖìáÉåíÉF=äÉ=éÉêãáíÉå=å~îÉÖ~ê=~= íê~î¨ë=ÇÉ=ëì=éêÉëÉåí~Åáµå=ÇÉ=mçïÉêmçáåí=Éå=ãçÇç=mêÉëÉåí~Åáµå=Åçå= Çá~éçëáíáî~ëK=båÅÜìÑÉ=Éä=ÅçåÉÅí~Ççê=rp_=ÇÉä=Å~ÄäÉ=ÇÉ=ä~=Åçãéìí~Ççê~=~=ëì= bä=Åçåíêçä=êÉãçíç=ìíáäáò~=Ççë=EOF=Ä~íÉê∞~ë=^^=ëìãáåáëíê~Ç~ëK=i~ë=ãáëã~ë=ëÉ= Åçãéìí~Ççê~=é~ê~=ìíáäáò~ê=Éëíçë=ÄçíçåÉëK=i~=éêáãÉê~=îÉò=èìÉ=äç=Ü~Ö~I=èìáò•= áåëí~ä~å=Ñ•ÅáäãÉåíÉI=ÇÉëäáò~åÇç=ä~=í~é~=Éå=ä~=é~êíÉ=éçëíÉêáçê=ÇÉä=Åçåíêçä= ~é~êÉòÅ~=Éä=~ëáëíÉåíÉ=^ÖêÉÖ~ê=åìÉîç=Ü~êÇï~êÉK=m~ê~=çÄíÉåÉê=áåÑçêã~Åáµå= êÉãçíçI=~äáåÉ~åÇç=äçë=ÉñíêÉãçë=H=ó=Ó=ÇÉ=ä~ë=Ä~íÉê∞~ëI=ÅçäçÅ•åÇçä~ë=Éå=ëì= ëçÄêÉ=ŵãç=Å~êÖ~ê=äçë=Åçåíêçä~ÇçêÉë=rp_=ÅçêêÉÅíçëI=ÅçåëìäíÉ=ä~=é•Öáå~=NPK= äìÖ~ê=ó=îçäîáÉåÇç=~=éçåÉê=ä~=í~é~K mêÉÅ~ìÅáµåW=^ä=êÉÉãéä~ò~ê=ä~ë=Ä~íÉê∞~ëI=íÉåÖ~=Éå=ÅìÉåí~=èìÉ=ìíáäáò~ê=ìå=íáéç= Äçíµå=~åíÉêáçê Äçíµå=ëáÖìáÉåíÉ ÇáÑÉêÉåíÉ=~=ä~ë=ëìãáåáëíê~Ç~ë=Åçå=Éä=éêçóÉÅíçê=éìÉÇÉ=Å~ìë~ê=Öê~îÉë=Ç~¥çë=~ä= Åçåíêçä=êÉãçíçK=`ì~åÇç=ÇÉëÉÅÜÉ=ä~ë=Ä~íÉê∞~ëI=~ëÉÖ∫êÉëÉ=ÇÉ=Ü~ÅÉêäç=ÇÉ= ~ÅìÉêÇç=Åçå=ä~ë=åçêã~ë=ãÉÇáç~ãÄáÉåí~äÉë=îáÖÉåíÉëKm~ê~=çéÉê~êI=~éìåíÉ=Éä= Åçåíêçä=êÉãçíç=Ü~Åá~=ä~=é~åí~ää~=ÇÉ=éêçóÉÅÅáµå=ç=Éä=éêçóÉÅíçê=Eåç=~=ä~= Åçãéìí~Ççê~FK=bä=ê~åÖç=ÇÉ=ÑìåÅáçå~ãáÉåíç=µéíáãç=Éë=ÇÉ=NR=éáÉë=EQIR=ãF= ~éêçñáã~Ç~ãÉåíÉK léêáãáê=Éä=Äçíµå=mçïÉê=ÇÉä=Åçåíêçä=êÉãçíç=Åì~åÇç=Éä=áåíÉêêìéíçê=ÇÉ= ÉåÅÉåÇáÇç=ÇÉä=éêçóÉÅíçê=ëÉ=ÉåÅìÉåíê~=Éå=ä~=éçëáÅáµå=lÑÑ=åç=ÉåÅáÉåÇÉ=Éä= ÄçíçåÉë éêçóÉÅíçêK=bë=åÉÅÉë~êáç=éçåÉê=Éä=áåíÉêêìéíçê=ÇÉ=ÉåÅÉåÇáÇç=ÇÉä=éêçóÉÅíçê=Éå= ÇÉ=å~îÉÖ~Åáµå ä~=éçëáÅáµå=lå=é~ê~=éÉêãáíáê=èìÉ=Éä=Åçåíêçä=êÉãçíç=äç=ÉåÅáÉåÇ~K `ì~åÇç=Éä=éêçóÉÅíçê=Éëí•=ÑìåÅáçå~åÇçI=éìÉÇÉ=éêÉëáçå~ê=Éä=Äçíµå=ÇÉ= ÉåÅÉåÇáÇç=ÇÉä=Åçåíêçä=êÉãçíç=é~ê~=ÅçäçÅ~ê=Éä=éêçóÉÅíçê=Éå=lÑÑ=EÅçåëìäíÉ=ä~= é•Öáå~ NV=é~ê~=çÄíÉåÉê=áåÑçêã~Åáµå=ëçÄêÉ=ŵãç=é~ê~ê=Éä=éêçóÉÅíçêF=ó= ~é~Ö~êäçK `µãç=ëçäìÅáçå~ê=éêçÄäÉã~ë=ÇÉä=Åçåíêçä=êÉãçíç mêÉëáçåÉ=Éä=Äçíµå=jÉåì=EjÉå∫F=ÇÉä=Åçåíêçä=êÉãçíç=é~ê~=~Äêáê=Éä=ëáëíÉã~=ÇÉ= √ ^ëÉÖ∫êÉëÉ=ÇÉ=èìÉ=ä~ë=Ä~íÉê∞~ë=Éëí¨å=áåëí~ä~Ç~ë=Éå=ä~=çêáÉåí~Åáµå=ÅçêêÉÅí~= ãÉå∫ë=ÇÉä=éêçóÉÅíçêK=ríáäáÅÉ=äçë=ÄçíçåÉë=Åçå=ÑäÉÅÜ~ë=é~ê~=å~îÉÖ~ê=ó=Éä=Äçíµå= ó=Éëí¨å=Å~êÖ~Ç~ëK pÉäÉÅí=EpÉäÉÅÅáçå~êF=é~ê~=ëÉäÉÅÅáçå~ê=Å~ê~ÅíÉê∞ëíáÅ~ë=ó=~àìëí~ê=î~äçêÉë=Éå=äçë= ãÉå∫ëK=`çåëìäíÉ=ä~=é•Öáå~ PM=é~ê~=çÄíÉåÉê=ã•ë=áåÑçêã~Åáµå=ëçÄêÉ=äçë= √...
- Page 152 m~ê~=ìíáäáò~ê=Éä=~äí~îçò=ÇÉä=éêçóÉÅíçêI=ÅçåÉÅíÉ=ä~=ÑìÉåíÉ=~ä=ÅçåÉÅí~Ççê=^ìÇáç= ÅçåÉÅíÉ=Éä=Å~ÄäÉ=ÇÉ=~ìÇáç få=ÇÉä=éêçóÉÅíçêK=`çåëìäíÉ=ä~=é•Öáå~ NR=é~ê~=çÄíÉåÉê=áåÑçêã~Åáµå=~ÅÉêÅ~=ÇÉä= ìëç=ÇÉä=~Ç~éí~Ççê=ÇÉ=~ìÇáçK m~ê~=~àìëí~ê=Éä=îçäìãÉåI=éêÉëáçåÉ=äçë=ÄçíçåÉë=sçäìãÉ=Éå=Éä=íÉÅä~Çç= åìã¨êáÅç=ç=Éä=Åçåíêçä=êÉãçíçK m~ê~=ëáäÉåÅá~ê=Éä=ëçåáÇçI=éêÉëáçåÉ=Éä=Äçíµå=jìíÉ=Éå=Éä=Åçåíêçä=êÉãçíçK= `µãç=ëçäìÅáçå~ê=éêçÄäÉã~ë=ÇÉ=~ìÇáç pá=Éä=~ìÇáç=åç=ëÉ=çóÉI=îÉêáÑáèìÉ=äç=ëáÖìáÉåíÉW ~àìëíÉ=Éä=îçäìãÉå √ ^ëÉÖ∫êÉëÉ=ÇÉ=èìÉ=Éä=Å~ÄäÉ=ÇÉ=~ìÇáç=Éëí¨=ÅçåÉÅí~ÇçK √ ^ëÉÖ∫êÉëÉ=ÇÉ=èìÉ=Éä=Äçíµå=jìíÉ=åç=Éëí¨=~Åíáî~Çç=EéêÉëáçåÉ=Éä=Äçíµå= jìíÉ=Éå=Éä=Åçåíêçä=êÉãçíçFK= √ ^ëÉÖ∫êÉëÉ=ÇÉ=èìÉ=Éä=îçäìãÉå=Éëí¨=äç=ëìÑáÅáÉåíÉãÉåíÉ=~äíçK=mêÉëáçåÉ=Éä= Äçíµå=sçäìãÉ=Éå=Éä=íÉÅä~Çç=åìã¨êáÅç=ç=Éå=Éä=Åçåíêçä=êÉãçíçK √ ^ëÉÖ∫êÉëÉ=ÇÉ=èìÉ=Éëí¨=~Åíáî~Ç~=ä~=ÑìÉåíÉ=ÅçêêÉÅí~K √ ^àìëíÉ=ä~=ÑìÉåíÉ=ÇÉ=~ìÇáçK √ pá=Éëí•=êÉéêçÇìÅáÉåÇç=ìå=îáÇÉçI=~ëÉÖ∫êÉëÉ=ÇÉ=èìÉ=ä~=êÉéêçÇìÅÅáµå=åç=ëÉ= Ü~ó~=ÇÉíÉåáÇçK i~=ã~óçê∞~=ÇÉ=äçë=ÄçíçåÉë=ëÉ=ÇÉëÅêáÄÉ=Éå=ÇÉí~ääÉ=Éå=çíê~ë=ëÉÅÅáçåÉëI=ëáå= ÉãÄ~êÖçI=~=Åçåíáåì~Åáµå=ëÉ=áåÅäìóÉ=ìå~=ÇÉëÅêáéÅáµå=ÖÉåÉê~ä=ÇÉ=ëìë= ÑìåÅáçåÉëW jÉåì=Ó=~ÄêÉ=äçë=ãÉå∫ë=Éå=ä~=é~åí~ää~=Eé•Öáå~ PMFK pÉäÉÅí=Ó=ÅçåÑáêã~=ä~ë=ÉäÉÅÅáçåÉë=Éå=äçë=ãÉå∫ë=Eé•Öáå~ PMFK ÄçíçåÉë=ÇÉ cäÉÅÜ~ë=Ü~Åá~=~êêáÄ~L~Ä~àç=Ó=ëÉ=ìíáäáò~å=é~ê~=å~îÉÖ~ê=éçê=äçë=ãÉå∫ë=ó= å~îÉÖ~Åáµå=ÇÉ=ãÉå∫ë ~àìëí~ê=ä~ë=ÅçåÑáÖìê~ÅáçåÉë=Éå=Éääçë=Eé•Öáå~ PMFK ^ìíç=fã~ÖÉ=Ó=êÉëí~ÄäÉÅÉ=Éä=éêçóÉÅíçê=~=ä~=ÑìÉåíÉK mêÉëÉíë=Ó=Å~ãÄá~=ÉåíêÉ=ä~ë=ÅçåÑáÖìê~ÅáçåÉë=ÇÉ=î~äçêÉë=éêÉÉëí~ÄäÉÅáÇçë= ÇáëéçåáÄäÉë=Eé•Öáå~ POFK hÉóëíçåÉ=Ó=~àìëí~=ä~=êÉÅí~åÖìä~êáÇ~Ç=ÇÉ=ä~=áã~ÖÉå=Eé•Öáå~ NNFK sçäìãÉ=Ó=~àìëí~=Éä=ëçåáÇç=Eé•Öáå~ OTFK...
- Page 153 pÉ=éêçéçêÅáçå~å=î~êá~ë=Å~ê~ÅíÉê∞ëíáÅ~ë=é~ê~=Ñ~Åáäáí~ê=ä~ë=éêÉëÉåí~ÅáçåÉë=^= rå~=îÉò=èìÉ=ëì=Åçãéìí~Ççê~=Éëí¨=ÅçêêÉÅí~ãÉåíÉ=ÅçåÉÅí~Ç~=ó=ä~=áã~ÖÉå=ÇÉ= Åçåíáåì~Åáµå=ëÉ=áåÅäìóÉ=ìå~=ÇÉëÅêáéÅáµå=ÖÉåÉê~ä=ÇÉ=ä~ë=ãáëã~ëX=é~ê~= ä~=ãáëã~=~é~êÉòÅ~=Éå=ä~=é~åí~ää~I=éìÉÇÉ=çéíáãáò~ê=ÇáÅÜ~=áã~ÖÉå=ìíáäáò~åÇç= çÄíÉåÉê=áåÑçêã~Åáµå=ã•ë=ÇÉí~ää~Ç~I=ÅçåëìäíÉ=ä~=ëÉÅÅáµå=ÇÉ=ãÉå∫ëK äçë=ãÉå∫ë=Éå=é~åí~ää~K=m~ê~=çÄíÉåÉê=áåÑçêã~Åáµå=ÖÉåÉê~ä=ëçÄêÉ=ŵãç=ìíáäáò~ê= äçë=ãÉå∫ëI=ÅçåëìäíÉ=ä~=é•Öáå~ PMK √ bä=Äçíµå=bÑÑÉÅí=ÇÉä=Åçåíêçä=êÉãçíç=äÉ=éÉêãáíÉ=~ëáÖå~êäÉ=î~êá~ë=ÑìåÅáçåÉëK= bä=ÉÑÉÅíç=éêÉÇÉíÉêãáå~Çç=Éë=^ÅÉêÅ~=ÇÉI=èìÉ=ãìÉëíê~=áåÑçêã~Åáµå=ëçÄêÉ= √ ^àìëíÉ=ä~=ÅçêêÉÅÅáµå=íê~éÉòçáÇ~äI=Éä=Åçåíê~ëíÉ=ç=Éä=Äêáääç=Éå=Éä=ãÉå∫= Éä=éêçóÉÅíçê=ó=ä~=ÑìÉåíÉ=~Åíì~äK=mìÉÇÉ=ÉäÉÖáê=ÉåíêÉ=bå=_ä~åÅçI=páäÉåÅá~êI= fã~ÖÉå=Eé•Öáå~ PNFK= ^ëéÉÅíç=fã~ÖÉåI=`~å~äI=^ìíç=fã~ÖÉåI=m~ìë~I=^ìãÉåíç=ÇÉ=iÉåíÉI=ó= √ `~ãÄáÉ=Éä=~ëéÉÅíç=áã~ÖÉåK=bäáà~=ä~=çéÅáµå=èìÉ=ãÉàçê=ëÉ=~Ç~éíÉ=~=ä~= ^ÅÉêÅ~=ÇÉK=`çåëìäíÉ=ä~=é•Öáå~ PR=é~ê~=çÄíÉåÉê=ã•ë=ÇÉí~ääÉëK=bä=ÉÑÉÅíç= ÑìÉåíÉ=ÇÉ=Éåíê~Ç~=Eé•Öáå~ PNFK é~ìë~=äÉ=éÉêãáíÉ=ÅçåÖÉä~ê=ä~=áã~ÖÉå=ãçëíê~Ç~K=bëíç=êÉëìäí~=∫íáä=ëá=ÇÉëÉ~= √ ^àìëíÉ=ä~=åáíáÇÉò=ç=ä~=íÉãéÉê~íìê~=ÇÉä=Åçäçê=Éå=Éä=ãÉå∫=^î~åò~Çç= Ü~ÅÉê=Å~ãÄáçë=Éå=ëì=Åçãéìí~Ççê~=ëáå=èìÉ=Éä=é∫ÄäáÅç=äç=îÉ~K=bä=ÉÑÉÅíç=ÇÉ= Eé•Öáå~ PPFK ã•ëÅ~ê~=äÉ=éÉêãáíÉ=ÅìÄêáê=é~êíÉ=ÇÉ=ä~=áã~ÖÉå=Åçå=ìå~=Åçêíáå~=åÉÖê~K √ ^àìëíÉ=ä~=Ñ~ëÉI=Éä=ê~ëíêÉç=ç=ä~=éçëáÅáµå=Üçêáòçåí~ä=ç=îÉêíáÅ~ä=Éå=Éä=ãÉå∫= √ bä=Äçíµå=_ä~åâ=ÇÉä=Åçåíêçä=êÉãçíç=äÉ=éÉêãáíÉ=ãçëíê~ê=ìå~=é~åí~ää~=Éå= ^î~åò~Çç=Eé•Öáå~ PPFK Ää~åÅç=Éå=äìÖ~ê=ÇÉ=ä~=ÑìÉåíÉ=~Åíáî~K=mìÉÇÉ=ÉäÉÖáê=Éä=Åçäçê=ÇÉ=Éëí~= é~åí~ää~=Eé•Öáå~ PRFK √ rå~=îÉò=èìÉ=Ü~ó~=çéíáãáò~Çç=ä~=áã~ÖÉå=é~ê~=ìå~=ÑìÉåíÉ=é~êíáÅìä~êI= éìÉÇÉ=Öì~êÇ~ê=ä~ë=ÅçåÑáÖìê~ÅáçåÉë=ìíáäáò~åÇç=mêÉëÉíëK=bëíç=äÉ=éÉêãáíÉ= √...
- Page 154 rå~=îÉò=èìÉ=ëì=Çáëéçëáíáîç=ÇÉ=îáÇÉç=Éëí•=ÅçêêÉÅí~ãÉåíÉ=ÅçåÉÅí~Çç=ó=ä~= mìÉÇÉ=éÉêëçå~äáò~ê=Éä=éêçóÉÅíçê=é~ê~=ëìë=åÉÅÉëáÇ~ÇÉë=ó=ÅçåÑáÖìê~ÅáçåÉë= áã~ÖÉå=ÇÉä=ãáëãç=åç=~é~êÉòÅ~=Éå=ä~=é~åí~ää~I=éìÉÇÉ=çéíáãáò~ê=ÇáÅÜ~= ÉëéÉÅ∞ÑáÅ~ëK=`çåëìäíÉ=ä~ë=é•Öáå~ë=é•Öáå~ PQ=~=é•Öáå~ PS=é~ê~=çÄíÉåÉê=ÇÉí~ääÉë= áã~ÖÉå=ìíáäáò~åÇç=äçë=ãÉå∫ë=Éå=é~åí~ää~K=m~ê~=çÄíÉåÉê=áåÑçêã~Åáµå=ÖÉåÉê~ä= ëçÄêÉ=Éëí~ë=Å~ê~ÅíÉê∞ëíáÅ~ëK ëçÄêÉ=ŵãç=ìíáäáò~ê=äçë=ãÉå∫ëI=ÅçåëìäíÉ=ä~=é•Öáå~ PMK √ m~ê~=ä~=éêçóÉÅÅáµå=éçëíÉêáçêI=~ÅíáîÉ=Éä=ãçÇç=oÉ~ê=Éå=Éä=ãÉå∫= √ ^àìëíÉ=ä~=ÅçêêÉÅÅáµå=íê~éÉòçáÇ~äI=Éä=Åçåíê~ëíÉI=Éä=ÄêáääçI=Éä=Åçäçê=ç=Éä=íáåíÉ= `çåÑáÖìê~Åáµå=[=páëíÉã~K Éå=Éä=ãÉå∫=fã~ÖÉå=Eé•Öáå~ PNFK= √ m~ê~=ä~=éêçóÉÅÅáµå=ÇÉëÇÉ=ãçåí~àÉ=~ä=íÉÅÜçI=~ÅíáîÉ=Éä=ãçÇç=`ÉáäáåÖ=Éå=Éä= √ `~ãÄáÉ=Éä=~ëéÉÅíç=áã~ÖÉåK=bäáà~=ä~=çéÅáµå=èìÉ=ãÉàçê=ëÉ=~Ç~éíÉ=~=ä~= ãÉå∫=`çåÑáÖìê~Åáµå=[=páëíÉã~K= ÑìÉåíÉ=ÇÉ=Éåíê~Ç~=Eé•Öáå~ PNFK √ bëéÉÅáÑáèìÉ=èì¨=ÑìÉåíÉ=îÉêáÑáÅ~=éêáãÉêç=Éä=éêçóÉÅíçê=é~ê~=ÇÉíÉÅí~ê= √ bä=Äçíµå=bÑÑÉÅí=ÇÉä=Åçåíêçä=êÉãçíç=éÉêãáíÉ=~ëáÖå~êäÉ=ÇáîÉêë~ë= îáÇÉç=~Åíáîç=Çìê~åíÉ=Éä=ÉåÅÉåÇáÇçK= Å~ê~ÅíÉê∞ëíáÅ~ëK=bä=ÉÑÉÅíç=éêÉÇÉíÉêãáå~Çç=Éë=^ÅÉêÅ~=ÇÉI=èìÉ=ãìÉëíê~= √ bëéÉÅáÑáèìÉ=ä~=ÑìåÅáµå=ÇÉä=Äçíµå=bÑÑÉÅí=Éå=Éä=Åçåíêçä=êÉãçíçK= áåÑçêã~Åáµå=ëçÄêÉ=Éä=éêçóÉÅíçê=ó=ä~=ÑìÉåíÉ=~Åíì~äK=mìÉÇÉ=ÉäÉÖáê=ÉåíêÉ=bå= √ båÅáÉåÇ~=ó=~é~ÖìÉ=äçë=ãÉåë~àÉë=Éå=é~åí~ää~=ÇÉä=éêçóÉÅíçêK _ä~åÅçI=páäÉåÅá~êI=^ëéÉÅí=fã~ÖÉåI=`~å~äI=^ìíç=fã~ÖÉåI=m~ìë~I= √ båÅáÉåÇ~=ä~ë=Å~ê~ÅíÉê∞ëíáÅ~ë=ÇÉ=~Üçêêç=ÇÉ=ÉåÉêÖ∞~K= ^ìãÉåíç=ÇÉ=iÉåíÉ=ó=^ÅÉêÅ~=ÇÉK=`çåëìäíÉ=ä~=é•Öáå~ PR=é~ê~=çÄíÉåÉê=ã•ë= ÇÉí~ääÉëK= √...
- Page 155 jÉå∫=mêáåÅáé~ä ÄçíçåÉë=ÇÉ= m~ê~=~Äêáê=äçë=ãÉå∫ëI=çéêáã~=Éä=Äçíµå=jÉåì=Éå=Éä=íÉÅä~Çç=åìã¨êáÅç=ç=Éå=Éä= å~îÉÖ~Åáµå= ÇÉä=íÉÅä~Çç= Åçåíêçä=êÉãçíçK=Eiçë=ãÉå∫ë=ëÉ=ÅáÉêê~å=~ìíçã•íáÅ~ãÉåíÉ=ÇÉëéì¨ë=ÇÉ=SM= åìã¨êáÅç ëÉÖìåÇçë=ëá=åç=ëÉ=çéêáãÉ=åáåÖ∫å=ÄçíµåKF=^é~êÉÅÉ=Éä=ãÉå∫=mêáåÅáé~äK=ríáäáÅÉ= äçë=ÄçíçåÉë=ÇÉ=ÑäÉÅÜ~=é~ê~=ÇÉëéä~ò~êëÉ=Ü~Åá~=~êêáÄ~=ó=Ü~Åá~=~Ä~àç=ó= ëÉäÉÅÅáçå~ê=Éä=ëìÄãÉå∫=ÇÉëÉ~ÇçI=äìÉÖç=éêÉëáçåÉ=Éä=Äçíµå=pÉäÉÅíK= m~ê~=Å~ãÄá~ê=ä~=ÅçåÑáÖìê~Åáµå=ÇÉ=ìå=ãÉå∫I=ëÉäÉÅÅáµåÉäçI=éêÉëáçåÉ=pÉäÉÅíI= ìíáäáÅÉ=ä~ë=ÑäÉÅÜ~ë=Ü~Åá~=~êêáÄ~=ó=Ü~Åá~=~Ä~àç=é~ê~=~àìëí~ê=Éä=î~äçêI=ëÉäÉÅÅáçåÉ= ìå~=çéÅáµå=ìíáäáò~åÇç=äçë=ÄçíçåÉë=ÇÉ=~ëéÉÅíç=ç=ÄáÉå=ÉåÅáÉåÇ~=ç=~é~ÖìÉ=ä~= Å~ê~ÅíÉê∞ëíáÅ~=ìíáäáò~åÇç=ä~ë=Å~ëáää~ë=ÇÉ=îÉêáÑáÅ~ÅáµåK=mêÉëáçåÉ=pÉäÉÅí=é~ê~= ÅçåÑáêã~ê=äçë=Å~ãÄáçëK=ríáäáÅÉ=ä~ë=ÑäÉÅÜ~ë=é~ê~=å~îÉÖ~ê=Ü~ëí~=çíê~= ÅçåÑáÖìê~ÅáµåK=rå~=îÉò=èìÉ=Ü~ó~=Ñáå~äáò~Çç=äçë=~àìëíÉëI=å~îÉÖìÉ=Ü~ëí~=p~äáêI= jÉå∫ jÉå∫ éêÉëáçåÉ=pÉäÉÅí=ó=î~ó~=~ä=ãÉå∫=~åíÉêáçêX=éêÉëáçåÉ=Éä=Äçíµå=jÉåì=Éå= `çåÑáÖìê~Åáµ fã~ÖÉå Åì~äèìáÉê=ãçãÉåíç=é~ê~=ÅÉêê~ê=äçë=ãÉå∫ëK= éìåíçë bä=åçãÄêÉ=ÇÉä=ãÉå∫=Éëí•=éêÉÅÉÇáÇç=éçê=ìå=ç=ã•ë=éìåíçëK=i~=Å~åíáÇ~Ç=ÇÉ= éìåíçë=áåÇáÅ~=Éä=åáîÉä=ÇÉä=ãÉå∫I=èìÉ=î~ê∞~=ÇÉ=ìåç=EÉä=ãÉå∫=éêáåÅáé~äF=~= Åì~íêç=Eäçë=ãÉå∫ë=ã•ë=~åáÇ~ÇçëFK= içë=ãÉå∫ë=Éëí•å=~Öêìé~Ççë=éçê=ìëçW √ bä=ãÉå∫=fã~ÖÉå=éêçéçêÅáçå~=~àìëíÉë=ÇÉ=áã~ÖÉåK √ bä=ãÉå∫=`çåÑáÖìê~Åáµå=éêçéçêÅáçå~=~àìëíÉë=ÇÉ=ÅçåÑáÖìê~Åáµå=èìÉ=åç=ëÉ= Å~ãÄá~å=Åçå=ÑêÉÅìÉåÅá~K √ bä=ãÉå∫=^ÅÉêÅ~=ÇÉ=éêçéçêÅáçå~=áåÑçêã~Åáµå=ÇÉ=ëµäç=äÉÅíìê~=~ÅÉêÅ~=ÇÉä= jÉå∫=^ÅÉêÅ~=ÇÉ éêçóÉÅíçê=ó=ä~=ÑìÉåíÉK= `áÉêíçë=ÉäÉãÉåíçë=ÇÉä=ãÉå∫=éìÉÇÉå=åç=Éëí~ê=îáëáÄäÉë=ç=éìÉÇÉå=Éëí~ê= ëçãÄêÉ~Ççë=ëÉÖ∫å=ä~=ÑìÉåíÉ=Éå=é~êíáÅìä~ê=èìÉ=ëÉ=Éëí•=ÅçåÉÅí~åÇçK=mçê= ÉàÉãéäçI=káíáÇÉò=ëµäç=Éëí•=ÇáëéçåáÄäÉ=é~ê~=ÑìÉåíÉë=ÇÉ=îáÇÉç=ó=åç=Éëí•=îáëáÄäÉ= ~ä=~Åíáî~ê=ìå~=ÑìÉåíÉ=ÇÉ=Åçãéìí~Ççê~K=i~ë=çéÅáçåÉë=ÇÉä=ãÉå∫=Éëí•å= ëçãÄêÉ~Ç~ë=ëµäç=ëá=ä~=ÑìÉåíÉ=ëÉ=ëÉäÉÅÅáçå~=éÉêç=åç=ÉñáëíÉ=ëÉ¥~ä=éêÉëÉåíÉK=mçê= ÉàÉãéäçI=ëá=Éä=éêçóÉÅíçê=ëÉ=Ñáà~=Éå=ìå~=ÑìÉåíÉ=ÇÉ=îáÇÉç=éÉêç=ä~=ÑìÉåíÉ=Eéçê= ÉàÉãéäçI=ìå=êÉéêçÇìÅíçê=ÇÉ=asaF=ëÉ=~é~Ö~I=ä~ë=çéÅáçåÉë=ÇÉä=ãÉå∫=ÇÉ=îáÇÉç=...
- Page 156 jÉå∫=fã~ÖÉå jÉå∫=fã~ÖÉå m~ê~=~àìëí~ê=ä~ë=ëáÖìáÉåíÉë=ÅçåÑáÖìê~ÅáçåÉëI=ëÉäÉÅÅáçåÉ=ä~=ÅçåÑáÖìê~ÅáµåI= éêÉëáçåÉ=pÉäÉÅíI=ìíáäáÅÉ=ä~ë=íÉÅä~ë=Ü~Åá~=~êêáÄ~=ó=Ü~Åá~=~Ä~àç=é~ê~=~àìëí~ê=äçë= î~äçêÉë=ó=éêÉëáçåÉ=pÉäÉÅí=åìÉî~ãÉåíÉ=é~ê~=ÅçåÑáêã~ê=äçë=Å~ãÄáçëK `çêêÉÅÅáµå=qê~éÉòçáÇ~äW=~àìëí~=ä~=áã~ÖÉå=îÉêíáÅ~äãÉåíÉ=ó=Ü~ÅÉ=ìå~=áã~ÖÉå= ã•ë=Åì~Çê~Ç~K=q~ãÄá¨å=éìÉÇÉ=~àìëí~ê=ä~=ÅçêêÉÅÅáµå=íê~éÉòçáÇ~ä=ÇÉëÇÉ=Éä= íÉÅä~Çç=åìã¨êáÅçK `çåíê~ëíÉW=Åçåíêçä~=Éä=Öê~Çç=ÇÉ=ÇáÑÉêÉåÅá~=ÉåíêÉ=ä~ë=é~êíÉë=ã•ë=Åä~ê~ë=ó=ã•ë= ~ìãÉåíç=ÇÉ=ÅçêêÉÅÅáµå= ÇáëãáåìÅáµå=ÇÉ=ÅçêêÉÅÅáµå= çëÅìê~ë=ÇÉ=ä~=áã~ÖÉåI=ó=Å~ãÄá~=ä~=Å~åíáÇ~Ç=ÇÉ=åÉÖêç=ó=Ää~åÅç=ÇÉ=¨ëí~K íê~éÉòçáÇ~ä íê~éÉòçáÇ~ä _êáääçW=Å~ãÄá~=ä~=áåíÉåëáÇ~Ç=ÇÉ=ä~=áã~ÖÉåK `çäçêW=~àìëí~=ìå~=áã~ÖÉå=ÇÉ=îáÇÉç=ÇÉ=Ää~åÅç=ó=åÉÖêç=~=Åçäçê=íçí~äãÉåíÉ= ë~íìê~ÇçK=i~=ÅçåÑáÖìê~Åáµå=ÇÉ=Åçäçê=ëµäç=ëÉ=~éäáÅ~=~=ÑìÉåíÉë=ÇÉ=îáÇÉçK qáåíÉW=~àìëí~=Éä=Ä~ä~åÅÉ=ÇÉ=Åçäçê=êçàçJîÉêÇÉ=ÇÉ=ä~=áã~ÖÉå=Éå=áã•ÖÉåÉë=ÇÉ= îáÇÉç=kqp`K=i~=ÅçåÑáÖìê~Åáµå=ÇÉ=íáåíÉ=ëµäç=ëÉ=~éäáÅ~=~=ÑìÉåíÉë=ÇÉ=îáÇÉç= kqp`K ^ëéÉÅíç=fã~ÖÉåW=bä=~ëéÉÅíç=áã~ÖÉå=Éë=ä~=éêçéçêÅáµå=ÇÉä=~åÅÜç=ÇÉ=ä~= áã~ÖÉå=Åçå=êÉëéÉÅíç=~=ëì=~äíìê~K=i~ë=é~åí~ää~ë=ÇÉ=íÉäÉîáëáµå=ëçå= ÖÉåÉê~äãÉåíÉ=QWPK=içë=eaqs=ó=ä~=ã~óçê∞~=ÇÉ=äçë=êÉéêçÇìÅíçêÉë=ÇÉ=ÇáëÅç= ÇáÖáí~ä=EasaF=ëçå=NSWVK=bä=î~äçê=éêÉÇÉíÉêãáå~Çç=Éë=QWPK= pÉäÉÅÅáçåÉ=oÉ~ä=é~ê~=îÉê=ä~=Éåíê~Ç~=ëáå=ãçÇáÑáÅ~ÅáçåÉë=åá=êÉ~àìëíÉë=ÇÉ= í~ã~¥ç=ÇÉä=éêçóÉÅíçêK ^ëéÉÅíç=áã~ÖÉå pÉäÉÅÅáçåÉ=NSWV=é~ê~=îÉê=ÇáëÅçë=ÇÉ=îáÇÉç=ÇáÖáí~ä=Éå=é~åí~ää~=~åÅÜ~=ãÉàçê~Ç~K= m~ê~=çÄíÉåÉê=ã•ë=áåÑçêã~Åáµå=~ÅÉêÅ~=ÇÉä=~ëéÉÅíç=áã~ÖÉåI=ÅçåëìäíÉ=ä~= é•Öáå~ NQK...
- Page 157 mêÉÉëí~ÄäÉÅKW=içë=î~äçêÉë=éêÉÉëí~ÄäÉÅáÇçë=éêçéçêÅáçå~Ççë=èìÉ=çéíáãáò~å=Éä= éêçóÉÅíçê=é~ê~=éêÉëÉåí~ÅáçåÉë=ÇÉ=Åçãéìí~Ççê~I=ÑçíçÖê~Ñ∞~ëI=áã•ÖÉåÉë=ÇÉ= éÉä∞Åìä~=É=áã•ÖÉåÉë=ÇÉ=îáÇÉçK=i~=Éåíê~Ç~=ÇÉ=éÉä∞Åìä~=Éë=ã~íÉêá~ä= çêáÖáå~äãÉåíÉ=Å~éíìê~Çç=Åçå=ìå~=Å•ã~ê~=ÇÉ=ÅáåÉI=Åçãç=ìå~=éÉä∞Åìä~X=ä~= s~äçêÉë=mêÉÉëí~ÄäÉÅáÇçë Éåíê~Ç~=ÇÉ=îáÇÉç=Éë=ã~íÉêá~ä=çêáÖáå~äãÉåíÉ=Å~éíìê~Çç=Åçå=ìå~=Å•ã~ê~=ÇÉ= îáÇÉçI=Åçãç=ìå=éêçÖê~ã~=ÇÉ=íÉäÉîáëáµå=ç=ìå=ÉîÉåíç=ÇÉéçêíáîçK=mìÉÇÉ= dì~êÇ~ê ìíáäáò~ê=Éä=î~äçê=éêÉÉëí~ÄäÉÅáÇç=Åçãç=éìåíç=ÇÉ=é~êíáÇ~=ó=éÉêëçå~äáò~ê=ä~ë= ÅçåÑáÖìê~Åáµå ÅçåÑáÖìê~ÅáçåÉë=é~ê~=Å~Ç~=ÑìÉåíÉK=i~ë=ÅçåÑáÖìê~ÅáçåÉë=èìÉ=éÉêëçå~äáÅÉ=ëÉ= ÇÉ=ìëì~êáç Öì~êÇ~å=Éå=Éä=î~äçê=éêÉÉëí~ÄäÉÅáÇç=ÇÉ=Å~Ç~=ÑìÉåíÉK=m~ê~=êÉëí~ÄäÉÅÉê=äçë= î~äçêÉë=éêÉÇÉíÉêãáå~ÇçëI=Éäáà~=oÉëí~ÄäÉÅÉê=c•ÄêáÅ~=Éå=Éä=ãÉå∫= `çåÑáÖìê~Åáµå[pÉêîáÅáç=Eé•Öáå~ PSFK= q~ãÄá¨å=Ü~ó=ìå=î~äçê=éêÉÉëí~ÄäÉÅáÇç=ÇÉÑáåáÄäÉ=éçê=Éä=ìëì~êáçK=m~ê~= ÅçåÑáÖìê~ê=ìå=î~äçê=éêÉÉëí~ÄäÉÅáÇç=é~ê~=ä~=ÑìÉåíÉ=~Åíì~äI=~àìëíÉ=ä~=áã~ÖÉåI= ëÉäÉÅÅáçåÉ=dì~ê=rëì=Éå=Éä=ãÉå∫=mêÉÉëí~ÄäÉÅK=ó=äìÉÖç=p∞K=mìÉÇÉ=îçäîÉê=~= ìíáäáò~ê=Éëí~=ÅçåÑáÖìê~Åáµå=Éå=Éä=Ñìíìêç=ëÉäÉÅÅáçå~åÇç=rëì~êáç=NK=...
- Page 158 jÉå∫=^î~åò~Çç káíáÇÉòW=EÑìÉåíÉë=ÇÉ=îáÇÉç=∫åáÅ~ãÉåíÉF=Å~ãÄá~=~ä=Åä~êáÇ~Ç=ÇÉ=äçë=ÄçêÇÉë=ÇÉ= jÉå∫=^î~åò~Çç ìå~=áã~ÖÉå=ÇÉ=îáÇÉçK=pÉäÉÅÅáçåÉ=ìå=~àìëíÉ=ÇÉ=åáíáÇÉòK káíáÇÉò qÉãéÉê~íìê~=aÉä=`çäçêW=Å~ãÄá~=ä~=áåíÉåëáÇ~Ç=ÇÉ=äçë=ÅçäçêÉëK= qÉãéÉê~íìê~=ÇÉä=Åçäçê `çåíêçä=ÇÉä=ÅçäçêW=éÉêãáíÉ=èìÉ=ìëíÉÇ=~àìëíÉ=áåÇáîáÇì~äãÉåíÉ=Éä=~ìãÉåíç= EÅ~äçê=êÉä~íáîç=ÇÉä=ÅçäçêF=é~ê~=èìÉ=Ü~ó~=ÅçäçêÉë=êçàçëI=îÉêÇÉëI=ó=~òìäÉëK bëí•åÇ~ê=ÇÉ=sáÇÉçW=Åì~åÇç=ëÉ=ÅçåÑáÖìê~=Éå=^ìíçI=Éä=éêçóÉÅíçê=áåíÉåí~= ëÉäÉÅÅáçå~ê=Éä=Éëí•åÇ~ê=ÇÉ=îáÇÉç=~ìíçã•íáÅ~ãÉåíÉI=ëÉÖ∫å=ä~=ëÉ¥~ä=ÇÉ=Éåíê~Ç~= èìÉ=êÉÅáÄ~K=Ei~ë=çéÅáçåÉë=ÇÉ=Éëí•åÇ~ê=ÇÉ=îáÇÉç=î~ê∞~å=ëÉÖ∫å=ä~=êÉÖáµåKF=pá=Éä= =`çåíêçä=ÇÉä=Åçäçê éêçóÉÅíçê=åç=äçÖê~=ÇÉíÉÅí~ê=Éä=Éëí•åÇ~ê=ÅçêêÉÅíçI=äçë=ÅçäçêÉë=åç=ëÉ=îÉê•å=ÄáÉå= ç=ä~=áã~ÖÉå=é~êÉÅÉê•= êçí~ÒK=pá=Éëíç=ëìÅÉÇÉI=ëÉäÉÅÅáçåÉ=ã~åì~äãÉåíÉ=ìå= Éëí•åÇ~ê=ÇÉ=îáÇÉç=ÉäáÖáÉåÇç=kqp`I=m^i=ç=pb`^j=ÇÉä=ãÉå∫=bëí•åÇ~ê=ÇÉ= sáÇÉçK pçÄêÉëÅ~åÉçW=EÑìÉåíÉë=ÇÉ=îáÇÉç=∫åáÅ~ãÉåíÉF=Éäáãáå~=Éä=êìáÇç=~äêÉÇÉÇçê=ÇÉ= ä~=áã~ÖÉå=ÇÉ=îáÇÉçK i~ë=ëáÖìáÉåíÉë=Åì~íêç=EQF=çéÅáçåÉë=ëçå=ëµäç=é~ê~=ÑìÉåíÉë=ÇÉ=Åçãéìí~Ççê~K= c~ëÉW=~àìëí~=ä~=Ñ~ëÉ=Üçêáòçåí~ä=ÇÉ=ìå~=ÑìÉåíÉ=ÇÉ=Åçãéìí~Ççê~K bëí•åÇ~ê=ÇÉ=sáÇÉç o~ëíêÉçW=~àìëí~=Éä=ê~ëíêÉç=îÉêíáÅ~ä=ÇÉ=ìå~=ÑìÉåíÉ=ÇÉ=Åçãéìí~Ççê~K mçëáÅáµå=eçêáòKLsÉêíKW=~àìëí~=ä~=éçëáÅáµå=ÇÉ=ìå~=ÑìÉåíÉ=ÇÉ=Åçãéìí~Ççê~K...
- Page 159 jÉå∫=`çåÑáÖìê~Åáµå jÉå∫=`çåÑáÖìê~Åáµå ^ìÇáçW=éÉêãáíÉ=~àìëí~ê=Éä=îçäìãÉå=ÇÉ=äçë=~äí~îçÅÉë=áåíÉêåçëK=içë=~àìëíÉë= í~ãÄá¨å=ëÉ=éìÉÇÉå=êÉ~äáò~ê=ÇÉëÇÉ=Éä=íÉÅä~Çç=åìã¨êáÅç=ÇÉä=éêçóÉÅíçê=ó=Éä= ^ìÇáç Åçåíêçä=êÉãçíçK cìÉåíÉëW=cìÉåíÉ=ÇÉ=ÉåÅÉåÇáÇç=ÇÉíÉêãáå~=èì¨=ÑìÉåíÉ=îÉêáÑáÅ~=éêáãÉêç=Éä= éêçóÉÅíçê=é~ê~=ÇÉíÉÅí~ê=îáÇÉç=~Åíáîç=Çìê~åíÉ=Éä=ÉåÅÉåÇáÇçK=`ì~åÇç=ä~= ÑìåÅáµå=^ìíçÑìÉåíÉ=Éëí•=~Åíáî~Ç~I=Éä=éêçóÉÅíçê=ÉåÅìÉåíê~=~ìíçã•íáÅ~ãÉåíÉ= ä~=ÑìÉåíÉ=~Åíáî~=îÉêáÑáÅ~åÇç=ä~=cìÉåíÉ=ÇÉ=båÅÉåÇáÇç=éêáãÉêçK=i~ë=çéÅáçåÉë= ëçå=`çãéìíÉê=N=E`çãéìí~Ççê~=NF=é~ê~=ìå~=ÑìÉåíÉ=ÇÉ=Åçãéìí~Ççê~I=sáÇÉç=N= cìÉåíÉë Eé~ê~=ÅçåÉñáçåÉë=ÇÉ=pJîáÇÉçF=ó=sáÇÉç=O=Eé~ê~=ÅçåÉñáçåÉë=ÇÉ=îáÇÉç= cìÉåíÉ=ÇÉ ÅçãéìÉëí~ëF=é~ê~=ÑìÉåíÉë=ÇÉ=îáÇÉçK=`ì~åÇç=Éëí~=ÑìåÅáµå=Éëí•=ÇÉë~Åíáî~Ç~I= ÉåÅÉåÇáÇç Éä=éêçóÉÅíçê=ëÉ=éêÉÇÉíÉêãáå~=~=ä~=ÑìÉåíÉ=ëÉäÉÅÅáçå~Ç~=Éå=ä~=cìÉåíÉ=ÇÉ= ÉåÅÉåÇáÇçK=m~ê~=îáëì~äáò~ê=çíê~=ÑìÉåíÉI=ÇÉÄÉ=ëÉäÉÅÅáçå~êä~=éêÉëáçå~åÇç=Éä= Äçíµå=`çãéìíÉê=ç=sáÇÉç=Éå=Éä=Åçåíêçä=êÉãçíç=ç=Éå=Éä=íÉÅä~Çç=åìã¨êáÅçK páëíÉã~W=mçëíÉêáçê=áåîáÉêíÉ=ä~=áã~ÖÉå=é~ê~=èìÉ=éìÉÇ~=éêçóÉÅí~êä~=ÇÉëÇÉ= ~íê•ë=ÇÉ=ìå~=é~åí~ää~=íê~ëä∫ÅáÇ~K=jçåí~àÉ=~ä=íÉÅÜç=Ç~=îìÉäí~=ä~=áã~ÖÉå=é~ê~= ëì=éêçóÉÅÅáµå=ÇÉëÇÉ=ìå=ãçåí~àÉ=~ä=íÉÅÜçK=jÉåë~àÉë=Éå=é~åí~ää~=ãìÉëíê~=äçë= ãÉåë~àÉë=ÇÉ=Éëí~Çç=EÅçãç= _ìëÅ~åÇçÒ=ç= páäÉåÅá~êÒF=Éå=ä~=Éëèìáå~=áåÑÉêáçê= jÉå∫=páëíÉã~ áòèìáÉêÇ~=ÇÉ=ä~=é~åí~ää~K=kka=Éîáí~=èìÉ=ëì=Åçãéìí~Ççê~=ÇáÖáí~ä=éçêí•íáä= dì~êÇ~ê=é~åí~ää~ î~ó~=~ä=ãçÇç=dì~êÇ~ê=é~åí~ää~=ëá=Éä=Å~ÄäÉ=rp_=Éëí•=ÅçåÉÅí~ÇçK=^Üçêêç=ÇÉ= ÉåÉêÖ∞~=~é~Ö~=~ìíçã•íáÅ~ãÉåíÉ=ä~=ä•ãé~ê~=ëá=åç=ëÉ=ÇÉíÉÅí~=åáåÖìå~=ëÉ¥~ä= Çìê~åíÉ=OM=ãáåìíçëK=aÉëéì¨ë=ÇÉ=NM=ãáåìíçë=~ÇáÅáçå~äÉë=ëáå=åáåÖìå~=ëÉ¥~äI= Éä=éêçóÉÅíçê=ëÉ=ÇÉíáÉåÉ=ó=ëÉ=éìÉÇÉ=~é~Ö~êK=pá=ëÉ=êÉÅáÄÉ=ìå~=ëÉ¥~ä=~Åíáî~=~åíÉë= ÇÉ=èìÉ=Éä=éêçóÉÅíçê=ëÉ=~é~ÖìÉI=ëÉ=ãçëíê~ê•=ä~=áã~ÖÉåK=`ì~åÇç=^Üçêêç=ÇÉ= ÉåÉêÖ∞~=Éëí•=~Åíáî~ÇçI=dì~êÇ~ê=é~åí~ää~=ëÉ=ÇÉë~Åíáî~K=dì~êÇ~ê=é~åí~ää~= éêçóÉÅí~=~ìíçã•íáÅ~ãÉåíÉ=ìå~=é~åí~ää~=åÉÖê~=ëá=åç=ëÉ=ÇÉíÉÅí~=åáåÖìå~=ëÉ¥~ä= Çìê~åíÉ=ìå=å∫ãÉêç=éêÉÉëí~ÄäÉÅáÇç=ÇÉ=ãáåìíçëK=i~=áã~ÖÉå=îìÉäîÉ=Åì~åÇç=ëÉ= ÇÉíÉÅí~=ìå~=ÑìÉåíÉ=~Åíáî~=ç=~ä=éêÉëáçå~ê=ìå=Äçíµå=ÇÉä=Åçåíêçä=êÉãçíç=ç=ÇÉä= íÉÅä~Çç=åìã¨êáÅçK=...
- Page 160 içÖç=ÇÉ=áåáÅáçW=äÉ=éÉêãáíÉ=ãçëíê~ê=ìå=ÑçåÇç=ÇÉ=é~åí~ää~=Éå=äìÖ~ê=ÇÉ=ìíáäáò~ê= ä~=é~åí~ää~=éêÉÇÉíÉêãáå~Ç~=ÇÉ=áåáÅáç=ó=Åì~åÇç=åç=ëÉ=ÇÉíÉÅí~=ìå~=ÑìÉåíÉK= içÖç=ÇÉ=áåáÅáç cçåÇç=ÇÉ=m~åíW=ÇÉíÉêãáå~=èì¨=Åçäçê=ëÉ=ãìÉëíê~=~ä=éêÉëáçå~ê=Éä=Äçíµå=_ä~åâ= cçåÇç=ÇÉ=é~åí~ää~ Éå=Éä=Åçåíêçä=êÉãçíçK bÑÑÉÅí=hÉóW=EqÉÅä~=bÑÉÅíçF=äÉ=éÉêãáíÉ=~ëáÖå~ê=ìå~=ÑìåÅáµå=ÇáÑÉêÉåíÉ=~ä=Äçíµå= bÑÑÉÅí=ÇÉä=Åçåíêçä=êÉãçíçI=é~ê~=ìíáäáò~ê=ÇáÅÜç=ÉÑÉÅíç=Ñ•Åáä=ó=ê•éáÇ~ãÉåíÉK= qÉÅä~=ÇÉ=ÉÑÉÅíç pÉäÉÅÅáçåÉ=ìå=ÉÑÉÅíç=ó=éêÉëáçåÉ=pÉäÉÅí=é~ê~=ëÉäÉÅÅáçå~ê=çíêçK √ bå=Ää~åÅçW=ãìÉëíê~=ìå~=é~åí~ää~=Éå=Ää~åÅçK √ páäÉåÅá~êW=Éäáãáå~=íçÇçë=äçë=ëçåáÇçëK √ ^ëéÉÅíç=fã~ÖÉåW=Å~ãÄá~=ÉåíêÉ=QWPI=NSWV=ó=oÉ~ä=EÅçåëìäíÉ=ä~ë=é•Öáå~ NQ=ó= é•Öáå~ PNFK=`çåÑáÖ∫êÉäç=Åçãç=íÉÅä~=ÇÉ=ÉÑÉÅíçI=äÉ=éìÉÇÉ=éÉêãáíáê=Å~ãÄá~ê= ~ä=^ëéÉÅíç=áã~ÖÉå=é~ê~=ÇáëÅçë=ÇÉ=îáÇÉç=ÇáÖáí~äK √ `~å~äW=Å~ãÄá~=ÉåíêÉ=ÑìÉåíÉë=ÇáëéçåáÄäÉëK √ ^ìíç=fã~ÖÉåW=êÉëí~ÄäÉÅÉ=Éä=éêçóÉÅíçê=~=ä~=ÑìÉåíÉ=Eé•Öáå~ OTFK= √ m~ìë~W=ÅçåÖÉä~=ä~=áã~ÖÉå=éêçóÉÅí~Ç~K= √ ^ìãÉåíç=ÇÉ=iÉåíÉW=äÉ=éÉêãáíÉ=~ìãÉåí~ê=é~êíÉ=ÇÉ=ä~=áã~ÖÉåK=mêÉëáçåÉ= bÑÑÉÅí=ó=äìÉÖç=Éä=Äçíµå=áòèìáÉêÇç=ÇÉä=ê~íµå=é~ê~=~ìãÉåí~ê=ä~=áã~ÖÉåK= ríáäáÅÉ=Éä=Åçåíêçä=ÇÉä=Åìêëçê=é~ê~=ÇÉëéä~ò~êëÉ=éçê=ä~=áã~ÖÉå=~ãéäá~Ç~K= mêÉëáçåÉ=Éä=Äçíµå=ÇÉêÉÅÜç=ÇÉä=ê~íµå=é~ê~=êÉÇìÅáê=Éä=~ìãÉåíçK=mêÉëáçåÉ= Éä=Äçíµå=bÑÑÉÅí=é~ê~=Å~åÅÉä~ê=Éä=~ìãÉåíç=ó=êÉëí~ÄäÉÅÉê=ä~=~ãéäá~Åáµå= åçêã~äK √ ^ÅÉêÅ~=ÇÉW=Éë=Éä=ÉÑÉÅíç=éêÉÇÉíÉêãáå~ÇçK=^ÄêÉ=ìå~=îÉåí~å~=Åçå= áåÑçêã~Åáµå=ëçÄêÉ=Éä=éêçóÉÅíçê=ó=ä~=ÑìÉåíÉK=...
- Page 161 fÇáçã~ pÉêîáÅáç pÉäÉÅí oÉëíK=ÇÉ=Ñ•ÄêáÅ~ oÉëíK=Üêë=ìëç ^ÅÉêÅ~=ÇÉ `µÇáÖç=ÇÉ=ëÉêîáÅáç ^ÅÉêÅ~=ÇÉ bÑÑÉÅí...
- Page 162 iáãéáÉò~=ÇÉä=äÉåíÉ ^éäáèìÉ=ìå=äáãéá~Ççê=ÇÉ=äÉåíÉë=ÇÉ=Å•ã~ê~=åç=~Äê~ëáîç=~=ìå=é~¥ç=ëì~îÉ= ó=ëÉÅçK √ bîáíÉ=ìíáäáò~ê=ìå~=Å~åíáÇ~Ç=ÉñÅÉëáî~=ÇÉ=äáãéá~ÇçêI=åç=~éäáèìÉ=Éä= äáãéá~Ççê=ÇáêÉÅí~ãÉåíÉ=ëçÄêÉ=Éä=äÉåíÉK=içë=äáãéá~ÇçêÉë=~Äê~ëáîçëI=äçë= ëçäîÉåíÉë=ó=çíêçë=èì∞ãáÅçë=ëáãáä~êÉë=éìÉÇÉå=ê~ó~ê=Éä=äÉåíÉK m~ëÉ=Éä=é~¥ç=ëì~îÉãÉåíÉ=ëçÄêÉ=Éä=äÉåíÉ=Åçå=ãçîáãáÉåíçë=ÅáêÅìä~êÉëK=pá= åç=î~=~=ìíáäáò~ê=Éä=éêçóÉÅíçê=áåãÉÇá~í~ãÉåíÉI=îìÉäî~=~=ÅçäçÅ~ê=ä~=í~é~= ÇÉä=äÉåíÉK oÉÉãéä~òç=ÇÉ=ä~=ä•ãé~ê~=ÇÉ=éêçóÉÅÅáµå eçê~ë=ÇÉ=ìëç=ÇÉ=ä~=ä•ãé~ê~ bä=Åçåí~Ççê=ÇÉ=Üçê~ë=ÇÉ=ä~=ä•ãé~ê~=Éå=Éä=ãÉå∫=^ÅÉêÅ~=ÇÉ=ÅìÉåí~=Éä=å∫ãÉêç= ÇÉ=Üçê~ë=èìÉ=ä~=ä•ãé~ê~=Ü~=Éëí~Çç=Éå=ìëçK=aÉëéì¨ë=ÇÉ=PVUM=Üçê~ëI=Éä= ãÉåë~àÉ= `Ü~åÖÉ=ä~ãéÒ=E`~ãÄá~ê=ä•ãé~ê~F=~é~êÉÅÉ=Éå=ä~=é~åí~ää~=~ä=áåáÅáçK= pá=ëÉ=ÉñÅÉÇÉ=ä~=Çìê~Åáµå=ã•ñáã~=ÇÉ=QMMM=Üçê~ëI=ä~=ä•ãé~ê~=åç=ÉåÅÉåÇÉê•K=bå= ÉëéÉêÉ= ÇáÅÜç=Å~ëçI=ÇÉëéì¨ë=ÇÉ=êÉÉãéä~ò~ê=ä~=ä•ãé~ê~=ÇÉÄÉ=êÉëí~ÄäÉÅÉê=ä~ë=Üçê~ë=ÇÉ= PM=ãáåìíçë ìëç=éêÉëáçå~åÇç=ëáãìäí•åÉ~ãÉåíÉ=äçë=ÄçíçåÉë=ÇÉ=îçäìãÉå=Éå=Éä=íÉÅä~Çç= åìã¨êáÅç=ó=ã~åíÉåá¨åÇçäçë=éêÉëáçå~Ççë=Çìê~åíÉ=NM=ëÉÖìåÇçëK= klq^W=mìÉÇÉ=éÉÇáê=åìÉîçë=éçêí~ä•ãé~ê~ë=~=ëì=ÇáëíêáÄìáÇçêK=ríáäáÅÉ= ∫åáÅ~ãÉåíÉ=ìå~=ä•ãé~ê~=ÇÉ=êÉéìÉëíç=ÇÉä=ãáëãç=íáéç=ó=Åä~ëáÑáÅ~Åáµå=èìÉ=ä~= ä•ãé~ê~=çêáÖáå~äK ^é~ÖìÉ=Éä=éêçóÉÅíçê=ó=ÇÉëÉåÅÜìÑÉ=Éä=Å~ÄäÉ=ÇÉ=~äáãÉåí~ÅáµåK= bëéÉêÉ=PM=ãáåìíçë=é~ê~=èìÉ=Éä=éêçóÉÅíçê=ëÉ=ÉåÑê∞É=ÅçãéäÉí~ãÉåíÉK éìÉêí~=ÇÉ=ä~=ä•ãé~ê~ `çäçèìÉ=Éä=éêçóÉÅíçê=ÇÉ=Åçëí~Çç=ÇÉ=ãçÇç=èìÉ=ä~=éìÉêí~=ÇÉ=ä~=ä•ãé~ê~= Éëí¨=ÑêÉåíÉ=~=ìëíÉÇK=ríáäáò~åÇç=ìå=ÇÉëíçêåáää~Ççê=éä~åçI=~ÑäçàÉ=ä~=éìÉêí~= ÇÉ=ä~=ä•ãé~ê~=éçëáÅáçå~åÇç=ä~=éìåí~=ÇÉä=ÇÉëíçêåáää~Ççê=Éå=Éä=Éëé~Åáç= ÉåíêÉ=ä~=é~êíÉ=ëìéÉêáçê=ÇÉ=ä~=éìÉêí~=ÇÉ=ä~=ä•ãé~ê~=ó=Éä=éêçóÉÅíçêK...
- Page 163 ^ÑäçàÉ=äçë=Ççë=íçêåáääçë=áãéÉêÇáÄäÉë=èìÉ=ëìàÉí~å=Éä=éçêí~ä•ãé~ê~=~ä= ä•ãé~ê~ éêçóÉÅíçêK ÅçåÉÅí~Ççê pÉé~êÉ=Éä=ÅçåÉÅí~Ççê=ÇÉ=ä~=ä•ãé~ê~=çéêáãáÉåÇç=ä~=äÉåÖΩÉí~=ÇÉ=ëÉÖìêáÇ~Ç= Å~ÄäÉ=ÇÉ=ä~=ä•ãé~ê~ ÇÉä=ÅçåÉÅí~Ççê=ó=íáê~åÇç=ëì~îÉãÉåíÉ=ÇÉ=Éää~K ^asboqbk`f^W m~ê~=Éîáí~ê=èìÉã~Çìê~ëI=ÇÉàÉ=èìÉ=Éä=éêçóÉÅíçê=ëÉ=ÉåÑê∞É=Çìê~åíÉ=~ä= ãÉåçë=SM=ãáåìíçë=~åíÉë=ÇÉ=êÉÉãéä~ò~ê=ä~=ä•ãé~ê~K flkç=ÇÉàÉ=Å~Éê=Éä=éçêí~ä•ãé~ê~=åá=íçèìÉ=ä~=ÄçãÄáää~=ÇÉ=Åêáëí~ä>=bä= éçêí~ä•ãé~ê~ îáÇêáç=ëÉ=éìÉÇÉ=êçãéÉê=ó=éêçîçÅ~ê=äÉëáçåÉëK qÉåÖ~=ãìÅÜç=ÅìáÇ~Çç=~ä=èìáí~ê=Éä=éçêí~ä•ãé~ê~K=bå=Éä=Å~ëç= áãéêçÄ~ÄäÉ=ÇÉ=èìÉ=ä~=ÄçãÄáää~=ëÉ=êçãé~I=ëÉ=éìÉÇÉå=ÖÉåÉê~ê= Ñê~ÖãÉåíçë=éÉèìÉ¥çë=ÇÉ=Åêáëí~äK=bä=éçêí~ä•ãé~ê~=Éëí•=ÇáëÉ¥~Çç=é~ê~= ÅçåíÉåÉê=ÇáÅÜçë=Ñê~ÖãÉåíçëI=éÉêç=åìåÅ~=Éëí•=ÇÉ=ã•ë=íÉåÉê= éêÉÅ~ìÅáµå=~ä=èìáí~êäçK íçêåáääç Å~ÄäÉ=ÇÉ=ä~= ÅçåÉÅí~Ççê oÉíáêÉ=Éä=éçêí~ä•ãé~ê~ë=ÅìáÇ~Ççë~ãÉåíÉK=aÉëÉÅÜÉ=ä~=ä•ãé~ê~=ÇÉ= ä•ãé~ê~ ~ÅìÉêÇç=Åçå=ä~ë=åçêã~ë=~ãÄáÉåí~äÉë=îáÖÉåíÉëK= äÉåÖΩÉí~=ÇÉ=ëÉÖìêáÇ~Ç fåëí~äÉ=Éä=éçêí~ä•ãé~ê~ë=Åçå=ä~=åìÉî~=ä•ãé~ê~=ó=~àìëíÉ=äçë=íçêåáääçëK íçêåáääç=ÇÉä= sìÉäî~=~=ÅçäçÅ~ê=Éä=ÅçåÉÅí~Ççê=ÇÉ=ä~=ä•ãé~ê~=~ä=éêçóÉÅíçêK=i~=äÉåÖΩÉí~= éçêí~ä•ãé~ê~ ÇÉ=ëÉÖìêáÇ~Ç=ÇÉÄÉ=íê~Ä~êëÉ=Åì~åÇç=Éä=ÅçåÉÅí~Ççê=Éëí¨=íçí~äãÉåíÉ= íçêåáääç ÉåÅÜìÑ~ÇçK sìÉäî~=~=ÅçäçÅ~ê=ä~=éìÉêí~=ÇÉ=ä~=ä•ãé~ê~K båÅÜìÑÉ=Éä=Å~ÄäÉ=ÇÉ=~äáãÉåí~Åáµå=ó=ãìÉî~=Éä=áåíÉêêìéíçê=mçïÉê=é~ê~= ÉåÅÉåÇÉê=åìÉî~ãÉåíÉ=Éä=éêçóÉÅíçêK m~ê~=êÉëí~ÄäÉÅÉê=Éä=Åçåí~Ççê=ÇÉ=Üçê~ë=ÇÉ=ìëç=ÇÉ=ä~=ä•ãé~ê~I=å~îÉÖìÉ= Ü~ëí~=Éä=ãÉå∫=`çåÑáÖìê~Åáµå=[=pÉêîáÅáç=ó=ëÉäÉÅÅáçåÉ=oÉëÉí=i~ãéK= jÉå∫=pÉêîáÅáç `çåëìäíÉ=ä~=é•Öáå~ PS=é~ê~=çÄíÉåÉê=ã•ë=ÇÉí~ääÉëK...
- Page 164 iáãéáÉò~=ÇÉ=ä~ë=é~åí~ää~ë=ÇÉä=éçêí~ä•ãé~ê~ë bå=~ãÄáÉåíÉë=ëìÅáçë=ç=éçäîçêçëçëI=ä~ë=Ççë=é~åí~ää~ë=ÇÉä=Ñáäíêç=ÇÉ=éçäîç=Éå=Éä= éçêí~ä•ãé~ê~ éçêí~ä•ãé~ê~=éìÉÇÉå=í~é~êëÉI=Å~ìë~åÇç=~äí~ë=íÉãéÉê~íìê~ë=ó=Ñ~ää~ë= éêÉã~íìê~ë=ÇÉ=ä~=ä•ãé~ê~K=rå~=ã~åíÉåáãáÉåíç=êÉÖìä~ê=é~ê~=Éäáãáå~ê=Éä= éçäîç=ÇÉ=ä~ë=é~åí~ää~ë=ÇáëãáåìóÉ=ä~=íÉãéÉê~íìê~=ÇÉ=çéÉê~Åáµå=ÇÉ=ä~=ä•ãé~ê~= Ççë=é~åí~ää~ë ó=éêçäçåÖ~=ëì=îáÇ~=∫íáäK=m~ê~=~ìãÉåí~ê=~ä=ã•ñáãç=ä~=îáÇ~=∫íáä=ÇÉ=ä~=ä•ãé~ê~I= ä•ãé~ê~ Eìå~=~=Å~Ç~=ä~Çç ÇÉÄÉ=äáãéá~ê=ä~=é~åí~ää~=Å~Ç~=ORM=Üçê~ëK= ÇÉä=éçêí~ä•ãé~ê~F oÉíáêÉ=Éä=éçêí~ä•ãé~ê~K= bñ~ãáåÉ=ä~ë=é~åí~ää~ë=é~ê~=Ñáäíê~ê=Éä=éçäîç=ÇÉä=éçêí~ä•ãé~ê~ëK=pá=Éë= åÉÅÉë~êáçI=ìíáäáÅÉ=ìå~=~ëéáê~Ççê~=Éå=Ä~à~=éçíÉåÅá~=é~ê~=äáãéá~ê=ä~ë= é~åí~ää~ëK=qÉåÖ~=ÅìáÇ~Çç=ÇÉ=åç=~äíÉê~ê=åáåÖ∫å=ÅçãéçåÉåíÉ=áåíÉêåç=~ä= äáãéá~ê=ä~ë=é~åí~ää~ëK sìÉäî~=~=ÅçäçÅ~ê=Éä=éçêí~ä•ãé~ê~=ó=ä~=éìÉêí~=ÇÉ=ä~=ä•ãé~ê~K bä=éêçóÉÅíçê=íáÉåÉ=ìå~=íê~Ä~=ÇÉ=ëÉÖìêáÇ~Ç=é~ê~=ìíáäáò~ê=Åçå=ìå=páëíÉã~=ÇÉ= ÄäçèìÉç=ÇÉ=Å~ÄäÉ=é~ê~=m`=dì~êÇá~åK=pá=íáÉåÉ=ìå=ëáëíÉã~=ÇÉ=íê~Ä~=ÇÉä=Å~ÄäÉ= ÇÉ=m`=dì~êÇá~åI=ÅçåëìäíÉ=ä~=áåÑçêã~Åáµå=èìÉ=îáåç=Åçå=ä~=íê~Ä~=é~ê~=çÄíÉåÉê= áåëíêìÅÅáçåÉë=ëçÄêÉ=ŵãç=ìíáäáò~êä~K íê~Ä~=ÇÉ ëÉÖìêáÇ~Ç...
- Page 165 ^ÅÅÉëçêáçë ^ÅÅÉëçêáçë=Éëí•åÇ~ê bëéÉÅáÑáÅ~ÅáçåÉë EîáÉåÉå=Åçå=Éä=éêçóÉÅíçêF `~à~=ÇÉ=Éåî∞ç=EÅçå=ÉãÄ~ä~àÉF qÉãéÉê~íìê~ RM=~=NMQ ⁄c=ENM=~=QM=⁄`F=~=åáîÉä=ÇÉä=ã~ê j~äÉí∞å=ÇÉ=íê~åëéçêíÉ léÉê~íáî~ RM=~=VR ⁄c=ENM=~=PR=⁄`F=~=NMKMMM=éáÉë= `~ÄäÉ=ÇÉ=Åçãéìí~Ççê~=ÇÉ=S=éáÉë=ENIU=ãF EPMQU=ãÉíêçëF `~ÄäÉ=ÇÉ=~ìÇáç=ÇÉ=S=éáÉë=ENIU=ãF kç=çéÉê~íáî~ JQ=~=NQM ⁄c=EJOM=~=SM ⁄`F ^Ç~éí~Ççê=ÇÉ=~ìÇáç=o`^=~=PIR ãã= `~ÄäÉ=ÇÉ=pJîáÇÉç=ÇÉ=Q=ã=ENP=éáÉëF ^äíáíìÇ=léÉê~íáî~ M=~=NMKMMM=éáÉë=EPMQU=ãÉíêçëF= kç=çéÉê~íáî~ M=~=OMKMMM=éáÉë=ESMVS=ãÉíêçëF= `~ÄäÉ=ÇÉ=~äáãÉåí~Åáµå=EëÉÖ∫å= Éä=é~∞ëF `çåíêçä=êÉãçíç=ó=Ä~íÉê∞~ë eìãÉÇ~Ç=léÉê~íáî~= NMB=~=VRB=ÇÉ=ÜìãÉÇ~Ç=êÉä~íáî~I=ëáå= ÅçåÇÉåë~Åáµå mçêí~ä•ãé~ê~=ÇÉ=éêçóÉÅÅáµå=EáåÅäìáÇç=Éå=Éä= kç=çéÉê~íáî~ NMB=~=VMB=ÇÉ=ÜìãÉÇ~Ç=êÉä~íáî~I=ëáå= éêçóÉÅíçêF ÅçåÇÉåë~Åáµå q~é~=ÇÉä=äÉåíÉ q~êàÉí~=ÇÉ=áåáÅáç=ê•éáÇç NOIR=ñ=VIU=ñ=QIQV=éìäÖK=EPNU=ñ=OQV=ñ=NNQ=ããF aáãÉåëáçåÉë...
- Page 166 q~ã~¥ç=ÇÉ=ä~=áã~ÖÉå=éêçóÉÅí~Ç~ `çãéçêí~ãáÉåíç=ÇÉä=iba=êçàç=ó=ÉêêçêÉë= ÇÉä=éêçóÉÅíçê q~Ää~=OW= pá=Éä=éêçóÉÅíçê=åç=Éëí•=ÑìåÅáçå~åÇç=~ÇÉÅì~Ç~ãÉåíÉ=ó=Éä=iba=ÇÉëíÉää~=ÇÉ= o~åÖç=ÇÉ=Çáëí~åÅá~=~=ä~=é~åí~ää~=é~ê~=ìå=í~ã~¥ç= Åçäçê=êçàçI=ÅçåëìäíÉ=ä~=q~Ää~=P=é~ê~=ÇÉíÉêãáå~ê=ä~=Å~ìë~=éçëáÄäÉK=e~ó=é~ìë~ë= ÇÉ=é~åí~ää~=ÇÉíÉêãáå~Çç=Éå=Éä=éêçóÉÅíçê ÇÉ=Ççë=ëÉÖìåÇçë=ÉåíêÉ=äçë=ÅáÅäçë=ÇÉ=ÇÉëíÉääçK q~Ää~=PW= aáëí~åÅá~=~=ä~=é~åí~ää~ q~ã~¥ç= Çá~Öçå~ä=ÇÉ= ^åÅÜç=ÇÉ= `çãéçêí~ãáÉåíç=ÇÉä= bñéäáÅ~Åáµå é~åí~ää~= áã~ÖÉå= aáëí~åÅá~= aáëí~åÅá~= iba=êçàç EéìäÖ~Ç~ëL EéìäÖ~Ç~ëL ã•ñáã~ ã∞åáã~ rå=ENF=ÇÉëíÉääç i~=ä•ãé~ê~=åç=ëÉ=ÉåÅáÉåÇÉ=ÇÉëéì¨ë=ÇÉ=ÅáåÅç= ãÉíêçëF ãÉíêçëF EéáÉëLãÉíêçëF EéáÉëLãÉíêçëF ERF=áåíÉåíçëK=sÉêáÑáèìÉ=èìÉ=åç=Ü~ó~=ÅçåÉñáçåÉë= QMLN POLMIU RIULNIU QIULNIR ëìÉäí~ë=Éå=ä~=áåëí~ä~Åáµå=ÇÉ=ä~=ä•ãé~ê~=ó=ä~= RMLNIP QMLN TIULOIQ SIRLOIM éìÉêí~=ÇÉ=ä~=ä•ãé~ê~K SMLNIR...
- Page 167 SD-1m ™ Projector...
Need help?
Do you have a question about the SD-1M and is the answer not in the manual?
Questions and answers