APRILIA PEGASO 650 IE - PART1 02-2001 Manual
Hide thumbs
Also See for PEGASO 650 IE - PART1 02-2001:
- Use and maintenance book (54 pages) ,
- Manual (17 pages)
Table of Contents
Advertisement
Quick Links
Advertisement
Table of Contents

Related Manuals for APRILIA PEGASO 650 IE - PART1 02-2001


Summary of Contents for APRILIA PEGASO 650 IE - PART1 02-2001
- Page 1 PEGASO I.E. use maintenance book aprilia part# 8104312...
- Page 2 © 2001 aprilia s.p.a. - Noale (VE) The following precautionary warnings are The operations preceded by this used throughout this manual in order to symbol must be repeated also on convey the following messages: the opposite side of the vehicle.
-
Page 3: Automatic Light Switching Version
(I, UK, A, ...). periodical inspections. and are to be supplied to the aprilia Official Dealer as reference data for the purchase of spare parts or specific accessories of the model you have acquired. -
Page 4: Table Of Contents
EXHAUST SILENCERS ........40 REAR SUSPENSION ........78 INSTRUCTIONS FOR USE ........40 REAR SUSPENSION WITH HYDRAULIC SAFE DRIVE GETTING ON AND OFF THE VEHICLE ..40 PRELOAD ADJUSTMENT ......79 BASIC SAFETY RULES ........6 PRELIMINARY CHECKING OPERATIONS ..42 CHECKING THE BRAKE PAD WEAR .... - Page 5 safe drive...
- Page 6 The use of medicins, alcohol and drugs or Most road accidents are caused by the psychotropic substances notably increases driver’s lack of experience. To drive the vehicle it is necessary to be in the risk of accidents. NEVER lend the vehicle to beginners and, possession of all the requirements pre- in any case, make sure that the driver has Be sure that you are in good psychophysi-...
- Page 7 Rigorously observe all road signs and na- Avoid obstacles that could damage the ve- Always drive with both hands on the han- tional and local road regulations. hicle or make you lose control. dlebars and both feet on the footrests (or on the rider’s footboards), in the correct Avoid abrupt movements that can be dan- Avoid riding in the slipstream created by...
- Page 8 If necessary, have the vehicle inspected by an aprilia Official Dealer who should care- fully check the frame, handlebars, suspen- sions, safety parts and all the devices that you cannot check by yourself.
-
Page 9: Clothing
ONLY ORIGINALS Never change the position, inclination or Any modification of the vehicle and/or the colour of: number plate, direction indica- removal of original components can com- Before starting, always wear a correctly tors, lights and horns. promise vehicle performance levels and fastened crash helmet. -
Page 10: Accessories
(aprilia genuine accessories). Avoid using accessories that hamper ac- cess to the controls, since this can prolong reaction times during an emergency. - Page 11 Avoid hanging bulky, heavy and/or danger- Do not carry any bag if it is not tightly se- Do not exceed the maximum load allowed ous objects on the handlebars, mudguards cured to the vehicle. for each side-bag. and forks, because the vehicle might re- Do not carry bags which protrude too much When the vehicle is overloaded, its stability spond more slowly in turns and its ma-...
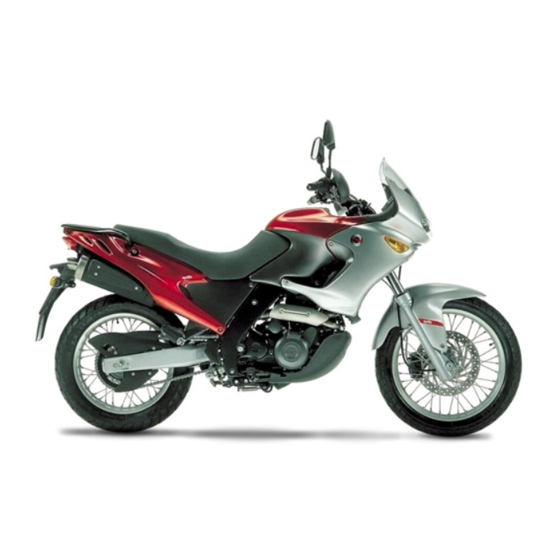
- Page 12 1) Headlight 9) Fuse carrier 15) Centre stand (supplied 20) Rear luggage rack (sup- 2) Ignition switch/steering lock 10) Passenger grab rail as standard equipment in plied as standard equipment 3) Left rear-view mirror 11) Glove/tool kit compartment the countries where re- in the countries where re- 4) Fuel tank filler cap 12) Rear luggage rack...
-
Page 13: Air Cleaner
3) Saddle lock 10) Right rear-view mirror 17) Anti-theft hook (for shielded as standard equipment in 4) Saddle 11) Horn cable “Body-Guard” aprilia the countries where re- 5) Rear brake fluid tank 12) Engine oil tank quired) 6) Air cleaner... -
Page 14: Instruments And Indicators
• 1) Clutch lever 8) Light switch ( ) (not provided for 2) Instruments and indicators 9) Direction indicator switch ( 3) Ignition switch/steering lock ( 10) Horn push button ( 4) Front brake lever 11) Dimmer switch ( 5) Throttle grip 12) High beam signalling push button ( 6) Engine stop switch ( 13) Cold start lever ( ) - Page 15 1) Revolution counter 8) Blue high beam warning light ( 2) Speedometer 9) Red diagnostic warning light ( ) 3) Total kilometres odometer 10) Amber low fuel warning light ( ) 4) Coolant temperature indicator ( ) 11) Green direction indicator warning light ( 5) Partial kilometres odometer 12) Green neutral indicator warning light ( ) 6) Odometer trip control...
- Page 16 Comes on whenever the ignition switch is in position “ ” and the engine is not running, thus checking the functionality of the bulb. If the light does not come on in this phase, contact an aprilia Official Dealer. Engine oil pressure Warning light If the engine oil pressure warning light “...
- Page 17 Official Dealer. It indicates the partial number of kilometres covered. To set it to zero, use the odometer trip con- Partial kilometres odometer trol.
- Page 18 NOTE The electrical parts work only when the ignition switch is in position “ ”. 1) HORN PUSH BUTTON ( The horn is activated when the push button is pressed. 2) DIRECTION INDICATOR SWITCH ( To indicate the turn to the left, move the switch to the left; to indicate the turn to the right, move the switch to the right.
- Page 19 NOTE The electrical parts work only when the ignition switch is in position “ ”. 1) ENGINE STOP SWITCH ( WARNING Do not operate the engine stop switch “ ” in running conditions. This is a safety or emergency switch. With the switch pressed in position “...
-
Page 20: Ignition Switch
Position Function Key removal The steer- It is possible ing is to remove the locked. It is key. neither pos- sible to start Steering the engine, lock nor to switch on the lights. Neither the It is possible engine, nor to remove the the lights key. - Page 21 WARNING To lock the saddle: Never turn the key to position “ ” in Position the tangs (3) in the seat, lower running conditions, in order to avoid and press the saddle, making the lock Position the vehicle on the stand, see p. losing control of the vehicle.
-
Page 22: Anti-Theft Hook
The tool kit (1) includes: cable “Body-Guard” aprilia (13), avail- – 3, 4, 5, 6, 8 mm bent hexagon spanners able at the aprilia Official Dealers . (2); – 5. 5 – 7 mm double fork spanner (3); WARNING – 8 – 11 mm double fork spanner (4);... -
Page 23: Special Tools
To perform some specific operations, it is advisable to use the following special tools (to be requested to an aprilia Official Deal- er): Tool Operations Support pins (1) for the rear Positioning of support stand, aprilia part# the vehicle on 8140204, see p. -
Page 24: Transport
WARNING To open the side bag, proceed as fol- lows: If it is necessary to transport more than Position the vehicle on the stand, see p. one object, distribute the load uniformly 52 (POSITIONING THE VEHICLE ON on the side bags. Thanks to the use of the side bags it is pos- THE STAND). - Page 25 To remove the side bag, proceed as fol- Two keys are supplied together with the WARNING lows: vehicle (one spare key). Upon reassembly, make sure that the NOTE Introduce the key (4) in the lock. bag is properly anchored to its support. Do not keep the spare key on the Turn the key (4) clockwise and at the vehicle.
- Page 26 WARNING Do not load the rear case excessively. Maximum allowed weight: 5 kg. To remove the rear case, proceed as fol- lows: Introduce the key (1) in the lock. Rotate the key (1) clockwise. Extract the handle (2) and grasp it firmly with one hand.
- Page 27 WARNING WARNING Further, prevent fuel from flowing out of Screw the plug up carefully after refuel- WARNING the fuel filler, as it could catch fire when ling. Avoid any contact of the fuel with The fuel used for internal combustion getting in contact with the red-hot sur- the skin and the inhalation of vapours;...
- Page 28 To refuel, proceed as follows: After refuelling: CAUTION Raise the flap (1). NOTE The cap can be closed only when Do not put additives or other substanc- Insert the key (2) in the tank plug lock the key (2) is inserted. es into the fuel.
- Page 29 WARNING WARNING NOTE This vehicle is provided with front Make sure that the brake discs are nei- Carefully wash the parts of your body ther oily nor greasy, especially after that get in contact with the liquid. Con- and rear disc brakes, with separate hy- sult a doctor or an oculist if the liquid draulic circuits.
-
Page 30: Disc Brakes
The front brake fluid tank is positioned on two years by an Official Dealer. years by an aprilia Official Dealer. the right part of the handlebar, near the Use brake fluid of the type specified in front brake lever coupling. -
Page 31: Front Brake
TOPPING UP WARNING Carefully read p. 29 (BRAKE FLUID - CHECK Avoid any prolonged exposure of the recommendations). brake fluid to the air. Keep the vehicle in vertical position and turn the handlebar, so that the fluid con- The brake fluid is hygroscopic and CAUTION tained in the tank is parallel to the brake when in contact with the air it absorbs... - Page 32 CAUTION Raise and remove the cover (3) together Put back the gasket (4) in its seat cor- with the screws (1) and (2). rectly. Do not exceed the “MAX” level while Remove the gasket (4). Put back the cover (3). topping up.
-
Page 33: Rear Brake
CAUTION In order not to spill the brake fluid while topping up, keep the fluid in the tank parallel to the tank rim (in horizontal po- sition). Do not put additives or other subtances into the fluid. If you use a funnel or other similar items, make sure that they are perfectly clean. -
Page 34: Coolant
UP); have the coolant changed every two The coolant is composed of 50% water and For the cooling solution use distilled water, years: for this operation, contact an aprilia 50% antifreeze. in order not to damage the engine. Official Dealer. - Page 35 CHECKING AND TOPPING UP If not, proceed as follows: Top up the expansion tank by adding coola nt, see p. 104 (LU BR ICA NT Unscrew and remove the filling cap (1). WARNING CHART), until this almost reaches the “MAX” level. Do not exceed this level, Check the coolant level and top up the WARNING otherwise the fluid will flow out while the...
-
Page 36: Tyres
There are several kinds of wear indica- tors. For more information on how to This vehicle is provided with tyres with check the wear, contact your Dealer. tube. Visually check if the tyres are worn and NOTE Carry out the maintenance oper- in this case have them changed. -
Page 37: Engine Oil
WARNING Engine oil may cause serious damage to the skin if handled daily and for long periods. Wash your hands carefully after use. KEEP AWAY FROM CHILDREN. DO NOT DISPOSE OF THE OIL IN THE ENVIRONMENT. Put it in a sealed container and take it to the filling station where you usually buy CAUTION WARNING... - Page 38 WARNING For the adjustment, proceed as follows: Position the vehicle on the stand, see p. If it is not possible to obtain a correct ADJUSTING THE CLUTCH 52 (POSITIONING THE VEHICLE ON adjustment or if the clutch does not Adjust the clutch after the first 1000 km THE STAND).
- Page 39 Screw the rod in order to ensure a mini- If necessary, contact your Offi- mum clearance of 0.5 – 1 mm between cial Dealer. the pump control rod (4) and the pump The brake control lever is positioned ergo- piston. nomically during the assembly of the vehi- cle.
- Page 40 If the noise produced by the exhaust system with metal catalytic converter of the “plati- The operations and movements required to increases, immediately contact your aprilia num-rhodium bivalent” type. Official Dealer. get on and off the vehicle must be per-...
- Page 41 NOTE The rider is responsible for in- The vehicle is provided with two stands: The stand has been designed to support structing the passenger how to safely get centre stand and side stand. the weight of the vehicle and a minimum on and off the vehicle.
-
Page 42: Preliminary Checking Operations
Place both feet on the ground, keeping Kick the side stand completely back us- Do not hesitate to consult your aprilia Offi- the vehicle in balance in riding position. ing your left foot. cial Dealer in case there is something you... -
Page 43: Adjusting The Accelerator Control
Component Check Page Check the functioning, the idle stroke of the control levers, the fluid level and make 29 (BRAKE FLUID - recommendations), 30 Front and rear disc sure there are no leaks. (DISC BRAKES), 31 (FRONT BRAKE), 33 brakes Check the wear of the pads. -
Page 44: Starting
NOTE With the side stand down, the en- At this point the following lights come on gine can be started only if the gears are in on the dashboard: WARNING neutral; in this case, if you try to engage – the engine oil pressure warning light the gears, the engine stops. - Page 45 CAUTION Operate the front brake lever completely. Press the start push button “ ” (11) with- Pull the clutch lever (8) completely and out accelerating and release it as soon Never leave abruptly with cold engine. shift the gearbox lever (9) into neutral as the engine starts.
- Page 46 STARTING WITH COLD ENGINE If the engine starts. When the room temperature is low (about Release the start push button “ ” (11) 0°C), it may be difficult to start the engine and the throttle grip (13). at the first attempt. Rotate the cold start lever “...
-
Page 47: Rear-View Mirrors
WARNING To leave: Start the engine, see p. 44 (STARTING). If you drive without passenger, make WARNING Adjust the inclination of the rear-view sure that the passenger footrests are Do not position any object inside the mirrors correctly, see p. 83 (REAR-VIEW folded. - Page 48 CAUTION If the engine oil pressure warning light “ ” (5) comes on during the normal operation of the engine, this means that the engine oil pressure in the circuit is insufficient. In this case, stop the engine immediate- ly and contact an Official Dealer.
- Page 49 If the situation on the dashboard re- risk of locking one wheel and conse- mains the same after the coolant level quently losing grip. has been checked, do not start the vehi- If you stop uphill, decelerate completely cle and contact an Official Deal- and use the brakes only to keep the ve- hicle steady.
-
Page 50: Running-In
building site metal plates become rather WARNING slippery by rain. For this reason all The running-in of the engine is essential to After the first 1000 km (625 mi), have an these obstacles have to be carefully ensure its duration and correct functioning. Official Dealer carry out the avoided, driving smoothly and leaning If possible, drive on hilly roads and/or... -
Page 51: Stopping
WARNING The fall or excessive inclination of the It is very important to choose a suitable WARNING vehicle may cause the fuel to flow out of parking area, respecting the road signs and If possible, avoid stopping abruptly, the tank. the indications given below. - Page 52 WARNING Press the side stand with your right foot and extend it completely (3). When getting on or off the vehicle, keep Incline the vehicle until the stand rests to the instructions given, see p. 40 SIDE STAND on the ground. (GETTING ON AND OFF THE VEHICLE).
- Page 53 NOTE Do not let the side stand touch C E N T R E S T A N D ( s u p p l i e d a s Load your weight on the lever (4) the ground. Keep the vehicle in vertical po- standard equipment in the countries (Pos.B) of the centre stand and at the sition.
- Page 54 Write down your personal data and tele- phone number in this page, to facilitate the identification of the owner in case of finding NEVER leave the ignition key (1) inserted after theft. and always use the steering lock “ ”. Park the vehicle in a safe place, possibly in SURNAME: ..........
Need help?
Do you have a question about the PEGASO 650 IE - PART1 02-2001 and is the answer not in the manual?
Questions and answers