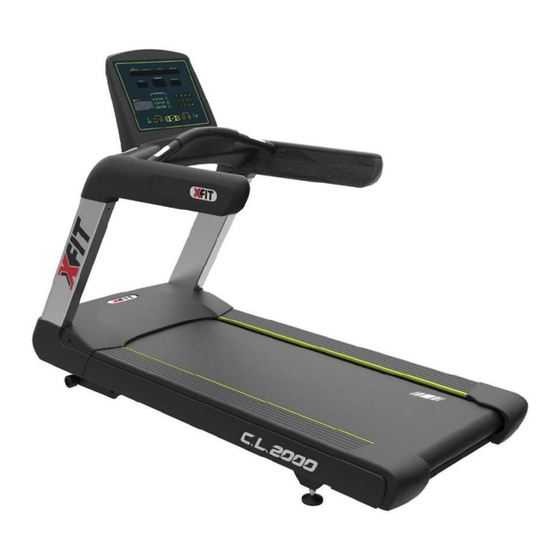
Summary of Contents for XFit C.L.2000
- Page 1 Treadmill User’s Manual * Product specifications may differ from the photo and are subject to change without notice.
- Page 3 INSTRUCTIONS Safety Tips: This instruction contains important information of safety use. Please read carefully before use. 1. This treadmill can be used in commercial gym, clubs for bodybuilding, sports training, teaching etc. 2. To avoid danger of power shock, please DO plug off the treadmill before cleaning or repairing; The power cord must be plugged into the grounded outlet when usage.
-
Page 4: Exploded Diagram
EXPLODED DIAGRAM... -
Page 5: Part List
PART LIST NAME NAME NAME Body frame Edgings L Non-slip nuts M14 Stand column Edgings R Homemade screw M14 Foot stool Footboard L Cup gasket Big frame Footboard R PWB M5*10 Heart rate inner Cylinder head hex socket The end cover L pipe screws M5*15 Foot margin... - Page 6 screw M6*30 Round head cross tapping Armrest inside R screw M3.5*15 Armrest front PWB M4*6 small cap L Armrest front PWB M4*8 small cap R headless socket head Armrest cover L screw M8*50 Armrest cover R Plain nut M8 Armrest bottom Round head hex socket cover L screws M10*45...
- Page 7 Assembling & Handling Instruction 2、The signal line connector C, D docking, and then by 1、 The signal line a and B docking, and then by half round in the six corners Screw B25 (M10*16) half round inner six angle screw B25 (M10*16) the 02 through the left and right columns 02 fixed.
- Page 8 Put the console top frame (05) at the middle iron plate of the treadmill. Align the hole with the hole, and then using half -round head with inner hexagon screw M10*50 (A5) through iron plate to lock. Then use half -round head with inner hexagon screw M10*20 (A6)...
-
Page 9: Drive Belt Adjustment
Drive belt adjustment 1. During operation, when the running belt is deviated to the left, clockwise adjust the adjustable bolt of the left running belt, or anticlockwise adjust the adjustable bolt of the right running belt; and vice versa. Adjustment method: use the Allen key to adjust the adjustable bolts on the left and right side of rear protecting cap, to make the running belt in the middle position;... -
Page 10: Machine Maintenance
Machine maintenance 1. Great attention should be paid to damageable parts. 2. Change the damaged parts in time. Machine cannot be used unless repaired, and noticeable nameplate "Being repaired" should be put around the machine. 3. When treadmills have unnormal sounds or won't operate due to some other reasons, please contact our after-sales service department without delay. -
Page 11: Technical Parameters
1. Control Using Instruction 2. Technical parameters Heart rate display / 70-200 / Min when holding heart rate to show heart rate, step number when the rate is switched to the rate of change (999 steps) to the maximum value of the reset after the reset step. - Page 12 RANDOM HILL 5K LOOP ALPINE PASS FITNESS TESTS TRAINNING TOOLS Time 00:00-99:59 Min Speed 0.0-20.0 km/h Distance 0.0-99.9KM Incline adjustment “+” increase gradient “-” decrease gradient one time 1% adjustment Program selector Program selection, middle "confirmation" key Pause, start, stop Control treadmill pause, start, stop "+"...
-
Page 13: Operation Panel Description
3. Operation panel description When the treadmill back power switch electricity, electricity green digital panel treadmill will light up, and in the middle of "PROGRAM" green display window welcomes the cycle, said ready. 1. Press the key ,(this is the touch button, as long as the contact can be), the middle "PROGRAM" green display window display 3 seconds countdown and accompanied by "Di ~ Di ~ ~ ~ ~"..."... - Page 14 8. When both hands hold the heart rate handle, the heart rate display frame will show the measured value of the heart rate (only for reference), when not holding the handle, will show the number of users on the treadmill exercise, for reference. 9.
-
Page 15: Lubrication Instructions
LUBRICATION INSTRUCTIONS WARNING! Always unplug the power cord before performing any maintenance on your treadmill. CLEANING: Regular cleaning of your treadmill will extend its life. WARNING! To avoid electric shock, make sure the treadmill is off and the power cord is unplugged before cleaning or maintenance. - Page 16 FEATURES MOTER: 5.0 hp (Range: AC 3.0 -> 7.0HP) SPEED RANGE: 1.0 – 22.0 km/h INCLINE: 15 level BELT: 160 cm x 57 cm (Thickness: 2.5mm) WEIGHT: 200 kg Ν.W./GW: 210 / 230kg MAXIMUM USER WEIGHT: 180 kg DIMENSIONS: L: 222 cm x W: 92.7 cm x H: 160 cm FOLDING: Non-Foldable INPUT VOLTAGE:...
- Page 17 TERMS OF WARRANTY Warranty period is 2 years for motor, 2 years for mechanical, electrical / electronic parts and 5 years for the • metal frame. • X-TREME STORES S.A. undertakes to repair the machine free of charge in the event of damage due solely to a manufacturing fault.
- Page 19 ΣΗΜΕΙΩΣΕΙΣ...
- Page 20 Koupi Avenue 34, Koropi P.C. 19441 P.O.Box 6201 Tel.: 210 66 20 921 -2 - FAX: 210 66 20 923 E-mail: info@xtr.gr • f/xtrstores • /@xtr.gr Tel for all Greece: 801.11.15.100 www.xtr.gr...


Need help?
Do you have a question about the C.L.2000 and is the answer not in the manual?
Questions and answers