
Related Manuals for XFit C.L.2500


Summary of Contents for XFit C.L.2500
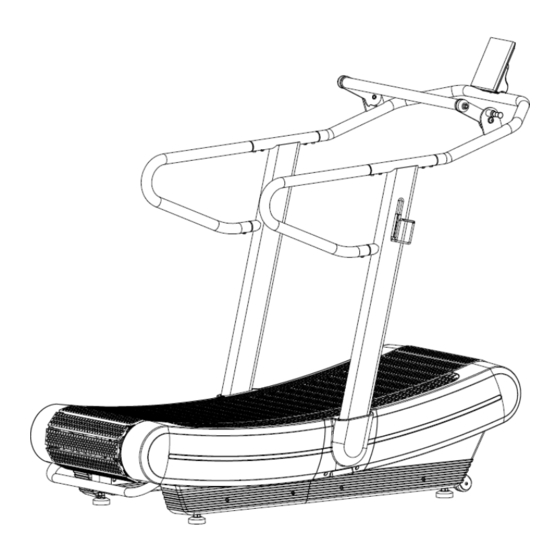
- Page 1 Curve Treadmill User’s Manual * Product specifications may differ from the photo and are subject to change without notice.
-
Page 3: Important Precautions
IMPORTANT PRECAUTIONS Read all instruction carefully before use this product. Retain this owner’s manual for the future’s reference: When you are running, keep your hand swinging natural, stare frontward, never look down at your feet. Add the speed step by step when running. ATTENTION 1. -
Page 4: Assembly Steps
ASSEMBLY STEPS Η συναρμολόγηση απαιτεί 2 άτομα. Caution: Read the instructions carefully before assembly ASSEMBLY STEP ONE: 1. Take the main frame (1) from the wooden pallet, and then put the main frame (1) on the ground, as the picture shown. ASSEMBLY STEP TWO:... - Page 5 ASSEMBLY STEP THREE: 1. Insert handlebar connection (9) to the L&R handlebar post (6L&R) meter connection tube and handlebar connection. Then lock them to Left &right handlebar post (6L&R) respectively with hex socket bolt (37). And don’t lock hex socket bolt(37) at the moment.
- Page 6 ASSEMBLY STEP FOUR: 1. Connected middle sensor extension wire (56) and upper sensor extension wire (57) well. 2. Insert console connection (7) to handlebar post (6L/R) ’s console connection tube. Then lock the console connection (7) to handlebar post (6L/R) respectively with hex socket bolt (37).Then lock all bolt and screw tightly in this process.
- Page 7 ASSEMBLY STEP FIVE: 1. Firstly,connect upper sensor extension wire(57)to wire of console (38). 2. Then lock console (38)to console connection(7)with cross pan screw(58). 3. Finally,lock console rear cover (29)to console connection (7)with cross pan screw(46).
- Page 8 ASSEMBLY STEP SIX: 1. Lock Aluminum bottle bracket (21) to handlebar post (6R) with Cross pan screw M5*15(42). 2. Attach the clip of L&R handlebar post cover(27L/R)to the L&R protective cover of main frame(1)(NOTE: when you attach the L&R handlebar post cover(27L/R) please note the angle should like below picture A to avoid the broken of cover )...
-
Page 9: Exploded Drawing
EXPLODED DRAWING... -
Page 10: Parts List
PARTS LIST Description Description Main frame Rubber roller wheel 2L/R L&R front foot pad Hex socket screw M10*55 3L/R L&R front foot pad Hex socket screw M10*35 4L/R L&R Rear base cover Cross pan head screw M10*25 Handlebar Hex socket bolt M10*25 6L/R L&R handlebar post Hex socket bolt M10*20... - Page 11 Coated aluminum chain Standard spring washerΦ6 25L/R Main frame front cover 1 pr Flat washerΦ6 26L/R Main frame rear cover Lower Sensor extension wire 27L/R L&R handlebar post cover 1 pr Middle Sensor extension wire Round end cap Upper Tension extension wire Console rear cover Cross pan screw M5*12...
-
Page 12: Key Function
EXERCISE MONITOR INSTRUCTION MANUAL KEY FUNCTION This key lets you to select and lock on to a particular function you want. ● SCAN→TIME→CALORIES(CAL) →SPEED→DIST→TOTAL DIST(ODO) →PULSE RATE Pressing and hold with 3 seconds to reset the value to zero(without ODO). ●... -
Page 13: Specifications
SPECIFICATIONS SCAN TIME 0:00-99:59(M :S) SPEED 0~999.9KM(MILE)/H FUNCTION DIST 0~999.9KM(MILE) 0~9999KM(MILE) 0~999.9Kcal PULSE 40~240BPM RATE BATTERY SIZE-AAA *2 0~40℃(32℉-104℉) Operating temperature Storage temperature -10~60℃((14℉-140℉) TECHNICAL PARAMETER DIMENSIONS (mm) 188.5 x 880 x 1590 RUNNING BELT CATERPILLAR RUNNING BELT DIMENSIONS (mm) 450 x 3600mm RUNNING SURFACE (mm) 450 x 1700mm... - Page 14 TERMS OF WARRANTY • Warranty period is 2 years. • X-TREME STORES S.A. undertakes to repair the machine free of charge in the event of damage due solely to a manufacturing fault. The warranty covers the cost of the spare parts. Replacement of spare parts or not is up to the company technicians.
- Page 16 Koupi Avenue 34, Koropi P.C. 19441 P.O.Box 6201 Tel.: 210 66 20 921 -2 - FAX: 210 66 20 923 E-mail: info@xtr.gr • f/xtrstores • /@xtr.gr Tel. for all of Greece: 801.11.15.100 www.xtr.gr...
Need help?
Do you have a question about the C.L.2500 and is the answer not in the manual?
Questions and answers