
Related Manuals for Magic Chef URBANLiving UBLBRE24W


Summary of Contents for Magic Chef URBANLiving UBLBRE24W
- Page 1 URBANLiving ™ 24-Inch Freestanding Electric Range User Guide Please read this manual carefully before using the appliance and keep it for future reference. urbanlivingappliance.com MODEL # UBLBRE24B / UBLBRE24W...
- Page 2 PRODUCT REGISTRATION Thank you for purchasing this Urban Living product. The first step to protect your new product is to complete the product registration on our website at urbanlivingappliance.com/register. The benefits of registering your product include the following: 1. Registering your product will allow us to contact you regarding a safety notification or product update. 2.
- Page 3 CONTENTS PRODUCT REGISTRATION ........... . . 2 PRECAUTIONS .
- Page 4 PRECAUTIONS EXPLANATION OF SYMBOLS WARNING Hazards or unsafe practices which COULD result in severe personal injury or death. CAUTION Hazards or unsafe practices which COULD result in minor personal injury. THIS PRODUCT IS INTENDED FOR HOUSEHOLD USE ONLY WARNING: Read and understand all safety precautions. Failure to follow all instructions described in this user manual may result in electric shock, fire and/or serious personal injury.
- Page 5 IMPORTANT SAFETY INSTRUCTIONS WARNING: To reduce the risk of fire, electric shock, or serious personal injury, please read and save all instructions before using the Electric Freestanding Range. When using this or any other electrical appliance, basic safety precautions should be observed, including the following: READ ALL INSTRUCTIONS BEFORE USE.
- Page 6 DO NOT TOUCH THE COOKING SURFACE, THE BURNERS, GRATES OR ANY AREAS NEAR THEM. Surface burners on appliance may be hot. Areas near surface burners or appliance may become hot enough to cause burns. DO NOT touch or let clothing or other flammable materials touch these areas during or after use until it has had sufficient time to cool.
- Page 7 DO NOT use decorative surface burner covers. If a burner is accidentally turned on, the decorative cover will become hot and possibly melt. You will not be able to see that the burner is on. burns will occur if the hot covers are touched.
- Page 8 SPECIFICATIONS Figure 1 34.6” (880 mm) Height 34.6” (880 mm) Width 23.5” (596 mm) Depth 23.6” (600 mm) Product Weight 125 lbs. (56.5 kg) Gross / U sable Capacity 2.9 Cu. Ft. Voltage Rating 240 V , 60 Hz Power Rating Refer to “Electrical Specifications”...
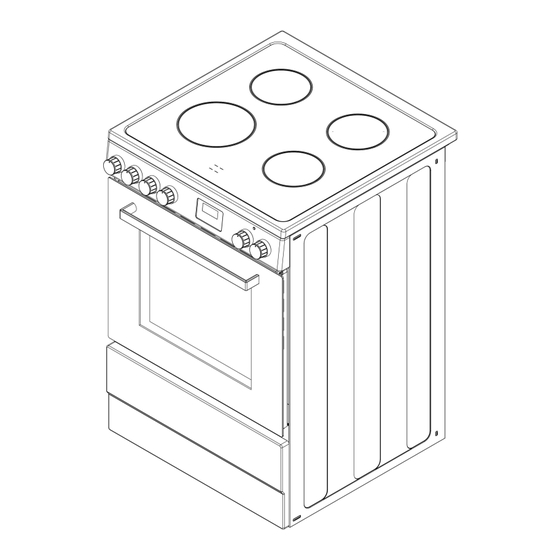
- Page 9 PARTS AND FEATURES Figure 2 Oven Racks (1) Anti-Tip bracket (1) Feet (4) Auxiliary Rack and Tray (1) Knobs (6) Screws (2)
- Page 10 INSTALLATION REqUIREMENTS VENTILATION WARNING: The range should have proper ventilation in order to keep the unit operating properly and maintain the temperature of immediate surroundings within safe limits. Check your local building codes as they may vary from the general rules outlined in this guide. It is recommended that a hood be installed above the range that is rated no less than 400 CFM.
- Page 11 MOBILE HOME REQUIREMENTS The installation of this range must conform to the Manufactured Home Construction and Safety Standard, Title 24 CFR, Part 3280 (formerly the Federal Standard for Mobile Home Construction and Safety, Title 24, HUD Part 280). When such standard is not applicable, use the Standard for Manufactured Home Installations, ANSI A225.1/ NFPA 501A or with local codes.
- Page 12 INSTALLATION INSTRUCTIONS UNPACKING & INSTALLING LEVELING FEET AND BACK PANEL WARNING: Excessive Weight Hazard / Tip Over Hazard • A child or adult can tip the range and be killed. • Use two or more people to move and install range. • Failure to follow these instructions can result in death or serious burns to children and adults.
- Page 13 Install the anti-tip bracket to hold the left rear leg of the slide-in range. Follow these steps to secure the range to the floor before moving the range into final operating position. STEP 1: LOCATE THE BRACKET Determine the final location of the range before attempting to install the bracket. Place the bracket on the floor with the back edge against the rear wall.
- Page 14 ELECTRICAL CONNECTION WARNING: Electrical Shock Hazard • Failure to follow these instructions can result in death, fire, or electrical shock. • Electrical connection must be performed by a qualified service technician in accordance with the kit instructions and all local codes and requirements. Electrical Specifications •...
- Page 15 NOTE: DO NOT install the power cord without a strain relief. The strain relief bracket MUST be installed before reinstalling the rear range wiring cover. 3- Wire Installation (Ground is through the neutral wire) Figure 9 Terminal Block Remove the 3 lower screws from the terminal (appearance may vary) block.
- Page 16 BEFORE USE BEFORE FIRST USE Before cooking for the first time the ceramic glass has to be cleaned. Remove any labels and protective sheeting. Place a saucepan of water on each of the front burners and switch them on the high for at least 30 minutes. After 30 minutes switch the front burners off, place a saucepan of water on each of the rear and the center burners.
- Page 17 OPERATION INSTRUCTIONS OVEN CONTROLLER Figure 11 Surface Cooking Temperature Oven Temperature Function Buttons to Select Cooking Mode Selection Knob Cooking Time and Set Timer Selection Knob Selection Knob COOKING MODES • Oven Light: Turns the oven light on when selected. Bake: Used for traditional baking.
- Page 18 After 5 seconds the clock will start automatically or you can press the “ ” button to make it work. TIMER Timer Setting Press the “ ” button repeatedly until the “ ” symbol above “Timer” flashes. Press “ ” or “ ”...
- Page 19 Press the “ ” button repeatedly until the “ ” symbol above “Cook Time” flashes. Press “ ” or “ ” button and set the timer for how long the oven needs to cook. Switch on the oven immediately, the “ ”...
- Page 20 CARE AND MAINTENANCE WARNING: To avoid the risk of electric shock, ALWAYS ensure the appliance is off and completely cool before cleaning or doing any sort of maintenance. CAUTION: • To avoid possible burns, use care when cleaning the appliance. •...
- Page 21 OVEN DOOR EXTERIOR • Use a glass cleaner and a soft cloth or sponge. • Apply glass cleaner to soft cloth or sponge, not directly on panel. REMOVING AND CLEANING OVEN DOOR For normal range use, it is not suggested to remove the oven door. However, if removal is necessary, make sure the oven is off and cool.
- Page 22 TROUBLESHOOTING Problem Possible Causes Solutions Verify that the electrical wires are connected to the mains No power properly. Refer to “Electrical Connection” section on page 13. Will not operate or turn on Household fuse is blown or Replace the fuse or reset the circuit breaker. circuit breaker is tripped.
- Page 23 LIMITED WARRANTY MC Appliance Corporation warrants each new Range to be free from defects in material and workmanship, and agrees to remedy any such defect or to furnish a new part(s), at the company’s option, for any part(s) of the unit that has failed during the warranty period.
- Page 24 ™ URBANLiving Urban Living TM is a trademark of CNA International, Inc. d/b/a MC Appliance Corporation urbanlivingappliance.com Printed in China...
Need help?
Do you have a question about the URBANLiving UBLBRE24W and is the answer not in the manual?
Questions and answers