Table of Contents
Advertisement
Quick Links
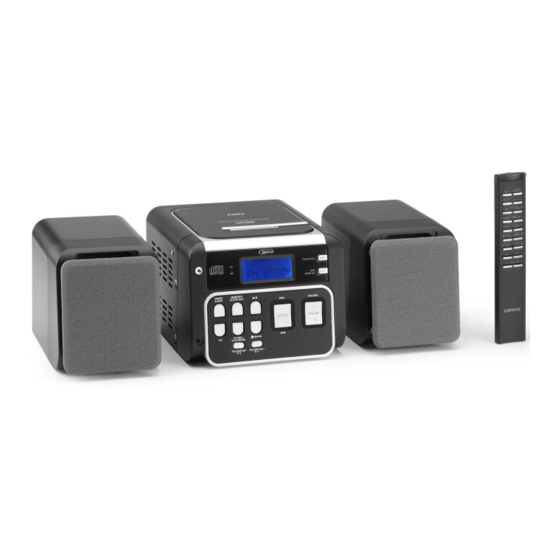
PLL MICROSET WITH CD, MP3 AND WMA
CONTROLS
MAIN UNIT
1. SPEAKERS (L&R)
2.
BUTTON (ON/STANDBY)
3. TIMER / SLEEP BUTTON
4. MEMORY / CLOCK ADJ. BUTTON
5. REMOTE SENSOR
6. ENTER / PLAY / PAUSE BUTTON
7. LCD DISPLAY
8. CD DOOR
+
9. NEXT
/TUNE
BUTTON
-
BACK
/TUNE
BUTTON
10. CD OPEN/CLOSE BUTTON
11. FUNCTION BUTTON
MC141
Instruction Manual
For information and support, www.lenco.eu
12. ID3 / DISPLAY BUTTON
13. PHONES JACK
14. PRESET EQ BUTTON
15. STEREO/MONO/PLAY MODE BUTTON
16. FOLDER UP/P
17. FOLDER DOWN/P
18. STOP
19. VOLUME
20. FM WIRE ANTENNA
21. AUX.IN JACK
22. AC CORD
+
BUTTON
-
BUTTON
/BAND BUTTON
+ -
/
BUTTON
Advertisement
Table of Contents

Related Manuals for LENCO MC-141


Summary of Contents for LENCO MC-141
- Page 1 MC141 PLL MICROSET WITH CD, MP3 AND WMA Instruction Manual For information and support, www.lenco.eu CONTROLS MAIN UNIT 12. ID3 / DISPLAY BUTTON 1. SPEAKERS (L&R) 13. PHONES JACK BUTTON (ON/STANDBY) 14. PRESET EQ BUTTON 3. TIMER / SLEEP BUTTON 15. STEREO/MONO/PLAY MODE BUTTON 4. MEMORY / CLOCK ADJ. BUTTON 16.
- Page 2 WARNING CLASS 1 LASER PRODUCT CAUTION CLASS 1 LASER PRODUCT INVISIBLE LASER RADIATION APPAREIL Á LASER DE CLASSE 1 WHEN OPEN AND INTERLOCKS PRODUCTO LASER DE CLASE 1 DEFEATED. AVOID EXPOSURE TO BEAM This product contains a low power laser device. Warning: Do not touch the lens. DO NOT THROW BATTERIES IN FIRE ! PRECAUTIONS Follow the advice below for safe and appropriate operations.
-
Page 3: System Connections
REMOTE CONTROL UNIT FUNCTION BUTTON ON / STANDBY BUTTON ENTER /PLAY STOP / BAND BUTTON /PAUSE BUTTON TUNE - BACK BUTTON TUNE + NEXT BUTTON +10 TRACK BUTTON - 10 TRACK BUTTON FOLDER UP / P + BUTTON FOLDER DOWN / P- BUTTON ST./MO./PLAY MODE BUTTON MEMORY/CLOCK/ADJ. -
Page 4: Adjusting The Sound
POWER ON/OFF AND FUNCTION CHANGE FUNCTION Power is on/off by pressing STANDBY button. STANDBY The function is changed cyclically by pushing FUNCTION button : TUNER AUX . AUX IN Connect an external LINE OUT to AUX. IN socket at the back of the unit. Press the FUNCTION button and select AUX mode. ( AUX IN CABLE NOT INCLUDED ) FUNCTION AUX. -
Page 5: Clock Adjustment
CLOCK ADJUSTMENT 1. The clock is displayed on CD display at power off condition. 2. Press the MEMORY CLOCK-ADJ. button, hour of clock flash. MEMORY/CLOCK-ADJ. 3. Press the adjust hour digit. 4. Press the MEMORY CLOCK-ADJ. button, the minute digit flash. 5. Press the to adjust minute digit. 6. Press the MEMORY CLOCK-ADJ. button again, the correct time is shown on display. LISTENING TO THE RADIO Press the FUNCTION button and select Radio 2 . Select AM or FM by pressing the mode. -
Page 6: Compact Disc Playback
COMPACT DISC PLAYBACK Press the FUNCTION button and select CD Insert a disc with the label side facing up. mode. Press OPEN/CLOSE button to close the CD door. For CD: Total number of tracks and time will be FUNCTION shown on the display. For MP3: Total number of folder and tracks will be shown on the display. -
Page 7: Folder Up / Down
REPEAT , REPEAT FOLDER AND MIX PLAYBACK Press PLAY MODE button during stop mode. CD plays with a single track repeat, all tracks repeat or randomly. FOR NORMAL COMPACT DISC PLAYBACK FOR MP3/WMA PLAYBACK Mode sequence REPEAT >> REPEAT ALL Mode sequence REPEAT >> REPEAT FOLDER >> >> RANDOM >> REPEAT OFF. REPEAT ALL >> RANDOM >> REPEAT OFF. During Repeat 1 mode, During Repeat 1 mode, display shows display shows During Repeat 2 mode, During Repeat 2 mode, display shows display shows During Repeat 3 mode, display shows During Mix mode, display shows CD display During Mix mode, display shows MP3/WMA display Note on CD-R/RW discs - Because of non-standardized format definition/ production of CD-R/RW, playback quality and performance are not guaranteed. -
Page 8: Program Playback
ID 3 DISPLAY Song name,Singer name and album name can be displayed cyclically by pressing ID3 button during playing MP3. Title-song name Artist-singer name Album-Album name Press ID3 again to cancel ID3 display. PROGRAM PLAYBACK FOR NORMAL COMPACT DISC PLAYBACK Programmed playback enables tracks on a disc to be played in the desired order. CD display Up to 60 tracks can be programmed. Press the “ MEMORY “ button. Press the skip buttons to select the desired track number. Press “ MEMORY “ button again to memorize the track. Repeat steps 2 and 3 until all desired tracks are programmed. Press the “ PLAY/PAUSE “ button to start. “ MEMORY “ is shown on the CD display. Press “ STOP “ button to stop programmed playback. -
Page 9: Maintenance
If at any time in the future you should need to dispose of this product please note that Waste electrical products should not be disposed of with household waste.Please recycle where facilities exist. Check with your Local Authority or retailer for recycling advice. (Waste Electrical and Electronic Equipment Directive) For information and support, www.lenco.eu GB 7...
Need help?
Do you have a question about the MC-141 and is the answer not in the manual?
Questions and answers