Advertisement
Quick Links
Advertisement

Subscribe to Our Youtube Channel
Related Manuals for ALFAtron ALF-SCK51TS-D


Summary of Contents for ALFAtron ALF-SCK51TS-D
- Page 1 ALFATRON ELECTRONICS GmbH GERMANY ALF-SCK51TS-D...
- Page 2 ALF-SCK51TS-D Thank you for purchasing this product For optimum performance and safety, please read these instructions carefully before connecting, operating or adjusting this product. Please keep this manual for future reference. Surge protection device recommended This product contains sensitive electrical components that may be damaged by electrical spikes, surges, electric shock, lighting strikes, etc.
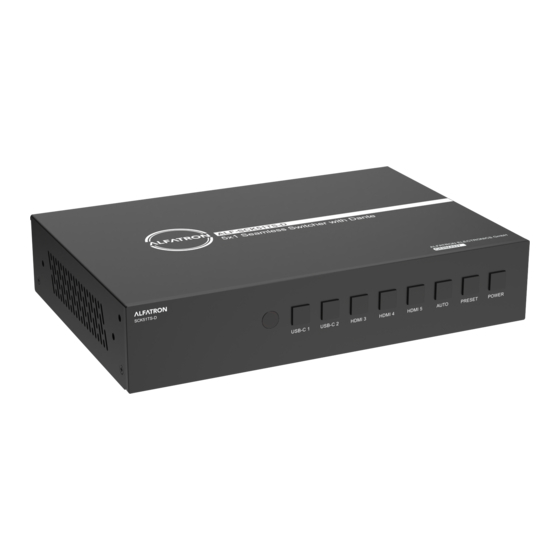
- Page 3 ALF-SCK51TS-D 1. Introduction This 5x1 seamless presentation switch features 3 HDMI inputs, 2 USB-C inputs (DP Alt mode, USB 2.0, 100M Ethernet and 60W charging), 1 HDMI output and 1 HDBT mirrored output. HDBT supports standard PoE power supply and can extend uncompressed signal up to a distance of 230ft/70m (4K@30Hz 4:4:4) or 131ft/40m (4K@60Hz 4:4:4) via a single CAT6A (F/FTP) cable.
- Page 4 ALF-SCK51TS-D 3. Specifications Technical HDMI Compliance HDMI 2.0b HDCP Compliance HDCP 2.2 DP Version DP 1.2 Video Bandwidth 18Gbps TX USB DEVICES to TX HOST/USB-C: 480Mbps USB Bandwidth RX USB DEVICES to TX HOST/USB-C: 350Mbps RX USB DEVICES to RX HOST: 480Mbps...
- Page 5 ALF-SCK51TS-D 93dB @ 2Vrms, 1kHz A-weighted Audio S/N Ratio <0.1% @ 0dBV, 1kHz Audio THD+N RX Analog Audio Output Impedance 330 Ohms 8.2dBu (2Vrms) @ balanced audio Line Output Level 2.2dBu (1Vrms) @ unbalanced audio (Maximum) Frequency Response (+0.5 dB, -1 dB) 20 Hz to 20 kHz...
- Page 6 ALF-SCK51TS-D Mechanical Housing Front panel: Aluminum; Rear case: Metal Enclosure Color Black Transmitter: 220mm [W]×150mm [D]×44mm [H] Dimensions Receiver: 140mm [W]×105mm [D]×21.5mm [H] Weight Transmitter: 1.21Kg; Receiver: 424g Input: AC100 - 240V 50/60Hz Power Supply Output: DC 24V/8A (US/EU standard, CE/FCC/UL certified)
- Page 7 ALF-SCK51TS-D Name Function Description Press this button to enable/disable the auto switching function. AUTO button When the auto switching function is enabled, the button light will be on. Press this button to cycle through the preset application scenes. The button light will automatically turn off after 1 second each PRESET button time.
- Page 8 ALF-SCK51TS-D Name Function Description Analog audio output port, supporting balanced audio output (with a maximum support of 2Vrms) and unbalanced audio output (with LINE OUT port a maximum support of 1Vrms). Balanced connection method: L+, L -, , R+, R-...
- Page 9 ALF-SCK51TS-D Name Function Description When the receiver is powered on, the red power LED will be on. Power LED ▪ Light on: Transmitter and Receiver are in good connection status. ▪ Light flashing: Transmitter and Receiver are in poor connection LINK LED status.
- Page 10 ALF-SCK51TS-D Power port, connected to the DC 24V power adapter. DC 24V port Note: The receiver also can be powered by HDBT POE power (from the HDBaseT IN port of the TX unit).
- Page 11 ALF-SCK51TS-D 4.3 IR Cable Pin Assignment The pin assignment of the IR Receiver cable and IR Blaster cable is as below: IR RECEIVER IR BLASTER IR BLASTER IR RECEIVER IR Signal Grounding Power 12V Note: When the angle between the IR receiver and the remote control is ± 45 °, the transmission distance is 0-5 meters;...
- Page 12 ALF-SCK51TS-D 6. Web GUI User Guide The presentation switch can be controlled by Web GUI. The operation method is shown as below: Step 1: Get the current IP Address. The default IP address is a static address 192.168.1.100 Port: 8000 by default. You can get the current switch IP address via RS-232 command control.
- Page 13 ALF-SCK51TS-D The default Admin username and password is as below: Username User Admin Password user admin USER password: Select the username “User” and input the password “user”, then click the “LOGIN” button to enter the User page. ■ User Page You can do the following operations on the User page: ①...
- Page 14 ALF-SCK51TS-D ■ Information Page ② ③ ④ ① The Information page provides basic information about the model’s name, software version, IP information and the current machine temperature. Besides, you can do the following operations in the upper right corner of each page.
- Page 15 ALF-SCK51TS-D ■ Preset Page You can set up to 5 preset scenes on the Preset page. ① Preset Name: You can name the preset scene. (Chinese name is not supported.) ② Preset Save: Click the Save button to save the scene.
- Page 16 ALF-SCK51TS-D ■ EDID Page ① ② ③ ④ ⑤ You can do the following operations on the EDID page. ① Click the drop-down list to set EDID for each input port. The EDID list is as below. EDID Mode EDID Mode Auto 1680x1050, Stereo Audio 2.0...
- Page 17 ALF-SCK51TS-D ■ Video Page Switch Mode ① Auto Switch: You can turn on/off the auto switching function. ② Fallback Input: Click the drop-down list to select Auto\USB-C 1\USB-C 2\HDMI 3\HDMI 4\ HDMI 5 as the signal source of Fallback input. When the auto switching function is turned on and the current input source is disconnected, the Fallback input signal source will be selected automatically.
- Page 18 ALF-SCK51TS-D display mode. ⑧ Border: Click the drop-down list to select the border and border color in PBP\Triple\Quad display mode. Output Setting ① Resolution: Click the drop-down list to select the output resolution. The output resolution list is as following.
- Page 19 ALF-SCK51TS-D Source Select ① Main In: Click the drop-down list to select the signal source for Main In. ② HDMI/HDBT Out: Click the drop-down list to select the signal source for HDMI/HDBT Out. ③ Line Out: Click the drop-down list to select the signal source for Line Out.
- Page 20 ALF-SCK51TS-D USB Switch ① Follow Video: Click this button to set the USB transmission to follow the video. It will follow the video output of window 1 in Multiview mode. ② Manual Switch: Switch to USB-C 1\USB-C 2\Host 3 manually.
- Page 21 ① Network Configuration: You can set the IP Mode (DHCP/Static), IP Address, Subnet Mask, Gateway, Telnet Port and Domain Name. Note: The Domain Name “ALF-SCK51TS-D-75AA.local” can be used to login the Web GUI. ② Account Passwords: You can modify the login password for User and Admin.
- Page 22 ALF-SCK51TS-D Power On/Off command. ③ Auto Power off Timer: Click the drop-down list to select the delay time for sending the command to turn off the display device when the transmitter is in standby mode or there is no signal input.
- Page 23 ALF-SCK51TS-D ALF-SCK51TS-D-010733 Step 4: Click the Device Info tab to check the IP address of the Dante device. Step 5: Input the IP address of Dante device into your browser on the PC to enter the login interface of the Dante Web GUI.
- Page 24 On the Network page, you can set the IP Mode (DHCP/Static), IP Address, Subnet Mask, Gateway, Telnet Port, TCP Port and Domain Name. The product model can be modified. Note: The Domain Name “ALF-SCK51TS-D-010733.local” can be used to login the Dante Web GUI.
- Page 25 ALF-SCK51TS-D You can do the following operations on the System page: ① Account Passwords: You can modify the login password for Admin. After inputting the old password, new password and confirm password, click “Save” to take effect. ② Firmware Update: You can update the firmware and DEP SDK software. Click “Browse”...
- Page 26 ALF-SCK51TS-D 9. Connection Diagram PC or Control System Microphone Audio Processor with DANTE 16× 16 D IGIT A L M AT RIX PR OC ES S OR W ITH DANTE IR Receiver Amplifier IR Blaster Power Supply CONTROL AUDIO Switch...
Need help?
Do you have a question about the ALF-SCK51TS-D and is the answer not in the manual?
Questions and answers