
Related Manuals for LENCO DF-711B


Summary of Contents for LENCO DF-711B
-
Page 1: Digital Photo Frame
ENGLISH Digital Photo Frame Digital Photo Frame Digital Photo Frame Digital Photo Frame User's Manual Please read this manual before operating DF-711... -
Page 2: Important Safety Instructions
Important Safety Instructions WARNING: Do not expose this device to water or moisture. The device should be situated away from sources of high heat such as radiators or stoves. The device should be connected to a power supply only of the type described in the operating instructions or as marked on the unit. -
Page 3: Getting Started
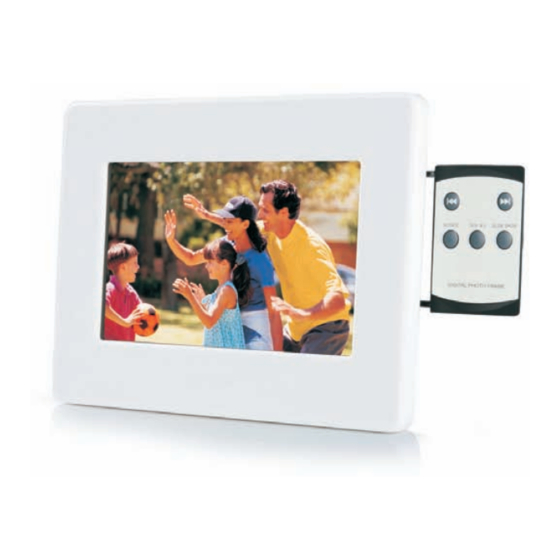
Getting Started Locating Controls and Connections 1. LCD 2. SD/MMC/MS/XD Slot 3. Power DC IN Jack 4. SKIP-BACKWARD( 5. SKIP-FORWARD( 6. ROTATE: Use to rotate the photo . 7. 16:9/4:3: Use to switch among Wide Screen 16:9, Auto Zoom Regular Screen 4:3. 8. - Page 4 Getting Started 1. Retractable keypad 2. Key holes for wall mount. 3. Stand screw hole 4. LOCK SLOT: for connection of lockable chain lock. 5. Power on/off indicating LED 6. Screen brightness adjustment knob 7. POWER ON/OFF 8. USB Slot 9.
- Page 5 Getting Started Placing the Photo Frame You can place this Photoframe on a flat surface or hang it on the wall. Place on a flat surface 1. Screw in the stand to the stand screw hole on the back of the Photoframe.
-
Page 6: Using The Key Pad
Getting Started Using the Key Pad To use the key pad, just pull it To hide the key pad, simply out all the way. push it back. - Page 7 Getting Started Using Card Reader and USB Memory Cards 1. Insert the memory card into the slot of the Photoframe, making sure that the metal contacts of the memory card is facing the front of the Frame. 2. To remove, simply pull out the card. Metal contacts on the memory card SD/MS/MMC/XD...
- Page 8 Getting Started Using the AC Adaptor This Photoframe can be powered by AC through the supplied switching power AC adaptor. Connect the AC adaptor to your Photoframe as illustrated below, There are two input sockets (DC 12V IN) for accepting the plug from AC adaptor. DC IN 12V To home power outlet DC IN 12V...
-
Page 9: Viewing Photos
Viewing Photos Viewing Photos 1. Insert one end of the AC ADAPTER into DC IN, and the other end into an electrical outlet. 2. Slide ON /OFF to the "ON" position. The POWER INDICATOR illuminates. using 3. Adjust the screen brightness the Brightness Adjustment Knob on the back of the frame. - Page 10 Viewing Photos Turning Off/On Slideshow Press , to turn off and turn on slide show. With the Slideshow turned off, you can browse the photo manually by pressing to view the next photo and to view the previous photo . With the Slideshow turned on, the photos display automatically.
- Page 11 Removing and Installing Decorative Frame Installing Decorative Frame 1. Insert the two anchor tabs on the top of main unit into the two matching holding slots of the decorative frame, make sure tabs are fully inserted. Anchor tab Anchor tab 2.
-
Page 12: Connecting Locks
Connecting Locks The Photoframe has a receptacle (slot) to accept a locking cable to keep it secure in high-traffic areas, such as in-store product demonstration. -
Page 13: Troubleshooting
Troubleshooting Symptom Check No display 1. Make sure the AC Power cord is securely plugged into an active AC outlet. 2. Check Power switch is at ON position. 3. Check the Brightness Adjustment knob is not set at the minimum. No photos displayed while 1. -
Page 14: Specifications
Specifications Power Requirements General Input:100~240V AC Power Consumption Max 8W Operating Temperature Range +10 C~ +40 C Operating Voltage 12V DC Compatible SD/MMC/MS/XD card Memory Cards Photo Formats JPEG Supported A.C Adaptor IN: 100~240V AC OUT: 12V/1.25A Display TFT-LCD Size Resolution 7”... - Page 15 If at any time in the future you should need to dispose of this product please note that: Waste electrical products should not be disposed of with household waste. Please recycle where facilities exist. Check with your Local Authority or retailer for recycling advice. (Waste Electrical and Electronic Equipment Directive)
Need help?
Do you have a question about the DF-711B and is the answer not in the manual?
Questions and answers