Table of Contents
Advertisement
Quick Links
Advertisement
Table of Contents

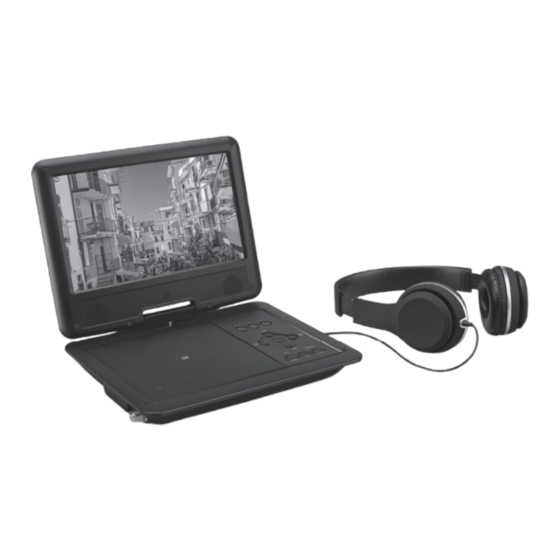
Summary of Contents for GPX PTDE954
-
Page 2: Safety Instructions And Warnings
Safety Instructions & Warnings Important Safety Instructions WARNING: To reduce the risk of electric CAUTION RISK OF ELECTRIC SHOCK shock, do not remove cover (or back). No DO NOT OPEN • Read these Instructions. user-serviceable parts inside. Refer servicing ATTENTION •... -
Page 3: Additional Warnings And Precautions
Additional Warnings and Precautions • CAUTION: TO PREVENT ELECTRIC SHOCK, MATCH WIDE BLADE OF PLUG TO WIDE SLOT, FULLY INSERT. • Mains plug is used as disconnect device and it should remain readily operable during intended use. In order to disconnect the apparatus from the mains completely, the mains plug should be disconnected from the mains socket outlet completely. -
Page 4: Table Of Contents
Table of Contents Setup � � � � � � � � � � � � � � � � � � � � � � � � � � � � � � � � � � � � � � � � � � � � � � � � � � � � � � � � � � � � � � � � � � � � � � � � � � � � � � � � � � � � � � � � � � � � � � � � 5 Includes Power Remote... -
Page 5: Setup
Setup Includes • Remote control with 2 AAA batteries • 1 set of headphones • 3.5mm A/V cable • Carrying case • AC/DC power adapter • User's Guide • 12V DC car power adapter • Telescopic antenna • 1 set of earbuds •... -
Page 6: Orientation
Orientation Controls & Inputs USB Media Port SD/MMC Memory Card Port Stereo Headphone Jack Audio/Video Output Audio/Video Input Power Switch DC Power Input Battery Charge Indicator: Turns red when the battery is charging. Turns green when the battery is fully charged. Remote Receiver 10. - Page 7 16 17 18 12. Disc Door/Open: Press open the disc door. 13. Setup: Press to view DVD player setup menu and settings. 14. Volume: Press to adjust the volume of the speaker. 15. Arrows/OK: Use to navigate and make selections in menu and settings screens.
-
Page 8: Remote Functions
Orientation Remote Functions Standby GOTO/- Press to access a specific chapter Press to power ON/OFF. or title. Search Rewind/CH - Press to search for TV stations. Press to rewind search through a TFT On/Off loaded DVD. Press to turn the screen ON/OFF. Press to change channels in TV Mute mode... -
Page 10: Tv Setup
TV Setup Initial System Setup for TV (ATSC) When you press the Menu button on the remote while in TV mode, the following setting menu will appear on the screen. Press the Arrow buttons to navigate between the menu pages and press the OK button select and confirm your choices. -
Page 11: Time Menu
TV Setup Time Menu 1. Time Offset Use the Arrow buttons to select Auto or Manual. 2. Country Region Use the Arrow buttons to select USA or Mexico as your region 3. Time Zone Use the Arrow buttons to select your current time zone when TIme Offset is set to Manual. Option Menu 1. -
Page 13: Dvd & Cd
DVD & CD DVD Setup Menu In DVD mode, press the DVD Setup button to access the DVD setup menu. Press the DVD Setup button to exit the DVD setup menu. Player Setup When you press the Setup button on the remote, the following setting menus will appear on the screen. Press the Arrow buttons to navigate between the menu pages and press the OK button select and confirm your choices. -
Page 14: Connecting To Other Devices
Connecting to other Devices Connecting the AV Output Connecting the AV Input Requires a 3�5mm to 3x RCA audio/video cable Requires a 3�5mm to 3x RCA audio/video cable (included). (included). 1. Connect the 3�5mm to 3x RCA audio/video 1. Connect the 3�5mm to 3x RCA audio/video cable to the AV Output on the unit and the cable to the AV Input on the unit and the RCA stereo audio inputs and composite video... -
Page 16: Customer Support
Para descargar este Manual del Usuario en inglés, español y francés, o para obtener respuestas a preguntas frecuentes, visite la sección de apoyo en: www�gpx�com Pour télécharger ce guide de l’utilisateur en anglais, espagnol ou français, ou pour obtenir des réponses à des questions fréquemment posées, consultez la rubrique d’assistance sur: www�gpx�com Made Green...


Need help?
Do you have a question about the PTDE954 and is the answer not in the manual?
Questions and answers