GPX D1816 Instruction Manual
Gpx d1816: user guide
Hide thumbs
Also See for D1816:
- Manual de instrucciones (16 pages) ,
- Specification sheet (1 page) ,
- Instruction manual (6 pages)
Advertisement
Table of Contents
- 1 Table of Contents
- 2 Warnings & Precautions
- 3 Important Safety Instructions
- 4 In the Box, Features, & Powering the Unit
- 5 Composite Video Output: Connecting a Television
- 6 S-Video Output: Connecting a Television
- 7 Component Video Output: Connecting a Television
- 8 Surround Sound
- 9 Coaxial Audio Output: Connecting a Television or Stereo System
- 10 Programming a DVD or CD
- 11 The Setup Menu
- 12 The Setup Menu
- 13 Controls & Definitions
- 14 Service Information
- Download this manual
D1816
INSTRUCTION MANUAL
Contents
Warnings & Precautions ................................................................................... 2
Important Safety Instructions ............................................................................ 3
In the Box, Features, & Powering the Unit ....................................................... 4
Composite Video Output: Connecting a Television .......................................... 5
S-Video Output: Connecting a Television ......................................................... 6
Component Video Output: Connecting a Television ......................................... 7
Coaxial Audio Output: Connecting a Television or Stereo System ................... 8
Programming a DVD or CD .............................................................................. 9
The Setup Menu ........................................................................................ 10-11
Controls & Definitions ............................................................................... 12-15
Service Information......................................................................................... 16
Advertisement
Table of Contents

Related Manuals for GPX D1816


Summary of Contents for GPX D1816
-
Page 1: Table Of Contents
D1816 INSTRUCTION MANUAL Contents Warnings & Precautions ... 2 Important Safety Instructions ... 3 In the Box, Features, & Powering the Unit ... 4 Composite Video Output: Connecting a Television ... 5 S-Video Output: Connecting a Television ... 6 Component Video Output: Connecting a Television ... 7 Coaxial Audio Output: Connecting a Television or Stereo System ... -
Page 2: Warnings & Precautions
Warnings and Precautions TO PREVENT FIRE OR SHOCK HAZARDS, DO NOT EXPOSE THIS UNIT TO RAIN OR MOISTURE. This symbol, located on back or bottom of the unit, is intended to alert the user to the presence of uninsulated “dangerous voltage” within the product’s enclosure that may be of sufficient magnitude to constitute a risk of electric shock to persons. -
Page 3: Important Safety Instructions
Important Safety Instructions 1. Read Instructions - All the safety and operating instruction should be read before the product is operated. 2. Retain Instructions - The safety and operating instruction should be retained for future reference. 3. Heed Warnings - All warning on the product and in the operating instructions should be adhered to. -
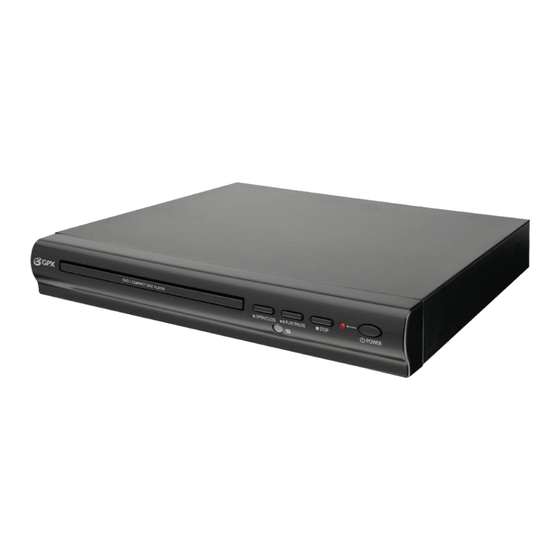
Page 4: In The Box, Features, & Powering The Unit
In the Box DVD Player Remote Control RCA Cables • DVD Player • Remote Control • RCA Cables • Documentation Features The remote control requires 2 AAA batteries (not included). Do not mix old and new batteries. Do not mix alkaline, standard (carbon-zinc), or rechargeable (ni-cad, ni-mh, etc) batteries. -
Page 5: Composite Video Output: Connecting A Television
Composite Video Output: Connecting a Television When connecting two products using an RCA Cable, match the colored ports with the same colored connection. (Red to Red, White to White, and Yellow to Yellow) 1. Connect the RCA Cable to the Audio Outputs and Composite Video Output on the unit to the audio/video inputs on the Television 2. -
Page 6: S-Video Output: Connecting A Television
S-Video Output: Connecting a Television When connecting two products using an RCA Cable, match the colored ports with the same colored connection. (Red to Red, White to White, and Yellow to Yellow) 1. Connect an S-Video Cable (not included) to the S-Video Output on the unit and the S-Video Input on the Television. -
Page 7: Component Video Output: Connecting A Television
Component Video Output: Connecting a Television When connecting two products using an Component Cable, match the colored ports with the same colored connection. (Green to Green, Red to Red, and Blue to Blue) 1. Connect a Component Cable (not included) to the Component Video Outputs on the unit and the component video inputs on the Television 2. -
Page 8: Coaxial Audio Output: Connecting A Television Or Stereo System
Coaxial Audio Output: Connecting a Stereo System When connecting two products using an RCA Cable, match the colored ports with the same colored connection. (Red to Red, White to White, and Yellow to Yellow) 1. Connect an RCA Cable (included) to the Coaxial Audio Output on the unit and the coaxial audio input on a surround sound system. -
Page 9: Programming A Dvd Or Cd
Programming a DVD or CD CD Program Menu DVD Program Menu 1. Press the Standby Button to turn the unit on. The Power Indicator will illuminate green when the unit is turned on. 2. Insert a DVD or CD into the CD/DVD Drawer. 3. -
Page 10: The Setup Menu
The Setup Menu General Audio - - General Setup Page - - Tv Shape Angle Mark Osd Lang Digital out Captions Screen Saver Go To General Setup Page General TV Shape The ratio of the width of an image to its height. •... -
Page 11: The Setup Menu
The Setup Menu Audio Downmix • Lt/Rt The digital audio output format are set in Lt/Rt downmix mode. • Stereo The digital audio output format are set in Stereo downmix mode. Dolby Dynamic Adjust the Dynamic Range of the audio between Off, 1/8, 1/4, 3/8, 1/2, 5/8, 3/4, 7/8, and Full. Video Output Mode •... - Page 12 Location of Controls: Front and Back...
- Page 13 Location of Controls: Remote...
-
Page 14: Controls & Definitions
Control Definitions CD/DVD Drawer Use the CD/DVD Drawer to load DVD, CD, and CD-R/RW discs. Composite Video Output Use the Video Output connection to send a composite video signal from the unit to a TV. (Requires an RCA Cable, included) Component Video Output Connect the Component Outputs to send the best video signal from the unit to a TV. - Page 15 Control Definitions 24 N/P Press the N/P Button to switch between NTSC and PAL TV modes. 25 Wide Button Press the Wide Button to switch the Aspect Ratio between 4:3 Pan Scan, 4:3 Letter Box, Screenfit or Zoomfit. • The WIDE button will only work when the unit is in stop mode. 26 PREV/NEXT Buttons Press the PREV/NEXT Buttons to skip to the previous or next track or chapter on a CD or DVD.
-
Page 16: Service Information
2007 DPI, Inc. All trademarks appearing herein are the property of their respective owners. All products subject to change without notice. Para descargar este manual de instrucción en inglés, español, o francés visite la sección de la ayu- da en www.gpx.com. Pour télécharger manuel d’instruction en anglais, espagnol,...
Need help?
Do you have a question about the D1816 and is the answer not in the manual?
Questions and answers