Table of Contents
Advertisement
Available languages
Available languages
Quick Links
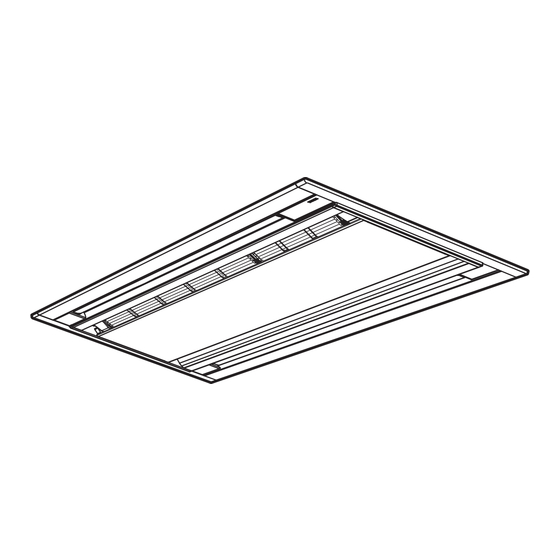
AIR CONDITIONER (2-way Cassette type)
Installation manual
Ceiling panel
Model name:
RBC-UW283PG(W)-E
RBC-UW803PG(W)-E
RBC-UW1403PG(W)-E
English
Installation manual
1
Français
Manuel d'installation
8
Deutsch
Installationshandbuch
15
Italiano
Manuale d'installazione
22
Español
Manual de instalación
29
Português
Manual de instalação
36
Nederlands
Installatiehandleiding
43
Ελληνικά
Εγχειρίδιο εγκατάστασης
50
Русский
Руководство по установке
57
Türkçe
Kurulum kılavuzu
64
中文
安装手册
71
Advertisement
Table of Contents

Related Manuals for Toshiba RBC-UW283PG-E


Summary of Contents for Toshiba RBC-UW283PG-E
- Page 1 AIR CONDITIONER (2-way Cassette type) Installation manual Ceiling panel Model name: RBC-UW283PG(W)-E RBC-UW803PG(W)-E English Installation manual RBC-UW1403PG(W)-E Français Manuel d’installation Deutsch Installationshandbuch Italiano Manuale d’installazione Español Manual de instalación Português Manual de instalação Nederlands Installatiehandleiding Ελληνικά Εγχειρίδιο εγκατάστασης Русский Руководство по установке Türkçe Kurulum kılavuzu 中文...
-
Page 2: Table Of Contents
– 1 – 1-EN 2-EN Installation Manual Installation Manual Ceiling panel Ceiling panel Precautions for Safety Delivery to the customer • After finishing installation, perform a test run to confirm that no problems exist, and explain how to use and •... -
Page 3: Accessory Parts
Installation Manual Installation Manual Ceiling panel Ceiling panel Accessory Parts Preparation Before Installing The Ceiling Panel Part name Quantity Shape Usage This manual Confirming the position of the indoor unit Installation Manual (Be sure to hand this to the customer.) Check the dimensions of the opening on the ceiling referring to the table on the below. - Page 4 – 3 – 5-EN 6-EN Installation Manual Installation Manual Ceiling panel Ceiling panel Detaching the center panel ▼ Figure 3 Move the center panel as shown in Figure 4 The air filters are fixed with clips. and detach it. Push down the knobs as shown in Figure 5 Center panel to release the clips, and pull the knobs up to Loosen the screws on the center panel...
-
Page 5: Installation
Installation Manual Installation Manual Ceiling panel Ceiling panel Installation Height adjustment When fitting, align the ceiling panel’s end Confirm that the screw holes on the ceiling which has the louver motor wire with the panel and the indoor unit are aligned and fix indoor unit’s end which has the electrical the panel to the indoor unit with the supplied If there are gaps between the ceiling panel and the... - Page 6 – 5 – 9-EN 10-EN Installation Manual Installation Manual Ceiling panel Ceiling panel Electrical connection of the Remove the two screws (at the markers) Slide the two slide levers to the OPEN Attach the adjustment cover. (Figure 12) fixing the adjustment cover. (Figure 10) position.
- Page 7 Installation Manual Installation Manual Ceiling panel Ceiling panel ▼ Figure 14 Attaching the center panel Fit the hooks on the center panel over the Hook the S shaped loop through the wire pivots on the adjustment cover as shown in hanger from below.
-
Page 8: Other Information
– 7 – 13-EN 14-EN Installation Manual Installation Manual Ceiling panel Ceiling panel Carefully close the center panel in the Push the four center panel holders inside direction of arrow (1). (Figure 18) and make them level with the frame cover, and tighten the screws which were loosened ▼... -
Page 9: Consignes De Sécurité
Manuel d’installation Manuel d’installation Panneau de plafond Panneau de plafond Consignes de sécurité Livraison au client • À la fin de l’installation, procédez à un essai de fonctionnement pour vous assurer de l’absence d’anomalie; • Ces précautions de sécurité mentionnent divers points importants pour prévenir les accidents corporels et les expliquez au client comment utiliser et entretenir l’appareil en se basant sur le manuel du propriétaire de dommages aux équipements. -
Page 10: Accessoires
– 9 – 3-FR 4-FR Manuel d’installation Manuel d’installation Panneau de plafond Panneau de plafond Accessoires Préparation pour l’installation du panneau de plafond Désignation Quantité Forme Utilisation Ce manuel Confirmation de l’emplacement de l’unité intérieure Manuel d’installation (N’oubliez pas de le remettre au client.) Vérifiez les dimensions de l’ouverture dans le plafond en vous reportant au tableau ci-dessous. - Page 11 Manuel d’installation Manuel d’installation Panneau de plafond Panneau de plafond Dépose du panneau central ▼ Figure 3 Déplacez le panneau central comme sur la Les filtres à air sont maintenus par des clips. Figure 4 et déposez-le. Appuyez sur les boutons (Figure 5) pour Panneau central libérer les clips, puis tirez sur les boutons Desserrez les vis qui maintiennent le...
-
Page 12: Installation
– 11 – 7-FR 8-FR Manuel d’installation Manuel d’installation Panneau de plafond Panneau de plafond Installation Réglage de la hauteur Lors de la pose, alignez l’extrémité du Assurez-vous que les trous de vis du panneau de plafond pourvue du câble du panneau de plafond et l’unité... - Page 13 Manuel d’installation Manuel d’installation Panneau de plafond Panneau de plafond Connexion électrique du Déposez les deux vis (repères ) qui Faites glisser les deux leviers vers la Posez le cache de réglage. (Figure 12) maintiennent le cache de réglage. (Figure 10) position OPEN.
- Page 14 – 13 – 11-FR 12-FR Manuel d’installation Manuel d’installation Panneau de plafond Panneau de plafond Pose du panneau central ▼ Figure 14 Fixez les crochets au panneau central sur Engagez la boucle en S à travers le support les pivots du cache de réglage, comme le de câble par le bas.
-
Page 15: Autres Informations
Manuel d’installation Manuel d’installation Panneau de plafond Panneau de plafond Fermez soigneusement le panneau central Appuyez sur les quatre supports intérieurs dans la direction de la flèche (1). (Figure 18) de panneau central de manière qu’ils soient au niveau du cache de châssis et serrez les ▼... -
Page 16: Vorsichtsmaßnahmen Für Die Sicherheit
– 15 – 1-DE 2-DE Installationshandbuch Installationshandbuch Deckenplatte Deckenplatte Vorsichtsmaßnahmen für die Sicherheit Aushändigung beim Kunden • Nach der Installation führen Sie einen Probelauf aus, um zu bestätigen, dass keine anormalen Zustände • Diese Vorsichtsmaßregeln zur Sicherheit beschreiben wichtige Fragen zur Sicherheit, um Verletzungen an vorliegen, und erklären Sie dann dem Kunden die Verwendung und Wartung des Produkts entsprechend Benutzern und anderen Personen, ebenso wie Sachschäden zu vermeiden. -
Page 17: Zubehör
Installationshandbuch Installationshandbuch Deckenplatte Deckenplatte Zubehör Vorbereitung vor dem Installieren der Deckenblende Teilename Anzahl Form Einsatz Dieses Handbuch Bestätigen der Position des Raumgeräts Installationshandbuch (Immer dem Kunden direkt auszuhändigen.) Prüfen Sie die Abmessungen der Öffnung in der Decke unter Bezug auf die Tabelle unten. UW283PG-Typ UW803PG-Typ M5 ✕... - Page 18 – 17 – 5-DE 6-DE Installationshandbuch Installationshandbuch Deckenplatte Deckenplatte Abnehmen der Mittenblende ▼ Abbildung 3 Bewegen Sie die Mittenblende entsprechend Die Luftfilter sind mit Clips befestigt. Abbildung 4 und nehmen Sie sie ab. Drücken Sie die Knöpfe ein, wie in der Mittenblende Abbildung 5 gezeigt, um die Clips zu lösen, Lösen Sie die Schrauben an den Haltern der...
-
Page 19: Installation
Installationshandbuch Installationshandbuch Deckenplatte Deckenplatte Installation Höheneinstellung Richten Sie beim Ansetzen das Ende der Bestätigen Sie, dass die Schraubenlöcher Deckenblende, das das Luftklappen- an der Deckenblende und dem Raumgerät Motorkabel hat, mit dem Ende des ausgerichtet sind und befestigen Sie die Wenn Abstände zwischen der Deckenblende und der Decke vorhanden sind, können Sie den Abstand Raumgeräts aus, das den elektrischen... - Page 20 – 19 – 9-DE 10-DE Installationshandbuch Installationshandbuch Deckenplatte Deckenplatte Elektroverbindung mit Entfernen Sie die beiden Schrauben (bei den Schieben Sie die beiden Hebel in Offen- Bringen Sie die Einstellabdeckung an. Markierungen ), um die Einstellabdeckung Position (OPEN). (Abbildung 11) (Abbildung 12) Deckenblende zu fixieren.
- Page 21 Installationshandbuch Installationshandbuch Deckenplatte Deckenplatte ▼ Abbildung 14 Anbringen der Mittenblende Setzen Sie die Haken auf die Mittenblende Haken Sie die S-förmige Schleife von unten über die Drehzapfen auf der durch den Drahthänger. (Abbildung 17) Elektrischer Schaltkasten (am Scharnier hängend) Einstellabdeckung, wie in der Abbildung 16 Bringen Sie die Luftfilter an.
-
Page 22: Weitere Information
– 21 – 13-DE 14-DE Installationshandbuch Installationshandbuch Deckenplatte Deckenplatte Schließen Sie vorsichtig die Mittenblende in Drücken Sie die vier Mittenblenden-Halter nach Pfeilrichtung (1). (Abbildung 18) innen und richten Sie sie eben mit der Rahmenabdeckung aus, und ziehen die ▼ Abbildung 18 Schrauben an, die sich beim Abnehmen der Mittenabdeckung gelöst haben. -
Page 23: Precauzioni Per La Sicurezza
Manuale d’installazione Manuale d’installazione Pannello a soffitto Pannello a soffitto Precauzioni per la sicurezza Consegna del manuale al cliente • Al termine dell’installazione si raccomanda di eseguire una prova di funzionamento per verificare che tutto • Le avvertenze per la sicurezza di seguito illustrate forniscono istruzioni importanti per prevenire lesioni alle funzioni correttamente e, inoltre, di spiegare al cliente come usare e manutenere il pannello in base alle persone e il danneggiamento delle cose. - Page 24 – 23 – 3-IT 4-IT Manuale d’installazione Manuale d’installazione Pannello a soffitto Pannello a soffitto Accessori Preparazione all’installazione del pannello a soffitto Nome della parte Quantità Illustrazione Utilizzo Questo documento Controllo della posizione dell’unità interna Manuale d’installazione (Si raccomanda di consegnarlo al cliente.) Controllare le dimensioni dell’apertura ricavata nel soffitto facendo riferimento alla tabella Tipo UW283PG seguente.
- Page 25 Manuale d’installazione Manuale d’installazione Pannello a soffitto Pannello a soffitto Rimozione del pannello ▼ Figura 3 Spostare il pannello nel modo mostrato nella I filtri dell’aria sono bloccati con fermagli. Figura 4 e rimuoverlo. Per sbloccare i fermagli occorre premere i centrale Pannello centrale braccetti di presa mostrati nella Figura 5 e...
-
Page 26: Installazione
– 25 – 7-IT 8-IT Manuale d’installazione Manuale d’installazione Pannello a soffitto Pannello a soffitto Installazione Regolazione dell’altezza Durante questa operazione si deve allineare Verificare ora che i fori per viti del pannello a l’estremità del pannello a soffitto provvista soffitto e quelli dell’unità... - Page 27 Manuale d’installazione Manuale d’installazione Pannello a soffitto Pannello a soffitto Collegamento elettrico del Rimuovere le due viti (ubicate nei punti Fare scorrere le due linguette nella Reinstallare il coperchio della regolazione. marcati ) che fissano il coperchio della posizione OPEN. (Figura 11) (Figura 12) pannello a soffitto regolazione.
- Page 28 – 27 – 11-IT 12-IT Manuale d’installazione Manuale d’installazione Pannello a soffitto Pannello a soffitto Reinstallazione del pannello ▼ Figura 14 Come mostra la Figura 16 agganciare i ganci Agganciare la volta a S da sotto attraverso il del pannello centrale ai pernetti ubicati sul cavetto.
-
Page 29: Controllo Dell'installazione
Manuale d’installazione Manuale d’installazione Pannello a soffitto Pannello a soffitto Chiudere con cautela il pannello centrale in Premere verso l’interno i quattro supporti direzione della freccia (1). (Figura 18) del pannello centrale in modo che si allinei al coperchio del telaio e, quindi, serrare le viti ▼... -
Page 30: Precauciones De Seguridad
– 29 – 1-ES 2-ES Manual de instalación Manual de instalación Panel para cielorraso Panel para cielorraso Precauciones de seguridad Entrega al cliente • Después de finalizada la instalación, realice la prueba de funcionamiento para confirmar que no existan • Estas precauciones de seguridad describen aspectos importantes relacionados con la seguridad para evitar problemas y explique al cliente cómo utilizar y mantener el producto de acuerdo con el Manual del usuario lesiones a los usuarios o a terceros y daños materiales. - Page 31 Manual de instalación Manual de instalación Panel para cielorraso Panel para cielorraso Accesorios Preparativos previos a la instalación del panel para cielorraso Nombre de la pieza Cantidad Diseño Función Este manual Confirmación de la posición de la unidad interior Manual de instalación (Asegúrese de entregárselo al cliente.) Compruebe las dimensiones de la abertura en el cielorraso mediante la tabla de abajo.
- Page 32 – 31 – 5-ES 6-ES Manual de instalación Manual de instalación Panel para cielorraso Panel para cielorraso Cómo desprender el panel ▼ Figura 3 Mueva el panel central de acuerdo con Los filtros de aire están fijados con clips. Figura 4 y despréndalo. Presione las perillas como se muestra en la central Panel central...
-
Page 33: Instalación
Manual de instalación Manual de instalación Panel para cielorraso Panel para cielorraso Instalación Ajuste de la altura Durante la instalación, alinee el extremo del Confirme que los orificios para tornillos del panel para cielorraso que tiene el cable del panel para cielorraso y de la unidad interior motor de las rejillas con el extremo de la estén alineados y fije el panel a la unidad Si existiera separación entre el panel para cielorraso y... - Page 34 – 33 – 9-ES 10-ES Manual de instalación Manual de instalación Panel para cielorraso Panel para cielorraso Conexión eléctrica del panel Extraiga los dos tornillos (en las marcas Deslice las dos palancas deslizables a la Instale la cubierta de ajuste. (Figura 12) que fijan la cubierta de ajuste.
- Page 35 Manual de instalación Manual de instalación Panel para cielorraso Panel para cielorraso ▼ Figura 14 Cómo instalar el panel central Instale los ganchos del panel central sobre Enganche el bucle con forma de S a través los pivotes de la cubierta de ajuste, como se del gancho para cables, desde abajo.
- Page 36 – 35 – 13-ES 14-ES Manual de instalación Manual de instalación Panel para cielorraso Panel para cielorraso Cierre con cuidado el panel central en la Presione hacia dentro los cuatro soportes dirección de la flecha (1). (Figura 18) del panel central y nivélelos con la cubierta del bastidor;...
-
Page 37: Precauções De Segurança
Manual de instalação Manual de instalação Painel de tecto Painel de tecto Precauções de segurança Entrega ao cliente • Após a instalação, realize um um teste de funcionamento para confirmar que não haja nenhum problema, • Estas precauções de segurança descrevem assuntos importantes sobre a segurança para prevenir ferimentos e explique como utilizar e manter o produto para o cliente seguindo o manual do proprietário da unidade aos utilizadores ou outras pessoas, e danos à... - Page 38 – 37 – 3-PT 4-PT Manual de instalação Manual de instalação Painel de tecto Painel de tecto Acessórios Preparação antes de instalar o painel de tecto Nome da peça Quantidade Forma Utilização Este manual Confirmação da posição da unidade interior Manual de instalação (Certifique-se entregá-lo ao cliente.) Verifique as dimensões da abertura no tecto referindo-se à...
- Page 39 Manual de instalação Manual de instalação Painel de tecto Painel de tecto Remoção do painel central ▼ Figura 3 Mova o painel central como mostrado em Os filtros de ar estão fixados com grampos. Figura 4 e retire-o. Empurre os botões para baixo como Painel central mostrado na Figura 5 para libertar os Desaperte os parafusos nos suportes do...
-
Page 40: Ajuste Da Altura
– 39 – 7-PT 8-PT Manual de instalação Manual de instalação Painel de tecto Painel de tecto Instalação Ajuste da altura Quando ajustar, alinhe a extremidade do Confirme que os orifícios para parafuso no painel de tecto que contém o cabo do motor painel de tecto e a unidade interior estão das grelhas de ventilação com a alinhados, e fixe o painel na unidade interior... - Page 41 Manual de instalação Manual de instalação Painel de tecto Painel de tecto Conexão eléctrica do painel Retire os dois parafusos (nos marcadores Deslize as duas alavancas de deslizamento Instale a tampa de ajuste. (Figura 12) ) fixando a tampa de ajuste. (Figura 10) para a posição OPEN.
- Page 42 – 41 – 11-PT 12-PT Manual de instalação Manual de instalação Painel de tecto Painel de tecto ▼ Figura 14 Colocação do painel central Coloque os ganchos no painel central sobre Enganche a argola em forma de S através do os pivôs na tampa de ajuste como mostrado suspensor de cabo por debaixo.
- Page 43 Manual de instalação Manual de instalação Painel de tecto Painel de tecto Feche cuidadosamente o painel central na Empurre os quatro suportes do painel direcção da seta (1). (Figura 18) central para centro, nivele-os com a tampa da armação e, em seguida, aperte os ▼...
- Page 44 – 43 – 1-NL 2-NL Installatiehandleiding Installatiehandleiding Plafondpaneel Plafondpaneel Veiligheidsvoorzorgen Aflevering • Na het installeren, moet een test worden uitgevoerd om te controleren dat er geen problemen zijn. Leg het • Deze veiligheidsvoorzorgen geven belangrijke informatie over de veiligheid en het voorkomen van lichamelijk gebruik en onderhoud van de unit uit aan de klant aan de hand van de Handleiding van de binnenunit.
- Page 45 Installatiehandleiding Installatiehandleiding Plafondpaneel Plafondpaneel Accessoires Alvorens het plafondpaneel te installeren Naam van onderdeel Hoeveelheid Vorm Gebruik Bevestigen van de plaats van de binnenunit Dit boekje Installatiehandleiding Controleer de afmetingen van het gat in het plafond aan de hand van de volgende tabel. (Geef de handleiding beslist aan de klant.) Controleer dat de positie tussen het plafond en de onderkant van de binnenunit als aangegeven UW283PG type...
- Page 46 – 45 – 5-NL 6-NL Installatiehandleiding Installatiehandleiding Plafondpaneel Plafondpaneel Verwijderen van het ▼ Afbeelding 3 Verplaats het middenpaneel als aangegeven De luchtfilters zijn met clips bevestigd. in Afbeelding 4 en verwijder het. Druk de knoppen als aangegeven in middenpaneel Middenpaneel Afbeelding 5 omlaag om de clips te Middenpaneelhouders ▼...
- Page 47 Installatiehandleiding Installatiehandleiding Plafondpaneel Plafondpaneel Installatie Afstellen van de hoogte Zorg dat hierbij het uiteinde van het Controleer dat de schroefgaten van het plafondpaneel met de louver-motorkabel in plafondpaneel en de binnenunit in lijn zijn en lijn is met het uiteinde van de binnenunit bevestig het paneel vervolgens aan de Indien er openingen zijn tussen het plafondpaneel en het plafond, kunt u zonder het plafondpaneel te...
- Page 48 – 47 – 9-NL 10-NL Installatiehandleiding Installatiehandleiding Plafondpaneel Plafondpaneel Elektraverbinding van het Verwijder de twee schroeven (bij de Schuif de twee schuifhendels naar de OPEN Bevestig de afstelafdekking. (Afbeelding 12) markeringen) waarmee de afstelafdekking is stand. (Afbeelding 11) plafondpaneel ▼ Afbeelding 12 bevestigd.
- Page 49 Installatiehandleiding Installatiehandleiding Plafondpaneel Plafondpaneel ▼ Afbeelding 14 Bevestigen van het Plaats de haken van het middenpaneel over Haak de S-vorm lus vanaf de onderkant door de spillen van de afstelafdekking zoals u in de draadhanger. (Afbeelding 17) Afdekking elektra-regelbox middenpaneel (hangend aan de haak) Afbeelding 16 ziet.
-
Page 50: Overige Informatie
– 49 – 13-NL 14-NL Installatiehandleiding Installatiehandleiding Plafondpaneel Plafondpaneel Sluit het middenpaneel voorzichtig in de Druk de vier middenpaneelhouders naar richting van de pijl (1). (Afbeelding 18) binnen en zorg dat ze horizontaal gelijk aan de frame-afdekking zijn. Draai de bij het ▼... -
Page 51: Προφυλάξεις Για Ασφάλεια
Εγχειρίδιο εγκατάστασης Εγχειρίδιο εγκατάστασης Πάνελ οροφής Πάνελ οροφής Προφυλάξεις για ασφάλεια Παράδοση στον πελάτη • Μετά από την ολοκλήρωση της εγκατάστασης, εκτελέστε μια δοκιμαστική δοκιμή για να επιβεβαιώσετε ότι • Αυτές οι προφυλάξεις ασφάλειας περιγράφουν σημαντικά ζητήματα που σχετίζονται με την ασφάλεια για την δεν... - Page 52 – 51 – 3-GR 4-GR Εγχειρίδιο εγκατάστασης Εγχειρίδιο εγκατάστασης Πάνελ οροφής Πάνελ οροφής Παρελκόμενα Προετοιμασία πριν από την εγκατάσταση του πάνελ οροφής Όνομα εξαρτήματος Ποσότητα Σχήμα Χρήση Το παρόν εγχειρίδιο Επαλήθευση της θέσης της εσωτερικής μονάδας Εγχειρίδιο εγκατάστασης (Φροντίστε να το παραδώσετε στον πελάτη.) Ελέγξτε...
- Page 53 Εγχειρίδιο εγκατάστασης Εγχειρίδιο εγκατάστασης Πάνελ οροφής Πάνελ οροφής Απόσπαση του κεντρικού ▼ Σχήμα 3 Μετακινήστε το κεντρικό κάλυμμα όπως Τα φίλτρα αέρα είναι στερεωμένα με κλιπ. φαίνεται στο Σχήμα 4 και αφαιρέστε το. Πιέστε τα κομβία προς τα κάτω όπως καλύμματος...
- Page 54 – 53 – 7-GR 8-GR Εγχειρίδιο εγκατάστασης Εγχειρίδιο εγκατάστασης Πάνελ οροφής Πάνελ οροφής Εγκατάσταση Ρύθμιση ύψους Κατά την τοποθέτηση, ευθυγραμμίστε την Επαληθεύστε ότι οι οπές για τις βίδες στο πλευρά του πάνελ οροφής που φέρει το πάνελ οροφής και την εσωτερική μονάδα καλώδιο...
- Page 55 Εγχειρίδιο εγκατάστασης Εγχειρίδιο εγκατάστασης Πάνελ οροφής Πάνελ οροφής Ηλεκτρική σύνδεση του Αφαιρέστε τις δύο βίδες (στα σημεία με την Σύρετε τους δύο μοχλούς ολίσθησης στη Τοποθετήστε το κάλυμμα ρύθμισης. (Σχήμα 12) ένδειξη ) που στηρίζουν το κάλυμμα θέση OPEN (Άνοιγμα). (Σχήμα 11) πάνελ...
- Page 56 – 55 – 11-GR 12-GR Εγχειρίδιο εγκατάστασης Εγχειρίδιο εγκατάστασης Πάνελ οροφής Πάνελ οροφής ▼ Σχήμα 14 Τοποθέτηση του κεντρικού Στερεώστε τα άγκιστρα του κεντρικού Αγκιστρώστε τον βρόχο σε σχήμα S μέσω του καλύμματος στους άξονες του καλύμματος αναρτήρα καλωδίου από κάτω. (Σχήμα 17) Κάλυμμα...
- Page 57 Εγχειρίδιο εγκατάστασης Εγχειρίδιο εγκατάστασης Πάνελ οροφής Πάνελ οροφής Κλείστε προσεκτικά το κεντρικό κάλυμμα Πιέστε προς τα μέσα τις τέσσερις υποδοχές προς την κατεύθυνση του βέλους (1). του κεντρικού καλύμματος, ευθυγραμμίστε (Σχήμα 18) τις ως προς το κάλυμμα του σκελετού και σφίξτε...
-
Page 58: Меры Предосторожности
– 57 – 1-RU 2-RU Руководство по установке Руководство по установке Потолочная панель Потолочная панель Меры предосторожности Доставка к покупателю • После завершения установки выполните проверку функционирования устройства, чтобы убедиться в • Данные правила техники безопасности охватывают важные меры обеспечения безопасности в целях отсутствии... -
Page 59: Принадлежности
Руководство по установке Руководство по установке Потолочная панель Потолочная панель Принадлежности Подготовка перед установкой потолочной панели Наименование Количество Форма Применение Данное руководство Проверка расположения внутреннего блока Руководство по установке (Обязательно передайте его покупателю.) Проверьте размеры отверстия в потолке, сверяясь по таблице, приведенной ниже. Тип... - Page 60 – 59 – 5-RU 6-RU Руководство по установке Руководство по установке Потолочная панель Потолочная панель Отсоединение центральной ▼ Рис. 3 Переместите центральную панель, как Воздушные фильтры крепятся с показано на Рис. 4, и отсоедините ее. помощью зажимов. панели Центральная панель Держатель...
-
Page 61: Установка
Руководство по установке Руководство по установке Потолочная панель Потолочная панель Установка Регулировка высоты Подсоединяя потолочную панель, Убедитесь в том, что винтовые отверстия располагайте ее таким образом, чтобы та на потолочной панели и на внутреннем ее сторона, где расположен кабель блоке совмещены, и прикрепите панель к При... - Page 62 – 61 – 9-RU 10-RU Руководство по установке Руководство по установке Потолочная панель Потолочная панель Электрическое Удалите два винта (указанные метками Передвиньте два сдвижных рычага в Прикрепите регулировочную крышку. (Рис. 12) ), которыми крепится регулировочная положение OPEN. (Рис. 11) подключение потолочной ▼...
- Page 63 Руководство по установке Руководство по установке Потолочная панель Потолочная панель ▼ Рис. 13 Прикрепление центральной Наденьте крюки на центральной панели Пропустите S-петлю сквозь кронштейн на штифты на регулировочной крышке, крепления шнура снизу вверх. (Рис. 17) Крышка электрического блока управления панели как...
-
Page 64: Другая Информация
– 63 – 13-RU 14-RU Руководство по установке Руководство по установке Потолочная панель Потолочная панель Осторожно закройте центральную панель Нажимом задвиньте четыре держателя в направлении, указанном стрелкой (1). центральной панели внутрь так, чтобы (Рис. 18) они выровнялись с крышкой рамы, и затяните... -
Page 65: Güvenlik Önlemleri
Kurulum Kılavuzu Kurulum Kılavuzu Tavan paneli Tavan paneli Güvenlik önlemleri Müşteriye teslim etme • Kurulumu tamamladıktan sonra herhangi bir sorun olup olmadığını kontrol etmek için bir deneme çalışması • Bu güvenlik önlemleri kullanan kişilerin veya diğer kişilerin yaralanmasını ve ürünün zarar görmesini önlemek gerçekleştirin ve iç... -
Page 66: Aksesuar Parçaları
– 65 – 3-TR 4-TR Kurulum Kılavuzu Kurulum Kılavuzu Tavan paneli Tavan paneli Aksesuar Parçaları Tavan panelinin kurulum hazırlıkları Parça adı Miktar Şekil Kullanım İç ünitenin konumunun belirlenmesi Bu kılavuz Kurulum Kılavuzu (Müşteriye bu kılavuzu verdiğinizden emin Aşağıdaki tabloyu kullanarak tavandaki açıklığın boyutlarını kontrol edin. olun.) Tavan ve iç... - Page 67 Kurulum Kılavuzu Kurulum Kılavuzu Tavan paneli Tavan paneli Orta panelin sökülmesi ▼ Şekil 3 Orta paneli Şekil 4 ile gösterildiği gibi Hava filtreleri klipslerle sabitlenmiştir. hareket ettirin ve sökün. Klipslerin açılması için düğmeleri Şekil 5 ile Orta panel gösterildiği gibi aşağı doğru itin ve hava Çerçeve kısmındaki orta panel tutucunun Orta panel tutucular ▼...
- Page 68 – 67 – 7-TR 8-TR Kurulum Kılavuzu Kurulum Kılavuzu Tavan paneli Tavan paneli Montaj Yükseklik ayarlaması Sabitlerken tavan panelinin panjur motor Tavan panelindeki ve iç ünitedeki vida kablosu olan ucunu ve iç ünitenin elektrik yuvalarının aynı hizaya geldiğinden emin kontrol kutusu olan ucunu aynı hizaya olun ve kutunun içinden çıkan vidalarla Tavan paneli ve tavan arasında boşluk varsa bu boşluğu iç...
- Page 69 Kurulum Kılavuzu Kurulum Kılavuzu Tavan paneli Tavan paneli Tavan panelinin elektrik İki vidayı da sökün ( işaretlerinin olduğu İki kaydırma tırnağını OPEN (AÇIK) konumuna Ayarlama kapağını takın. (Şekil 12) yerden) ayarlama kapağını sabitleyin. doğru kaydırın. (Şekil 11) bağlantısı ▼ Şekil 12 (Şekil 10) Elektrik kontrol kutusundaki iki vidayı...
- Page 70 – 69 – 11-TR 12-TR Kurulum Kılavuzu Kurulum Kılavuzu Tavan paneli Tavan paneli Orta panelin takılması ▼ Şekil 14 Orta paneldeki kancaları Şekil 16 ile S şeklindeki teli kablo askısına alt taraftan gösterildiği gibi ayarlama kapağındaki geçirin. (Şekil 17) Elektrikli kontrol kutusu kapağı millerin üzerine sabitleyin.
-
Page 71: Diğer Bilgiler
Kurulum Kılavuzu Kurulum Kılavuzu Tavan paneli Tavan paneli Orta paneli ok yönünde (1) dikkatlice Dört orta panel tutacağını içeri doğru itin ve kapatın. (Şekil 18) çerçeve kapağıyla aynı hizaya geldiklerinden emin olun ardından orta panel sökülürken ▼ Şekil 18 gevşetilen vidaları sıkıştırın. (Şekil 20) ▼... - Page 72 – 71 – 1-CN 2-CN 安装手册 安装手册 顶棚镶板 顶棚镶板 安全预防措施 交付给客户 • 安装完成后请进行测试以确保没有问题,并根据室内装置的用户手册向客户解释如何使用和维护本产品。 • 这些安全事项描述了避免用户或他人受伤及财产受损的重要事项。了解下面的内容(指示的意义)后,请仔细 让用户将本安装手册和用户手册及室内装置的安装手册放在一起。 阅读本手册,并严格按照手册中的说明进行操作。 指示 指示的意义 目录 这种指示表示不按照 “ 警告 ” 指示中的要求而进行不当操作会导致严重的人身伤害(*1)或危及生命。 警告 这种指示表示不按照 “ 小心 ” 指示中的要求而进行不当操作会导致严重的身体伤害(*2)或 1 安全预防措施............71 小心...
- Page 73 安装手册 安装手册 顶棚镶板 顶棚镶板 附件 安装顶棚镶板之前的准备工作 附件名称 数量 形状 用途 确定室内装置的位置 本手册 安装手册 根据下表确定顶棚开口的尺寸。 (务必将本手册交给客户。) 确定顶棚和室内装置底部之间的定位是否如图 1 所示。定位不正确会引起漏气、漏水、通风窗无法正常 UW283PG 型号 工作等问题。 UW803PG 型号 M5 ✕ 40mm 螺钉 注意 用来固定顶棚镶板 UW1403PG 型号 • 确保已除去用于运输的保护衬垫和将通风窗固定在顶棚镶板上的塑料带。 • 不要将顶棚镶板面朝下放置,将其倚靠某物或挂在钩子上。否则其表面会有划损。 * 螺钉粘在泡沫塑料包装上。 运输或安装时要注意避免背面的临时挂钩变形。 单位: (mm) 型号...
- Page 74 – 73 – 5-CN 6-CN 安装手册 安装手册 顶棚镶板 顶棚镶板 ▼ 图 3 如图 4 移动中央镶板,将其卸下。 拆卸中央镶板 空气过滤器由夹子固定。 依照图 5 按下把手即可打开夹子,再向上拉把 中央镶板 ▼ 图 4 手即可卸下空气过滤器。 找到固定在护板盖上的中央镶板支架,转动上 中央镶板支架 面的螺钉约三次,使其松开。(图 2) 中央镶板 开口侧 ▼ 图 5 铰链侧 注意 镶板的每侧长边上都有一个护板盖。 ▼ 图 2 低于表面...
- Page 75 安装手册 安装手册 顶棚镶板 顶棚镶板 固定时要将顶棚镶板有通风电机线缆的一端与 确认顶棚镶板和室内装置的螺钉孔已对齐,并 高度调整 安装 室内装置有电控箱的一端对齐。 (图 7) 用随附的螺钉(M5 x 40mm:4 个 UW283PG 和 UW803PG,6 个 UW1403PG)将镶板固定 如果顶棚镶板和顶棚之间有空隙,可适当地调整室内 ▼ 图 7 到室内装置上。(图 7) 装置的垂直高度使空隙消失。这样,即使不拆下顶棚 安装顶棚镶板 镶板,排水管和其他连接也不会受到影响。 室内装置 注意 电控箱 卸下护板盖上的螺钉,然后向里按住挂钩将护 将顶棚镶板的临时挂钩固定在室内装置两侧的 • 固定螺钉时请确保不要弄断任何线路。 板盖拆下。(图 9) 吊架上。(图 6) •...
- Page 76 – 75 – 9-CN 10-CN 安装手册 安装手册 顶棚镶板 顶棚镶板 将两个滑杆滑到 OPEN(打开)位置。(图 11) 安装调整盖板。(图 12) 卸下固定调整盖板的两个螺钉(在 标志的位 顶棚镶板的电路连接 置)。(图 10) 注意 ▼ 图 12 卸下电控箱上的两颗螺钉,按图 13 中箭头方向 ▼ 图 10 滑动时要按住滑杆。 滑动箱盖将其打开。 打开后,电控箱盖会挂在铰链上,如图 14 所示。 外部护板 标志 螺钉 螺钉 外部护板 将顶棚镶板的通风电机线缆接到 CN33:白色 ▼...
- Page 77 安装手册 安装手册 顶棚镶板 顶棚镶板 ▼ 图 14 将 S 形的环从下往上挂到线缆吊架上。(图 17) 安装中央镶板 将中央镶板挂钩固定到调整盖板的横轴上,如 图 16 所示。 电控箱盖 ▼ 图 17 确保将挂钩固定到铰链侧(即有镶板挡块的一 (悬挂在铰链上) 安装空气过滤器。 夹住内部护板上的夹子。(图 15) 侧)。 CN 33: 白色 注意 注意 (5P 接头) 如果先把挂钩固定到另一侧(无镶板挡块),您将无 向下拉把手,确认空气过滤器已正确固定。 法完成中央镶板的安装。 ▼ 图 15 ▼ 图 16 夹子...
- Page 78 – 77 – 13-CN 14-CN 安装手册 安装手册 顶棚镶板 顶棚镶板 沿箭头 (1) 的方向小心地关上中央镶板。 向里推动四个中央镶板支架,使其与护板盖平 (图 18) 行,然后拧紧拆卸中央镶板时松开的螺钉。 (图 20) ▼ 图 18 ▼ 图 20 挂钩 中央镶板 开口侧 铰链侧 中央镶板支架 护板盖 保持中央镶板开口侧处于关闭状态,(2) 向上推 中央镶板的铰链侧并 (3) 滑动镶板到铰链侧使其 固定。(图 19) 注意 固定镶板时要抓住挂钩附近,先滑动一端,再滑动另 一端。 ▼...
- Page 79 安装手册 安装手册 顶棚镶板 顶棚镶板 MEMO MEMO ..............................................................................................................................................................................................................................................................................................................................................................................................................................................................................................................................................................................................................................................................................................................
- Page 80 EH99691701-1...
Need help?
Do you have a question about the RBC-UW283PG-E and is the answer not in the manual?
Questions and answers