Advertisement
Projector Features
Crenova XPE498 projector includes these special and outstanding features:
Incredible watching experiences
- Over 50 percent brighter than conventional projector
- Maximum supported resolution of 1920×1080 pixels
- Dual-fan system delivers effective cooling result with low noise
Flexible connectivity
- Supported multimedia playing through VGA, HDMI or AV port respectively
- Supported USB storage device through USB port
- Supported SD card through SD card slot
Easy-to-use setup and operation features
- User-friendly operating system
- Innovative keystone correction slider for flexible projector placement
Product Box Contents
Please save all the packaging in case you have further requirements (replacement or refund). Use the original packaging (or equivalent) when shipping. Ensure your projector box included all of these parts:
- XPE498 projector
- Remote control
- Power cord
- AV cable
- Adjustable foot
- Instruction manual
- HDMI cable
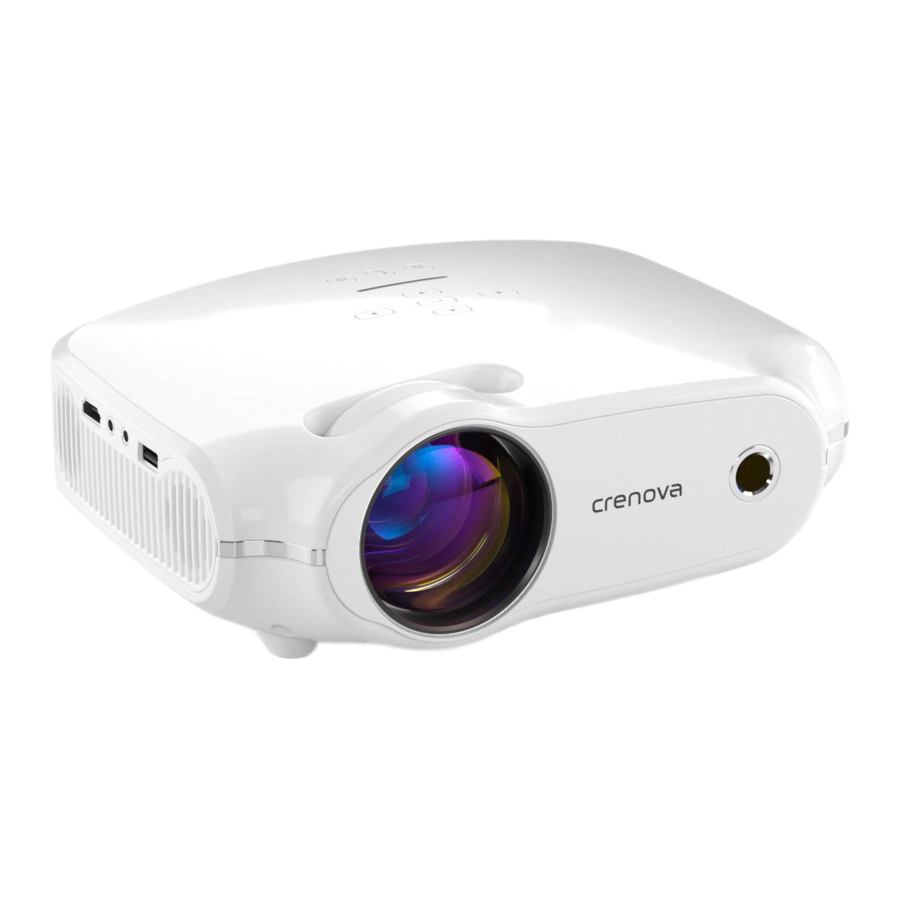
Projector Part Locations
Front/Top
- Lens
- Focus/Zoom ring
- Front adjustable foot
- Control panel
Left
- HDMI port
- AV input port
- Audio jack
- USB port
- Air intake port
Rear
- IR receiver
- SD card slot
- VGA port
- Keystone slider
- AC input port
- Air exhaust port
Base
- Front adjustable foot
- Front/Rear feet
- Mounting bracket hole
Control Panel
- Up button (selects upward movement)
- Left/Volume Down button (selects leftward movement/adjusts speaker volume)
- Enter/OK/Play/Pause button (selects and confirms options/plays/stops playing audio or video)
- Down button (selects downward movement)
- Right/Volume Up button (selects rightward movement/adjusts speaker volume)
- Source button (selects the input source)
- Menu/Exit Button (accesses projector menu system/exits functions)
- Power button (turns the projector on or off)
Remote Control
- Power button (turns the projector on or off)
- Mute button (turns off sound)
- VOL+ button (adjusts speaker volume)
- Fast backward button (fast backwards)
- Fast forward button (fast forwards)
- VOL- button (adjusts speaker volume)
- Play/Pause button (plays/pauses the playing content)
- Stop button (stops the playing content)
- SOURCE button (selects the input source)
- INFO button (operates the information function)
- ENTER button (selects and confirms options)
- Up (selects upward movement)
- Left (selects leftward movement)
- Right (selects rightward movement)
- Down (selects downward movement)
- MENU button (accesses projector menu system)
- EXIT button (exits functions)
- CH- button (changes channels)
- CH+ button (changes channels)
- Numeric buttons (enter numbers)
Setting Up the Projector
Before projecting, please be familiar with the following suggestions of placement, installation and adjustment.
Projector Placement and Installation
You can place or install your projector in the following ways:
Front/Rear/Front Ceiling/Rear Ceiling
Front/Rear/Front Ceiling/Rear Ceiling
Whether the way you choose to project your images or videos, please keep these suggestions in mind:
- Ensure the place you set the projector is sturdy and even;
- Do not block any ventilation openings which prevent the projector from overheating;
- If the way you project is from the ceiling or from the rear, please ensure to select the correct projection option in the menu system.
Projection Distance and Screen Size
The throw distance, zoom factor, aspect ratio, and other settings determine the approximate size of the image. Please refer to the following graph for the relationship between projection distance and image size.
16:9 Aspect Ratio
 Note: The graph and measurements provided are for reference only.
Projector Adjustment
Except setting suitable throw distance, you can adjust keystone slider and focus/zoom ring manually before projecting your images or videos:
- Rotate the focus ring to adjust the clarity of the projected image until it is crystal clear;
- Adjust the keystone slider to correct keystone distortion.
Basic Projector Operations
Basic operations provided help you to get started quickly.
Power on/off the Projector
Power on the projector
Indicator light will turn on after plugging in the power cord. Then press the Power button on the top of XPE498 or on the remote control, the multimedia interface appears within 2 to 5 seconds.
Power off the projector
Press the Power button on the top of XPE498 or on the remote control, "Power to standby, Else to cancel" will appear on the screen. Press the Power button again to turn off the projector.
Projector Menu Settings
Press the Menu button on the control panel or on the remote control to access to the menu interface. The menu interface allows you to set Picture, Sound, Time, and Option. Choose the feature you want to set by pressing the Left/Right button on the remote control or on the control panel.
For detailed settings, press the UP/Down button to view options listed under Picture, Sound, Time, and Option. Then press the Enter/OK button to select options. (Some of these options have a submenu, press the Menu button to exit a submenu.)
Projector Picture Settings
For picture settings, you may adjust:
Picture Mode
Color Temperature
Aspect Ratio
Noise Reduction
Screen
Projection Direction
HDMI Mode
Reduce Display Size
Projector Sound Settings
For sound settings, you may adjust:
Sound Mode
Balance
Auto Volume
Projector Time Settings
For time settings, you may adjust:
Sleep Timer
Projector Option Settings
For option settings, you may adjust:
OSD Language
Restore Factory Default
Blending
OsdDuration
Software Update (USB)
Projector Connections
You can connect the projector to a USB flash drive, a SD card, an audio source, an AV equipment, a VGA device or a HDMI device to enjoy your presentations, images, or other videos, with premium sound.
Introduction to Ports
USB port (connect to a USB flash drive)
SD card slot (connects to a SD card)
AV input port (connects to an AV equipment)
HDMI port (connects to a HDMI device)
VGA port (connects to a VGA device)
Audio jack (connects to an audio device)
Connecting to a USB Flash Drive
Insert a USB drive into USB port, press the Source button and select USB/SD as input source.
Press Left/Right to choose multimedia contents you want to display (Movie/Music/Photo/Text) on the multimedia interface. Press Enter/OK to confirm.
Press Enter/OK to select and open your USB drive.
Press Up/Down/Left/Right to select the content/file in your drive, then press Enter/OK to play/open it. Press the Play/Pause button to play or stop the content.
Connecting to a SD Card
Insert a SD card into SD card slot, press the Source button and select USB/SD as input source.
Press Left/Right to choose multimedia contents you want to display (Movie/Music/Photo/Text) on the multimedia interface. Press Enter/OK to confirm.
Press Enter/OK to select and open your SD card.
Press Up/Down/Left/Right to select the content/file in your SD card, then press Enter/OK to play/open it. Press the Play/Pause button to play or stop the content.
Connecting to an AV Equipment
When connecting to an AV equipment through AV input port using 3-in-1 AV cable, press the Source button and select AV as input source.
Connecting to a HDMI Device
When connecting to a HDMI device through HDMI port, press the Source button and select HDMI as input source.
Connecting to a VGA Device
When connecting to a VGA device through VGA port, press the Source button and select PC-RGB as input source.
Connecting to an Audio Device
Connect the projector to an audio device through 3.5mm audio jack.
Note: Ensure format and resolution of Movie/Music/Photo/Text projected are supported by the projector.
For supported format details, please check the table below.
| Supported Video Formats | MPG/MPE/VOB/DAT/BUK/TS0/TRP/TS/TP/ M2T/RM0/RMV/RM/RMVB/AVI/MP4/DIV/MOV/MKV/WSF/ASF/FLV/WMV/ASM/3GP/ 3G2/H265 |
| Supported Audio Formats | MP3/WMA/AAC/WAV/M4A |
| Supported Image Formats | JPG/JPEG/BMP/GIF/PNG/TIF |
| Supported File Format | TXT |
Projector Cleaning and Maintenance
For optimum watching experiences and longer lifetime, please clean the projector periodically. For projector maintenance, please seek help from or under the guidance of specified persons. If it is necessary to replace any parts of the projector, please feel free to contact the dealer or qualified customer service team. Before cleaning and maintaining the projector, please turn off the projector and unplug the power cord.
Projector Cleaning
Always keep the projector clean to avoid affecting image quality and ventilation system during working caused by dust, dirt and smudge.
Cleaning the Projector Case
Use a piece of dry, soft and lint-free cloth to remove dust or dirt.
Use a piece of moistened and soft cloth with a little water and mild soap to remove stubborn dirt.
Cleaning the Lens
Gently wipe the lens with a piece of dry and non-abrasive cloth or paper to remove dust or dirt.
Gently wipe the lens by a piece of moistened (with a little water), non-abrasive and lint-free cloth to remove stubborn dirt.
Cleaning the Vents
Use a soft brush or a special designed small vacuum to remove the dust.
Note: For cleaning process, do Not spray any liquid (included water) directly on any parts of the projector. Do Not use the chemical detergents to clean the projector which will damage the projector.
Projector Maintenance
For this part, we only offer the basic maintaining suggestions. If you have any further requirements (replacement or repair), please contact the dealer or qualified customer service team.
Batteries Replacement of the Remote Control
If batteries have run out, please replace the batteries by following steps:
- Open the battery cover of the remote control.
- Insert the batteries with the + and – ends facing as shown.
- Close the battery cover and press it down until it clicks into place.
Technical Specifications
To know product better and use projector properly, please read the table below:
| Imaging Technology | TFT LCD |
| Native Resolution | 800 x 480 pixels |
| Maximum Supported Resolution | 1920 x 1080 pixels |
| Light | LED |
| Lens | Multichip Coated Lens (F=126) |
| Keystone | ± 15°Correction |
| Screen Size | 37-130 inches |
| Projection Distance | 1.2-3.8m |
| Recommended Projection Distance | 1.5m with screen size of 51 inches |
| Aspect Ratio | 16:9 |
| Color | 16.7k |
| Interface | 1 x AC Input |
| 1 x USB Port | |
| 1 x SD Card Slot | |
| 1 x VGA Port | |
| 1 x AV Input | |
| 1 x HDMI Port | |
| 1 x 3.5mm Audio Jack | |
| Consumption | 50W (Max) |
| Power Supply | AC 100-240V (50/60 Hz) |
| Supported Video Formats | MPG/MPE/VOB/DAT/BUK/TS0/TRP/TS/TP/ M2T/RM0/RMV/RM/RMVB/AVI/MP4/DIV/ MOV/MKV/WSF/ASF/FLV/WMV/ASM/3GP/ 3G2/H265 |
| Supported Audio Formats | MP3/WMA/AAC/WAV/M4A |
| Supported Image Formats | JPG/JPEG/BMP/GIF/PNG/TIF |
| Supported File Formats | TXT |
| Supported Languages | 23 Languages |
| Package Accessories | Instruction Manual, Remote Control, Power Cord, AV Cable, HDMI Cable, Adjustable Foot |
| Dimensions | ? x? x? cm |
| Net Weight | ? kg |
Troubleshooting
As a high-tech product, the projector combined with optical, mechanical and electronic components and equipped with a protective and complicated circuit inside. To quickly solve your problems and to prevent improper using and settings, please follow operating instructions below.
If your problems or inquiries cannot be eliminated after reading the table, please do not hesitate to contact us.
| Problem Description | Troubleshooting |
| The projector won't turn on | Check if the power source is the indicated one and the power cord is correctly connected. Make sure the power cord is not defective. |
| Lamp does not work after turning on the projector | Ensure power cord and power source are correctly connected. If the lamp gets damages, please contact us to help. |
| No images | Check whether the format and resolution of images are supported by the projector. |
| No response from remote control | Check whether batteries of the remote control run out or are installed correctly. Make sure there is no obstacle between the remote control and IR receiver. Always use the remote control within its effective distance (?m). |
| Obscure/Blurred images | Please rotate the focus ring, adjust the keystone and throw distance until the projected image is clear. Ensure the lens is clean. |
| Abnormal sound | Ensure the audio device is connected correctly and function well. Check if the mute or minimum volume mode is set. |
Service
Whether you need further assistance, are looking for answers, or just want to share your reviews with us, you will find many ways to contact us right here:
Email: service@crenova.net
Facebook: https://www.facebook.com/icrenova/
Official Homepage: www.crenova.net
Precautions for Use
Please read this user's guide carefully before operating the projector, and save this guide for future use.
Follow these safety instructions and read these helpful tips before setting up and using the projector.
Important Safety Instructions
- Do not disassemble the projector. If needed, please contact your dealer for repair/replacement.
- Always use the indicated type of power source. Different power source may result in fire or electric shock.
- Do not look into the lens when the projector is operating. The bright light may damage your eyes.
- Do not use the projector near water or sources of heat.
- Place the projector on an even surface or stable stand. If the projector is mounted on a ceiling, it should be installed by qualified mounting hardware which designed for use with this projector.
- Unplug the projector after powering down.
- Never subject the projector to heavy shocks and do not shake or drop it.
Helpful Tips
- For incredible clarity and optimum results, operating the projector in a dark environment is recommended.
- You may adjust the focus ring and keystone simultaneously until to get crystal clear images.
- Please understand that the cooling system makes noise to avoid overheating during working. Nevertheless, it will not affect watching experiences when connected to an audio device.
- XPE498 projector is ideal for home entertainment, such as videos watching, photos viewing and games playing etc. Please be advised that the projector is not for business data presentation.
- Maximum supported resolution of XPE498 projector is 1920x1080 pixels with its native resolution of 800x480 pixels.
- The projector supports screen mirror with smartphone. The only accessory you need to prepare is a HDMI/WiFi dongle. The stability of mirror screen completely depends on the HDMI/WiFi dongle.
- Please kindly note that XPE498 projector accepts 1920x1080 as maximum supported resolution, but the image will only be as good as the native resolution.
- The operation, features and illustrations in this manual may differ from the actual product due to upgrade of product functions.
- If there is no sound when playing videos, you may check whether these videos are equipped with Dolby technologies. The projector cannot support Dolby Vision for the present, but you can connect XPE498 projector to a computer/laptop for videos watching instead.
Documents / Resources
References
Download manual
Here you can download full pdf version of manual, it may contain additional safety instructions, warranty information, FCC rules, etc.
Advertisement


Need help?
Do you have a question about the XPE498 and is the answer not in the manual?
Questions and answers