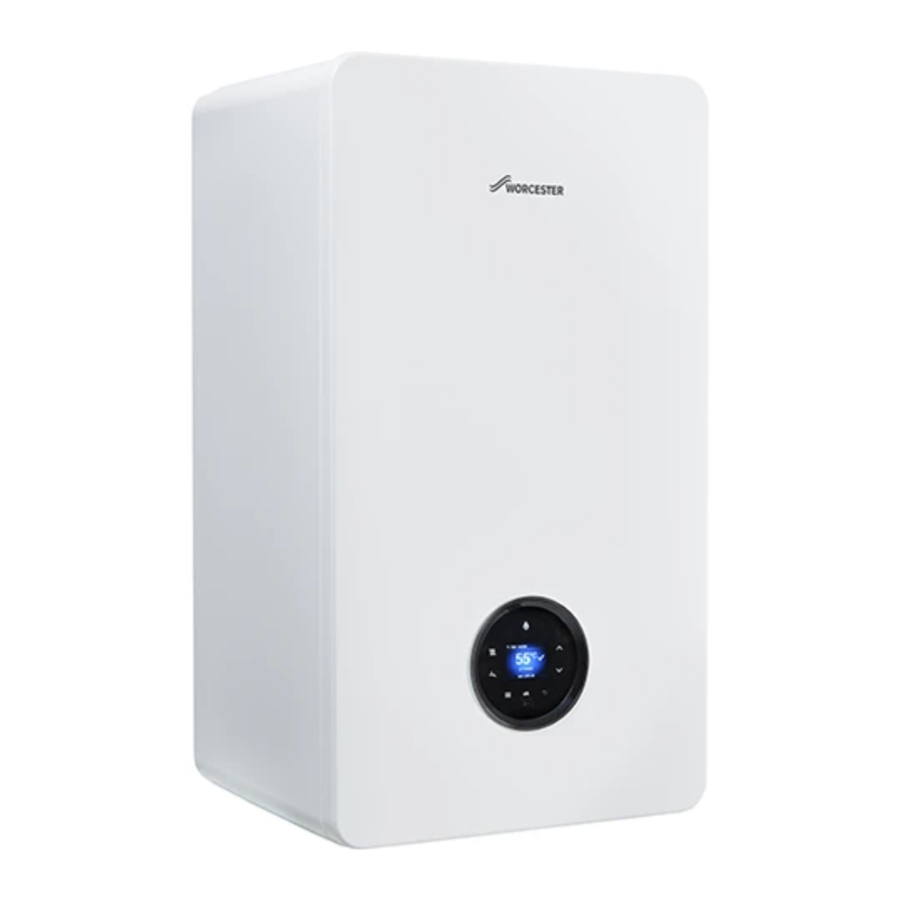
Worcester Greenstar 8000+ GR8701iW 30 S Manual
- User instructions (20 pages) ,
- Installation and maintenance instructions manual (92 pages)
Advertisement
- 1 Product Information
- 2 Prepare for operation
- 3 Operating the appliance
- 4 Key
- 5 Setting frost protection
- 6 Thermal disinfection
- 7 Clearances and ventilation information
- 8 Malfunction or failure
- 9 Tips on energy saving
- 10 Energy consumption
- 11 Explanation of symbols and safety instructions
- 12 Documents / Resources
Product Information
Appliance identification and serial number
The data label contains information of the appliance model and serial number. This is located on the frame of the front cover. See Fig. 1

Servicing

Ensure that the service engineer completes the Service Record in the Benchmark Checklist after each service.
The Service Record can be found at the rear of the appliance's Installation and Maintenance Instructions. It will be required in the event of any guarantee work and may be required by the local Building Control Inspector.
- To ensure the continued safe, reliable and environmentally optimum operation of the boiler, it must be thoroughly serviced annually by a competent, qualified person, such as a Worcester service engineer, British Gas engineer or other Gas Safe registered engineer. In the Republic of Ireland servicing work must be carried out by a Worcester service engineer or other Registered Gas Installer (RGII).
- Having a contract covering annual servicing, cleaning and maintenance is a good way to ensure this is not missed.
- It is important that any required maintenance or repairs are carried out without delay.
- Ensure that the service engineer completes the Service Record, at the rear of the Installation and Maintenance Instructions manual, after each service.
- Have any work carried out by a competent, qualified person, Worcester service engineer, British Gas engineer or other Gas Safe registered engineer. In the Republic of Ireland servicing work must be carried out by a Worcester service engineer or other Registered Gas Installer (RGII).
- Always use original spares, to help maintain the efficiency, safety and reliability of the appliance.
Maintaining your appliance
Your new appliance represents a long term investment in a reliable, high quality product.
Wipe the appliance casing with a soft clean cloth. Please do not use chemical cleaning products which may damage the paint finish.
In order to realise the appliance's maximum working life, and to ensure the appliance continues to operate at peak efficiency and performance, it is essential that servicing and maintenance checks are performed at least once a year by a competent engineer in accordance with the current Gas Safe Regulations.
If you would like to know more about servicing options from Worcester, Bosch Group, please visit worcester-bosch.co.uk.
Please tick the appropriate box on your warranty registration card for further details of the Worcester, Bosch Group Service Contract.
When your appliance requires servicing please contact a Worcester, Bosch Group contact centre (see rear cover, appointments).
In addition to the service contract we are pleased to offer a one-off annual service or breakdown call out for your appliance.
Maintenance tips
- Appliances on a sealed heating system:
- Regularly check the system pressure.
- Do not obstruct the flue outlet or the air inlet.
- Use in hard water areas:
- In exceptionally hard water areas a device to prevent scale formation should be fitted. Installation of a salt based water softener should be in accordance with the requirements of the local water company. A bypass valve must be fitted and used to fill/top up the heating system with untreated water.
- If you have to add water regularly in your heating system, call a competent, qualified person.
Benchmark standard
The Benchmark initiative is a code of practice to encourage the correct installation, commissioning and servicing of domestic central heating appliances and system equipment.
A "checklist" is dispatched with every appliance and can be found towards the back of the Installation, Commissioning and Servicing Instructions. This is a vital document that needs to be completed by the installer at the time of installation. It confirms that the appliance has been installed and commissioned according to the manufacturer's instructions.
The service record provides space for the recording of regular servicing of the appliance/heating system and this can become a valuable document when, for example, you wish to sell the property. The service record will show a potential purchaser that the heating system has received regular professional maintenance and servicing during its lifetime.
The Benchmark initiative aims to:
- Raise standards among professional installers.
- Build and maintain high safety standards in the industry.
- Improve customer satisfaction levels.
- Make a contribution to the nation's commitment to climate change.
Prepare for operation
Open vented heating system
Appliances that can be connected to open vented heating systems will have the pressure maintained automatically by the header tank feeding the system.
Sealed heating system
Appliances that can be connected to sealed heating systems are prepressurised before operation, this pressure must be maintained for safe use of the appliance.
- Check regularly that the pressure is maintained.
- Re-charge the system if the display reads less than 1 bar.
- If a permanent significant decrease or increase in pressure is indicated on the display, contact your installer or maintenance engineer.
Checking the system pressure
If the pressure is too low ( ≤ 0.2 bar) the system is out of operation and a warning notification stays on the screen. Fill the water until indicator is in green zone.
Your installer will advise you of the optimum operating pressure.
- Press the menu key [1]. Select and confirm Boiler status.
The screen Boiler status with a pressure indicator [2] appears. See Fig. 2.

- Check the system pressure at the display.
- Indicator in red zone: pressure is too low or too high.
- Indicator in yellow zone: pressure is low or slightly too high.
- Indicator in green zone: pressure is normal.
- Top up the heating water, if the pressure is low or too low.

Constantly re-pressurising the system
Constantly having to re-pressurise the heating system should be investigated as it is an indicator of potential leaks and the concentration of inhibitor protection in the system will be reduced; this can result in corrosion within the heating system, reducing efficiency and increasing contaminates.
- Check for leaks on heating system (pipework and radiator valves).
- Contact your installer or maintenance engineer if a recurring significant decrease or increase in pressure is shown on the pressure indicator (pressure gauge or pressure display).
System pressure increasing:
- If the system pressure repeatedly increases and you need to vent air from the radiators, refer to
![]() section "Topping up the system pressure".
section "Topping up the system pressure".
 section "Topping up the system pressure".
Topping up the system pressure
Integral keyless filling link
Locate the filling link and follow the instructions for re-pressurising the system. See Figs. 3-4


- Re-pressurise the system.
- Pull the lever [1] down to start the filling process.
- The pressure indicator on the pressure display will start to move towards the green bar.
- When the pressure indicator reaches the middle of the green bar [2] and the pressure is between 1 and 1.5 bar
- Release the lever [1] to stop the filling process.
- Top up the system pressure, if as a result of the air bleeding the pressure drops off.
If the indicator is on the right hand side red pressure zone as a result of over filling:
- Bleed one radiator until the pressure indicator returns to the green bar.
Greenstar Intelligent Filling System (Accessory) (See Fig. 5)
The Intelligent Filling System refills the water into the heating system as required. Your specialist programmes the Intelligent Filling System according to your heating system. Have your specialist explain the function of the Intelligent Filling System to you.
Automatic refilling keeps the pressure in the heating system at the programmed value.

An Intelligent Filling System is available as an accessory.
Operating the appliance
Display overview

See Fig. 6
- Display
![]() and
and ![]() keys
keys- Heating water pressure display
![]() key
key- OK key
- Menu key
- DHW key
- Heat key
- Burner display
 and
and  keys
keys key
keySymbols in the display

Table 3 Symbols in the display
1) The energy values shown are an estimation based on internal data of the appliance. Under real world conditions, many factors influence the energy consumption and the shown values will deviate from the values of an energy meter. The information is for indication only and should not be used for billing purposes. The values can be used for relative comparison of energy consumption between different days/weeks/month.
The heating and hot water settings have been adjusted by the installer to the appliance's optimum settings.
- Before making any adjustments it is advisable to make a note of these settings so that you can return to these optimum settings in the future.
Adjusting the appliance flow temperature
Heating key
The heating key is used to set the max. flow temperature. The maximum flow temperature can be set between 30°C and 88°C1). The current flow temperature is shown on the display.
1) The maximum value can be reduced by the service technician.
With underfloor heating systems observe the maximum permissible flow temperature.
- Press the
![]() key.
key.
The set maximum flow temperature appears. - Press the
![]() or
or ![]() keys to set the desired maximum flow temperature.
keys to set the desired maximum flow temperature.
 key.
key.| Supply temperature | Sample application |
| Approx. 50°C | Underfloor heating system |
| Approx. 75°C | Radiator heating system |
| Approx. 82°C | Convector heating system |
Table 4 Maximum flow temperature
- To save the setting, press the ok key or wait for 2 seconds.
The symbol![]() appears for a short time.
appears for a short time.
 appears for a short time.
If a time program is activated and set on S auto press the ok key to switch to S Advance. Time programs are available with Key (accessories).
S auto: Heating is switched on and off according to programmed times for heating.
S Advance: Switch to S Advance to move to the next on or off time and directly switch on or off heating.
Hot water mode
Hot water function is only available with optional integral diverter valve kit fitted.

Risk of scalding
At maximum adjusted hot water temperature can cause serious scalding.
- Only use the maximum adjustable hot water temperature for thermal disinfection.
- Press the
![]() key.
key.
The set hot water temperature appears. - To set the desired hot water temperature, press the
![]() or
or ![]() keys.
keys. - To save the setting, press the ok key or wait for 2 seconds. The symbol
![]() appears for a short time.
appears for a short time. - To switch hot water operation mode, press the ok key.
 key.
key.In S eco mode the appliance will heat the cylinder if the temperature falls approximately 12°C below the set temperature. Eco mode is enabled by default, during the initial appliance start up.
In S Preheat mode the appliance will heat the cylinder if the temperature falls approximately 6°C below the set temperature. The appliance heats the cylinder more frequently. This tops up the cylinder temperature for quicker heat up times, this is useful for large/longer demand periods.
If a time program is available and hot water operation mode set on S auto press the ok key to switch to S Advance. Time programs are available with Key (accessories).
Auto: Heating the cylinder is switched on and off according to programmed times.
S Advance: Switch to S Advance to move to the next on or off time and directly switch on or off heating the cylinder.
Operating the menu
Opening and closing the menu
- To open the menu, press the
![]() key.
key. - To exit the menu, press the
![]() key again.
key again.
-or- - Press the
![]() key.
key.
 key.
key. key.
key.Changing the setting values
- To highlight a menu item, press the
![]() key or the
key or the ![]() key.
key. - Select the menu item with the ok key.
- To change the value, press the
![]() or
or ![]() key.
key. - Press the ok key.
The new value is saved.
Exiting the menu without saving values
- Press the
![]() key.
key.
Settings in the menu
The factory settings are highlighted in the following table.
| Menu item | Function definition |
| Heating mode |
|
| Heat. time prog.1) | Timer for heating: Weekday(s) selection, day program and timer adjustment (  "Time program")1) "Time program")1) |
| DHW operation |
|
| Eco/Preheat |
|
| DHW time prog.1) | Timer for hot water: Weekday(s) selection, day program and timer adjustment ( "Time program")1) |
| Boiler status | Screen with current system values including the pressure indicator. |
| Information | The current system values and the active operating conditions can be called up in the Information menu. Changes are not possible.
|
| Energy consump.2) | Display Gas consumption
Display Elec. consump.
|
| Holiday1) | Start and end date of the holiday, activate and deactivate. |
| Settings |
|
| Cleaning funct. | No operation is possible for 15 s. The display shows a countdown. |
| Emergency mode3) |
|
Table 5 Settings Menu
1) Only available with installed Key (accessories)
2) The energy values shown are an estimation based on internal data of the appliance. Under real world conditions, many factors influence the energy consumption and the shown values will deviate from the values of an energy meter. The information is for indication only and should not be used for billing purposes. The values can be used for relative comparison of energy consumption between different days/weeks/month.
3) Allows manual control of heating during loss of RF Key signal
Key
(accessories)
Installing the Key
Installing the Key will enable timer functions (Additional functions  chapter "Settings in the menu"). For Pairing Key manual.
Always turn off the power to the appliance before installing Key (accessories).
- Plug Key into Key housing. See Fig. 7

- The lever [2] of the locking mechanism is located right hand side of the Key housing. Ensure that it is in its Open position before pulling lever [2] towards front. See Fig. 8

- Turn on the power.
LED [1] starts blinking green. - Wait until LED is constantly yellow.


Note the display:
- Set time and date if necessary.
Key LED
Key LED status
The LED on the Key displays different states with flashing or constant colours.
| Description of the LED displays | Example |
| Flashing red: Fault, e.g. no communication between the Key and appliance:
|  |
| Flashing yellow: No fault, user please wait. | |
| Flashing green: No fault, initialisation process is running. | |
| Constant red: Temporary fault:
|  |
| Constant yellow: No fault, time and date not available:
| |
| Constant green: No fault, normal operating condition. | |
| LED Off: No fault, power-saving mode or appliance without power. |  |
Table 6 LED status
Setting the time program
The same method for setting the time program for heating is used to set the time program for hot water.
- Press the
![]() key.
key. - Select and confirm the Heat. time prog. or DHW time prog.menu.
- Select and confirm the Time program menu.
The menu items Mon - Fri, Sat - Sun, Mon ... Sun are displayed.
 key.
key.Possible items to change:
- Mon - Fri to change switching times for all weekdays together
- Mon ... Sun to change switching times for individual days
- Sat - Sun to change switching times for weekends
- Select and confirm item you want to change.
- Select and confirm time entry you want to change.
- To change the time, press the
![]() or
or ![]() key.
key. - Press the ok key.
The new time is saved. Next time entry is selected.
Add one additional switching time block by selecting +. Delete an existing switching time block by selecting  .
.
Setting frost protection
NOTICE
Risk of damage to the system from frost!
The heating system can freeze up after a prolonged period (e.g. during a power failure, switching off the power supply, faulty fuel supply, boiler fault etc.).
- Ensure that the heating system is in constant use (particularly when there is a risk of frost).
If you are leaving your property unoccupied during cold weather, please leave your external programmer on constant and your room thermostat set to 12°C.
Thermal disinfection
To prevent hot water from becoming contaminated by bacteria such as legionella, we recommend thermal disinfection after long downtimes.
Risk of scalding.
During thermal disinfection, discharging unmixed hot water can cause serious scalding.
- Only use the maximum adjustable hot water temperature for thermal disinfection.
- Inform occupants of the premises of the risk of scalding.
- Perform thermal disinfection outside of the normal operating times.
- Do not discharge DHW unmixed.
Proper thermal disinfection involves the DHW system including the draw-off points.
- Set the thermal disinfection in the hot water program of the heating controller (
![]() heating controller operating instructions).
heating controller operating instructions). - Close DHW draw-off points.
- Set any DHW circulation pump to continuous operation.
- Wait until the maximum temperature is reached.
- Open all DHW draw-off points, from the nearest to the one furthest away, and draw off hot water until hot water at a minimum of 70°C has flown from all draw-off points for at least 3 minutes.
- Restore the original settings.
 heating controller operating instructions).
 Clearances and ventilation information
Appliance clearances
Your installer will have provided adequate space around the appliance for operation, safety and servicing/maintenance access.
- The following detail the necessary clearance around the appliance for service and maintenance.

Risk of damage to appliance or property
The appliance will overheat if the clearance space around the appliance is restricted by objects.
- Do not restrict this space with the addition of cupboards, shelves etc. next to or around the appliance.
- Do not store any combustible materials on or next to the appliance, such as clothes, towels, paper or plastic bags.
| Minimum clearances | ||
| Description | Dimensions [mm] | |
| X | Appliance width | 440 |
| Y | Appliance height | 780 |
| Z | Appliance depth | 365 |
| Installation/Maintenance | ||
| 1 | Overall clearance height | 1,150/1,190* |
| 2 | Overall clearance depth | 965 |
| 3 | In front of appliance | 450 |
| 4 | Overall clearance width | 450 |
| 5 | Above the appliance | 170/210* |
| 6 | Either side of appliance | 5 |
| 7 | Below the appliance | 200 |
| 8 | Compartment depth | 385 |
| 9 | Appliance to removable door | 20 |
| 10 | Min clearance to the floor | 400 |
Table 7
[*] Height for either 60/100 flue or 80/125 flue
Ventilation information
The air supply must not be restricted or contaminated.
Ventilation considerations
- Do not place objects to hinder the air circulation required by the appliance.
- The installation premises may require ventilation to be fitted according to its features or use.
Malfunction or failure
If you believe there is a problem with your central heating or hot water supply, before you contact your installer/maintenance engineer and report the error and appliance type carry out the following checks.
Basic checks
Some items to check before placing a call are:
- Is the electrical power switched on to the appliance?
- Is the programmer/timer set to ON or in an ON period?
- Is the room thermostat set too low?
- Is the cylinder thermostat (if fitted) set too low?
- Is the cold water main turned on?
- Sealed heating system:
- Is the static system pressure (when appliance is cold) between 1 and 1.5 bar?
- Do you have gas?
- Are other gas appliances working, gas cooker/hob for example?
- Has your credit run out on your gas pre-payment meter?
Worcester, Bosch Group
The appliance is supported in the UK and Eire by Worcester, Bosch Group.
Specialist service engineers are available to attend an appliance breakdown.
Invoices for attendance and repair work carried out on this appliance by any third party will not be accepted.
- No charge will be made for parts and/or labour providing:
- The appliance fault is found and the appliance is within the guarantee period. Reasonable evidence of this must be supplied on request. i.e. a completed Commissioning and service record and has been regularly serviced at least once a year.
- A call-out charge will be made where:
- The appliance is outside the guarantee period or has not been serviced in accordance with the manufacturers instructions.
- Our Field Service Engineer finds no fault with the appliance.
- The cause of breakdown is misuse or with other parts of your plumbing/heating system, or with equipment not supplied by Worcester, Bosch Group.
No appliance fault is found on over 30% of all service calls.
- In the case of a suspected fault, refer to the basic checks earlier in this section.
In the event of an appliance fault or breakdown please contact Worcester, Bosch Group appointments team on 0330 123 9339. Your advisor will arrange for an engineer to call with the minimum of delay; under normal circumstances this will be from 1~3 working days (excluding weekends and bank holidays) for priority breakdown situations (no hot water and/or heating).
Fault reset troubleshooting
If there is fault in the system, there will be a message shown on the display with an icon on the right up corner. The color of this icon depends on the severity of the fault in the system. The cause of the fault is coded (e.g. fault code 232) and displayed as text.
- Press the
![]() and
and ![]() keys until Reset is displayed.
keys until Reset is displayed.
The appliance starts up again and the current supply temperature is displayed.
 and
and  keys until Reset is displayed.
If a fault persists:
- Contact the contractor or the customer service.
- Provide them with the displayed fault code and the device data (table 5).
Fault 2980
Fault 2980
- If fault 2980 is visible on the boiler display then contact a qualified heating engineer immediately. Do not attempt to remedy the fault otherwise there is a chance this could lead to a serious, safetyrelated fault. Heating and hot water will not be available until remedied by a qualified heating engineer.
Extreme cold weather
In certain instances where the condensate pipework is run externally or in an unheated area, such as a garage, the condensate pipework can be at risk of freezing, even if well insulated.
A frozen/blocked condensate pipe will cause the boiler to shut down. Worcester, Bosch Group have available helpful videos on thawing frozen condensate pipe work on our website in the Customer Service section.

Falling hazard!
Failure to follow this guidance may result in personal injury.
- Only attempt to thaw a condensate pipe that is at ground level and easily accessible.
- Never attempt to thaw a condensate pipe that is at height.
Risk of damage to pipe work!
Thermal shock from boiling water can damage plastic pipes.
- DO NOT use boiling water to thaw the condensate pipe!
Slip hazard
- Ensure that the subsequent freezing of any water does not result in a slip hazard.
If the condensate pipe has frozen:
- Locate the blockage.
- It is likely that the pipe is frozen at the most exposed point outside the building or where there is an obstruction to flow. This could be the open end of the pipe, at a bend or elbow, or where there is a sag in the pipe in which condensate can collect.
- The location of the blockage should be identified as closely as possible before taking further action.
- Thaw the frozen pipe.
- The pipe can be thawed by applying a hot water bottle, a microwaveable heating pack (the sort used for muscular aches and pains) or a cloth soaked in hot water to the exterior of the pipe, close to the point of blockage.
- Hot water, but not boiling, can also be poured onto the pipe from a watering can or similar container.
- Care must be taken at pedestrian areas where this water may freeze and create a slip hazard.
- Worcester, Bosch Group have available on our website helpful videos in the Customer Service section to aid in thawing a frozen pipe.
- Reset the appliance and wait two or three minutes for the appliance to restart.
- Contact Worcester, Bosch Group Appointments Team on:
0330 123 9339, if the boiler does not restart. - Contact your installer in order to find a permanent solution to the problem.
System gassing troubleshooting
Caution must be exercised when venting radiators or adjusting system pressure after commissioning of your boiler.
Do not repeatedly vent your radiators, if symptoms persist, contact a heating engineer.
- Do not vent air from radiators whilst the central heating is switched on; turn your boiler off.
- Whilst venting radiators, do not allow the pressure on the boiler to drop below the pressure at which it is normally set
If the pressure in your heating system is repeatedly rising (this can be checked via the boilers pressure gauge or digital display and should be checked when the system is cold), and especially if you need to keep venting the radiators, urgent action is required and you must contact a heating engineer. This can indicate that there is corrosion occurring within the heating system
Note: Ensure the reading stays between minimum and maximum operating pressures at all times whilst the boiler is operating
- This must be properly addressed to prevent serious damage to thу entire system.
- Failure to properly maintain the heating system may affect your warranty.

Table 9 System gassing flow chart
Tips on energy saving
Heating economically
The appliance provides a high level of comfort whilst keeping fuel consumption and the environment effects as low as possible.
The appliance is controlled in such a way that it delivers heat at the correct rate and only if there is a clear demand from the system.
Central heating systems with thermostatic radiator valves
With modern heating systems set around a 20°C heat loss, the optimum setting for a condensing boiler will be approximately 65°C for the central heating temperature. This is to ensure a return temperature of less than 52°C.
The system must be balanced correctly and the radiators may need upgrading. This allows the boiler to condense as much as possible for the central heating system.
The temperature of each room can be set individually (except primary room with the room thermostat) using the thermostatic radiator valves.
Room thermostats
Reducing the setting of the room thermostat by 1°C can reduce fuel consumption by up to 10%.
New control systems
Upgrade your heating control system if necessary with the latest equipment available.
Roof insulation
Around 30% of the heat loss from a property is through the roof. Replace any old insulation with new insulation, preferably of around 200mm thickness or more.
Window frames
Single glazed windows, particularly those with steel frames, can lose a great deal of heat. Consideration should be given to replacement with PVCu or wooden framed double glazed units.
Radiators
If a radiator is sited underneath a window, its performance will be affected if the curtains are allowed to drape over the radiator. Shelves fitted above or in front of the radiator should also be avoided.
It is advisable to manually adjust all thermostatic radiator valves every 2~3 months to prevent them sticking. Ensure radiator valves are correctly set and not damaged.
Draughts
Try to ensure that draughts around doors, windows, letter boxes and keyholes etc. are reduced by using a suitable draught excluder.
Air vents!
- Do not block or seal any air vents that are installed to ensure that the appliance operates safely.
Curtains
Lined curtains, or heavier full length curtains can provide excellent insulation. However, always ensure that the curtains do not drape over radiators.
Energy consumption
The maximum heat output of this boiler can be adjusted to suit the exact requirements of the building. The process of adjusting the maximum heat output is commonly referred to as range rating. The new boiler is set at the maximum output and should be adjusted when it is installed and commissioned. In accordance with the standards, the declared space heating efficiency, useful efficiency and NO x values efficiency for this range rated boiler are not measured at the maximum output. To achieve the published efficiency and NO x values, the gas rate should be reduced by your installer during commissioning ( Installation and Maintenance instructions).
Product data on energy consumption
The information provided fulfills the requirements of regulations (EU) 811/2013 and (EU) 813/2013.
Specific precautions for installation, maintenance as well as recycling and/or disposal are provided within the installation and operating manuals. Read and follow the installation and operating manuals.
| Product data | Symbol | Unit | 7736702590 7736702598 | 7736702591 7736702597 |
| Product type | – | – | GR8701iW 30 S NG/LPG | GR8701iW 35 S NG/LPG |
| Energy Efficiency Class | – | – | A | A |
| Range rated heat output | Prated | kW | 30 | 35 |
| Seasonal space heating energy efficiency at range rated output | η s | % | 94 | 94 |
| Annual energy consumption (average climate conditions) | QHE | kWH | – | – |
| Annual energy consumption | QHE | GJ | 69 | 78 |
| Sound power level, indoors | LWA | dB | 53 | 53 |
| Special precautions to be taken during assembly, installation or maintenance (if applicable) | – | – | product accompanying documents | |
| Condensing boiler | – | – | Yes | Yes |
| Low temperature boiler | – | – | No | No |
| B1 boiler | – | – | No | No |
| Cogeneration space heater | – | – | No | No |
| Combination heater | – | – | No | No |
| Useful heat output | ||||
| At rated heat output and high temperature regime | P4 | kW | 29.5 | 33.7 |
| At 30% of rated heat output and low temperature regime | P1 | kW | 9.9 | 11.3 |
| Useful efficiency | ||||
| At rated heat output and high temperature regime | η 4 | % | 88.5 | 88.8 |
| At 30% of rated heat output and low temperature regime | η 1 | % | 98.7 | 98.8 |
| Auxiliary electricity consumption | ||||
| At full load | elmax | kW | 0.067 | 0.048 |
| At part load | elmin | kW | 0.014 | 0.013 |
| In standby mode | PSB | kW | 0.001 | 0.001 |
| Other items | ||||
| Standby heat loss | Pstby | kW | 0.071 | 0.071 |
| Ignition burner power consumption | Pign | kWh | – | – |
| Emissions of nitrogen oxides (only gas- or oil fired) at range rated output | NOx | mg/kWh | 23 | 25 |
| Annual energy consumption | QHE | kWh | 20556 | 18056 |
| Annual energy consumption | QHE | GJ | 74 | 65 |
| Sound power level, indoors | LWA | dB | 45 | 44 |
Table 10 Product data on energy consumption Greenstar 8000 +
Explanation of symbols and safety instructions
Explanation of symbols
Warnings
In warnings, signal words at the beginning of a warning are used to indicate the type and seriousness of the ensuing risk if measures for minimising danger are not taken.
The following signal words are defined and can be used in this document:

DANGER indicates that severe or life-threatening personal injury will occur.
WARNING indicates that severe to life-threatening personal injury may occur.
CAUTION indicates that minor to medium personal injury may occur.
NOTICE
NOTICE indicates that material damage may occur.
The info symbol indicates important information where there is no risk to people or property.
General safety instructions
 Notices for the target group
These operating instructions are intended for the heating system operator.
All instructions must be observed. Failure to comply with instructions may result in material damage and personal injury, including danger to life.
- Read and retain the operating instructions (heat generator, heating controller, etc.) prior to operation.
- Observe the safety instructions and warnings.
- Operate the heat generator only with the casing fitted and closed.
Determined use
The product may only be used for the heating of boiler water and for DHW heating.
Any other use is considered inappropriate. We assume no liability for damage occurring due to non-permitted use.
If you smell gas
A gas leak could potentially cause an explosion. If you smell gas, observe the following rules:
- Prevent flames or sparks:
- Do not smoke, use a lighter or strike matches.
- Do not operate any electrical switches or unplug any equipment.
- Do not use the telephone or ring doorbells.
- Turn off the gas at the meter or regulator.
- Open windows and doors.
- Warn your neighbours and leave the building.
- Prevent anyone from entering the building.
- Move well away from the building: call the National Gas Emergency Service on 0800 111 999.
- L.P.G. boilers: Call the supplier's number on the side of the gas tank.
Danger to life from poisoning by flue gas
There is a danger to life from escaping flue gas.
- Never modify any parts through which flue gas is routed.
If flues are damaged or leaking, or if you smell flue gas, observe the following rules.
- Switch off the heat source.
- Open doors and windows
- Warn your neighbours and leave the building immediately.
- Prevent third parties from entering the building.
- Notify an approved contractor.
- Have any defects rectified.
Danger to life from carbon monoxide
Carbon monoxide (CO) is a poisonous gas, which arises during the incomplete combustion of fossil fuels such as oil, gas or solid fuels.
Dangers arise, if carbon monoxide escapes from the heating system due to a fault or a leak and collects unnoticed in enclosed spaces.
You can neither see, taste nor smell carbon monoxide.
To avoid danger from carbon monoxide:
- Have the heating system inspected and serviced regularly by an approved contractor.
- Use a CO detector, which gives an alarm in good time if CO escapes.
- If you suspect a CO leak:
- Warn your neighbours and leave the building immediately.
- Call an approved contractor.
- Have any defects rectified.
Inspection, cleaning and maintenance
The user is responsible for ensuring the heating system is safe and environmentally compatible.
Non-existent or improper inspection, cleaning and maintenance may result in personal injury, including danger to life or material damage.
We recommend that you enter into a contract covering an annual inspection and responsive cleaning and maintenance with an approved contractor.
- Have work carried out only by an approved contractor.
- Have the heating system inspected by an approved contractor at least once a year.
- Have any required cleaning or maintenance work carried out immediately.
- Have any defects in the heating system remedied immediately, independent of the annual inspection.
Fittings and modification
Only a competent engineer can remove the appliance case and carry out any work, in accordance with the relevant Installation Regulations.
Any misuse or unauthorised modifications to the appliance, flue or associated accessories and heating system will invalidate the guarantee.
- Do not modify the appliance or flue system in any way.
Worcester, Bosch Group accepts no liability arising from any such actions. This does not affect your statutory rights.
Combustion air/ambient air
The air in the installation location must be free of flammable or chemically aggressive substances.
- Do not store or use any flammable or explosive materials (paper, petrol, thinners, paints, etc.) in the vicinity of the heat source.
- Do not store or use any corrosive substances (solvents, adhesives, chlorinated cleaning agents, etc.) in the vicinity of the heat source
General considerations
- The boiler must be installed in a well ventilated area. The openings must be kept in good condition.
- The vents or any other component contributing to the functioning of the boiler must not be reduced or sealed.
- We recommend an annual service of the appliance by an approved engineer to ensure reliable and efficient operation.
Safety of electrical devices for domestic use and similar purposes
The following requirements apply in accordance with EN 60335-1 in order to prevent hazards from occurring when using electrical appliances:
"This appliance can be used by children of 8 years and older, as well as by people with reduced physical, sensory or mental capabilities or lacking in experience and knowledge, if they are supervised and have been given instruction in the safe use of the appliance and understand the resulting dangers. Children shall not play with the appliance. Cleaning and user maintenance must not be performed by children without supervision."
"If the power cable is damaged, it must be replaced by the manufacturer, its customer service department or a similarly qualified person, so that risks are avoided."
Please read these instructions carefully
- These instructions are applicable to the Worcester appliance model/ s stated on the front cover only.
- These instructions apply in the UK/IE only and must be followed except for any statutory obligation.
| TECHNICAL SUPPORT: | 0330 123 3366 |
| RENEWABLE SUPPORT: | 0330 123 9229 |
| CONTROLS AND CONNECTIVITY TEAM: | 0330 123 3641 |
| APPOINTMENTS: | 0330 123 9339 |
| SPARES: | 0330 123 9779 |
| LITERATURE: | 0330 123 9119 |
| TRAINING: | 0330 123 0166 |
| SALES: | 0330 123 9669 |
Bosch Thermotechnology Ltd.
Cotswold Way, Warndon
Worcester WR4 9SW
United Kingdom
Tel. 0330 123 9559
worcester-bosch.co.uk
Documents / Resources
References

Download manual
Here you can download full pdf version of manual, it may contain additional safety instructions, warranty information, FCC rules, etc.
Advertisement


Need help?
Do you have a question about the Greenstar 8000+ and is the answer not in the manual?
Questions and answers