Table of Contents
Advertisement
Quick Links
Advertisement
Table of Contents

Related Manuals for Attacus CHIRON GT1


Summary of Contents for Attacus CHIRON GT1
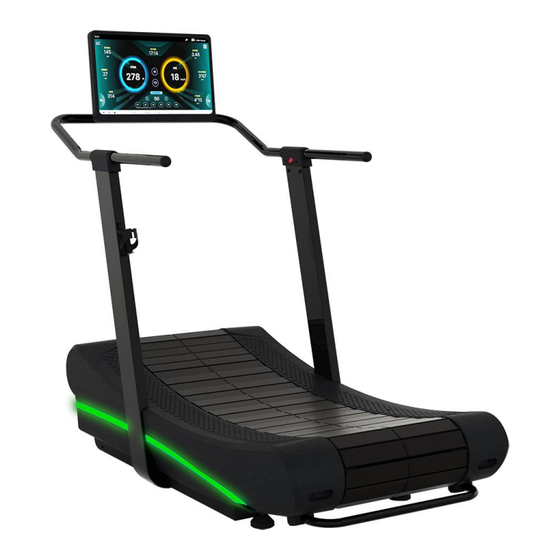
- Page 1 CHIRON GT1 ECO TREADMILL...
-
Page 3: Table Of Contents
NFC Quick-Pair ....................39 The LED Indicators ..................... 41 Training Target ....................43 Power Generation....................46 Charging ......................47 5 Maintenance .............. 49 6 Specification ............... 50 7 Appendix ..............52 Exploded View Drawing ..................52 CHIRON GT1 ECO Treadmills... -
Page 4: Important Notice
1 Important Notice Please Keep the Manual in Good Condition Please thoroughly read and follow the instructions for assembling or using the equipment. If you have any questions, please contact your local distributor or visit our website: ATTACUSfitness.com. For your safety, please take safety measures and follow the instructions. Keep this manual in good condition for future reference. -
Page 5: Safety Precautions
ATTACUS is not responsible for any personal injury or death caused by faulty assembly, self-modification/disassembly which would nullify the warranty, or any other ways the user fails to follow the manual. -
Page 6: Assembly
3 Assembly Please read through the manual before the assembly process. If you have any questions, please contact your local distributor or look it up on the official website: ATTACUSfitness.com To enhance service quality and effectiveness, please be sure to have the product model name and serial number ready when making the call. -
Page 7: Part Names
(Bottle diameter range Ø 65~ Ø 80mm) Standing Masts (Left/Right) Foot Rest (Left/Right) Slat Belt LED Light Transportation Handle Power Input Port (IN 19V) Foot Pad (Left/Right) Power Output Port (OUT 24V) Anti-Slip Pad (Left/Right) Transportation Wheels (Left/Right) CHIRON GT1 ECO Treadmills... -
Page 8: Product Serial Number And Safety Warning
3.4 Product Serial Number and Safety Warning Login with QR Code: Scan to log in with your Ⓐ GPTfit account. Ⓑ ⚠WARNING! To reduce the risk of harm, please follow the below safety instructions: Serious injuries can occur on this equipment. ... - Page 9 [Your Avatar] on the top right corner [Set Up] [Product Registration] and the serial number is just below the product registration QR code.) ⑨ WEEE Mark ⑩ CE Mark ⑪ Please refer to this manual constantly. CHIRON GT1 ECO Treadmills...
-
Page 10: Place Of Use
3.5 Place of Use Before choosing where to install the equipment we recommend that you check that the following conditions are available: Flat, stable, and vibration-free floor, which is strong enough to bear the weight of the equipment plus the user. ... -
Page 11: Part List
Round Head Phillips Screws Round Head Phillips Screws M4×0.7×10L M4×0.7×10L Large Phillips Flat Head Screws M5×0.8×10L 8mm Hex Key (Allen Key) 5mm Phillips Hex Key (Phillips Allen Key) 4mm Hex Key (Allen Key) 3mm Hex Key (Allen Key) CHIRON GT1 ECO Treadmills... - Page 12 Operation Guide...
- Page 13 Some parts are pre-lubricated to help with the assembly. DO NOT wipe off the grease. Unauthorized personnel are prohibited to remove the maintenance covers. DO NOT discard the packaging material until the assembly is completed. CHIRON GT1 ECO Treadmills...
-
Page 14: Assembly Steps
3.7 Assembly Steps Assembling Left and Right Masts Ref. NO. Reference Image Specification Qty. Left Mast Right Mast Hex Socket Set Screw M10×1.5×25L Serrated Safety Washer M10 Flat Washer Φ10×Φ25×2T 8mm Hex Key (Allen Key) Operation Guide... - Page 15 (coming out from the side cover). B) Connect the Power connector from the mast to the controller connector (emerging from the side cover). Controller Brake Connector Mast Brake Connector Controller Power Connector Mast Power Connector CHIRON GT1 ECO Treadmills...
- Page 16 Assembling the Handrail A) Under the right handrail, connect the Power connector from the handrail to the corresponding connector that emerges from the mast. B) Under the right handrail, connect the Brake connector from the handrail to the corresponding connector that emerges from the mast.
- Page 17 Fasten Mid-Left and Right Covers Ref. NO. Reference Image Specification Qty. Mid-Left Cover Mid-Right Cover Round Head Phillips Screws M4×0.7×10L 5mm Phillips Hex Key (Phillips Allen Key) CHIRON GT1 ECO Treadmills...
- Page 18 Installing the Front Left Cover A) Connecting: Connect the wire from the Front Left Cover with that of the light. B) Fasten: Fasten the Front Left Cover. Ref. NO. Reference Image Specification Qty. Front Left Cover Large Phillips Flat Head Screws M5×0.8×10L (Black EDP) Truss Self Tapping Screw M4×10L 5mm Phillips Hex Key (Phillips Allen Key)
- Page 19 B) Connecting the light connector in the front right cover with the side light connector. Power Board Wire Power Board Side Light Wire Front Right Cover Side light Wire Ref. NO. Reference Image Specification Qty. Front Right Cover CHIRON GT1 ECO Treadmills...
- Page 20 Fasten the Front Right Cover Ref. NO. Reference Image Specification Qty. Front Right Cover Large Phillips Flat Head Screws M5×0.8×10L (Black EDP) Truss Self Tapping Screw M4×10L 5mm Phillips Hex Key (Phillips Allen Key) Operation Guide...
- Page 21 Fasten the Front Left and Right Footrests Ref. NO. Reference Image Specification Qty. Front Left Footrest B Front Right Footrest B Flat head Self Tapping Screw M5×0.8×25L 3mm Hex Key (Allen Key) CHIRON GT1 ECO Treadmills...
- Page 22 Install the Inner and Outer Mast Covers Please follow the steps below to install the inner and outer mast covers. A) Separate the inner and out covers, which were put together for transportation purposes. B) Screw the inner cover on the treadmill's main frame. C) Latch on the outer cover to the inner cover.
- Page 23 Ref. NO. Reference Image Specification Qty. Left Handrail Cover B Left Handrail Cover A Right Handrail Cover A Right Handrail Cover B Flat Head Phillips Self Tapping Screw M5×0.8×30L 5mm Phillips Hex Key (Phillips Allen Key) CHIRON GT1 ECO Treadmills...
- Page 24 Install the Bottle Holder Ref. NO. Reference Image Specification Qty. Bottle Holder Hex Socket Set Screw M5×12L 4mm Hex Key (Allen Key) Operation Guide...
- Page 25 B) Connect the RJ45 wire from the Handrail to the port on the back of the console. Ref. NO. Reference Image Specification Qty. 21.5” TFT Console Large Phillips Fat Head Screws M5×0.8×10L 5mm Phillips Hex Key (Phillips Allen Key) CHIRON GT1 ECO Treadmills...
- Page 26 Install the 15.6” Console (Alternative Model) A) Screw the screen with the console holder on the handrail. B) Connect the RJ45 wire from the handrail to the port on the back of the console. Ref. NO. Reference Image Specification Qty. 15.6”...
-
Page 27: Moving The Treadmill
Source of character illustrations: ManyPixels 3) Push or pull the machine to the designated location, then lower it gently to the floor. ⚠ATTENTION! The treadmill is very heavy, please lift or move it with care. CHIRON GT1 ECO Treadmills... -
Page 28: Operation
4 Operation 4.1 Using the Equipment Under any circumstances, the equipment is for one person to use only. DO NOT have more than one user using it simultaneously. DO NOT use the product in the presence of small children or pets. ... -
Page 29: Before Use
8) When exiting the treadmill, please hold on to the Handrails and place your feet on the footrests. Exit from either side of the footrest. DO NOT exit the treadmill immediately after use as one may experience dizziness. 9) Please properly stretch or massage the sore muscle accordingly to prevent fatigue. CHIRON GT1 ECO Treadmills... - Page 30 Exercise Guidelines for Adults (HPA): Benefits Activities Freq. Duration Improve Aerobic exercise such At least 3 times a At least an average of 20 cardiorespiratory as running, power week. minutes per time. fitness and endurance. walking, swimming, cycling, dancing, rope skipping, ball games, traditional fitness, etc.
-
Page 31: Operation Overview
Pairing Bluetooth Heart Rate Device/ Audio Device Wi-Fi Selection ⑥ Volume Adjustment Screen Brightness Adjustment Electronic Brake Button: (Red Button) ⑦ Press and continuously hold onto the button to slow down or stop the belt. CHIRON GT1 ECO Treadmills... - Page 32 ⚠ATTENTION! Data generated under “Guest” will not be saved. On the login page, users may set up to three quick-login user account. If you would like to remove existing quick-login user, please remove them manually. On the Home Page, selecting “ ✕,“ then remove the user(s). 首頁...
- Page 33 User Account Setup, including Basic Information, preferences, and Privacy Setting. Device Setting, including Lighting Setting, Pair the device, Product ⑤ Set Up registration. Log out ☞When operating with a Guest account, users will find [Exist] instead. CHIRON GT1 ECO Treadmills...
- Page 34 Connecting to ⑥ Select [Heart Rate Sensor] to connect to heart rate devices. Heart Rate Devices Disconnect to Heart ⑦ Select [Disconnected] to disconnect the connected heart rate device. Rate Device ⑧ Select [GO] to begin workout. From the Task bar, you can switch between the following windows: ...
- Page 35 Select to change the options. ⑥ Select to switch the displayed data on the right. Select to access preinstalled media platform such as YouTube, Netflix, ⑦ Iqiyi or Spotify. CHIRON GT1 ECO Treadmills...
- Page 36 ⑧ Select to mark the laps manually. Select to pause. ⑨ Once paused, select to continue. To end select ⚠ATTENTION! allows a smoother increase and decrease of resistance as you [Comfort Mode switch the gear. ] allows a quicker reaction time so that the switch of resistance [Sport Mode would be perform immediately after selection.
- Page 37 Select to adjust the Resistance level, there are six levels available: Min ⑧ /20% /40% /60% /80% /100%, you can tap on for minor adjustment, the larger percentage indicates higher resistance. ⑨ Select to change the options. CHIRON GT1 ECO Treadmills...
- Page 38 ⑩ Select to turn the [Comfort Mode] on. Select to turn the [Sport Mode] on. Quick Setup: Pairing Bluetooth Heart Rate Device/ Audio Device ⑪ Wi-Fi Selection Volume Adjustment Screen Brightness Adjustment ⚠ATTENTION! allows a smoother increase and decrease of resistance as you [Comfort Mode switch the gear.
-
Page 39: Operation Instruction
1 Heart rate data is only available when a Bluetooth heart rate device is connected. 2 The treadmill will turn to sleep mode after 3-5 minutes after being left idle in non-exercise mode for energy preservation. To wake the treadmill, please walked with the speed of 5km/h on the treadmill. CHIRON GT1 ECO Treadmills... - Page 40 ⚠ATTENTION! During cases when the power could not be turned on, immediately connected with the power or exercise at the constant speed of 9 km/h until the main page appeared on the screen. When the energy is too low, a pop-up window would appear and indicate 20% of Battery life.
-
Page 41: Nfc Quick-Pair
[NFC Pairing the Device] Select the icon to proceed with unpairing the device. 2. Pairing to the new device: Select [Your Avatar] [Set Up] [Device Setting] [NFC Pairing the Device] [Add a device CHIRON GT1 ECO Treadmills... - Page 42 ��Note 1 NFC near-field connection tag (passive). 2 NFC function is limited to using ATTACUS Obeat3 or Obeat1 NFC heart rate armband (Optional. Not included in the treadmill package). 3 Heart Rate Armband can be activated by pressing the button. Or press and hold to turn on and begin recording.
-
Page 43: The Led Indicators
Firstly, one would measure the maximum heart rate (MHR=220-Age) and times it with the intended intensity percentile. For instance, for a 30-year-old person, the maximum heart rate would be 220-30=190 bpm the intensity level of 80% would give: 190×0.8=152 bpm CHIRON GT1 ECO Treadmills... - Page 44 4.6.2 Speed Zone Indicator To set up the preference for the side indicator lights according to the speed zone, go to [Your Avatar] [Set up] [Device Setting] [Lighting Setting]. Light Zone Speed Range(km/h) Cyan Green 8~12 Yellow 12~15 Orange Operation Guide...
-
Page 45: Training Target
The adjustable range for minimum zone is 30~170 bpm. Your target heart rate will be listed under the real-time heart rate during training. The real-time heart rate will turn red when it is not within the target range. CHIRON GT1 ECO Treadmills... - Page 46 Program Item Description This program simulates the up and down hill landscape by automatically increasing and decreasing the resistance. Once it has reached the preset 2 kilometers, the page will automatically end the exercise and go to the summary page. ...
- Page 47 Because GT1 is a non- motorized model, the slate will not stop along with the program. Be sure to slow down manually and utilize the red brake button on the right hand rail to stop. CHIRON GT1 ECO Treadmills...
-
Page 48: Power Generation
4.8 Power Generation This treadmill can transfer running power into electric power. The maximum power generated is 150watt/ h. While providing power to the console, the treadmill could also charge an external power bank. The following steps will demonstrate how to charge the power bank. -
Page 49: Charging
B) Insert the round jack of the power cord into the input port marked '19V IN' (for connecting to the power supply) on the right front side cover. C) Connect the plug to the corresponding socket. CHIRON GT1 ECO Treadmills... - Page 50 ⚠ ATTENTION! Please thoroughly inspect the adaptor, plugs and charging port before plugging in for any odd objects (wetness, burn, rust, or accumulated dust). Constantly wipe down the machine and keep it dry to ensure safe connectivity and prevent short circuit.
-
Page 51: Maintenance
Please unplug the power before performing any cleaning or maintenance. Please cease using the treadmill immediately if any damage, tear, or malfunction is discovered. Contact local distributor for maintenance service. Resume the usage only after the maintenance is completed. CHIRON GT1 ECO Treadmills... -
Page 52: Specification
6 Specification Product L×W×H:186.3×91.6×168.8 cm / 73.6”×35.8”×66.5” (With 21.5” TFT Weight:158 kg / 348 lb. Console) Maximum User 180 kg / 397 lb. Weight L×W×H:185×100.5×76.5 cm / 72.8”×39.6”×30.1” Shipment Packaging Weight:202 kg / 445.3 lb. Running Surface 48×168 cm / 18.9"×66.1" Screen (2 Models) □15.6”... -
Page 53: Recycling Information
��Note 1 Featured applications may vary by region. 2 ATTACUS Obeat3 and Obeat1 NFC are optical heart rate armbands that support the NFC function. Recycling information At the end if its useful life please dispose of this article correctly and safely (local refuse sites). -
Page 54: Appendix
7 Appendix 7.1 Exploded View Drawing Operation Guide... - Page 55 CHIRON GT1 ECO Treadmills...
- Page 56 Operation Guide...
- Page 57 CHIRON GT1 ECO Treadmills...
- Page 59 Designed by ALATECH Technology Limited. Made in China. 2024/11 V3 © 2024 ALATECH Technology Limited.
Need help?
Do you have a question about the CHIRON GT1 and is the answer not in the manual?
Questions and answers