Table of Contents
Advertisement
Quick Links
Advertisement
Table of Contents

Related Manuals for Attacus AT100


Summary of Contents for Attacus AT100
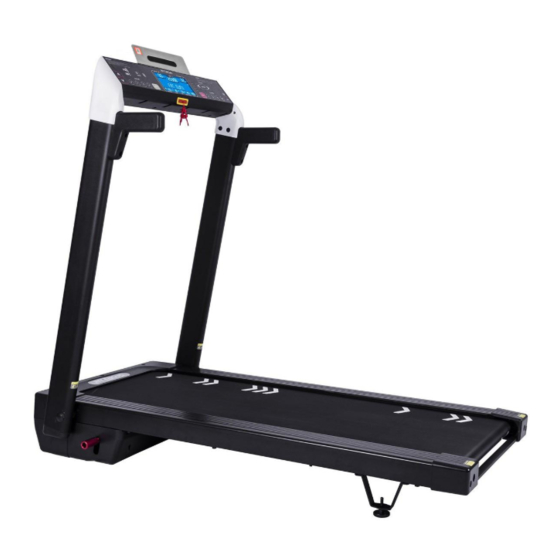
- Page 1 AT100...
-
Page 3: Table Of Contents
Application and Compatibility ..............32 6 Maintenance ............. 35 7 Belt Adjustment ............36 Center the Belt ..................... 36 Adjusting Belt Tension .................. 37 8 Lubrication ..............38 9 Specification .............. 39 10 Appendix ..............40 10.1 Exploded View ....................40 AT100 Smart Treadmill... -
Page 4: Important Notice
The owner of the equipment has the sole responsibility ensuring that all the instructions and safety measures are learned and followed by the users. You can download the most up-to-date user’s guide from our website: ATTACUSfitness.com. AT100 Smart Treadmill... -
Page 5: Safety Precautions
DO NOT use the equipment before it is well-maintained. ATTACUS is not responsible for any personal injury or death caused by faulty assembly, self-modification/disassembly, or any other ways the user fails to follow the manual. It is highly recommended for you to consult your doctor and run a full health check to... - Page 6 Please consult your physician before starting any exercise plan. Improper training or overtraining can result in serious injury or death. To prevent electrical shock, always turn off and unplug the machine before cleaning, performing maintenance and removing parts. AT100 Smart Treadmill...
-
Page 7: Assembly
3 Assembly Please thoroughly read through the manual before assembling. If you have any questions, please consult your distributor or see more information on our website: ATTACUSfitness.com. Please have your model number and serial number ready when you call. Serial Number Tablet Rack QR Code Control Panel &... - Page 8 Fixed foot pads Folding Foot Pedal Transportation Wheels Console Cover USB Output Power Manufacturer Label Power Port Power Switch (ON/OFF) AT100 Smart Treadmill...
- Page 9 Please be sure to have your model name and serial number ready before calling the customer service. The model name and serial number can be found on the manufacturer label, or by scanning the QR Code sticker on the right of the tablet rack. Model: AT100 Scan the QR Code to get the following: ...
-
Page 10: Parts List
2 ft (0.6m) on both sides of the treadmill, 79 inches (2m) on the rear end, and 1 ft (0.3m) at the front. 0.6 m (2 ft) 0.3 m (1 ft) (79 inch) 0.6 m (2 ft) AT100 Smart Treadmill... - Page 11 ⚠Attention Keep children and pets away during assembly. If you have any questions or the equipment has any missing parts, please contact your distributor or dial in the customer service number on the maintenance card. The treadmill is heavy; use care and additional help if necessary when moving. Do not attempt to move or assemble alone with single hand.
-
Page 12: Assemble Steps
1) Step on the folding lever and push up the console into position. 2) Carefully lift the console mast into the upright position until lock latch engages with a “click.” 3) Make sure the console mast is securely latched before letting go. AT100 Smart Treadmill... - Page 13 # of Parts in Parts Images Specification part letters used Handrail Hexagon Socket Head Cap Screw (M6×16L) 5mm Hex Key Operation Guide...
- Page 14 1) Expand: See Figure A, lift up the tablet rack. 2) Fold down: Push the tablet rack slightly to the left and fold it backward. (Figure B) AT100 Smart Treadmill...
- Page 15 # of Parts in Parts Images Specification part letters used Safety Key ⚠ Attention! The treadmill will not start unless the safety key is installed in position. Attach the clip end securely to your clothing. This safety key is designed to cut off the power of the treadmill in the case of emergency.
- Page 16 Unplug from outlet when not in use, before cleaning, and performing maintenance. Never operate the treadmill if it has a damaged cord or plug, or is not working properly. Please contact customer service or your distributor for replacement or repair. AT100 Smart Treadmill...
- Page 17 ASSEMBLY COMPLETE! Before the first use, lubricate the running belt and deck by following the instructions Lubrication. Operation Guide...
-
Page 18: Folding And Moving Guideline
3) Crouch down to the ground to lower the center of the body. Grasp on both rear ends and lift the machine up with both hands. 4) Lift it up until the transportation wheels are maneuverable. 5) Once the treadmill is in-position, place it gently to the floor. AT100 Smart Treadmill... - Page 19 6) If to store the treadmill horizontally, lift the rear end until the fixed foot pads on the motor cover are securely on the ground. ☞Please make sure to have a fitting space enough for treadmill to be straightened and close to the wall. 33.8 cm ⚠...
-
Page 20: Preparation
Take a 2~3 minutes break in between Improve flexibility. Stretching exercises, At least 3 times a Stretch at least 8~10 parts traditional fitness, week. of your body. gymnastic ,etc. Each muscle stretch at least 20~30 seconds and perform 1~3 repetitions. AT100 Smart Treadmill... - Page 21 Improve body mass Mainly Aerobic At least 3 times a At least 20 minutes each (Maintain a healthy exercise supplemented week. time. percentage of body with weight training. At least 1~3 groups per day. fat). Reference: https://www.hpa.gov.tw/Pages/Detail.aspx?nodeid=571&pid=882 ⚠ Attention! Always wear proper running shoes while using this equipment. Do not operate the machine barefooted or wearing only socks.
-
Page 22: Control Panel & Display Window
Speed Shortcut: Press to reach desired speed. A total of four speed options, 3/6/9/12, the larger number indicate the faster speed. (Unit: km/h) Speed Adjustment: Press to adjust speed by units. Press to adjust values in the Sport Mode. AT100 Smart Treadmill... -
Page 23: Data Fields
5.2 Data Fields Standby Window Figure/ Icon Data Fields Incline: Indicates the current inclination level. Inclination is shown through percentage. The range is 3.0%~9.0%. Under the sport mode, it is shown as Time: Shows either the exercise time remains or the time elapses. Within the first hour, the time is displayed as MM:SS. - Page 24 4 When the Safety Key is removed, the notification “Plug in safety” will continuously appear on the screen until the safety key is properly installed back to the port. Once it is installed, the standby “Welcome” screen would resume and the operation keys would be available to use. AT100 Smart Treadmill...
-
Page 25: Pairing With Nfc
6. On the Console: Press START to begin exercising. See Figure D. �� Footnote 1 NFC Tag (Passive). If you are interested to learn more about ATTACUS Obeat 3 Hear Rate Armband, please see the User Quick Guide. 3 Once you start working out, the NFC detection will be closed after one minute; it is recommended that you pair the device first before you pressing START key. -
Page 26: Heart Rate Zone Indicator
For instance, for a 30 year-old person, the maximum heart rate would be 220-30=190 bpm the intensity level of 80% would give: 190×0.8=152 bpm. Following the previous example, the THR (target heart rate) of a 30-year-old person is 152 bpm. AT100 Smart Treadmill... -
Page 27: Sport Mode
5.5 Sport Mode You can select from the following sport mode: Mode Types BASIC: Insert designated training time and basic user info. Then proceed to train. HRC: Insert designated training time, basic user info, and the target heart rate (THR). Then proceed to work out. - Page 28 Time (min) adjustable at any time during the workout. This mode simulates hiking movements. The preset incline program help to enhance endurance. Time, Speed, and Inclination are adjustable at any time during the workout. Time (min) AT100 Smart Treadmill...
- Page 29 Mode Profile Name Time Description (minutes) You could insert your own THR. Set the THR= (220-age)×80% for the basis of automatic inclination changes. If the THR is set as 152±2 bpm, when the heart rate does not reach 150 bpm, the inclination will increase 1% per 30 sec until it reaches the limit.
- Page 30 HR in every 15 sec until the heart rate is within the set range. Speed is adjustable at any time Time (min) during the workout in accordance to one’s physical condition and to maintain in the Target Heart Rate Zone. AT100 Smart Treadmill...
- Page 31 Mode Profile Name Time Description (minutes) With a timer on, the program ends once the set Calorie Goal is achieved. Speed and Inclination is adjustable at any time during the workout With a timer on, the program ends once the set Distance Goal is achieved.
- Page 32 ☞ T1 and T2 are 20 intervals in total. ☞ For example, if the time is set for 15 minute, both T1 and T2 are set as 2, then T2=(inserted time/20)×2. The repetition would be the following: (T2=90 sec, T1=90sec)×5 times. AT100 Smart Treadmill...
-
Page 33: Select A Workout Or Target
5.5.1 Select a Workout or Target Program Code Set up Time Name of Sport Mode or Program Name Set up Distance Goal Set up Calories Goal Set up Target Heart Rate 1) Under Sleep Mode, press any key to wake up the console 2) Use to select Sport Mode and press ENTER to confirm. -
Page 34: Quick Start
Fitness (see 5.6 Application and Compatibility), or pair the console with ATTACUS Optical Heart Rate devices to collect and analyze your workout data. Be sure to check if your data has been stored in your compatible devices right after an activity. -
Page 35: Application And Compatibility
5.6 Application and Compatibility 1) Pair, Connect, and Start Your Activity. 1-1) Scan the QR code to install Ala Fitness. System Requirement: iOS 11.0 or later Android 5.0 or later Built-in Bluetooth 4.0 or later 1-2) Please turn on Bluetooth on your mobile device. 1-3) Open Ala Fitness. - Page 36 3/5/7/9. The larger number indicates the steeper the inclination would be). Adjusting the speed: Use to adjust, or press the Shortcut Keys (There are four levels available 3/6/9/12. The larger number indicates the faster the speed would be). AT100 Smart Treadmill...
- Page 37 4) End an Activity: 4-1) On Ala Fitness: Select [Unlock]> [Pause] > [Stop] to end the activity. 4-2) On the Console: Press STOP twice to stop. On the「Workout Summary」display, press the STOP key to return to standby mode. 4-3) Swipe left or right on Ala Fitness to view workout summary. 4-4) If you would like to save this record, select .
-
Page 38: Maintenance
To avoid damaging the belt, please apply treadmill silicone oil; DO NOT apply petroleum-based degreaser. DO NOT operate the machine if any part is found broken, worn, or malfunctioned. Please contact your local distributor for maintenance services before resume to use. AT100 Smart Treadmill... -
Page 39: Belt Adjustment
7 Belt Adjustment 7.1 Center the Belt Different running postures and habits could cause the belt to shift to the sides. If the belt is off-centered, please calibrate it accordingly. 1. Tools: 6mm Hex Key. 2. Press the START button to start the treadmill, keeping the speed between 8~10 km/h. 3. -
Page 40: Adjusting Belt Tension
If the belt did not stop when being dragged by sudden force, it means it is in proper tightness. 6. Once the testing is completed, press the STOP button three times to stop the belt. AT100 Smart Treadmill... -
Page 41: Lubrication
8 Lubrication Please lubricate the belt on a regular basis. This would prolong the product lifespan by reducing the friction between the belt and the deck and ensure better operational performance. Please lubricate when the mileage reaches 100 km or the word “LUBE” appeared on the screen. -
Page 42: Specification
Cloud Integration GPTfit ALATECH Heart Rate Chest Strap CS009/CS010/CS011/CS012 Selective Accessories ATTACUS Optical Heart Rate Armband Obeat1/Obeat3 ATTACUS GPS Watch Star ONE/Star 2 After Sale Services (Only applies to Taiwan area) Attacus International 39F., No.758, Zhongming S. Rd., South Dist., Taichung City 40255, Taiwan (R.O.C.) Customer Service line: 0800-608341 Operating Hours:Mon.-Fri. -
Page 43: Appendix
10 Appendix 10.1 Exploded View Operation Guide... - Page 44 Designed in Taiwan, made in China. 2023/10 V2 © 2023 ALATECH Technology Limited.
Need help?
Do you have a question about the AT100 and is the answer not in the manual?
Questions and answers