
Related Manuals for Toshiba MW2-AC25T(BK)


Summary of Contents for Toshiba MW2-AC25T(BK)
- Page 1 INSTRUCTION MANUAL MICROWAVE OVEN MW2-AC25T(BK) Please review this instruction manual before operating.
-
Page 2: Table Of Contents
CONTENTS PRODUCT SAFETY Precautions to avoid possible exposure to excessive microwave energy ........EN-01 Important safety instructions ........................EN-03 To reduce the risk of injury to persons grounding installation ............EN-08 Cleaning ................................EN-10 Utensils .................................. EN-11 Materials you can use in microwave oven ....................EN-12 Materials can not be used in microwave oven .................. -
Page 3: Product Safety
PRODUCT SAFETY PRECAUTIONS TO AVOID POSSIBLE EXPOSURE TO EXCESSIVE MICROWAVE ENERGY (a). Do not attempt to operate this oven with the door open since open door operation can result in harmful exposure to microwave energy. It is important not to defeat or tamper with the safety interlocks. -
Page 4: Specifications
SPECIFICATIONS MW2-AC25T(BK) Model: Rated Voltage: 230-240V~50Hz Rated Input Power (Microwave): 1450-1500W Rated Output Power (Microwave): 900-950W Rated Input Power (Grill): 1100-1150W Rated Input Power (Convection): 2100-2250W All pictures in this manual are for illustrative purposes only; these may be slightly different from the purchased equipment, please refer to the NOTE actual product. -
Page 5: Important Safety Instructions
IMPORTANT SAFETY INSTRUCTIONS To reduce the risk of fire, electric shock, injury to persons or exposure to excessive microwave oven energy when using your appliance, follow basic WARNING precautions, including the following: Keep the appliance and Read and follow the its cord out of reach of specific: "PRECAUTIONS children less than 8 years. - Page 6 IMPORTANT SAFETY INSTRUCTIONS When heating food in manufacturer, its service plastic or paper containers, agent or similarly qualified keep an eye on the oven persons in order to avoid a due to the possibility of hazard. ignition. WARNING: Ensure that the appliance is switched off Only use utensils that before replacing the lamp...
- Page 7 IMPORTANT SAFETY INSTRUCTIONS result in a hazardous checked before situation. consumption, in order to avoid burns. Only use the temperature The oven should be probe recommended cleaned regularly and any for this oven. (for ovens food deposits removed. provided with a facility to Please keep the waveguide use a temperature-sensing area clean.
- Page 8 IMPORTANT SAFETY INSTRUCTIONS the oven under adult The microwave oven is supervision due to the intended for heating food temperatures generated. and beverages. Drying of food or clothing and heating of warming pads, Eggs in their shell and slippers, sponges, damp whole hard-boiled eggs cloth and similar may lead should not be heated in...
- Page 9 IMPORTANT SAFETY INSTRUCTIONS The appliances are not Metallic containers for food intended to be operated by and beverages are not means of an external timer allowed during microwave or separate remote-control cooking. system. The appliance shall not be cleaned with a steam cleaner.
-
Page 10: To Reduce The Risk Of Injury To Persons Grounding Installation
TO REDUCE THE RISK OF INJURY TO PERSONS GROUNDING INSTALLATION This appliance must be grounded. In the event of an electrical short circuit, grounding reduces the risk of electric shock by providing an escape wire for the electric current. This appliance is equipped with a cord having a grounding wire with a grounding plug. - Page 11 TO REDUCE THE RISK OF INJURY TO PERSONS GROUNDING INSTALLATION Electric Shock Hazard: Improper use of the grounding can result in electric shock. Do not plug into an outlet until appliance is properly installed and grounded. 1. A short power-supply cord is provided to reduce the risks resulting from becoming entangled in or tripping over a longer cord.
-
Page 12: Cleaning
CLEANING Be sure to unplug the appliance from the power supply. 1. Clean the cavity of the oven after using with a slightly damp cloth. 2. Clean the accessories in the usual way in soapy water. 3. The door frame and seal and neighbouring parts must be cleaned carefully with a damp cloth when they are dirty. -
Page 13: Utensils
UTENSILS Personal Injury Hazard: It is hazardous for anyone other than a competent person to carry out any service or repair operation that involves the removal of a cover which gives protection against exposure to microwave energy. See the instructions on " Materials you can use in microwave oven "... -
Page 14: Materials You Can Use In Microwave Oven
MATERIALS YOU CAN USE IN MICROWAVE OVEN UTENSILS REMARKS Follow manufacturer’s instructions. The bottom of browning dish must be at least 3/16 inch (5mm) above the turntable. Incorrect usage may cause Browning dish the turntable to break. Microwave-safe only. Follow manufacturer’s instructions. - Page 15 MATERIALS YOU CAN USE IN MICROWAVE OVEN UTENSILS REMARKS Microwave-safe only. Follow the manufacturer’s instructions. Should be labeled “Microwave Safe”. Some plastic containers soften, as the food inside gets hot. “Boiling bags” and tightly closed plastic bags should be Plastic slit, pierced or vented as directed by package.
-
Page 16: Materials Can Not Be Used In Microwave Oven
MATERIALS CAN NOT BE USED IN MICROWAVE OVEN UTENSILS REMARKS May cause arcing. Transfer food into microwave-safe dish. Aluminum tray May cause arcing. Transfer food into microwave-safe dish. Food carton with metal handle Metal shields the food from microwave energy. Metal trim may cause arcing. -
Page 17: Product Setting
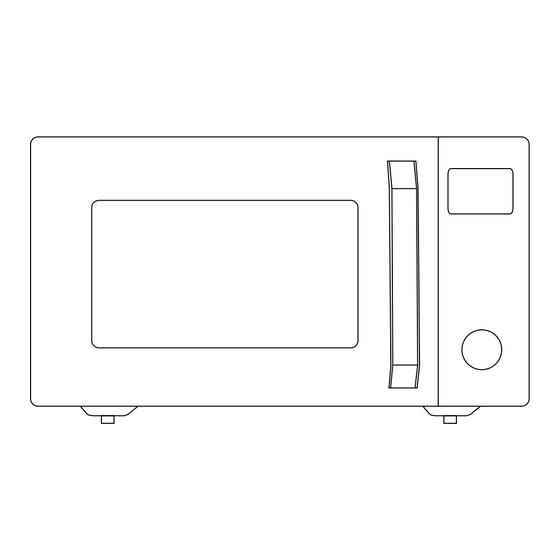
PRODUCT SETTING SETTING UP YOUR OVEN NAMES OF MICROWAVE OVEN PARTS AND ACCESSORIES Remove the oven and all materials from the carton and oven cavity. Glass Tray Grill Rack (Can be used under Instruction Manual ( Can not be used in microwave all functions) function and must be placed on the glass tray ) -
Page 18: Setting Up Your Oven
SETTING UP YOUR OVEN TURNTABLE INSTALLATION Cleaning the cooking compartment and putting the turntable in place. For new installations, make sure all packaging and shipping tape has been removed from the turntable shaft. Before using the appliance to prepare food for the first time, you will need to put the turntable in place correctly. -
Page 19: Countertop Installation
SETTING UP YOUR OVEN COUNTERTOP INSTALLATION Remove all packing material and accessories. Examine the oven for any damage such as dents or broken door. Do not install if oven is damaged. Cabinet: Remove any protective film found on the microwave oven cabinet surface. Do not remove the waveguide cover that is attached to the oven cavity to protect the magnetron. - Page 20 SETTING UP YOUR OVEN 2. Plug your oven into a standard household outlet. Be sure the voltage and the frequency is the same as the voltage and the frequency on the rating label. • Do not install oven over a range cooktop or other heat-producing appliance.
-
Page 21: Instruction For Use
INSTRUCTION FOR USE BEFORE USING FOR THE FIRST TIME The appliance may produce unpleasant odors when it is used for the first time. This section tells you what you need to do before using your microwave to prepare food for the first time. -
Page 22: Operation
OPERATION CONTROL PANEL Micro./Grill/Combi./Conv Weight/Time Defrost Clock/Kitchen Timer Stop/Clear Start/+30Sec./Confirm Turn the knob to select the function you need and cooking time,weight. EN-20... -
Page 23: Clock Setting
OPERATION INSTRUCTIONS This microwave oven uses modern electronic control to adjust cooking parameters to meet your needs better for cooking. 1. CLOCK SETTING " Clock/Kitchen Timer " once, In waiting state, press "00:00" displays. Hour figures flash. " to adjust the hour figures, the input time Turn "... -
Page 24: Microwave Cooking
OPERATION INSTRUCTIONS 2. MICROWAVE COOKING Press the " Micro./Grill/Combi./Conv " key once and , "P100" display . Press the " Micro./Grill/Combi./Conv " for times or turn " " to select the microwave power from 100% to 10%. "P100", "P80", "P50", "P30", "P10" will display in order. -
Page 25: Grill Cooking
OPERATION INSTRUCTIONS 3. GRILL COOKING Press the " Micro./Grill/Combi./Conv " key once, and "P100" displays. Press the " Micro./Grill/Combi./Conv " for times or turn " " to select the grill function. When "G-1" displays, it indicates grill function. Press " Start/+30Sec./Confirm " to confirm. Turn "... -
Page 26: Combination Cooking
OPERATION INSTRUCTIONS 4. COMBINATION COOKING the " Micro./Grill/Combi./Conv " key Press once, and "P100" displays. Press the " Micro./Grill/Combi./Conv " for times or turn " " to select the combination function. Stop turning when "C-1", "C-2","C-3","C-4" displays. Press " Start/+30Sec./Confirm " to confirm. Turn "... -
Page 27: Convection Cooking(With Preheating Funtion)
OPERATION INSTRUCTIONS 5. CONVECTION COOKING(WITH PREHEATING FUNTION) The convection cooking can let you to cook the food as a traditional oven. Microwave is not used. It is recommended that you should preheat the oven to the appropriate temperature before placing the food in the oven. Press the "... -
Page 28: Convection Cooking( Without Pre-Heating Function)
OPERATION INSTRUCTIONS • Cooking time cannot be input until the preheating temperature arrives. If the temperature arrives, door must be opened to input the cooking time. NOTE • If the time not input in 5 minutes, the oven will stop preheating. The buzzer sound five times and turn back to waiting states. -
Page 29: Multi-Stage Cooking
OPERATION INSTRUCTIONS 7.MULTI-STAGE COOKING Two stages can be maximumly set. If one stage is defrosting, it will be put in the first stage automatically. The buzzer will ring once after each stage and the next stage will begin. NOTE Auto menu and preheating cannot be set as one of the multi-stage. Example: if you want to defrost the food for 5 minutes, then to cook with 80% microwave power for 7 minutes. -
Page 30: Kitchen Timer
OPERATION INSTRUCTIONS Turn " " to adjust the cooking time of 7 minutes; Press " Start/+30Sec./Confirm " to start cooking. 8. KITCHEN TIMER In waiting state, press " Clock/Kitchen Timer " twice, "00:00" displays. Turn " " to adjust the timer. The MAX.time is 95 minutes. -
Page 31: Speedy Cooking
OPERATION INSTRUCTIONS SPEEDY COOKING In waiting state, press " Start/+30Sec./Confirm " key to cook with 100% power level for 30 seconds. Each press on the same key can increase 30 seconds. The maximum cooking time is 94 minutes and 59 seconds. During microwave, grill, convection and combination states, press... -
Page 32: Auto Menu Chart
OPERATION INSTRUCTIONS Turn " " to choose the weight of menu,and "g" indicator will light. Press " Start/+30Sec./Confirm " to start cooking. Cake menu is under convection cooking with 180°C-warm-up function, and you should preheat first following the auto menu operation, when the oven NOTE reaches the temperature, it will stop working and sound to remind opening the door to put cake in, then press "... - Page 33 OPERATION INSTRUCTIONS Display Menu Weight Power 150g 250g 350g Fish 450g 650g 50g(with water 450ml) 100g(with water 800ml) Pasta 150g(with water 1200ml) 200ml 400ml 100% Soup 600ml A8 Cake Preheat at 160 degrees 475g 200g C -2 300g Pizza 400g 500g 750g Chicken...
-
Page 34: Defrost By Time
OPERATION INSTRUCTIONS Press " Start/+30Sec./Confirm " key to start defrosting. 12. DEFROST BY TIME Press " Weight/Time Defrost " key twice, the oven will display "d-2" . Turn " " to select the cooking time. The maximum setting time is 95 minutes. Press "... -
Page 35: Lock-Out Function For Children
OPERATION INSTRUCTIONS 14. TURNTABLE RESET FUNCTION When cooking finished, if the turntable is not at the initial position, it will enter the turntable reset function. At this time, the lamp, fan and turntable are working, LED enters dynamic display. The oven stops working and reminds cooking finished. -
Page 36: Appliance Front
CLEANING With good care and cleaning, your appliance will retain its appearance and remain fully functioning for a long time to come. We will explain here how you should correctly care for and clean your appliance. • Scratched glass in the appliance door may develop into a crack. Do not use a glass scraper, sharp or abrasive cleaning aids or detergents. - Page 37 CLEANING APPLIANCE FRONT PLATE Hot soapy water: Clean using a dish cloth and then dry with a soft cloth. Remove splashes and patches of limescale, grease, starch and albumin immediately. Corrosion can form under these patches or splashes. Do not use glass cleaners or metal or glass scrapers for cleaning.
-
Page 38: Maintenance
MAINTENANCE TROUBLE SHOOTING Check your problem by using the chart below and try the solutions for each problem. If the microwave oven still does not work properly, contact the nearest authorized service center. TROUBLE POSSIBLE CAUSE POSSIBLE REMEDY a. Electrical cord for oven is not a. - Page 40 #DetailsMatter...
- Page 41 MW2-AC25T(BK)
- Page 42 ..........................BG-01 .................... BG-03 ......BG-08 ............................... BG-10 ..........................BG-11 ..... BG-12 ....BG-14 ......................BG-15 ......................BG-19 ..............................BG-20 Отстраняване на проблеми........................BG-36...
- Page 43 ( ). (b). (c). BG-01...
- Page 44 MW2-AC25T(BK) 230-240 V~50 Hz 1450-1500 W 900-950 W 1100-1150 W 2100-2250 W BG-02...
- Page 45 : " ". BG-03...
- Page 46 BG-04...
- Page 47 – Важно е редовно да почиствате фурната и да се отървете от всякакви остатъци от храна. Благодарим ви, че поддържате чистотата в зоната на вълновода. Ако върху зоната на вълновода или кухината има остатъци от пръски храна, почистете ги с мека, влажна...
- Page 48 BG-06...
- Page 49 BG-07...
- Page 50 – BG-08...
- Page 51 (1). (2). (3). BG-09...
- Page 52 300 ml 100% BG-10...
- Page 53 " " " " . 250 ml BG-11...
- Page 54 5 mm BG-12...
- Page 55 BG-13...
- Page 56 BG-14...
- Page 57 BG-15...
- Page 58 ③ ① ③. ① ② • • • • • • BG-16...
- Page 59 85 cm. 30 cm. 20 cm. 30 cm (CM) 30 cm 0 cm 20 cm 20 cm 20 cm 20 cm >85 cm 0 cm BG-17...
- Page 60 • BG-18...
- Page 61 " " . 3. • • BG-19...
- Page 62 /+30 BG-20...
- Page 63 " ". "00:00". " ", 0 23. " ". " ", 0 59. " ", ":" • • " ", BG-21...
- Page 64 " ". "P100". " " " ", 100% 10%. "P100", "P80", "P50", "P30", "P10". " /+30 ", " ", 0:05 95:00.) " /+30 ", 0 – 1 1---5 : 10 5---10 : 30 10---30 30---95 P100 BG-22...
- Page 65 " ". "P100". " " " ", "G-1", " /+30 ", " ", 0:05 95:00.) " /+30 ", " /+30 ". BG-23...
- Page 66 " ". "P100". " " " ", "C-1", "C-2", "C-3" "C-4". " /+30 ", " ", 0:05 95:00.) " /+30 ", • BG-24...
- Page 67 " ". "P100". " " " ", 150°C 220°C. " /+30 ", " /+30 ", " ", " /+30 ", BG-25...
- Page 68 • – • " ". "P100". " " " ", 150°C 220°C. " /+30 ", " ", " /+30 ", BG-26...
- Page 69 " " "d-2". " ", " ". " ", "P80". " /+30 ", BG-27...
- Page 70 " ", " /+30 ", " " "00:00". " ", , 95 " /+30 ", • • BG-28...
- Page 71 " /+30 " 100% " " " " " /+30 " 100% " " "A1" "A10". " /+30 ", BG-29...
- Page 72 " ", "g" " /+30 ", 180°C. " /+30 ", 150 g 250 g 350 g 100% 450 g 600 g 1 ( . 230 g) 2 ( . 460 g) 100% 3 ( . 690 g) 150 g 300 g 100% 450 g 600 g...
- Page 73 150 g 250 g 350 g 450 g 650 g 50 g ( 450 ml 100 g ( 800 ml 150 g ( 1200 ml 200 ml 400 ml 100% 600 ml 475 g 160°C. 200 g 300 g 400 g 500 g 750 g 1000 g...
- Page 74 " /+30 ", " " "d-2". " ", " /+30 ", " ". " ", BG-32...
- Page 75 • • • " " 0:00. " " " /+30 ". " /+30 " BG-33...
- Page 76 • • • BG-34...
- Page 77 BG-35...
- Page 78 BG-36...
- Page 79 Гаранционният срок на продуктите с марка е 36м. ( с думи: тридесет и шест) месеца и започва да TOSHIBA тече от датата на покупката. За дата на покупката се смята датата на съответния платежен документ, издаден от продавача – данъчна фактура и/или касов бон, а при лизинг от датата на получаване на стоката.
- Page 80 При неправилно инсталиран софтуер от потребителя Когато не са спазени условията за експлоатация, съхранение и транспорт. При причинени повреди от неправилно боравене, претоварване, механични повреди, сътресение, удар, въздействие на температура, влага или други фактори извън допустимите граници, прах, предмети, растения, животни...
- Page 81 3. несъответствието е толкова сериозно, че оправдава незабавно намаляване на цената или разваляне на договора за продажба, или 4. продавачът е заявил или от обстоятелствата е ясно, че продавачът няма да приведе стоката в съответствие в разумен срок или без значително неудобство за потребителя. (5) Потребителят...
- Page 82 + 359 24284 112, warranty@asbis.bg : 0700 10 218; https://bgs.bg ; e-mail: o ce@bgs.bg : ........BG-40...
- Page 84 #DetailsMatter ASBIS Bulgaria EOOD 1528 Sofia, Bulgaria, 7 Iskarsko Shouse blvd, Building 3...
- Page 85 BRUGERVEJLEDNING MIKROBØLGEOVN MW2-AC25T(BK) Læs denne brugervejledning, før du betjener apparatet.
- Page 86 INDHOLD PRODUKTSIKKERHED Forholdsregler for at undgå mulig eksponering for kraftig mikrobølgeenergi ....... DA-01 Vigtige sikkerhedsanvisninger ........................DA-03 Installation af jordforbindelse fo at reducere risiko for personskade .......... DA-08 Rengøring ................................DA-10 Redskaber ................................DA-11 Materialer, du kan bruge i mikrobølgeovnen ..................DA-12 Materialer, du ikke kan bruge i mikrobølgeovnen ................
-
Page 87: Produktsikkerhed
PRODUKTSIKKERHED FORHOLDSREGLER FOR AT UNDGÅ MULIG EKSPONERING FOR KRAFTIG MIKROBØLGEENERGI (a). Forsøg ikke at betjene ovnen med døren åben, da betjening med døren åben kan medføre farlig eksponering for mikrobølgeenergi. Det er vigtig ikke at besejre eller manipulere sikkerhedslåsene. (b). Du må ikke anbringe genstande mellem ovnens forside og ovndøren eller lade skidt eller rengøringsrester ophobes på... - Page 88 SPECIFIKATIONER Model: MW2-AC25T(BK) Nominel spænding: 230-240 V~ 50 Hz Nominel indgangseffekt (mikrobølge): 1.450-1.500 W Nominel udgangseffekt (mikrobølge): 900-950 W Nominel indgangseffekt (grill): 1.100-1.150 W Nominel indgangseffekt (konvektion): 2.100-2.250 W Alle billeder i denne vejledning er kun vejledende. Disse kan afvige lidt fra dem på...
-
Page 89: Vigtige Sikkerhedsanvisninger
VIGTIGE SIKKERHEDSANVISNINGER For at reducere risiko for brand, elektriske stød, personskade eller eksponering for kraftig mikrobølgeenergi fra ovnen, når du bruger ADVARSEL apparatet, skal du følge grundlæggende forholdsregler, herunder følgende: Læs og følg de bestemte: Hold apparatet og "FORHOLDSREGLER ledningen utilgængeligt FOR AT UNDGÅ... - Page 90 VIGTIGE SIKKERHEDSANVISNINGER Når du opvarmer servicecenter eller madvarer i plastik- eller tilsvarende kvalificerede papirbeholdere, skal du teknikere for at undgå holde øje med ovnen, da fare. der er mulighed for antændelse. ADVARSEL: Sørg for, at apparatet er slukket, inden Brug kun redskaber, du udskifter pæren, for at der er egnede til brug i undgå...
- Page 91 VIGTIGE SIKKERHEDSANVISNINGER negativt og muligvis omrøres eller rystes, og medføre en farlig temperaturen skal situation. kontrolleres før indtagelse for at undgå forbrændinger. Brug kun stegetemperaturspyddet, Det er vigtigt at rengøre der anbefales til ovnen ovnen regelmæssigt og (gælder for ovne med en erne eventuelle madrester.
- Page 92 VIGTIGE SIKKERHEDSANVISNINGER under tilsyn af en voksen Mikrobølgeovnen er på grund af de opnåede beregnet til opvarmning af temperaturer. mad- og drikkevarer. Tørring af madvarer eller tøj og opvarmning af varmepuder, Æg i deres skal og hele tøfler, svampe, fugtige hårdkogte æg må...
- Page 93 VIGTIGE SIKKERHEDSANVISNINGER Apparaterne er ikke Metalliske beholdere til beregnede til brug mad- og drikkevarer er med en ekstern timer ikke tilladt under eller et separat mikrobølgetilberedning. fjernbetjeningssystem. Apparatet må ikke rengøres med damprenser. LÆS OMHYGGELIGT, OG OPBEVAR TIL FREMTIDIG BRUG DA-07...
-
Page 94: Installation Af Jordforbindelse Fo At Reducere Risiko For Personskade
INSTALLATION AF JORDFORBINDELSE FOR AT REDUCERE RISIKOEN FOR PERSONSKADE Apparatet skal jordforbindes. I tilfælde af en elektrisk kortslutning reducerer jordforbindelsen risikoen for elektrisk stød ved at give elektrisk strøm en flugtledning. Apparatet er udstyret med en ledning, der er udstyret med en jordledning og et jordforbundet stik. - Page 95 INSTALLATION AF JORDFORBINDELSE FOR AT REDUCERE RISIKOEN FOR PERSONSKADE Risiko for elektrisk stød: Forkert anvendelse uden jordforbindelse kan føre til elektrisk stød. Sæt ikke stikket i stikkontakten, før apparatet er installeret og jordforbundet korrekt. 1. Der leveres en kort netledning for at reducere risiciene som følge af, at den vikler sig ind, eller at man snubler over en længere ledning.
-
Page 96: Rengøring
RENGØRING Sørg for at trække stikket på apparatet ud af strømforsyningen. 1. Rengør ovnrummet efter brug med en let fugtig klud. 2. Rengør tilbehøret på normal vis i sæbevand. 3. Dørkarmen, tætningen og de tilstødende dele skal rengøres omhyggeligt med en fugtig klud, når de er snavsede. 4. -
Page 97: Redskaber
REDSKABER Fare for personskade: Det er farligt for andre end en kvalificeret person at udføre evt. service- eller reparationsarbejde indebærende fjernelse af et dæksel, der giver beskyttelse mod eksponering for mikrobølgeenergi. Se vejledningen til "Materialer, du kan bruge i mikrobølgeovnen" eller "Materialer, du ikke kan FORSIGTIG bruge i mikrobølgeovnen"... -
Page 98: Materialer, Du Kan Brugei Mikrobølgeovnen
MATERIALER, DU KAN BRUGE I MIKROBØLGEOVNEN REDSKABER BEMÆRKNINGER Følg producentens anvisninger. En bageplades bund skal være mindst 5 mm over drejetallerkenen. Forkert brug kan få drejetallerkenen Stegefad til at gå i stykker. Kun mikrobølgesikker. Følg producentens anvisninger. Brug ikke revnede eller brækkede tallerkender. Bordservice Fjern altid låget. - Page 99 MATERIALER, DU KAN BRUGE I MIKROBØLGEOVNEN REDSKABER BEMÆRKNINGER Kun mikrobølgesikker. Følg producentens anvisninger. Skal være mærket "Mikrobølgesikker". Nogle plastbeholdere blødgøres, når maden indeni bliver varm. "Kogeposer" og tættillukkede plastikposer skal revnes, Plastik punkteres eller ventileres som angivet på pakken. Kun mikrobølgesikker. Bruges til at dække maden under tilberedning for at bevare fugtindholdet.
-
Page 100: Materialer, Du Ikke Kan Brugei Mikrobølgeovnen
MATERIALER, DU IKKE KAN BRUGE I MIKROBØLGEOVNEN REDSKABER BEMÆRKNINGER Kan medføre gnistdannelse. Overfør mad til en mikrobølgesikker tallerken. Aluminiumstallerken Kan medføre gnistdannelse. Overfør mad til en mikrobølgesikker tallerken. Mademballage med metalgreb Metal beskytter maden mod mikrobølgeenergi. Metalkanter kan forårsage gnistdannelse. Metalredskaber eller redskaber med metalkanter Kan forårsage gnistdannelse og dermed brand i... -
Page 101: Indstilling Af Produktet
INDSTILLING AF PRODUKTET SÅDAN KONFIGURERER DU DIN OVN NAVNE PÅ MIKROBØLGEOVNENS DELE OG TILBEHØR Tag ovnen ud samt alt materiale fra kassen og ovnrummet. Glastallerken Grillrist (kan bruges med Brugervejledning (kan ikke bruges i alle funktioner) mikrobølgefunktionen og skal anbringes på glastallerkenen) A. -
Page 102: Sådan Konfigurerer Du Din Ovn
SÅDAN KONFIGURERER DU DIN OVN INSTALLATION AF DREJETALLERKENEN Sådan rengøres tilberedningsrummet og anbringes drejetallerkenen på plads. For nye installationer skal du sikre, at al emballage og forsendelsestape er fjernet fra drejetallerkenens aksel. Før du bruger apparatet til at tilberede mad første gang, skal du sætte drejetallerkenen korrekt på... - Page 103 SÅDAN KONFIGURERER DU DIN OVN INSTALLATION PÅ BORDPLADE Fjern alt emballeringsmateriale og tilbehør. Ovnen skal undersøges for eventuelle skader, som f.eks. buler eller ødelagt dør. Installér ikke, hvis ovnen er beskadiget. Kabinet: Fjern eventuelle beskyttende belægninger på over aden af mikrobølgeovnens kabinet.
- Page 104 SÅDAN KONFIGURERER DU DIN OVN 2. Sæt din ovn i en almindelig husholdningsstikkontakt. Sørg for, at spændingen og frekvensen svarer til spændingen og frekvensen på mærkaten med arbejdsværdier. • Installér ikke ovnen over et komfur eller andet varmeproducerende apparat. Hvis den installeres i nærheden eller over ADVARSEL en varmekilde, kan ovnen beskadiges, og garantien kan ugyldiggøres.
-
Page 105: Brugsanvisning
BRUGSANVISNING FØR DU BRUGER APPARATET FØRSTE GANG Apparatet kan producere ubehagelige lugte, når det bruges første gang. Dette afsnit fortæller dig, hvad du skal gøre, før du bruger din mikrobølgeovn til at tilberede mad første gang. Læs på forhånd afsnittet "VIGTIGE SIKKERHEDSANVISNINGER" på side 3. Før du kan bruge dit nye apparat, skal du sætte drejetallerkenen korrekt på... -
Page 106: Betjening
BETJENING KONTROLPANEL Mikro./Grill/Kombi./Konv. Vægt/Optøningstid Ur/køkkentimer Stop/Ryd Start/+30 sek./Bekræft Drej knappen for at vælge den ønskede funktion, tilberedningstid og vægt. DA-20... - Page 107 BETJENINGSVEJLEDNING Denne mikrobølgeovn benytter moderne elektronisk kontrol til at justere tilberedningsparametre for bedre at imødekomme dine tilberedningskrav. 1. URINDSTILLING skal trykke én gang på "Ur/køkkentimer" i ventetilstand, hvorefter "00:00" vises. Timetallene blinker. Drej " " for at justere timetallene. Den indtastede tid skal ligge i intervallet 0--23.
- Page 108 BETJENINGSVEJLEDNING 2. TILBEREDNING MED MIKROBØLGER Tryk én gang på knappen "Mikro./Grill/Kombi./ Konv.", hvorefter "P100" vises. Tryk flere gange på "Mikro./Grill/ Kombi./Konv.", eller drej " " for at ELLER vælge mikrobølgeeffekten i intervallet 100-10 %. "P100", "P80", "P50", "P30", "P10" vises i rækkefølge. Tryk på...
-
Page 109: Tilberedning Med Grill
BETJENINGSVEJLEDNING 3. TILBEREDNING MED GRILL Tryk én gang på knappen "Mikro./Grill/Kombi./Konv.", hvorefter "P100" vises. Tryk flere gange på "Mikro./Grill/Kombi./ Konv.", eller drej " " for at vælge ELLER grillfunktionen. Når "G-1" vises, angiver det grillfunktionen. Tryk på "Start/+30 sek./Bekræft" for at bekræfte. Drej "... - Page 110 BETJENINGSVEJLEDNING 4. KOMBINATIONSTILBEREDNING Tryk én gang på knappen "Mikro./Grill/Kombi./ Konv.", hvorefter "P100" vises. Tryk flere gange på "Mikro./Grill/Kombi./ Konv.", eller drej " " for at vælge ELLER kombinationsfunktionen. Stop med at dreje, når der vises "C-1", "C-2", "C-3", "C-4". Tryk på "Start/+30 sek./Bekræft"...
- Page 111 BETJENINGSVEJLEDNING 5. KONVEKTIONSTILBEREDNING (MED FORVARMNINGSFUNKTION) Med konvektionstilberedning kan du tilberede mad som i en traditionel ovn. Mikrobølger bruges ikke. Det anbefales, at du forvarmer ovnen til den passende temperatur, før du sætter maden i ovnen. Tryk én gang på knappen "Mikro./Grill/Kombi./Konv.", hvorefter "P100"...
- Page 112 BETJENINGSVEJLEDNING • Tilberedningstiden kan ikke indtastes, før forvarmningstemperaturen er nået. Hvis temperaturen nås, skal døren åbnes for at indtaste tilberedningstiden. BEMÆRK • Hvis tiden ikke indtastes inden for 5 minutter, stopper ovnen med at forvarme. Brummeren lyder fem gange og vender tilbage til ventetilstand. 6.
- Page 113 BETJENINGSVEJLEDNING 7. TILBEREDNING I FLERE FASER Der kan højst indstilles to faser. Hvis en af faserne er optøning, indstilles den automatisk som den første fase. Brummeren ringer én gang efter hver fase, og den næste fase begynder. BEMÆRK Automatisk menu og forvarmning kan ikke indstilles som en af de flere faser. Eksempel: Hvis du vil optø...
- Page 114 BETJENINGSVEJLEDNING Drej " " for at indstille tilberedningstiden på 7 minutter; Tryk på "Start/+30 sek./Bekræft" for at starte tilberedningen. 8. KØKKENTIMER skal trykke to gange på "Ur/køkkentimer" i ventetilstand, hvorefter "00:00" vises. Drej " " for at justere timeren. Den maksimale tid er 95 minutter. Tryk på...
-
Page 115: Automatisk Menu
BETJENINGSVEJLEDNING 9. HURTIG TILBEREDNING Du skal trykke på knappen "Start/+30 sek./Bekræft" i ventetilstand for at tilberede med 100 % effektniveau i 30 sekunder. Hvert tryk på samme knap kan forøge tilberedningstiden med 30 sekunder. Den maksimale tilberedningstid er 94 minutter og 59 sekunder. Hvis du trykker på... - Page 116 BETJENINGSVEJLEDNING Drej " " for at vælge vægten i menuen, hvorefter indikatoren for "g" lyser. Tryk på "Start/+30 sek./Bekræft" for at starte tilberedningen. Menuen Kage er under konvektionstilberedning med funktionen til opvarmning ved 180 °C. Du skal først forvarme efter betjening af den automatiske menu. Når BEMÆRK ovnen når temperaturen, holder den op med at fungere og lyder for at påminde dig om at åbne døren og sætte kagen i, hvorefter du skal trykke på...
- Page 117 BETJENINGSVEJLEDNING Menu Vægt Effekt 150 g 250 g 80 % 350 g Fisk 450 g 650 g 50 g (med vand 450 ml) 100 g (med vand 800 ml) 80 % Pasta 150 g (med vand 1.200 ml) 200 ml 400 ml 100 % Suppe...
-
Page 118: Optøning Efter Tid
BETJENINGSVEJLEDNING Tryk på knappen "Start/+30 sek./Bekræft" for at starte optøningen. 12. OPTØNING EFTER TID Tryk to gange på knappen "Vægt/Optøningstid", hvorefter ovnen viser "d-2". Drej " " for at vælge tilberedningstiden. Den maksimale indstillingstid er 95 minutter. Tryk på knappen "Start/+30 sek./Bekræft"... - Page 119 BETJENINGSVEJLEDNING 14. FUNKTION TIL NULSTILLING AF DREJETALLERKEN Hvis drejetallerkenen ikke er i startpositionen, når tilberedningen er færdig, slås funktionen til nulstilling af drejetallerkenen til. På dette tidspunkt er lampen, ventilatoren og tallerkenen i drift. LED'en går i dynamisk visning. Ovnen holder op med at fungere og påminder dig om, at tilberedningen er færdig.
- Page 120 RENGØRING Ovnen beholder sit udseende med god pleje og rengøring og kan bruges i mange år fremover. Her forklarer vi, hvordan du skal pleje og rengøre apparatet korrekt. • Ridset glas i apparatets dør kan udvikles til en revne. Brug ikke en glasskraber eller skarpe eller slibende rengøringshjælpemidler eller rengøringsmidler.
- Page 121 RENGØRING APPARATETS FORFLADE Varmt sæbevand: Rengør med et viskestykke, og aftør så med en blød klud. Fjern sprøjt og kalk-, fedt-, stivelses- og albuminpletter med det samme. Der kan dannes korrosion under disse pletter eller sprøjt. Brug ikke præparater til rengøring af glas eller metal- eller glasskrabere til rengøring.
-
Page 122: Vedligeholdelse
VEDLIGEHOLDELSE FEJLFINDING Prøv løsningerne for hvert problem efter at have brugt skemaet nedenfor til at kontrollere dit problem. Kontakt det nærmeste autoriserede serviceværksted, hvis mikrobølgeovnen stadig ikke fungerer korrekt. FEJL SANDSYNLIG ÅRSAG MULIG LØSNING a. Ovnens elektriske ledning er a. Tilslut til stikkontakten. ikke sat i stikkontakten. - Page 123 GARANTI I BEVIS Dette produkt er omfattet af 2 års reklamationsret, der fastslår, at det er fri for materiale- og fabrikationsfejl i en periode på 2 år fra købsdatoen. Denne reklamationsret er gældende fra den dato, hvor mikroovnen er købt og kan ikke overdrages.
- Page 124 #DetailsMatter NSI Electronic Delta 1, DK-8382 Hinnerup...
- Page 125 MANUAL DE INSTRUC IUNI CUPTOR CU MICROUNDE MW2-AC25T(BK) Vă rugăm să consulta i acest manual de instruc iuni înainte de utilizare.
- Page 126 CUPRINS SIGURAN A PRODUSULUI Precau ii pentru evitarea expunerii posibile la energie excesivă de microunde ..... RO-01 Instruc iuni importante de siguran ă ...................... RO-03 Instala ie de împământare pentru reducerea riscului de vătămare a persoanelor ....RO-08 Cură area ................................RO-10 Utensile ................................
-
Page 127: Siguran A Produsului
SIGURAN A PRODUSULUI PRECAU II PENTRU EVITAREA EXPUNERII POSIBILE LA ENERGIE EXCESIVĂ DE MICROUNDE (a). Nu încerca i să folosi i acest cuptor cu u a deschisă, deoarece acest lucru poate duce la o expunere dăunătoare la energia cuptorului cu microunde. Este important să... - Page 128 SPECIFICA II Model: MW2-AC25T(BK) Tensiune nominală: 230-240 V~50 Hz Putere nominală intrare (Microunde): 1450-1500 W Putere nominală ie ire (Microunde): 900-950 W Putere nominală intrare (Grill): 1100-1150 W Putere nominală de intrare (Convec ie): 2100-2250 W Toate imaginile din acest manual au doar scop ilustrativ; acestea pot fi u or diferite de echipamentele achizi ionate, vă...
-
Page 129: Instruc Iuni Importante De Siguran Ă
INSTRUC IUNI IMPORTANTE DE SIGURAN Ă Pentru reducerea riscului de incendiu, electrocutare, vătămare personală sau expunere excesivă la energia generată de microunde, respecta i AVERTISMENT precau iile elementare, inclusiv următoarele: Nu lăsa i aparatul i cablul Citi i i respecta i de alimentare la îndemâna instruc iunile specifice: copiilor mai mici de 8 ani. - Page 130 INSTRUC IUNI IMPORTANTE DE SIGURAN Ă La încălzirea alimentelor în service al acestuia sau de recipiente din plastic sau persoane cu o calificare hârtie supraveghea i similară pentru a evita orice cuptorul, deoarece există pericol. posibilitatea aprinderii. AVERTISMENT: Asigura i-vă că aparatul este oprit înainte de a Folosi i numai ustensile înlocui lampa, pentru a...
- Page 131 INSTRUC IUNI IMPORTANTE DE SIGURAN Ă afecta durata sa de trebuie verificată înainte de utilizare i poate genera o consum, pentru a evita situa ie periculoasă. arsurile. Este important să cură a i în Utiliza i numai sonda de mod regulat cuptorul și să temperatură...
- Page 132 INSTRUC IUNI IMPORTANTE DE SIGURAN Ă unui adult, din cauza Cuptorul cu microunde este temperaturilor generate. destinat încălzirii alimentelor i băuturilor. Uscarea alimentelor sau a hainelor i Ouăle în coajă i ouăle fierte încălzirea pernelor termice, a întregi, tari nu trebuie papucilor, bure ilor, lavetelor încălzite în cuptorul cu umede i a altor articole...
- Page 133 INSTRUC IUNI IMPORTANTE DE SIGURAN Ă Aparatele nu sunt concepute Recipientele metalice pentru pentru a fi ac ionate cu alimente i băuturi nu sunt ajutorul unui temporizator permise în timpul gătitului la extern sau al unui sistem microunde. separat de comandă de la distan ă.
- Page 134 INSTALA IA DE ÎMPĂMÂNTARE PENTRU REDUCEREA RISCULUI PENTRU PERSOANE Acest aparat trebuie să fie legat la pământ. În cazul unui scurtcircuit electric, împământarea reduce riscul de oc electric prin faptul că oferă un fir de evacuare a curentului electric. Acest aparat este echipat cu un cablu prevăzut cu un conductor de împământare cu techer de împământare.
- Page 135 INSTALA IA DE ÎMPĂMÂNTARE PENTRU REDUCEREA RISCULUI PENTRU PERSOANE Pericol de electrocutare: Utilizarea incorectă a împământării poate conduce la electrocutare. A nu se cupla aparatul la priză până când nu este instalat i împământat adecvat. 1. Pentru reducerea riscului de încurcare sau împiedicare într-un cablu lung, aparatul este prevăzut cu un cablu de alimentare scurt.
-
Page 136: Cură Area
CURĂ AREA Nu uita i să scoate i aparatul din sursa de tensiune. 1. Cură a i cavitatea cuptorului după utilizare cu o cârpă u or umedă. 2. Cură a i accesoriile în mod obi nuit cu apă cu săpun. 3. - Page 137 USTENSILE Pericol de vătămare personală: Este periculos pentru oricine, cu excep ia unei persoane calificate, să efectueze orice opera ie de service sau repara ie care implică îndepărtarea unui capac de protec ie împotriva expunerii la energia degajată de microunde. Consulta i instruc iunile din „Materiale ce pot fi folosite în cuptorul cu ATEN IE microunde”...
-
Page 138: Materiale Pe Care Le Pute I Folosi În Cuptorul Cu Microunde
MATERIALE PE CARE LE PUTE I FOLOSI ÎN CUPTORUL CU MICROUNDE USTENSILE REMARCI Urma i instruc iunile producătorului. Partea inferioară a platoului trebuie să aibă minimum 3/16 inch (5 mm) deasupra păcii rotative. Utilizarea Platou pentru rumenit incorectă poate provoca spargerea platanului. Numai pentru cuptorul cu microunde. - Page 139 MATERIALE PE CARE LE PUTE I FOLOSI ÎN CUPTORUL CU MICROUNDE USTENSILE REMARCI Numai pentru cuptorul cu microunde. Urma i instruc iunile producătorului. Ar trebui să fie etichetat „Sigur pentru microunde”. Unele recipiente din plastic se înmoaie, pe măsură ce alimentele din interior devin fierbin i.
-
Page 140: Materiale Pe Care Nu Le Pute I Folosi În Cuptorul Cu Microunde
MATERIALE PE CARE NU LE PUTE I FOLOSI ÎN CUPTORUL CU MICROUNDE USTENSILE REMARCI Poate provoca arc. Transfera i alimentele într-un vas sigur pentru microunde. Tavă din aluminiu Poate provoca arc. Transfera i alimentele într-un vas sigur pentru microunde. Carton de alimente cu mâner metalic Metalul protejează... -
Page 141: Configurarea Produsului
CONFIGURAREA PRODUSULUI CONFIGURAREA CUPTORULUI NUMELE PĂR ILOR I ACCESORIILOR CUPTORULUI CU MICROUNDE Scoate i cuptorul i toate materialele din cutie i din cavitatea cuptorului. Tavă de sticlă Grătar (Poate fi folosit în Manual de (Nu poate fi folosit în func ia de toate func iile) instruc iuni cuptor cu microunde i trebuie... -
Page 142: Configurarea Cuptorului
CONFIGURAREA CUPTORULUI MONTAREA PLĂCII ROTATIVE Cură area compartimentului de gătit i punerea la loc a tăvii rotative. Pentru echipamente noi, asigura i-vă că toată banda de ambalare i de transport a fost îndepărtată de pe arborele plăcii rotative. Înainte de a utiliza aparatul pentru a pregăti alimente pentru prima dată, va trebui să a eza i corect placa rotativă. - Page 143 CONFIGURAREA CUPTORULUI MONTARE PE BLAT Scoate i toate materialele de ambalare i accesoriile. Examina i cuptorul de defecte, cum ar fi lovituri sau u ă spartă. Nu instala i dacă cuptorul este avariat. Cabinet: Scoate i orice înveliș de protec ie care se găsește pe suprafa a dulapului cuptorului cu microunde.
- Page 144 CONFIGURAREA CUPTORULUI 2. Conecta i cuptorul la o priză standard de uz casnic. Asigura i-vă că tensiunea i frecven a sunt acelea i cu tensiunea i frecven a de pe eticheta de identificare. • Nu monta i cuptorul pe o plită de gătit sau alt aparat care produce căldură.
-
Page 145: Instruc Iuni De Utilizare
INSTRUC IUNI DE UTILIZARE ÎNAINTE DE PRIMA UTILIZARE Aparatul poate produce mirosuri neplăcute atunci când este utilizat pentru prima dată. Această sec iune vă spune ce trebuie să face i înainte de a utiliza cuptorul cu microunde pentru a pregăti mâncarea pentru prima dată. Citi i în prealabil sec iunea intitulată „INSTRUC IUNI IMPORTANTE DE SIGURAN Ă”... -
Page 146: Func Ionarea
FUNC IONAREA PANOU DE COMANDĂ Dezghe are în func ie Micro./Grill/Combi./Conv de greutate/de timp Ceas/Cronometru Stop/ terge de bucătărie Start/+30Sec./Confirm Roti i butonul pentru a selecta func ia de care ave i nevoie i timpul de gătire, greutatea. RO-20... -
Page 147: Setarea Ceasului
INSTRUC IUNI DE UTILIZARE Acest cuptor cu microunde folose te o comandă electronică modernă de reglare a parametrilor de gătire, pentru a vă satisface mai bine nevoile. 1. SETAREA CEASULUI In starea de a teptare apăsa i „Ceas/Cronometru de bucătărie” o dată, „00:00” se va afi a. Cifrele orei vor licări. - Page 148 INSTRUC IUNI DE UTILIZARE 2. GĂTIRE LA MICROUNDE Apăsa i tasta „Micro./Grill/Combi./Conv” o dată si „P100” se afi ează. Apăsa i tasta „Micro./Grill/Combi./Conv” pentru timp sau roti i „ ” pentru a selecta puterea de microunde de la 100% la 10%. „P100”, „P80”, „P50”, „P30”, „P10”...
- Page 149 INSTRUC IUNI DE UTILIZARE 3. GĂTITUL LA GRĂTAR Apăsa i tasta „Micro./Grill/Combi./Conv” o dată i se va afi a „P100”. Apăsa i tasta „Micro./Grill/Combi./Conv” pentru timpi sau roti i „ ” pentru a selecta func ia de grătar. Când se afi ează „G-1”, acesta indică func ia grătar.
- Page 150 INSTRUC IUNI DE UTILIZARE 4. GĂTITUL COMBINAT Apăsa i tasta „Micro./Grill/Combi./Conv” o dată i se va afi a „P100”. Apăsa i tasta „Micro./Grill/Combi./Conv” pentru timpi sau roti i „ ” pentru a selecta func ia de combinare. Opri i rotirea când se afi ează „C-1”, „C-2”, „C-3”, „C-4”.
- Page 151 INSTRUC IUNI DE UTILIZARE 5. GĂTITUL PRIN CONVEC IE (CU FUNC IE DE PREÎNCĂLZIRE) Gătitul prin convec ie vă poate permite să găti i mâncarea ca i cum a i folosi un cuptor tradi ional. Nu se folosesc microundele. Se recomandă să preîncălzi i cuptorul la temperatura adecvată...
- Page 152 INSTRUC IUNI DE UTILIZARE • Timpul de gătire nu poate fi setat până când nu se atinge temperatura de preîncălzire. Dacă se atinge temperatura, trebuie deschisă u a pentru a introduce OBSERVA IE timpul de gătire. • Dacă nu se setează timpul în 5 minute, cuptorul se va opri din preîncălzit.
- Page 153 INSTRUC IUNI DE UTILIZARE 7. GĂTIRE ÎN MULTIPLE ETAPE Se pot seta maximum două etape. Dacă o etapă este de dezghe are, aceasta va fi pusă automat în prima etapă. Alarma sonoră va suna o dată după fiecare etapă i următoarea etapă...
- Page 154 INSTRUC IUNI DE UTILIZARE Roti i „ ” pentru a regla timpul de gătit la 7 minute; Apăsa i „Start/+30Sec./Confirm” pentru a începe gătitul. 8. CRONOMETRU DE BUCĂTĂRIE În starea de a teptare, apăsa i „Ceas/Cronometru de bucătărie” de două ori, se afi ează „00:00”. Roti i „...
-
Page 155: Gătire Rapidă
INSTRUC IUNI DE UTILIZARE 9. GĂTIRE RAPIDĂ În starea de a teptare, apăsa i tasta „Start/+30Sec./Confirm” pentru a găti cu un nivel de putere de 100% timp de 30 de secunde. Fiecare apăsare pe aceea i tastă poate mări timpul cu 30 de secunde. -
Page 156: Grafic Meniu Automat
INSTRUC IUNI DE UTILIZARE Roti i „ ” pentru a alege greutatea meniului i indicatorul „g” se va aprinde. Apăsa i „Start/+30Sec./Confirm” pentru a începe gătitul. Meniul de prăjituri este gătit prin convec ie cu func ie de încălzire la 180°C i trebuie să... - Page 157 INSTRUC IUNI DE UTILIZARE Afi aj Meniu Greutate Putere 150 g 250 g 350 g Pe te 450 g 650 g 50 g (cu apă 450 ml) 100 g (cu apă 800 ml) Paste 150 g (cu apă 1200 ml) 200 ml 400 ml 100%...
- Page 158 INSTRUC IUNI DE UTILIZARE Apăsa i tasta „Start/+30Sec./Confirm” pentru a începe dezghe area. 12. DEZGHE ARE ÎN FUNC IE DE TIMP Apăsa i tasta „Dezghe are în func ie de greutate/de timp” de două ori, cuptorul va afi a „d-2”. Roti i „...
- Page 159 INSTRUC IUNI DE UTILIZARE 14. FUNC IA DE RESETARE A TĂVII ROTATIVE La terminarea gătirii, dacă tava rotativă nu se află în pozi ia ini ială, va intra în func ia de resetare. În acest moment, lampa, ventilatorul i tava rotativă func ionează, LED-ul intră...
- Page 160 CURĂ AREA Cu o bună îngrijire i cură are, aparatul dumneavoastră î i va păstra aspectul i va rămâne pe deplin func ional pentru o lungă perioadă de timp. Vă vom explica aici cum trebuie să îngriji i i să cură a i corect aparatul. •...
- Page 161 CURĂ AREA PLACA FRONTALĂ A APARATULUI Apă fierbinte cu săpun: Cură a i cu o lavetă pentru vase i apoi usca i cu o lavetă moale. Îndepărta i imediat stropii i petele de calcar, grăsime, amidon i albumină. Sub aceste pete sau stropi se poate forma coroziune.
-
Page 162: Solu Ionarea Problemelor
MENTENAN Ă SOLU IONAREA PROBLEMELOR Încerca i solu iile pentru fiecare problemă după ce a i folosit tabelul de mai jos pentru a verifica problema dvs. Contacta i cea mai apropiată unitate de service autorizată dacă cuptorul cu microunde continuă să nu func ioneze corect. - Page 163 CERTIFICAT DE GARANȚIE Tip produs Cod produs: Model produs Serie produs: Perioadă de garanție VÂNZĂTOR (firma, localitate, semnătură, ștampilă) Data vânzării Factura / chitanța nr. NUMELE ȘI ADRESA IMPORTATORULUI SC MARELVI IMPEX SRL - str. Calea Cernăuți, nr. 114, Rădăuți, Suceava, office@marelvi.ro S-a efectuat proba de funcționare a aparatului, s-a prezentat modul de folosire, s-au predat instrucțiunile de utilizare și toate accesoriile.
- Page 164 Remedii incluse în garanţia legală de conformitate conform OUG nr. 140/2021 (vă rugăm să aveţi în vedere prevederile de mai jos) MARELVI IMPEX garantează toate drepturile legale prevăzute de OUG nr. 140/2021 în beneficiul consumatorilor cu privire la garanţia legală de conformitate. Dispoziţiile prezentului certificat de garanţie legală de conformitate se completează, în mod corespunzător, cu dispoziţiile OUG nr.
- Page 165 Consumatorul are dreptul de a suspenda plata unei părţi restante din preţul bunurilor sau a unei părţi a acesteia până în momentul în care vânzătorul îşi va fi îndeplinit obligaţiile care îi revin în temeiul legii - art. 11(6). Reducerea de preţ este proporţională...
- Page 166 și va fi prezentat împreună cu documentul fiscal de plată în cazul apariției unei defecțiuni. 5. Termenii de garanție pentru produsele la care se referă acest certificat sunt: - Toshiba electrocasnice: 3 ANI 6. Pentru reparații în perioada de garanție, apelați numai la unități de service abilitate.
- Page 168 #DetailsMatter S.C. Marelvi Impex S.R.L., str. Calea Cernăuți, nr. 114, Rădăuți, Suceava, România...
Need help?
Do you have a question about the MW2-AC25T(BK) and is the answer not in the manual?
Questions and answers