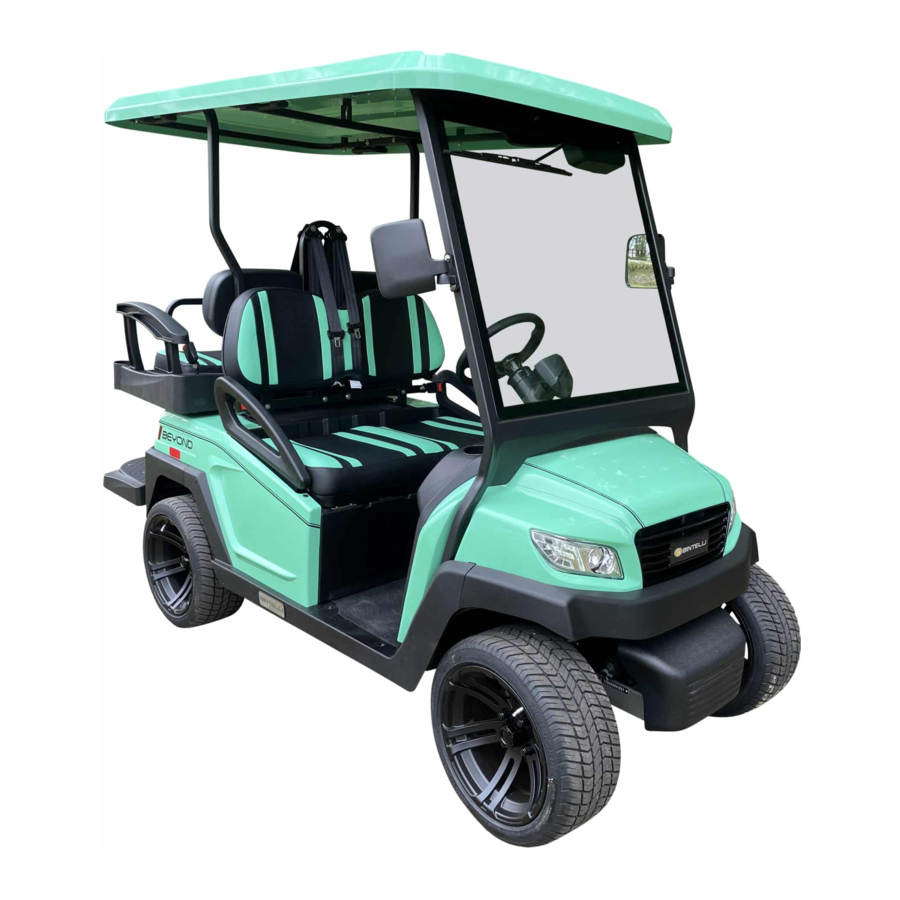
Advertisement
- 1 Introduction
- 2 Security Statements
- 3 Operating the Vehicle
- 4 Vehicle Information
- 5 Chassis Number
- 6 Dash Controls
- 7 LCD Meter
- 8 Tow/Run Switch (Also Off/On Switch)
- 9 Combination Switch
- 10 Radio
- 11 Safe Operation Instructions
- 12 Storing and Charging
- 13 Maintenance
- 14 Lead Acid Batteries
- 15 Lead Acid Battery Maintenance
- 16 Lead Acid Manual
- 17 Lead Acid Resources
- 18 Cleaning
- 19 Checking the terminal and nuts
- 20 Recharging
- 21 Curtis Meter
- 22 Watering
- 23 Lithium Batteries
- 24 Features for Users
- 25 Lithium Battery Care
- 26 Lithium Resources
- 27 Regular Maintenance Checklist
- 28 Client Responsibilities
- 29 Documents / Resources
Introduction
Your comfort and safety are very important to us, we strongly recommend that you read and follow the operating instructions in this manual, to avoid serious personal injury. Please make sure anyone operating your vehicle is familiar with the cart's functions.
Bintelli continually seeks advancements in product design and quality, therefore, while this manual contains the most current product information, please keep in mind there may be minor discrepancies between your actual golf cart and this manual. If you have any questions about your vehicle, please contact us or an authorized Bintelli dealership.
Security Statements
Please pay close attention to the statements marked as "Warning", "Danger", and "Caution". If any operating or safety warning sign on the vehicle is damaged, peeling, or blurred, it should be replaced immediately to prevent property damage, personal injury, or death.
This vehicle is limited to a certain number of passengers (including the driver). The number of passengers depends on the specific model, i.e. 2PR, 4PR, and 6PR.

Failure to comply with all safety warnings may cause bodily injury to the vehicle operator and/or passengers.
- Keep the entire body in the vehicle when in motion.
- Do not operate while under the influence of drugs or alcohol.
- Make sure all passengers are securely seated before driving.
- Engage the parking brake when the cart is parked or unattended.

The batteries in your vehicle are capable of delivering large levels of power that can cause injury and even death. For your safety, never smoke near the vehicle. It should be stored away from sparks or flames. Only use the appropriate charger for your vehicle. When working on or near the battery, always wear eye protection, protective clothing, and gloves.
Operating the Vehicle
Contact your local DMV for rules and regulations regarding who may legally operate the vehicle.
Switch the Tow/Run switch to the "Run" position. Make sure the Forward/Reverse switch is switched to Neutral before switching the ignition to "On". Do not forget to disengage the parking brake.
Once "On" switch the Forward/Reverse switch to the appropriate position.

Do NOT shift from Forward or Reverse while the vehicle is moving.
Please note your vehicle has regenerative braking and will start slowing down when the accelerator is not pressed.
Exercise caution in areas such as:
- Steep sloped
- Sharp bends
- Blind spots
- Wet or icy ground
- Keep your entire body inside the vehicle, keep seated, and hold on while the vehicle is moving.
- Do not start the vehicle until all occupants are securely seated.
- Do not start the vehicle until power has been unplugged.
- Keep your hands on the steering wheel and your eyes on the path you are going.
- Always back up slowly, and watch the back carefully.
- Avoid starting or stopping the vehicle suddenly.
- Avoid turning the steering wheel too sharply at high speed.
- Always drive slowly up or down any incline.
- Do not make any modifications or additions which may affect the capacity or safety of the vehicle.
Children are not allowed to play in the vehicle. Children should be seated between or next to an adult and protected by them when the vehicle is moving.
Vehicle Information
The VIN plate is located on the base of the seat as shown in Fig. 1 On a 4-passenger VIN plate is located on the base of the driver side. On the 6-passenger VIN plate is located on the base of the second row of seats.

Chassis Number
The Chassis number (also known as the serial number) is located on the passenger side behind the front wheel. It will be on a suspension of the cart, as pictured in Fig. 2

Dash Controls

- Combination Switch Fig. 5
- Speedometer/LCD Meter**See Fig. 3 for the breakdown of the speedometer controls**
- Lead Acid Battery Meter
- Parking Brake (4 Passenger)**Please note 6 Passenger will have a hand brake located on the base of the seat**
- Brake Pedal
- Accelerator Pedal
- Ignition
- Locking Glove Box
- Not pictured, Tow/Run Switch**Depending on the year of your cart it will either be located on the front dash to the left of the glove box or underneath the seat that contains the batteries see Fig. 4.**
LCD Meter

As shown in Fig. 3, it is used to display the status of the vehicle. All the below icons can be seen on the LCD Meter.
- The low beam icon will light up when the vehicle is in the low beam mode.
- The high beam icon will light up when the vehicle is in the high beam mode.
- Arrows will blink if the left or the right turn signal is on.
- When the parking brake is on the "P" to the left side of the meter will light up.
- When the vehicle is in motion, the speed will be shown on the meter.
- When there is a malfunction in the vehicle, a fault code will be displayed on the meter.
- Contact your local service center to have them diagnose the cause of the fault code and stop using the vehicle.
- When the vehicle has low voltage, the battery fault light will be on indicating the batteries need to be charged immediately.
- The number on the odometer is the current total mileage of the vehicle.
Tow/Run Switch (Also Off/On Switch)
")
Before operating the vehicle, make sure the Tow/Run switch is in the "Run" position. When towing or pushing the vehicle flip the switch to the "Tow" position.
Pushing or towing the vehicle while in the "Run" position will burn up the motor and the electrical components of the cart. This is a significant fire hazard.
Combination Switch

- Turn signals
- Push up to turn on the right turn signal.
- Push down to turn on the left turn signal.
- Headlights
- Low beams
- Pull towards you one click to turn on the low beam lights.
- High beams
- Pull towards you a second time to turn on the high beam lights.
- Low beams
- Horn
- Push in to activate the horn.
Radio
Instructions for Bluetooth: Turn on Bluetooth on the cellphone, search Bluetooth device name "BEYOND" and press connect. If the connection has been successful the word "CONNECT'' will be displayed on the radio screen. Once the pairing is complete, BT AUD mode will show in MOD function mode. In BT AUD mode, you can play music from your phone and answer phone calls by pressing the Volume button and hang up by pressing the BND button.

- POW/MOD
Short press to turn on, long press to shut down. If you are using the USB port, each short press will switch to another function: radio, USB, SD, AUX, or BT. - BND/AMS
Pressing this button will switch from FM1, FM2, and FM3, between the local radio stations. - SEL
Press to select the functions: BAS//LOUD/RTC.OFF
BAS: Bass adjustment
LOUD: Bass enhancement
RTC. OFF: Switch for the clock display On/Off - Press to lower volume
- Press to increase the volume
- TUNE/TRACK BUTTON
- TUNE/TRACK BUTTON
Short press to skip to the next track or go back to the previous track, long press to fast forward or rewind - PAU
On USB/SD mode use to PLAY/PAUSE - INT
On USB/SD mode pressing it gives a 10-second preview function - RPT
On USB/SD mode used to switch over from REP1, REP ALBUM, and REP ALL - RDM
On USB/SD mode use for RDM mode - CLK
Clock, press SEEK + to adjust the hour, SEEK - to adjust the minute
*** Please note if you wish you set the time on your vehicle, it will be reset every time the cart is turned off as the radio loses power every time the vehicle is turned off *** - MUT
Press to mute the sound, and press it again to recover the previous volume level - USB,
- AUX,
- Screen
Safe Operation Instructions
Our vehicles are designed for simple operations. However, please make sure to observe the following safe operation instructions. As with any new vehicle, always familiarize yourself with its controls. As well as perform checks on the battery, tires (recommended tire pressure is 30 psi), body/chassis, brakes, parking brake, and steering prior to operating the vehicle.
Always ensure that the key is removed before performing any of the above checks.
- Only authorized people should drive this vehicle, and from the driver's side only.
- Do not drive this vehicle on any public roads before it is registered and has the license plate attached.
- Only drive this vehicle where you are allowed by law or local regulations.
- Do not overload the vehicle, otherwise, the motor may be damaged, or the vehicle will lose control putting the driver and passengers in danger.
- Do not operate the vehicle under the influence of alcohol or drugs.
- Do not attempt to go uphill/slopes beyond its grade ability.
- Do not pass other vehicles at crossroads, blind areas, or any dangerous conditions.
- ALWAYS engage the parking brake when getting out of your vehicle.
Storing and Charging
If the vehicle needs to be stored for an extended period of time, perform the following actions:
- Fully charge the battery system
- Turn the "Tow/Run" switch to the "Tow" position.
- Remove the key and keep it in a safe place.
- Ensure each tire is reading 30 psi.
- Verify each battery is filled to the proper lever with distilled water (if using lead acid batteries) and all cable connections are secure.
- Clean the body, seats, battery box, and chassis.
- If storing outdoors, cover the vehicle with a storage cover.
- Plug in the onboard smart charger and leave it plugged in.
- Make sure to check the battery water level at least once a month and lubricate at least every six months.
- Monitor the battery connections and cables for corrosion, remove with soda water if necessary.
When the temperature where the vehicle is stored reaches higher than 95°F, check the water levels of the battery every 2 weeks. If the temperature reaches 0°F, always keep the batteries fully charged to prevent the water from freezing, resulting in loss of battery life.
Maintenance
The appropriate care must be used when performing maintenance, service, or accessory installation. Only trained technicians should service or repair the vehicle and/or battery charging system. Anyone doing even simple repairs or services should have knowledge and experience in electrical and mechanical repairs.
Before disconnecting or connecting the batteries, the Tow/Run switch must be in the "Tow" position. Failure to comply with this warning may result in battery failure leading to serious personal injury.
- When maintaining the vehicle or batteries, do not wear loose clothing or conductive jewelry such as rings, watches, and brackets.
- Insulated tools need to be used when working near the battery or power connections to prevent the cart from short-circuiting.
- Before working under the cart, make sure the parking brake is on, the cart is switched into the "Tow" position, and the key is removed from the ignition.
- Please keep all signs, warnings, and instructions provided by the manufacturer clear and untampered.
Lead Acid Batteries
Our standard vehicles are equipped with lead-acid batteries. The quantity of batteries will vary depending on the cart model. See Figure 1 and Figure 2 below for distinction.

Figure 1. Beyond 4 Passenger witha total of 6 lead acid batteries. Batteries are located in the 2nd row storage, underneath the flip seat.

Figure 2. Beyond 6 Passenger with a total of 8 lead acid batteries. Batteries are located in the Ist row storage, underneath the flip seat.
Battery electrolyte is poisonous and dangerous and may cause severe burns and injury.
Always wear gloves and protective eye gear when working around battery electrolytes.
KEEP OUT THE REACH OF CHILDREN.
Lead Acid Battery Maintenance
Vehicles with lead-acid batteries will need routine maintenance at least twice a month. We recommend checking weekly if the cart is being used frequently. Checklist for routine maintenance includes:
- Cleaning terminals and ensuring the surface is free of moisture and debris.
- Checking terminals and securing supportive hardware to batteries.
- Recharging batteries after every use.
- Checking water levels and distributing distilled fluid periodically.
Neglecting routine maintenance to your batteries can impact the longevity lead acid has to offer. It's important to be aware that improper management can cause further damage to your vehicle.

Before performing any maintenance to the batteries, it's essential to cut all power to the vehicle. To turn off the power supply, make sure the cart is in park, turn the Tow/Run switch to "Tow", and remove the key from the ignition. Once this has been completed, routine maintenance may begin.
Always keep sparks and Flames away from batteries including smoking. If you come in direct contact with the acid in the batteries, flush with large amounts of water.
Lead Acid Manual
For in depth information on how to perform each routine maintenance on your batteries, visit LeadAcidManual
Lead Acid Resources
Warranty Claims: Contact Continental Battery Systems Customer Experience (844) 935-1186 for any warranty questions/claims.
For additional questions and customer support, please contact your local dealer or Bintelli manufacturer.
Cleaning
Batteries can attract dust, dirt, and grime. Keeping them clean will help you spot signs of trouble if they appear, and avoid problems associated with grime.
Checking the terminal and nuts
The connection of the battery should always be kept in good condition. Please check every week whether any battery cable terminals or nuts have become loose in order to prevent any spark or damage to terminals. Check the battery cables for damages weekly, and replace any damaged battery cables immediately.
Do not place any objects on the battery and do not connect the positive pole to the negative pole. This may cause a short circuit, or dangerous spark or may cause damage to the battery or the user.
Recharging
Important for monitoring accurate battery data. Download the Lester app and follow the prompts to see the state of charge your batteries are reading and any other charging inquiries.
- The battery should be recharged daily AND after the vehicle is used. Any delay in the recharging will have a negative effect on the battery. Lead-acid batteries do not have a memory and therefore do not need to be fully discharged before recharging.
- Always keep the cart on charge unless specified in the charging link.
- Only use a dedicated 20 amp circuit when charging the batteries.
- If using an extension cord, make sure it's a 10/12 gauge only. No more than 25 ft.
Curtis Meter
 A
A
nother way to check lead acid battery charge is with the Curtis Meter.
This resource is located on your dash, to the left of the steering wheel. Although this does not give you an exact percentage reading as the lester app does, it allows you to monitor the vehicle's current state of charge.
Please make sure the battery is recharged BEFORE the battery power meter shows 20% or less. An overcharged battery will have a short service life.
Watering
Distilled water should always be added after fully charging. Before charging, there should be enough water to cover the plates. If the battery has been discharged (partially or fully), the water levels should be above the plates. Keeping the water at the correct level after a full charge, you will not have to worry about the water level at a different state of charge. Do not let the plates get exposed to air, this will cause them to corrode.
- Watering kits available through local dealers or visithttps://bintelliparts.com/
- Video instructionsLeadacidwateringvideo
Lithium Batteries
Lithium batteries are sealed and essentially maintenance free. While there is no fluid to add to the battery pack as you would a deep cycle battery, you still need to periodically check the cables and connections for tightness, ensure they are free of corrosion, recharge, and comprehend temperature and storage conditions.

Only licensed technicians should be performing maintenance on batteries with the exception of checking and cleaning terminals while the batteries and vehicle are fully powered off. Please contact your local dealer or Eco Support for anything other than routine battery care.
Features for Users

Power Button
Located on the side of the lithium battery. This feature is used for powering the batteries. If the power is not on, the cart will not run. This component is also important when performing maintenance to turn power off. For more details, visit the user link found in the Lithium Manual section.
There are different variations of lithium ion features in the Beyond editions. It's important to note that the state of charge feature will change depending on the charger in the cart.
For carts with a supported Eco charger, the state of charge meter is the EB LCD meter.

State of Charge Meter- ECO charger
Located on the front dash of your vehicle. This feature reads your battery voltage and charge. Just as a fuel gauge in a car, the State of Charge meter (SOC meter) lets you know in a percentage value how much power you have left in your batteries before you need to recharge. For more details, visit the user link found in the Lithium Manual section.
For Lithium batteries with the supportive charger being Lester, the state of charge reading will be on the speedometer LCD meter.

State of Charge- Lester Charger
Located on the upper left hand side of the speedometer display. This feature reads your current percentage left in the lithium battery. For more details on your lithium battery reading, download the lester app found in the Recharging section in lead acid.
Lithium Battery Care
Do not touch or attempt to secure terminal connection until the power is completely shut off to the vehicle. To disengage power, turn the tow/run switch to "tow", remove the key, and locate the power button on the lithium battery and switch it "off"(Power button shown on Figure 3).
The Power switch on the battery must be OFF before any interaction.
Lithium Check:
- Cleaning cables and ensuring the surface is free of moisture and debris.
- Checking cables and securing connections to Battery.
- Recharging batteries.
- Monitoring inactivity, long term storage, and colder temperatures.
Although Lithium batteries do not require the same type of routine maintenance as Lead Acid, it is still strongly recommended to use the proper suggested care to maintain their efficiency. This includes the Lithium Checklist and more detailed information noted in the user manual.
It's important to be aware that improper management can void warranties and cause further issues with the service of your vehicle.
Lithium Resources
Registering Eco Battery- 90 days after purchase for 8 year warranty Ecobatteryregistration
Submitting Warranty Claims- EcoBatteryWarrantyClaims
Eco Battery Support- support@ecobattery.com
For additional questions and customer support, please contact your local dealer or Bintelli manufacturer.
Regular Maintenance Checklist

Client Responsibilities
Batteries – Battery fluid must be checked at least once monthly for lead acid. Use distilled water only. Do not overfill.
Battery Cables – Tighten battery cables per battery manufacturer instructions located on batteries.
Failure to tighten once a month could result in damage to the batteries. BEFORE placing the vehicle into service, please check all battery cables and tighten as they may become loose due to turbulence in shipping.
Battery Lock Washers - Ensure a qualified technician maintains lock washers on all battery posts when replacement batteries are needed.
Charger Power Cord – Do not remove the manufacturer tag on the power cord as doing so will void the warranty. Always unplug the charger before turning the vehicle on.
Charging – Each charger must have a dedicated circuit with 20 amps. The vehicle should be left plugged in when not in use. The charger will trickle charge at 80% only when needed. Improper charging will lower the range.
Extension Cords – We do not recommend using an extension cord to charge. If you do use one, it must be heavy-duty (10 gauge) as the extension cord will determine how many amps the charger will receive.
Parking Brake – All vehicles have a parking brake (hand or foot). Driving with a parking brake engaged will damage the motor and braking systems and can create a fire hazard. Always disengage the parking brake before driving.
Storage – Vehicles should NOT be left out in the elements 24/7. We recommend storing covered in a garage environment in order to preserve the integrity of the paint and fit/finish of the vehicle.
Tires – Must be inflated to proper capacity. Upon delivery, please check all lug nuts and tighten them as they may become loose due to turbulence in shipping. Additionally, check lug nut tightness once a month.
Tow Switch – Must be pointed to "Run" and not "Tow" to operate. Must be in "Tow" position if towing.
Warranty (ECO) registration- All vehicles with an eco battery must register within 90 days of purchase to honor the 8 year warranty. If you do not register your batteries, the warranty will only be valid for a year.
Documents / Resources
References
![www.trojanbattery.com]() Trojan Battery | Battery Maintenance
Trojan Battery | Battery Maintenance![bintelliparts.com]() Home - Bintelli Parts for Sale - Nationwide Part Shipping Available
Home - Bintelli Parts for Sale - Nationwide Part Shipping Available![www.youtube.com]() Bintelli Electric Vehicles - How to add water to your golf cart - YouTube
Bintelli Electric Vehicles - How to add water to your golf cart - YouTube![ecobattery.com]() Eco Battery Store
Eco Battery Store
Download manual
Here you can download full pdf version of manual, it may contain additional safety instructions, warranty information, FCC rules, etc.
Advertisement


Need help?
Do you have a question about the Beyond and is the answer not in the manual?
Questions and answers