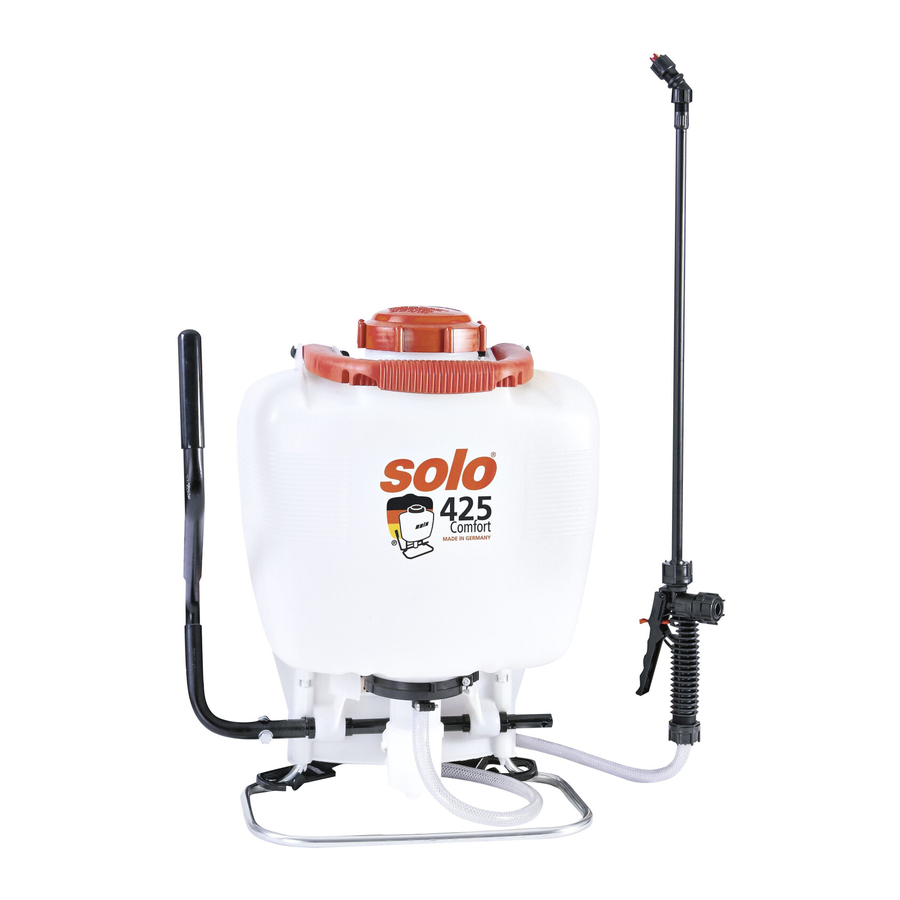
Solo 425, 475, 435, 485, 473D Manual
- Instruction manual (96 pages) ,
- Operator's manual (13 pages) ,
- Operator's manual & parts list (12 pages)
Advertisement
- 1 General Information
- 2 Check list for completeness
- 3 Assembly
- 4 Correct choice of
- 5 Pressure adjustment
- 6 Volume of spray solutions
- 7 Preparing spray solution
- 8 Filling
- 9 Spraying
- 10 Maintenance and care
- 11 Storage
- 12 Technical specifications
- 13 Workshop service, replacement parts
- 14 List of spare parts
- 15 Specification of nozzle tips
- 16 Safety
- 17 Documents / Resources
General Information
The SOLO Pressure Sprayer is designed for the application of approved plant protection chemicals in agriculture, horticulture, viticulture and forestry. All Accident Prevention Regulations and all generally recognized Safety Precautions are to be adhered to. Spray solutions other than approved plant protection materials may only be used if any detrimental effect to the machine or harm to persons, animals and environment can be excluded. For the operator and possibly the chemical manufacturer to test the material resistance to certain chemicals, the product manufacturer will provide details of the type of materials used for the Pressure Sprayer. Any unauthorized modification or changes made to the Pressure Sprayer will automatically exclude liability claims against the manufacturer.
Check list for completeness
- 1 piece Pressure Sprayer (assembled with Pressure tube and handle)
- 1 piece LX-lever
- 2 pieces disc 16,5 x 24 x 1
- 1 piece Screw M8 x 30
- 1 piece disc 8,4
- 1 piece nut M8
- 1 piece spray tube (complete assembled)
- 1 piece Tank Lid
- 1 piece Pressure Tank Plug with O-Ring 16 x 3 (not Model 473)
- 1 piece Operators Manual
- 1 piece Hollow Cone Nozzle with Swirl Plate and Gasket
- 1 pc. each symbolic label for container content: herbicide, fungicide and insecticide.
![]()
NOTE:
Affix the appropriate label to identify the container content.

PLEASE NOTE:
Never pour different agents at the same time into the container. Before using a different agent, thoroughly clean out the container and all parts in contact with the spray agent, then flush with plenty of water. We recommend the SOLO horticultural equipment cleaner in 500 ml bottles; part no. 49 00 600
Assembly
The Sprayer is assembled except for the pump lever which can be attached to either side. (discharge hose and lever grip already fitted) I-off lever grip (LX lever model). The pressure sprayer is supplied with fittings for assembly of the lever grip (LX lever) preattached on the left-hand side (facing towards the tank inscription). If you prefer the lever grip (LX lever) to be mounted on the opposite side, reposition the safety clips (a) on the r.h. side.

When fitting the LX lever, the retaining tube (b) of the LX lever should be facing upwards and back (facing towards the tank inscription).
If you prefer the lever grip (LX lever) to be mounted on the opposite side, reposition the safety clips (a) on the r.h. side.
To store the device, raise the pump handle (C) of the LX lever in the retaining tube (b) and suspend the spray tube in both clips (d).
To work the pump handle (c),lower it again in the retaining tube (b).
The spray tube is connected to the shut-off valve by means of screw cap.
Correct choice of

The spray tube is connected to the shut-off valve by means of screw cap (e).
For the treatment of shrubs, bushes and trees (three dimensional distribution) we recommend the use of the hollow cone nozzle (f). For area treatment (two dimensional distribution) we recommend the use of a flat spray nozzle (g).
For the treatment of tall bushes or trees, a brass tree lance (150cm length) is available as an accessory (part no. 49 00528).
Pressure adjustment

To regulate the output quantity/ droplet size, the spray pressure can be adjusted in steps from 1-4 bar.
The pressure is adjusted prior to filling the tank by turning the adjuster cap (h) on top of the pressure tank. After any pressure in the pressure tank has been released via the shutoff valve, press down adjuster cap and locate the selected pressure marker tooth over the tooth on the pressure tank.
Should spray pressure in excess of 4 bar be required we recommend to replace the pressure valve with the pressure plug (i)(part no 42 00 215) which is supplied with the unit. Release any pressure in the pressure tank first before replacing the valve. A spanner width of 24 mm is required.
Volume of spray solutions
Prepare spray solution according to the instructions provided by the chemical manufacturer. Prepare only as much solution as is required for the job. nate the environment or water mains network.
Medium Volume Guide for Plant Protection:
- Ground Plants 0.3 - 0.5 Itr. for 10 m2
- Espalier trees, pencil bushes 0.5 - 1.0 Itr. per plant
- Taller bush trees 2.0 Itr. per plant.
- Older, free standing trees 3.0 - 5.0 Itr. per tree
- Small Shrubs 1.0 - 1.5 Itr. for 10 m2
Preparing spray solution
Prepare solution outside, never within living areas, stables or n storage area for foodstuff.
Prepare solution with powder chemicals in a separate container. Mix well and then transfer to sprayer tank.
NOTE:
If necessary, the solution can be re-agitated in the tank by stirring with the spray tube.
With liquid plant protection chemicals (if full tank is required), fill sprayer tank 1/4 full with water, add prediluted chemical and then add remaining water as required.
When applying organic spray solutions please filter the solution as or before pouring into the spray tank.
 Always observe the Safety Notes provided by the chemical manufacturer!
Filling
When filling the spray tank always use the filter provided with the machine and observe the total filling process.
Avoid a direct connection between water hose and spray tank.
Spray Chemical may not reach the water mains.
When filling ensure that no spray chemicals will contaminate the environment or water mains network.
Avoid any overflow from the tank and any contamination of public waterways, drainage and water channels.
Spraying
Prime the pump with a few up and down strokes of the pump lever. By squeezing the shut-off trigger valve, liquid will be forced through the spray nozzle. When the shut-off trigger valve is released, the spray will stop.
Maintenance and care
The SOLO Backpack Sprayer is almost maintenance free. If the tank lid becomes hard to tighten or open, apply all to the lid gasket.
Proper Maintenance also includes:
- Regular check of the spray tank,
- Regular check of spray line and screw connectors,
- Clean all filters and check for any damage.
To protect piston, cylinder and piston collar (models 425/435/ 473P) from impurities in the spray solution, an additional filter is fitted on the inlet side of the pressure tank. This filter can be cleaned by vigorously shaking the tank when flushing it.
With models 425/435/473P: After disassembly of pump components or after replacing the piston collar, use water resistant grease to lubricate the piston and the collar.
In case of unexpected problems please refer to your SOLO Dealer.
Storage
Even through the tank is manufactured from UV- stabilized material we recommend that the unit is protected from direct sunlight and stored in a dry room, away from children and animals. In areas subject to frost, always drain all the liquid from tank, pressure tank and hoses. Please always use SOLO Original Replacement Parts available from your SOLO Partner.
Technical specifications
| Typ | 425 | 435 | 473P | 473D | 475 | 485 | |||
| Weight empty | kg | ca. 4,3 | ca. 4,6 | ca. 3,9 | ca. 3,9 | ca. 4,3 | ca. 4,6 | ||
| Tank capacity | | | 15 | 20 | 12 | 12 | 15 | 20 | ||
| Pump system | Piston pump | Diaphragm pump | |||||||
| Pressure tank volume | | | 1,3 | |||||||
| Stroke volume | cm3 | 80 | |||||||
| Operating pressure max. | bar | 4; with pressure plug 6 bar | 4 | ||||||
| Dimensions with lever | Height | mm | 520 | 580 | 540 | 540 | 520 | 580 | |
| width | mm | 400 | 440 | 360 | 360 | 400 | 440 | ||
| depth | mm | 240 | 280 | 220 | 220 | 240 | 280 | ||
| Hopper mesh width | mm | 1,5 | |||||||
| Mesh width of filter screen in spray tubing | mm | 0,8 | |||||||
Workshop service, replacement parts
Maintenance and repair:
Maintenance and repair of modern motorized devices, as well as their safety-relevant assemblies, require qualified, specialized training and a workshop equipped with special tools and test devices. Thus SOLO recommends that you have a specialized SOLO workshop carry out all work that is not described in these operating instructions. Your SOLO specialist has the required training, experience, and equipment at his disposal to provide you with the most costeffective solution and can help you in many ways with advice and service.
Replacement parts:
Dependable operation and the safety of your device also depend on the quality of the replacement parts that you use. Use only original SOLO replacement parts. Only original parts come from the production of the device and thus guarantee the highest possible material quality, dimensional accuracy, function, and safety. Original replacement parts and accessory parts are available from your dealer. He also maintains the requisite replacement part lists to determine the required replacement part numbers, and he is constantly provided with information concerning detail improvements and innovations in the replacement part offering. Please note as well that guarantee performances from SOLO are not possible if parts other than SOLO original parts are used.
List of spare parts

| Pos | Order-No. | Type | Specification |
| 20 | 44 00 278 | 425/435/473P | cyli.+piston+connecting |
| 25 | 44 00 203 | 425/435/473P | piston pump, compl. |
| 55 | 44 00 221 | 475/485/473D | diaphragm pump, compl. |
| 75 | 42 00 162 | 425/475 | tank-frame, 15 | |
| 75 | 42 00 201 | 435/485 | tank-frame, 20 | |
| 75 | 42 00 401 | 473P/473D | tank-frame, 12 II |
| 90 | 42 00 166 25 | filler basket | |
| 95 | 42 00 242 25 | tank lid, (incl.: gasket, vent cap, valve plate) | |
| 98 | 43 00 340 | carrying strap, (incl.: plastic hook) | |
| 112 | 48 00 196 25 | pump lever, LX, (incl.: grip, clip) | |
| 116 | 00 64 234 | Hose 10x3x1300 mm | |
| 125 | 49 00 356 | Accessories | pressure gauge |
| 130 | 49 00 440 | shut-off valve set | |
| 133 | 49 00 391 | spray tube 500 mm | |
| 135 | 49 00 448 | Accessories | nozzle kit incl.: 3 Flat spray Tipp, 3 Hollow cone jet, 2 No-Drift |
| 140 | 49 00 442 | 425/435/473P | gasket kit |
| 140 | 49 00 443 | 475/485/473D | gasket kit |
Specification of nozzle tips
| Specification | Order-No. | Delivery I/min | Pressure bar | Angle | Applications |
| Hollow Cone Tip 1 mm orifice grey *) | 49 00 209 | 0,4 0,55 | 1.0 2.0 | 50° - 70° | For treatment of shrubs, bushes |
| Hollow Cone Jet 1, 4 mm orifice black **) | 49 00 252 | 0,64 0,91 1,11 | 1.0 2.0 3.0 | 50° - 70° | |
| Hollow Cone Jet 1,8mm orifice blue **) | 49 00 322 | 0,88 1,25 1,53 | 1.0 2.0 3.0 | 50° - 70° | |
| No-Drift DT 1,0 yellow **) | 40 74 385 | 0,46 0,65 0,80 0,93 | 1.0 2.0 3.0 4.0 | 105° | Mainly for herbicides at low pressure |
| No-drift DT red **) | 40 74 386 | 0,91 1,29 1,60 1,85 | 1.0 2.0 3.0 4.0 | 105° | |
| Adjustable nozzle brass **) | 49 00 206 | 0,44 - 1,10 0,55 - 1,45 0,66 - 1,75 0,75- 1,95 | 1.0 2.0 3.0 4.0 | ||
| Flat Spray Tip green **) | 40 74 504 | 0,49 0,60 0,69 | 2.0 3.0 4.0 | 80° | Areal and row treatment |
| Flat Spray Tip yellow **) | 40 74 501 | 0,65 0,80 0,92 | 2.0 3.0 4.0 | 80° | |
| Flat Spray Tip red *) | 40 74 263 | 1,31 1,60 1,85 | 2.0 3.0 4.0 | 110° |
*) Standard equipment
**) Accessories
Safety
- Do not operate the sprayer while persons (especially children) or animals are in close vicinity. The operator is responsible for any damage or harm to third parties.
- When using plant protection equipment and while working with plant protection chemicals of any kind, always observe the Safety Precautions prescribed by the chemical manufacturer. The operator is to observe Personal Safety Regulations (Safety Clothing).
- Heavily dilute (approx. 1:10) surplus spray fluid left over after treatment of field or garden, and spray the solution over the area you have already treated.
- After every use and especially after the end of the spraying season, clean and flush the sprayer, tank as well as all parts which come in contact with chemicals.
- Residues of plant protection chemicals may lead to corrosion and damage of the sprayer.
- Clean and service wear parts such as nozzles, filters, gaskets and seals.
- Never clean nozzles with hard objects.
- Any remaining excess spray solution can be heavilydiluted (approx. 1:10 ratio) and applied over the already treated area.
- Damaged parts should be replaced without delay. Always use Original Parts.
- Always release all pressure in the tank or spray line before commencing service or maintenance work on the machine.
We recommend the SOLO horticultural equipment cleaner in 500 ml bottles; part no. 49 00 600
- When removing the spray tube from the machine always point the end of the tube away from yourself.
- For safety reasons, the sprayer should not be used forth application of:
- aggressive liquids (sanitizers, disinfectants and preservatives)
- liquids above 40°C temperature
- flammable liquids with a flashpoint below 55°C
SOLO
Postfach 60 01 52
D 71050 Sindelfingen
Tel. 07031-301-0
Fax 07031-301-130
info@solo-germany.com
SOLO
P.O.Box 60 01 52
D 71050 Sindelfingen
Germany
Phone+49-7031-301-0
Fax +49-7031-301-149
export@solo-germany.com
Documents / ResourcesDownload manual
Here you can download full pdf version of manual, it may contain additional safety instructions, warranty information, FCC rules, etc.
Advertisement


Need help?
Do you have a question about the 425 and is the answer not in the manual?
Questions and answers