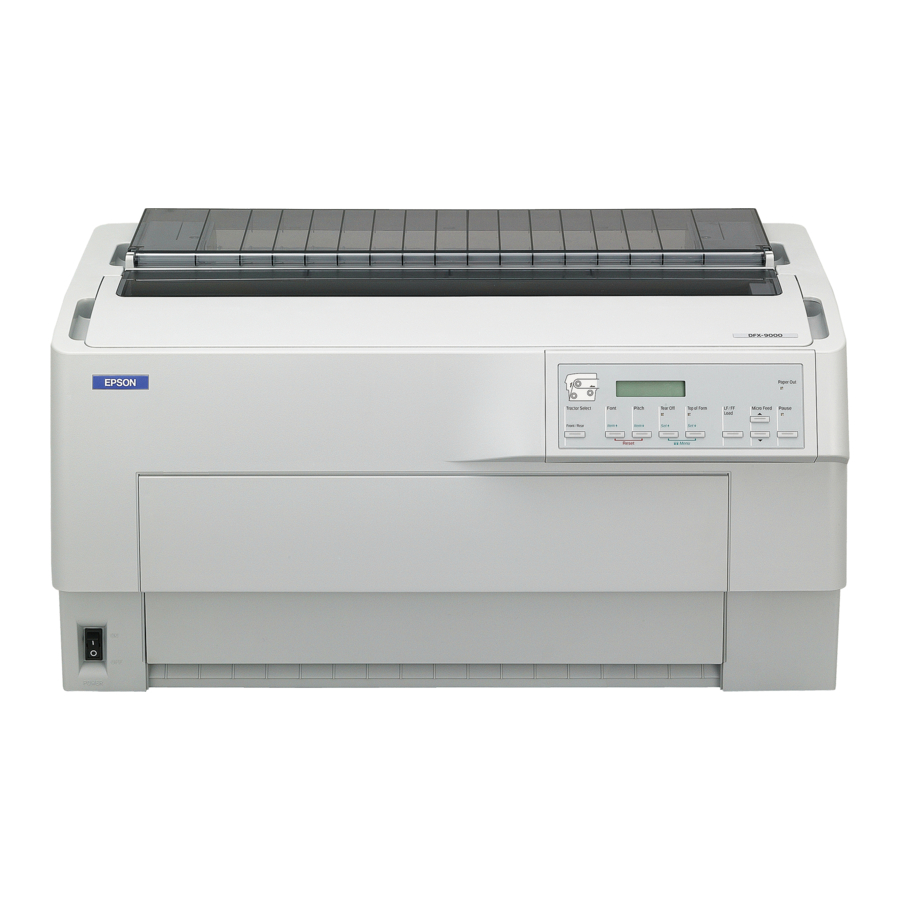
Epson DFX-9000 Manual
- Service manual (333 pages) ,
- Repair manual (223 pages) ,
- Reference manual (198 pages)
Advertisement
-
1
Setting Up the Printer
- 1.1 Unpacking the Printer
- 1.2 Choosing a Place for the Printer
- 1.3 Installing the Ribbon Cartridge
- 1.4 Connecting the Power Cord
- 1.5 Connecting the Printer to Your Computer
- 1.6 Installing the Printer Software
- 1.7 Installing and Viewing the Online Reference Guide
- 1.8 Installing and Using the Remote Configuration Manager
- 2 Loading Paper
- 3 Using the Control Panel
- 4 Troubleshooting
- 5 Product Information
- 6 Safety Instructions
- 7 Documents / Resources
Setting Up the Printer
Unpacking the Printer

The printer weighs 75 lb (34 kg), so do not try to lift it alone.

Make sure you have these items:

Remove and save the protective packing materials as described on the Notice Sheet.
Choosing a Place for the Printer
- Place the printer on a flat, stable surface. The printer will not operate properly if it is tilted. If you use a printer stand, make sure it can support at least 75 lb (34 kg). Never use a stand that tilts the printer.
- Keep the printer away from direct sunlight, strong light, heat sources, or excessive moisture or dust; or places subject to rapid changes in temperature and humidity, or shocks and vibrations.
- Keep your computer system away from potential sources of electromagnetic interference, such as loudspeakers or the base units of cordless telephones.
- Place the printer near a wall outlet where you can easily unplug the power cord.
- Position the power cord and interface cable so they do not interfere with paper feeding.
- Avoid electrical outlets controlled by wall switches or automatic timers, or outlets on the same circuit as large motors or other appliances that can cause voltage fluctuations. Power interruptions can erase your printer or computer memory.
- Use a grounded power outlet; do not use an adapter plug.
- Do not block, cover, or insert objects into openings in the printer cabinet.
Installing the Ribbon Cartridge
- Make sure the printer is turned off. (The switch should be in the O position.)
- Open the top cover and slide the print head to the position shown, marked by the
![]() symbol.
symbol.
![]()
- Unpack the ribbon cartridge and remove the black plastic separator.
![]()
- Holding the sides of the cartridge, place the notch on each end onto the metal posts inside the printer. Then tilt the cartridge down into the printer until it clicks into place.

 symbol.


- Lift up the black plastic ribbon guide and slide it down behind the print head until it clicks into place. Do not twist or crease the ribbon.


- Slide the print head back and forth to make sure it moves freely. If not, lift up the ribbon guide and try again.
![]()
- Turn the ribbon-tightening knob to remove any slack.
- Close the top cover.
![]()


 Note:
Note:
For safety reasons, the printer will not work if the top cover is not closed completely.
Connecting the Power Cord
Make sure the printer is turned off. Then plug the power cord into the AC inlet on the back of the printer and connect the other end to a properly grounded electrical outlet.

Connecting the Printer to Your Computer
You can connect your printer using the following interfaces:
- IEEE-1284-compatible parallel interface (use a shielded, twisted-pair parallel cable with a 36-pin Centronics ® compatible connector)
- USB (Universal Serial Bus) interface (use a shielded USB cable)
- RS-232C serial interface (use a null modem cable)
- Type-B optional interface (see the Reference Guide to install an optional interface card)
Note: You can connect to multiple interfaces simultaneously; the printer switches interfaces automatically when it receives data.
- Make sure your printer and computer are turned off.
- Open the printer's interface cover.
![]()

- Use the appropriate cable to connect the printer to your computer.


Installing the Printer Software
The Epson® printer software on the CD-ROM supports Windows® 95, 98, Me, 2000, XP, and NT® 4.0.
- Make sure the printer is connected to your computer, but turned off.
- Turn on your computer and wait for Windows to load.
- Insert the printer software CD-ROM. You see this screen:

If it does not appear, double-click Setup.exe on the CD-ROM. - Select Install Printer Software and click
![]() . You see the software license agreement.
. You see the software license agreement. - Read the license agreement and click Accept. You see this window:

- Turn on your printer.
![]()
![]()
Before turning on the printer, be sure you have removed all protective materials or you may seriously damage the printer. (See the unpacking instructions provided with the printer.)
After a moment, the software begins installing. Follow any on-screen instructions until you return to the Installation screen.
![warning]() Note:
Note: - If the New Hardware Found screen or any other wizard appears when you turn on your printer, click Cancel.
- If you're asked to insert a Windows CD-ROM, insert it and click OK. Close the Windows installer screen to continue installing the driver.
- When the installation is complete, follow the instructions below to install the Reference Guide and the Remote Configuration Manager utility.


Installing and Viewing the Online Reference Guide
Select Install Reference Guide on the Installation screen and click ![]() . The DFX-9000 Reference Guide icon appears on your desktop.
. The DFX-9000 Reference Guide icon appears on your desktop.
To view the Reference Guide, double-click the DFX-9000 Reference Guide icon or click Start > Programs (or All Programs) > EPSON > DFX-9000 Reference Guide > Reference Guide.
Installing and Using the Remote Configuration Manager
The Epson Remote Configuration Manager provides an easy way to change your printer's default settings in Windows. Follow these steps to install it:
- Select Install EPSON Remote Configuration Manager on the Installation screen and click
![]() .
. - When you see the InstallShield window, click Yes. You see this screen:

- Click Next and follow the on-screen instructions.
- When the installation is complete, click Finish. (You may need to close a window on your screen to see the final installation screen.)

To start the program, select Programs (or All Programs) > Epson Remote Configuration Mgr > Epson Remote Configuration Manager.
To open the program's on-screen User's Guide, select Programs (or All Programs) > Epson Remote Configuration Mgr > Epson Remote Configuration Manager User's Guide.
Note:
If you are using the serial port, you need to switch the printer driver to COM2 before you run the Remote Configuration Manager. Switch it back to COM1 when you're done.
Loading Paper
Using the Two-Tractor System
Your printer can load paper from a front tractor and a rear tractor. Be sure to leave enough room around the printer for the two stacks of fresh paper and for the printed stack. Align your paper supply so the paper feeds smoothly into the printer.

Place the paper supply lower than the printer to avoid a paper jam. Make sure that your stack of printed pages does not interfere with the rear tractor's paper supply.
Supported Paper Types and Sizes
You can use the following types of continuous paper with either tractor:
- Single-sheet
- Multi-part
- Labels
- Continuous forms with labels
- Overlapping multi-part forms
You can print on continuous paper from 3 inches (76.2 mm) to 16.5 inches (419.1 mm) wide. Your printer senses the paper width automatically.
The printer automatically adjusts to the thickness of the paper loaded when the platen gap setting is set to Auto in SelecType mode. See "Using SelecType Mode" for details.
Note:
- Make sure your paper matches the specifications described in the on-screen Reference Guide.
- When the optional perforation cutter (part number C81507X) is installed, the printable width is from 4 inches (101.6 mm) to 16 inches (406.4 mm).
Loading Paper On the Front Tractor
- Lift up the front cover until it locks in place.
![]()
- Release the right and left sprockets by pulling the lock levers down.sprocket lock lever
![]()
- Position the left sprocket so the pins are to the left of the arrow mark on the scale. Push up the sprocket lock lever to lock it in place.
![]()
- Slide the right sprocket to match the width of your paper. (Do not lock it in place yet.)
![]()
- Center the two paper supports between the two sprockets.
![]()
![warning]() Note:
Note:
For paper less than four inches wide, remove the paper supports by pulling them off the tractor. - Open both sprocket covers.
![]()
- Be sure your paper has a clean, straight edge and that the printable side of the paper is facing up. Fit the first few holes over the sprocket pins and close the sprocket covers.
![]()
- Slide the right sprocket until the paper is straight and there is no slack. Lock the sprocket by pushing up the sprocket lock lever. (The right sprocket may move slightly.)
![]()
![warning]() Note:
Note:
Be careful not to pull the paper too tightly. - Pull the printer's front cover out slightly, then close it.
![]()
![]()
Do not just push down the front cover; always pull it out slightly before closing it. - Turn on the printer if it is off.
![]()
You hear the print head moving to the left and Ready appears on the LCD. Either the front or rear Tractor Select arrow lights up to indicate the tractor that was selected last. - If the front tractor arrow light is red, press the LF/FF Load button to load the paper.
![]()
If the rear tractor arrow light is red, press the Front/Rear button to switch to the front tractor. When the printer switches tractors, it loads the paper automatically.


The front tractor arrow light turns green and the paper is loaded to the top-of form position. If you need to adjust the paper position, see "Adjusting the Paper Position" in your on-screen Reference Guide.
Loading Paper On the Rear Tractor
- Open the printer's back cover as shown below.
![]()
- Open the flap at the back.
![]()


- Release the right and left sprockets by pulling the lock levers down.
![]()

- Position the right sprocket so the pins are to the right of the arrow mark on the scale. Push up the sprocket lock lever to lock it in place.
![]()

- Slide the left sprocket to match the width of your paper. (Do not lock it in place yet.)
![]()
- Open both sprocket covers.
![]()
- Make sure your paper has a clean, straight edge and that the printable side of the paper is facing down. Feed it through the opening at the back.
![]()
- Fit the first few holes over the sprocket pins and close the sprocket covers.
![]()
- Slide the left sprocket until the paper is straight. Lock the sprocket by pushing up the lock lever. (The left sprocket may move slightly.)

![warning]() Note:
Note:
Be careful not to pull the paper too tightly. - Close the back cover and flap.
![]()
- Turn on the printer if it is off. You hear the print head move to the left and Ready appears on the LCD. Either the front or rear Tractor Select arrow lights up to indicate the tractor that was selected last.
![]()
- If the rear tractor arrow light is red, press the LF/FF Load button to load the paper.
![]()
If the front tractor arrow light is red, press the Front/Rear button to switch to the rear tractor. When the printer switches tractors, it loads the paper automatically.


The rear tractor arrow light turns green and the paper is loaded to the top-of form position. If you need to adjust the paper position, see "Adjusting the Paper Position" in your on-screen Reference Guide.
Switching Between Front and Rear Tractors
You can easily switch between paper loaded on the front and rear tractors, and vice-versa. Just wait for any print jobs to finish before switching tractors.

Never switch between tractors if labels are loaded in the printer. First remove the labels by tearing off the fresh supply below the tractor and pressing LF/FF Load to eject the remaining labels.
- Turn on the printer.
- If no paper is loaded in the front or rear tractor, load it as described in the "Loading Paper" chapter.
- To tear off any printed pages or excess paper, press the Tear Off button and tear off the pages at the perforation.
![]()
![]()
Always tear off the printed document and any excess paper before switching tractors. If the perforation does not align with the tear-off edge, you can adjust it. See "Adjusting the Tear-Off Position" in your on-screen Reference Guide. - Press the Front/Rear button to switch to the other tractor. The selected tractor light turns green and the paper advances to the top-of-form position.
![]()


Changing Paper
Follow the steps here when you need to change the paper loaded on the front or rear tractor.
- To tear off any printed pages or excess paper, press the Tear Off button and tear off the pages at the perforation.
![]()
![]()
- Always tear off the printed document and any excess paper before changing paper. If the perforation does not align with the tear-off edge, you can adjust it. See "Adjusting the Tear-Off Position" in your on-screen Reference Guide.
- To safely remove labels, continuous forms with labels, or overlapping multi-part forms before changing paper, tear off the fresh supply below the tractor and press LF/FF Load to eject the remaining labels or forms.
- Press the Front/Rear button to switch to the other tractor. The selected paper advances to the top-of-form position.
- Open the front cover or the back cover and the back flap.
![]()
- Open the sprocket covers and remove the paper from the tractor.
![]()
- Load the new paper. See "Loading Paper On the Front Tractor" or "Loading Paper On the Rear Tractor" for instructions.


Using the Control Panel
This chapter describes the buttons and lights on the control panel, plus:
- Selecting a font and pitch
- Changing the printer's default settings
- Locking the control panel buttons
Buttons and Lights


Selecting a Font and Pitch
Usually, you use your application program to select the font and pitch you want to use in a document. If necessary, however, you can select one of the printer's fonts (in different pitches) with the buttons on the printer's control panel, as described below. (The settings you make in application programs usually override settings you make from the printer's control panel.) The pitches available depend on the font you select:
| Font | Pitch |
| High Speed Draft | 10, 12, 15, 17, 20 |
| Draft | 10, 12, 15, 17, 20, Proportional |
| Roman | 10, 12, 15, 17, 20, Proportional |
| Sans Serif | 10, 12, 15, 17, 20, Proportional |
- Make sure that the printer is not printing. If it is, press the Pause button to stop printing.
- Press the Font button. The first available font is displayed on the LCD. Press the Font button until you see the font you want to use. The LCD returns to its original state in a few seconds and the font you selected is set.
- Press the Pitch button. The first available pitch is displayed on the LCD. Press the Pitch button until you see the pitch you want to use. The LCD returns to its original state in a few seconds and the pitch you selected is set.
Changing the Printer's Default Settings
While you can change many printer settings through your application software or the printer driver, there are other printer functions you can control as follows:
- Using the Epson Remote Configuration Manager on the printer software CD-ROM
- Using the printer's control panel to access SelecType mode and Defaultsetting mode
For instructions on using the Remote Configuration Manager, see the on-screen Remote Configuration Manager User's Guide, installed when you installed your printer software. ) To use SelecType, follow the instructions below.
For Default-setting mode.
Using SelecType Mode
The table below lists the settings available in SelecType mode.
| Setting | Options (default in bold) |
| Language | English, French, German, Italian, Spanish, Portuguese |
| Print settings | Press the Set  (Top of Form) button to print all current settings. (Top of Form) button to print all current settings. |
| Page length for rear tractor | 3 inches, 3.5 inches, 4 inches, 5.5 inches, 6 inches, 7 inches, 8 inches, 8.5 inches, 11 inches, 70/6 inches, 12 inches, 14 inches, 17 inches |
| Page length for front tractor | 3 inches, 3.5 inches, 4 inches, 5.5 inches, 6 inches, 7 inches, 8 inches, 8.5 inches, 11 inches, 70/6 inches, 12 inches, 14 inches, 17 inches |
| Skip over perforation | Off, On |
| Line spacing | 1/6 inch, 1/8 inch |
| Left margin | 0 column to 80 columns |
| Right margin | 1 column to 136 columns |
| Platen gap | Auto, 0 to 15 |
| Auto tear off | Off, On |
| Auto line feed | Off, On |
| Print direction | Bi-D, Uni-D |
| Software | ESC/P,® IBM PPDS |
| 0 slash | Off, On |
| I/F (Interface) mode | Auto, Parallel, Serial, USB, Optional |
| Auto I/F (Interface) wait time | 10 seconds, 30 seconds |
| Parallel I/F bi-directional mode | Off, On |
| Packet mode | Auto, Off |
| Serial baud rate | 19200 BPS, 9600 BPS, 4800 BPS, 2400 BPS, 1200 BPS, 600 BPS, 300 BPS |
| Serial parity | None, Odd, Even, Ignore |
| Serial data length | 8-bit, 7-bit |
| Character table | Standard version: PC437, PC850, PC860, PC863, PC865, PC861, BRASCII, Abicomp, Roman8, ISO Latin 1, PC858, ISO 8859-15, Italic U.S.A., Italic France, Italic Germany, Italic U.K., Italic Denmark 1, Italic Sweden, Italic Italy, Italic Spain 1 |
| NLSP version: PC437, PC850, PC860, PC863, PC865, PC861, BRASCII, Abicomp, Roman8, ISO Latin 1, PC858, ISO 8859-15, PC437 Greek, PC853, PC855, PC852, PC857, PC866, PC869, MAZOWIA, Code MJK, ISO 8859-7, ISO Latin 1T, Bulgaria, PC774, Estonia, ISO 8859-2, PC866 LAT., PC866 UKR, PC APTEC, PC708, PC720, PCAR864, PC771, PC437 Slovenia, PC MC, PC1250, PC1251, Italic U.S.A.,| Italic France, Italic Germany, Italic U.K., Italic Denmark 1, Italic Sweden, Italic Italy, Italic Spain 1 | |
| Auto CR (IBM PPDS)*1 | Off, On |
| IBM character table (IBM PPDS)*1 | Table 2, Table 1 |
| Buzzer | Off, On |
| Low-noise mode | Off, On |
| Auto cut mode*2 | Off, On |
| Auto cut/back mode*2 | Off, On |
| Overlapping multipart forms | Off, On |
| Continuous forms with labels | Off, On |
| Skip over binding | Off, On |
| Get IP address*3 | Panel, Auto, PING |
| IP address*4 | 000.000.000.000 to 255.255.255.255 |
| Subnet mask*3 | 000.000.000.000 to 255.255.255.255 |
| Default gateway*3 | 000.000.000.000 to 255.255.255.255 |
| Save settings?*5 | Save settings?*5 |
*1 This setting is available only in IBM PPDS emulation mode.
*2 This setting is available only when the optional perforation cutter (#C81570X) is installed.
*3 These settings are available only when the optional Print Server is installed.
*4 This setting is available only when the optional Print Server is installed and the Get IP address setting is set to Panel or PING.
*5 This menu appears when you press the Menu buttons (Tear Off and Top of Form) in SelecType mode.
Follow these steps to enter SelecType mode and change the settings:
- Make sure paper is loaded and the printer is on.
- Press the Menu buttons (Tear Off and Top of Form) to enter the SelecType mode. The LCD displays the currently selected language.
- If you want a different language, press the Set
![]() (Tear Off) or Set
(Tear Off) or Set ![]() (Top of Form) button until you see the language you want.
(Top of Form) button until you see the language you want. - Press the Item
![]() (Pitch) button to set the desired language.
(Pitch) button to set the desired language. - You see Print Settings on the LCD. Press the Set
![]() (Top of Form) button to print the current settings.
(Top of Form) button to print the current settings. - Press the Item
![]() (Font) or Item
(Font) or Item ![]() (Pitch) button to select the setting you want to change.
(Pitch) button to select the setting you want to change.
![warning]() Note:
Note:
You can scroll the menu settings by holding down the Item![]() (Font) or Item
(Font) or Item ![]() (Pitch)button for a few seconds.
(Pitch)button for a few seconds. - Press the Set
![]() (Tear Off) or Set
(Tear Off) or Set ![]() (Top of Form) button to scroll through the options available for the current setting until you see the one you want.
(Top of Form) button to scroll through the options available for the current setting until you see the one you want.
![warning]() Note:
Note:
You can scroll the options by holding down the Set![]() (Tear Off) or Set
(Tear Off) or Set ![]() (Top of Form)button for a few seconds.
(Top of Form)button for a few seconds. - When you finish making settings, press and hold down the Menu buttons (Tear Off and Top of Form). The LCD displays Save Setting.
- If you want to save the settings, select Yes by pressing the Set
![]() (Tear Off) button. If you don't want to save the settings, select No by pressing the Set
(Tear Off) button. If you don't want to save the settings, select No by pressing the Set ![]() (Top of Form) button. The printer exits SelecType mode.
(Top of Form) button. The printer exits SelecType mode.
![warning]() Note:
Note:
If you turn off the printer prior to exiting the SelecType mode, any changes you have made are canceled and not saved.
Default-setting Mode
Use the Default-setting mode if you need to adjust the print head position for printing on uneven forms or to choose which control panel buttons to lock when Lock-out mode is turned on. (See more information about Lock-out mode.)
Continuous forms with labels
If you are printing on forms of varying thicknesses—for example, a form that includes a label in addition to standard printing—you may need to adjust the Forms w/labels setting. By defining the position of the label, you tell the printer where it needs to raise the print head to accommodate the greater thickness as it prints over the label.
Before you can change the settings for continuous forms with labels, use SelecType as described to make sure the Forms w/labels setting is set to On.
Note:
You do not need to change these settings for printing label sheets of uniform thickness.
| Setting | Options (default in bold) |
| Label base position | Paper left edge, First dot |
| Label top position | 0 to 4752/216 (0 to 22" in 1/216-inch increments) |
| Label length | 0 to 4752/216 (0 to 22" in 1/216-inch increments) |
| Label left position | 0 to 1440/120 (0 to 12" in 1/120-inch increments) |
| Label width | 0 to 1440/120 (0 to 12" in 1/120-inch increments) |
| Base sheet PG (platen gap) position number | 0 to 14* |
| Label paper PG (platen gap) position number | 0 to 14** |
* Adjusts the platen gap for printing on label carrier (base sheet).
** Adjusts the platen gap for printing on labels affixed to label carrier.
Lock-out mode settings
| Button function | Settings (default in bold) |
| Pause | Unlock, Lock |
| Micro Feed | Unlock, Lock |
| Load | Unlock, Lock |
| LF | Unlock, Lock |
| FF | Unlock, Lock |
| Top of Form | Unlock, Lock |
| Tear Off | Unlock, Lock |
| Font | Unlock, Lock |
| Pitch | Unlock, Lock |
| Front/Rear | Unlock, Lock |
| Menu | Unlock, Lock |
| Reset | Unlock, Lock |
Follow these steps to enter Default-setting mode and change the settings:
- Make sure paper is loaded and turn off the printer.
![]()
Whenever you turn off the printer, wait at least five seconds before turning it back on; otherwise, you may damage the printer. - Turn on the printer while holding down the Font button to enter Defaultsetting mode. (Turning on the printer this way, you can access three menus: the Setting [SelecType] menu, Forms w/labels, and Panel lock out.)
![warning]() Note:
Note:
The instructions and current settings are printed in the language that you selected in SelecType mode. - Press the Set
![]() (Tear Off) or Set
(Tear Off) or Set ![]() (Top of Form) button to select the Forms w/labels or Panel lock out menu.
(Top of Form) button to select the Forms w/labels or Panel lock out menu.
![warning]() Note:
Note:
To change the printer's other settings, select the Print Settings menu and change the settings as described for SelecType 8. - Press the Item
![]() (Font) or Item
(Font) or Item![]() (Pitch) button to select the item you want to change and go to the next step.
(Pitch) button to select the item you want to change and go to the next step.
![warning]() Note:
Note:
You can scroll the menu settings by holding down the Item![]() (Font) or Item
(Font) or Item ![]() (Pitch)button for a few seconds.
(Pitch)button for a few seconds. - Press the Set
![]() (Tear Off) or Set
(Tear Off) or Set ![]() (Top of Form) button to select the options within the selected option until you find the desired setting.
(Top of Form) button to select the options within the selected option until you find the desired setting.
![warning]() Note:
Note:
You can scroll through options by holding down the Set![]() (Tear Off) or Set
(Tear Off) or Set ![]() (Top of Form)button for a few seconds.
(Top of Form)button for a few seconds. - After choosing the desired option, you can either continue to make changes to other settings by pressing the Item
![]() or Item
or Item ![]() button, or exit Defaultsetting mode.
button, or exit Defaultsetting mode. - When you finish selecting your settings, turn off the printer to exit Defaultsetting mode and save the settings.
Locking the Control Panel Buttons
You can restrict the use of buttons on the control panel by turning on Lock-out mode. When Lock-out mode is on, only the Pause, Load, and Tear Off buttons work.
If you want to lock other buttons, you can use Default-setting mode to select which buttons to lock. (See details.)
Follow these steps to turn on Lock-out mode:
- Turn off the printer.
- Hold down both the Font and Pitch buttons and turn on the printer. It beeps twice, indicating that Lock-out mode has been turned on.
To turn off Lock-out mode, repeat the steps above. The printer beeps once, indicating that Lock-out mode has been turned off.
Troubleshooting
This chapter explains the error indicators and describes how to clear paper jams.
For more troubleshooting information, see your on-screen Reference Guide. If you cannot resolve the problem using the information in the manuals, see "Where To Get Help".
Using the Error Indicators
Use the following table to diagnose printer errors.
| LCD message and panel light status | Beep pattern | Problem |
| Solution | ||
| Error: Paper out ● Paper Out | ••• | No paper is loaded on the selected tractor. |
| Load paper in the printer or select a different tractor by pressing the Front/Rear button. | ||
| ••• | The paper is not loaded correctly. | |
| Remove your paper and reload it correctly. | ||
| Error: No paper loaded ● Paper Out | ••• | Continuous paper is not fed to the standby position. |
| Tear off the printed page at the perforation; then press the LF/FF Load button. The printer feeds the paper to the standby position. | ||
| Error: Paper jam
| ••• | Paper is jammed in the printer. |
| Clear the paper jam as described. | ||
| Error: Switching not completed ● Pause | ••• | The printer fails to change the paper. |
| Cut the paper at the top and press the Pause or Front/Rear button. | ||
| Error: Ribbon jam ● Pause | ••• | Ribbon has jammed. |
| Remove and re-install the ribbon cartridge. See instructions. | ||
| Error: Ribbon out ● Pause | ••• | Ribbon is not installed. |
| Install the ribbon cartridge and press the Pause button. See instructions. | ||
| Error: Cover open ● Pause | ••• | The printer's top cover is open. The printer will not print if the cover is open. |
| Close the cover. | ||
| Print head hot
| — | The print head is overheated. |
| Wait a few minutes; the printer resumes printing automatically once the print head cools. | ||
| Error: xx
| ••••• | An unknown printer error has occurred. |
| Turn off the printer and leave it off for several minutes; then turn it on again. If the error recurs, contact your dealer. |
 Paper Out
● = On,
![]() = Flashing
= Flashing
••• = Three beeps,
••••• = Five beeps
Note:
The printer beeps once if you press a control panel button when the corresponding function is not available.
Clearing Paper Jams
- Turn off the printer and open the front or back printer cover (depending on the tractor currently being used).
- Tear off the fresh supply of paper at the perforation nearest the paper entry slot.
- Gently pull the paper out of the printer. Remove any remaining pieces of paper.
- Close the printer cover and turn on the printer. Make sure the Paper Out light is not flashing and the Pause light is off.
Where To Get Help
If your Epson printer is not operating properly and you cannot solve the problem using the troubleshooting information, see the support information below.
Internet support
Visit Epson's support website at http://support.epson.com and select your printer for solutions to common problems. You can download drivers and documentation, get FAQs and troubleshooting advice, or e-mail Epson with your questions.
Speak to a support representative
Before you call for support, please have the following information ready:
- Product name (Epson DFX-9000)
- Product serial number (located on the back of the printer)
- Proof of purchase (such as a store receipt) and date of purchase
- Computer configuration
- Description of the problem
Then call:
- U.S.:(562) 276-4322, 6 AM to 6 PM, Pacific Time, Monday through Friday.
- Canada:(905) 709-2170, 6 AM to 6 PM, Pacific Time, Monday through Friday.
Toll or long distance charges may apply.
Purchase supplies and accessories
You can purchase ribbon cartridges and other accessories from an Epson authorized reseller. To find the nearest reseller, call 800-GO-EPSON (800-463-7766). Or you can purchase online at www.epsonstore.com (U.S. sales) or www.epson.ca (Canada sales).
Product Information
Printer Specifications
| Printing method: | 36-pin impact dot matrix | (9 × 4, staggered) |
| Printing speed: | High speed draft Draft NLQ | 1550 cps at 10 cpi 1320 cps at 10 cpi 330 cps at 10 cpi |
| Printable columns: | 136 columns (at 10 cpi) | |
| Paper feed methods: | Push tractor (front, rear) Push and pull (front/rear) tractor; requires additional tractor | |
| Ribbon: | Black ribbon cartridge Ribbon life | S015384 approx. 15 million characters (Draft, 10 cpi, 14 dots/ character) |
| Acoustic noise: | Approx. 58 dB (A) (ISO 7779 pattern) | |
| Interfaces: | Standard bidirectional, 8-bit, parallel with IEEE 1284 nibble mode support USB (ver 1.1) Serial RS-232C Slot for optional Type B interface card | |
| Control code | ESC/P, IBM PPDS emulation |
Electrical
| Rated voltage range: | to 240 V |
| Input voltage range: | to 264 V |
| Rated frequency range: | 50 to 60 Hz |
| Input frequency range: | 49.5 to 60.5 Hz |
| Rated current: | 4.8 A (maximum 14.5 A) |
| Power consumption: | Approx. 185 W (ISO/IEC 10561 letter pattern) Approx. 9.5 W in sleep mode |
Environmental
| Temperature | Humidity (without condensation) | |
| Operation (plain paper) | 5 to 35°C (41 to 95°F) | 10 to 80% RH |
| Operation (recycled paper, envelope, label, or roll paper) | 15 to 25°C (59 to 77°F) | 30 to 60% RH |
| Storage | –30 to 60°C (–22 to 140°F) | 0 to 85% RH |
Options
By adding options such as a pull tractor or perforation cutter, you can further expand your printer's capabilities. Optional interface cards are also available to supplement your printer's built-in interfaces. (See the Reference Guide for more information.) You can purchase ribbon cartridges and other accessories from an
Epson authorized reseller. To find the nearest reseller, call 800-GO-EPSON (800-463-7766).
Or you can purchase online at
www.epsonstore.com (U.S. sales)
or www.epson.ca (Canada sales).
Safety Instructions
Hot Parts Caution Symbol
 This symbol is placed on the print head and other parts to indicate that they may be hot. Never touch those parts just after the printer has been used. Let them cool for a few minutes before touching them.
Important Safety Instructions
Read all of these safety instructions before using the printer. In addition, follow all warnings and instructions marked on the printer itself.
- Do not place the printer on an unstable surface or near a radiator or heat source.
- Place the printer on a flat surface. It will not operate properly if it is tilted or placed at an angle.
- Do not block or cover the slots and openings in the printer's cabinet, and do not insert objects through the slots.
- Use only the type of power source indicated on the printer's label.
- Connect all equipment to properly grounded electrical outlets. Avoid using outlets on the same circuit as photocopiers or air control systems that regularly switch on and off.
- Do not use a damaged or frayed power cord.
- If you use an extension cord with the printer, make sure the total ampere rating of all devices plugged into the extension cord does not exceed the cord's ampere rating. Also, make sure the total ampere of all devices plugged into the electrical outlet does not exceed the electrical outlet's ampere rating.
- Unplug the printer before cleaning it, and clean it with a damp cloth only.
- Do not spill liquid onto the printer.
- Except as specifically explained in the user documentation, do not attempt to service the printer yourself.
- Never replace the print head yourself; you may damage the printer. Also, other parts of the printer must be checked when the print head is replaced.
- You need to move the print head by hand to replace the ribbon cartridge. If you have just used the printer, the print head may be hot; let it cool for a few minutes before touching it.
- Adjust only those controls that are covered by the operating instructions.
- Unplug the printer and refer servicing to qualified service personnel under the following conditions: if the power cord or plug is damaged, if liquid has entered the printer, if the printer has been dropped or damaged, if it does not operate normally or exhibits a distinct change in performance.
To find the Epson Authorized Reseller nearest you, visit our website at: http://www.epson.com.
To find the Epson Customer Care Center nearest you, visit http://support.epson.com.
You can also write to: Epson America, Inc., P.O. Box 93012, Long Beach, CA 90809-3012.
Documents / Resources
References
Epson® Official Support
Buy Direct from Epson | Epson US
Epson Canada | Homepage
Epson Global Portal
Download manual
Here you can download full pdf version of manual, it may contain additional safety instructions, warranty information, FCC rules, etc.
Advertisement


Need help?
Do you have a question about the DFX-9000 and is the answer not in the manual?
Questions and answers