Advertisement
Box Contents
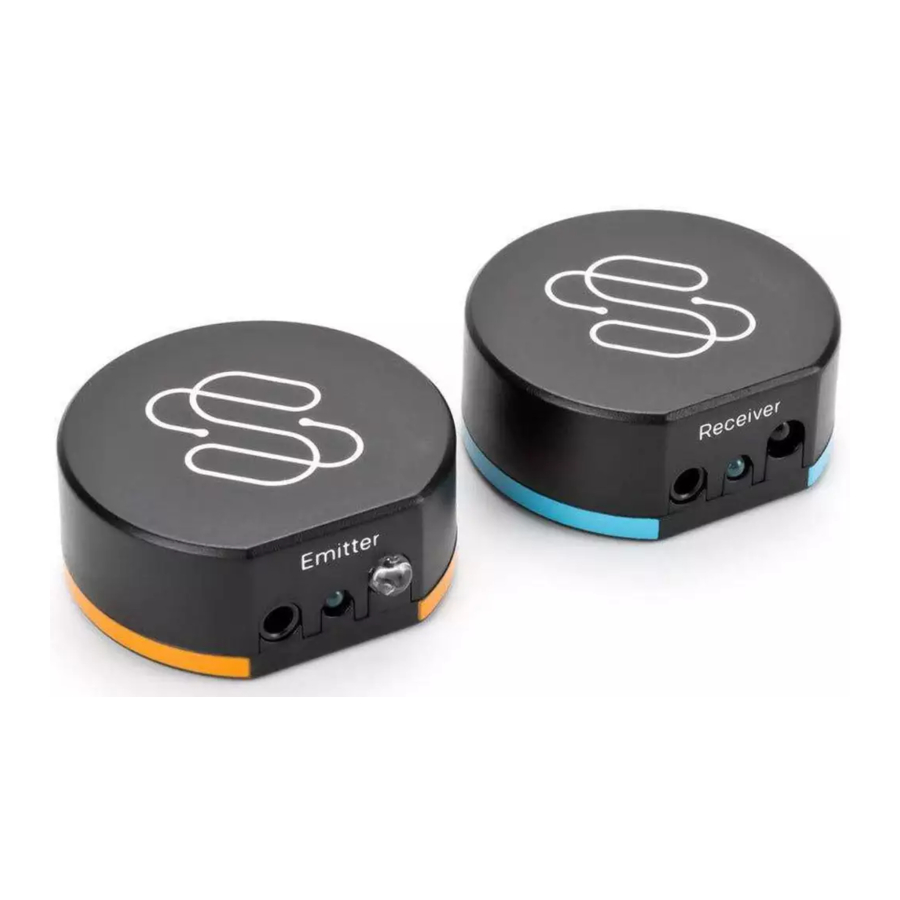
BlastIR Wireless IR Receiver
BlastIR Wireless IR Emitter
Dual IR Emitter Cable
IR Receiver Cable
(2) Airstick Microsuction Tape
(2) 3m Adhesive
(2) 5V.5A Power Supply
(2) USB to DC Cable
(2) Rubber Magnet Feet
Setup
Step One

Connect each unit to power using either the included power supplies or the USB to DC cables.
It is easy to mistake the IR cable port on the front for the power port. Please ensure that the power adapter is plugged into the appropriate port at the back.
Step Two

Place the blue unit next to your display.
Step Three

Place the orange unit in front of the device that you wish to control. Ensure that the IR emitter has a clear line of sight to the IR "eye" of your device.
Optional IR Cables

If you want to extend the reach or hide the reciver or emitter, connect the appropriate color-coded cable to the device. The blue IR receiver cable will add another receiver you can point your remote at. The orange IR emitter cable can attach to the R "eye" of the device you wish to control. Please ensure that the surface is clean before attaching the adhesive is clean
Optional Adhesive Placement

To keep the BlastlR Wireless in one place, we have included Airstick and 3M adhesive. Airstick is used as pictured above and it is designed to be reusable and leave no residue. The 3M adhesive is used the same way and is used for a more permanent placement. Please ensure that the surface is clean before attaching the adhesive
Optional Magnetic Placement

To keep the Blast IR Wireless in one place, we have included blue Rubber Magnetic Feet that you can stick to the bottom of each device to secure your device on any metal surface.
 Note: The magnet will not harm nor disrupt the functionality of the device.
Multizone

BlastIR Wireless receivers will only communicate with the emitters that are set to the same zone. The extender supports up to ten unique zones of communication. Setting the receiver's zone to "O" will allow communication to previous models of the BlastIR Wireless.
Possible Setups

Port Diagram

Troubleshooting
- The BlastIR Wireless Pro transmission range can be reduced by walls or other objects between the receiver and emitter, as well as by other wireless signals in the same area. If you are having trouble with the emitter receiving the signal, we recommend testing it with the receiver and emitter in the same room in order to verify that nothing is interfering with the signal.
- If the emitter or receiver seems to be cutting in and out, then the power connector may not be properly seated. We recommend reseating in the power connector. Keeping the modules in a place where there is minimal vibration or other movement will help prevent the power connectors from coming loose.
- Make sure that the receiver and emitter are set to the same desired channel before use. If they are on a different channel, then the emitter will not recognize the signal from the receiver.
Need Help?
Phone 800.709.1345
Email support@sewelldirect.com
Live support available Monday through Friday 9AM-8PM EST
If you have anything less than a 5-star experience, please let us be the first to know, and we'll make it right! sewelldirect.com/support
Documents / Resources
References
Download manual
Here you can download full pdf version of manual, it may contain additional safety instructions, warranty information, FCC rules, etc.
Advertisement


Need help?
Do you have a question about the BlastIR Wireless and is the answer not in the manual?
Questions and answers