Advertisement
POWER SUPPLY
MAINS SUPPLY
The instrument can be supplied by the AC/DC (Vdc =9V/I = 500 mA)  positive central adapter (supplied) conforms to national and international safety regulations covering electrical appliances. Insert the jack in the DC 9V socket.

RECOMMENDATIONS: The socket (1) for the adapter plug must be easily accessible.
- Inserting the plug into the socket at the back of the instrument automatically cuts off supply from the batteries.
- Do not expose the adapter to drops or splashes of water.
- The AC/DC adaptor shall not be exposed to dripping or splashing and that no objects filled with liquids, such as vases, shall be placed on apparatus.
- The AC/DC adaptor is used as disconnect device.
- The AC/DC adaptor of apparatus should not be obstructed OR should be easily accessed during intended used.
- To be completely disconnect the power input, the AC/DC adaptor of apparatus shall be disconnected from the mains.
- Battery shall not be exposed to excessive heat such as sunshine, fire or the like.
- Minimum distances 15cm around the apparatus for sufficient ventilations.
- The ventilation should not be impeded by covering the ventilation openings with items such as newspaper, table-cloths, curtains etc.
- No naked flame sources such as lighted candles should be placed on the apparatus.
- Attention should be drawn to the environmental aspects of battery disposal.
- The apparatus should only be used in moderate climates.

All batteries or transformers with safety insulation must be checked regularly for faults in cable, wire, or plug insulation or other parts.
NOTE: Rating plate information was located at bottom enclosure of the apparatus.
BATTERY SUPPLY
This instrument works with six 1.5V IEC R6 /AA batteries (not supplied) which are inserted in the housing at the bottom.
To open press on the part of the lid marked OPEN.
Fit the batteries as shown at the bottom of the housing.

ADVICE ON USING THE BATTERIES
- Non-rechargeable batteries are NOT to be recharged.
- Rechargeable batteries must be removed from the product before being charged.
- Rechargeable batteries are only to be charged under adult supervision.
- Different types of batteries or new and old batteries are not to be mixed.
- Use only batteries of the same or equivalent type.
- Batteries are to be inserted with correct polarity.
- Remove exhausted batteries to prevent leakage.
- Do not short circuit supply terminals.
- Remove batteries during long periods of non-use.
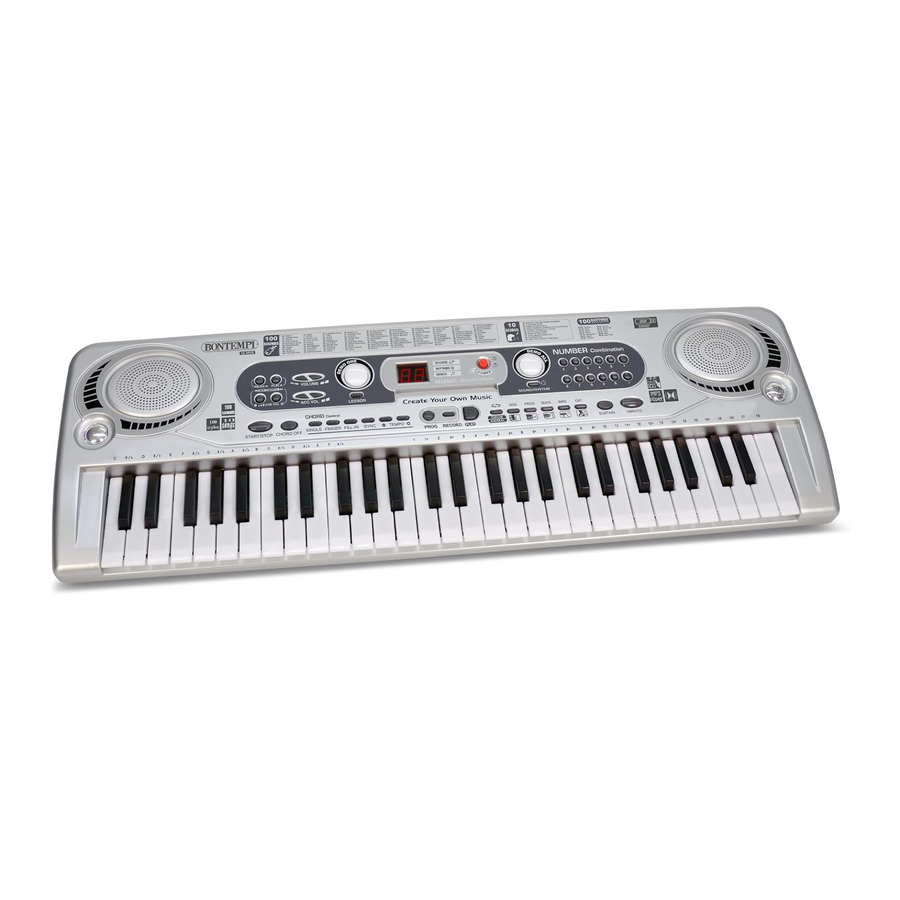
CONTROL PANEL

- START/STOP - Starts/Stops a rhythm style or a song
- CHORD OFF - Disables the arrangement of a rhythm style
- SINGLE - Enables composition of chords on the left side of the keyboard according to the easy method
- FILL-IN - Enters a rhythmic variation
- SYNC - Enables automatic accompaniment, in Single mode, after composing a chord
- TEMPO +/– - Sets the tempo for style performance, songs.
- PROG - Records a rhythmic sequence or animal voices
- RECORD - Records what is being played
- PLAY - Plays what has been recorded
- DRUM/ANIMAL - Selection of rhythm intruments or animal voices
- Rhythm intruments or animal voices
- SUSTAIN - Enables or disables the SUSTAIN function (prolonged sound)
- VIBRATO - Enables or disables the VIBRATO function (sound modulation)
- 100 RHYTHMS - Rhythms list
- NUMBER Combination - To select functions, rhythm style, songs and sounds
- DEMO ALL - To listen to all pre-recorded songs in sequence
- 10 DEMOS - Songs list
- SOUND/RHYTHM - To select the sounds or the rhythms on the keyboard
- POWER ON/OFF - Turns the instrument on and off
- LESSON - Learning level following a pre-recorded melody
- DEMO ONE - To listen to a pre-recorded song in sequence
- ACC +/– - Adjusts the accompaniment volume
- VOLUME +/– - Sets the master volume
- 100 SOUNDS - Sounds list
- USB Play-Pause-Vol - Adjusts MP3 songs read by the USB port
SOCKETS

DC 9 V - Socket for adapter (included).
PHONE - Socket for headphones (not included).
AUDIO IN - Socket for external audio source (MP3 player, smartphone etc.)
MIC - Socket for condenser microphone (not included).
USB - Socket for connecting a USB Flash Drive.
TECHNICAL CARACTERISTICS
KEYBOARD: 54 Keys (C-F)
DISPLAY: 2 Digit
100 SOUNDS
EFFECTS: Sustain and Vibrato
100 RHYTHMS
SEQUENCER: REC and PLAY to record and listen
EASY CHORDS
SONGS: 10 pre-recorded songs
General controls: Master Volume, Tempo +/–, Accompaniment Volume
USB player controls: Volume, next or previous song selection, pause
POWER SUPPLY: 6 x 1,5 Volt IEC R6/AA batteries
AC/DC Adapter – Input Vdc = 9 V / I = 500 mA
PHONE - Socket for headphones (not included).
AUDIO IN - Socket for external audio source (MP3 player, smartphone etc.)
MIC: Socket for condenser microphone
DIMENSIONS: 695 x 230 x 65 mm
DIRECTIONS ON THE KEYBOARD
Letters and numbers to play easily
Numbers 1 to 18 indicate the keys to play a melody with the easy musical scores at the end of this manual. The letters on the left indicate the name of the notes in order to compose a chord in SINGLE Chord and CLASSIC Chord mode (refer to the relative section).

HOW TO USE THE KEYBOARD
SWITCH ON AND SWITCH OFF
Move the switch to the POWER ON/OFF position to turn the instrument on or off. When turned on, the keyboard is set to operate with the Piano sound, the Rumba rhythm and the song Rudolph the red nosed reindeer.

DEMO - Demo song
The instrument has 10 pre-recorded songs.
Press DEMO ONE to hear the song in sequence; the display indicates the song number (e.g.: d1). Press DEMO ONE again to hear the next song.
Press START/STOP button ① to stop the song.
The DEMO ALL button plays all 10 songs in sequence. Press DEMO ALL again to stop the song.
When a song is playing, press +/– ⑮ to select the next or previous one, or enter a number from 0 to 09 to select one from the "10 DEMOS" list ⑰.

VOLUME
To regulate the volume of the instrument you must use buttons VOLUME + (to turn up) or VOLUME – (to turn down) ㉓.

SOUNDS
To select one of the 100 sounds recorded in the instrument, press SOUND/RHYTHM ⑱ and enter a number from 0 to 99 to select one from the list of 100 SOUNDS ㉔; the display shows a dot after the first digit, indicating that you are selecting sounds.
To select the next or previous sound, press +/- from the numerical keyboard ⑮.

Sustain
Prolongs the sound of a note when the key is released. To enable or disable this function, press SUSTAIN ⑫.
Vibrato
The vibrato effect is a sound modulation.
To enable or disable this function, press VIBRATO ⑬.
RHYTHM SELECTION
The keyboard has 100 rhythms recorded. To select them, press SOUND/RHYTHM ⑱ followed by a number from 0 to 99 to select one from the list of 100 RHYTHMS; the display shows a dot after the second digit, indicating that you are selecting rhythms.
To start or to stop a rhythm press the START/STOP button ①. To increase or decrease the speed of the song press the two buttons TEMPO + and TEMPO – ⑥. By holding the button pressed down, the variation becomes continuous. To go back to standard rhythm press buttons TEMPO + and TEMPO – together. The TEMPO + / – buttons are also used to adjust the speed of a demo.

FILL-IN
Pressing this button ④ while a rhythm is playing, reproduces a rhythmic variation of the drums.

SINGLE CHORD (easy chord)
To compose the simplified chords, play a rhythm by pressing START/STOP ①: press SINGLE ③ for the keyboard to automatically be split into two sections. This way, it is possible to compose chords on the left side (from C1 to F#2) in easy mode with one, two or three fingers (refer to the SINGLE CHORD table at the end of this manual).

SYNC
In SINGLE CHORD mode, instead of pressing START/STOP, press SYNC ⑤, in this way the rhythm will start after composing the chord.

CHORD OFF
When using chords in SINGLE mode, pressing CHORD OFF ② will exclude automatic arrangement.
CLASSIC CHORD
It is possible to compose chords in classic mode (refer to the CLASSIC CHORD at the end of this manual).
Percussion/animal voices
By pressing the button DRUM/ANIMAL ⑩ you can alternatively utilize the 5 pads either to play percussion instruments (DRUM) or to reproduce the animal voices (ANIMAL).

Programming rhythm/animal voices
This function enables you to record a rhythmic sequence or a sequence of animal voices. To programme, press PROG ⑦ and compose with the pads ⑪ at least 16 percussion instruments or animal voices (the letter "P" flashes on the display); press PLAY ⑨ to listen to the programming again and adjust rhythm speed by pressing TEMPO + or TEMPO – ⑥. To stop playing, press PROG ⑦ o START/STOP ①. The programming is not memorised.

LESSON
Press LESSON ⑳; the letter (d) will appear on the display. Choose one of 10 pre-recorded songs by pressing a white key on the keyboard: the display shows the selected song number and plays the backing track. Now try to play the melody of the song by casually and repeatedly pressing one or more keys on the keyboard, trying to keep tempo with the orchestra. Press LESSON again to exit the mode.


RECORD/PLAYBACK FUNCTION
This function enables you to record and playback a tune played on the keyboard. Press RECORD ⑧ before playing a tune. When you have finished press PLAY ⑨ to listen to the tune.

USB Player
This keyboard enables you to read MP3 songs on a USB Flash drive (Pen Drive) when it is connected to a USB port at the back of the instrument. After connecting the device, the first song will automatically start playing and will be heard from the speakers on the keyboard. To adjust the volume, keep the  button pressed; to pause the song, press
  or
or  ; to go to the next or previous song, press .

SONGS
COMPOSING A SONG
Each song is printed on a separate page. Under the title there is information regarding:
- SOUND: the sound needed to create the tune
- STYLE: the rhythm of the song
- TEMPO: the speed of the song
You can use this information to configure the keyboard and play the song at its best. This manual tells you how to select sound, rhythm and tempo.

The song also indicates:
- SOUND SINGLE CHORD: the easy chords for song accompaniment
![]()
- CLASSIC CHORD: the classic chords for song accompaniment
![]()


The song is marked by a continuous grey strip that indicates the numbers used to play the melody with your right hand. Each key must be pressed for some time, depending on the distance that separates each number on the grey strip from the next.

Basically, above the numbers you will notice a sequence of alternating black and grey sections within the grey strip. The distance between one black section and another represents the unit of musical time known as "beat", which corresponds to the movement of the metronome pointer from one end to the other. Every black and grey section represents a half "beat".

The instructions (meaning squares with letters) are found under this strip in order to use your left hand to play the accompaniment chords.

All musical notes of the song, which use classical wording, are under the grey strip.

For now, it is sufficient to remember that each note has a name: A, B, C, D, E, F, G, in anglo-saxon notation which correspond to LA, SI, DO, RE, MI, FA, SOL, in Latin notation and A, H, C, D, E, F, G, in German notation. This correspondence is illustrated on the next diagram.

HOW TO PLAY THE SONG IN EASY MODE
MELODY
Each note corresponds to a number on the grey strip. However, as you can see, there is a number on each note as well. This will help you to find the right key easily.

To play the melody, read the sequence of numbers contained in the grey band and press, one after the other, the white keys which correspond to the same numbers on the strip above the keyboard. The black keys correspond to the numbers for example on the music method grey band followed by the "+". The black key after white key 1 corresponds to the symbol 1+. Now that you know which key corresponds to which note, try and play the tune following the numbers on the grey strip.
CHORDS
To use accompaniment, press each chord with SINGLE or CLASSIC mode for the time indicated by the line next to the letter that represents the chord, until you come to the next one.
TROUBLE SHOOTING GUIDE
| Problem | Solution |
| The instrument does not play or the sound is distorted. | Batteries discharged – insert new batteries. Batteries inserted incorrectly – check. Mains adapter not suitable. |
| The instrument switches on or off when keys are pressed. | Batteries discharged – insert new batteries. |
| The display does not light up. | Check the batteries or the mains adapter. |
 ATTENTION: In the event of malfunction, remove the batteries and then reinsert them. ATTENTION: In the event of malfunction, remove the batteries and then reinsert them. | |
Documents / ResourcesDownload manual
Here you can download full pdf version of manual, it may contain additional safety instructions, warranty information, FCC rules, etc.
Advertisement


Need help?
Do you have a question about the 16 5415 and is the answer not in the manual?
Questions and answers