Advertisement
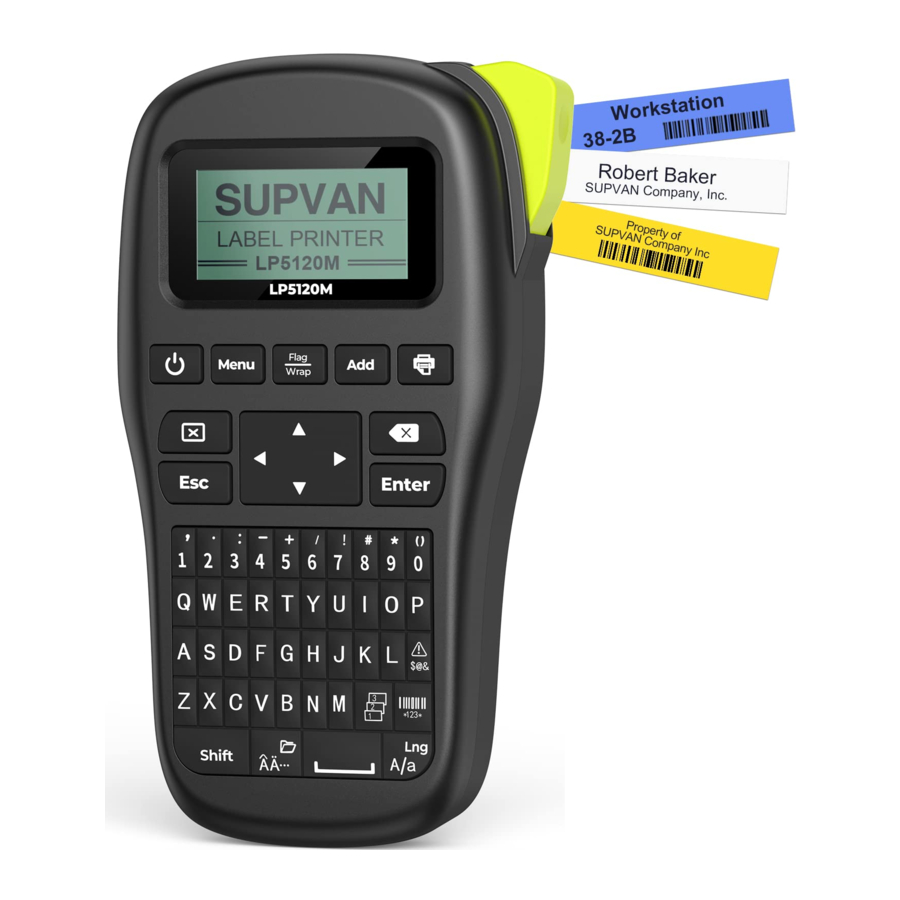
Device and Label tape
Tips
Before loading tape, Please tighten ribbon first!

Manually rotate the ribbon in the direction of the arrow to rewind the ribbon until the ribbon is straight.

If the label is curved, be sure to straighten the label and tighten the ribbon.

Power/Battery

Note
- AA ALKALINE LR6: Optional.
LCD and Keyboard
LCD Display

| No | Content | Discription |
| 1 | Page | Current label position/Total number of labels; Current editing label/Total number of editing label; |
| 2 | Length | Specify length value; If select"Auto" length, then display "A"; |
| 3 | Interface | Edit content for two lines of display; Each line can display letters/numbers up to 12 characters; |
| 4 | Preview | Flag and wrap labels are available for preview; |
| 5 | A/a | A-Capital letter input; a-Small letter input; |
| 6 | Line No | The number of lines that have been created 6mm width label tape can create 2 lines of content; 9mm width label tape can create3 lines of content; 12mm width label tape can create3 lines of content; |
Keyboard Layout

| No | Name | No | Name |
| 1 | 【  】 】 | 10 | 【 Add 】 |
| 2 | 【 Menu 】 | 11 | 【  】 】 |
| 3 | 【  】 】 | 12 | 【Enter】 |
| 4 | 【 Esc 】 | 13 | 【  】 】 |
| 5 | 【  】 】 | 14 | 【  】 】 |
| 6 | 【 Shift 】 | 15 | 【  】 】 |
| 7 | 【  】 】 | 16 | 【  】 】 |
| 8 | 【  】 】 | 17 | 【  】 】 |
| 9 | 【 Flag/Wrap 】 |
Keys Function Introduction

Create General Labels
【 】 is the name of the button, 《 》 is display content.
- Turn on and Turn off
Long press【 】 2 second,
Printer turn on.
Press【![]() 】, Printer turn on.
】, Printer turn on. - System language
Long press【![]() 】 You can select system language.
】 You can select system language.
Switch capital letter and small letter. - Create mutiple lines
After input the first line content,
Press【 Enter 】Then create a new line. - Add new label
This printer can add 20 pcs label at most each time.
After edit first label, Press 【 Add 】then create a new label.
e.g. Creat two labels, screen "Page" will show 2/2.

- Check label
If you create multiple labels, check or edit the first or previous labels. e.g, If create 2 labels and check the first label like below:- Page up
 】 You can select system language.
Press 【 Shift 】+ 【  】 or long press【 】, Screen will show the first labels content like below:

- Page down
Press【Shift】+【  】or long press 【 】, Screen whill show the second label content like below:

Note:
When editing a flag label, Press 【 Shift 】+【 】/【 】select cell, Input cell area content.
- Clear label content
Press【![]() 】delete the character before the cursor, delete one by one. Press 【
】delete the character before the cursor, delete one by one. Press 【 ![]() 】, You can select delete"Format+Text"or"Text".
】, You can select delete"Format+Text"or"Text".
If select"Format+Text", Delete all settings for the label and the contents of the label.
If select"Text", Delete the text content of all labels - Chain Printing
Press【 Menu 】, Select《Chain Printing》;- Press【 Enter 】 You can select "On"or "Off";
- When you select "On", After print will show as below:
- New Label
- Completed
- If you have not completed all edits, Then select 《 New Label 》, Printer not cut, Return to the editing interface and edit the new label that you need.
- If you complete all editing, Select 《 Completed 》, then finish print.
- Lead edge
Press【 Menu 】, Select 《Lead edge》- Press【
![]() 】【
】【 ![]() 】 Select《 No Cut 》,《 Cut 》, 《 Center Model 》
】 Select《 No Cut 》,《 Cut 》, 《 Center Model 》
(Invalid in chain printing mode),
Press【 Enter 】confirm select. - Print style as follows:
- 《 No Cut 》
![]()
- 《 Cu t》

- 《 Center Model 》

- Press【
- Input Euro-Latin Letters
The key 【![]() 】 is used to input variant form of the Latin letters in different language inputting.
】 is used to input variant form of the Latin letters in different language inputting.

 】delete the character before the cursor, delete one by one. Press 【
  】, You can select delete"Format+Text"or"Text".


Input the English letter and press 【 ![]() 】 key.
】 key.
- If the letter does not have any variant form, then there will be no action.
- If the letter has variant forms, then the letter will be into selected mode, continue to press key or press 【
![]() 】 【
】 【 ![]() 】 & 【
】 & 【 ![]() 】 to select the desired variant of the letter, press 【 Enter 】 to confirm.
】 to select the desired variant of the letter, press 【 Enter 】 to confirm.
 】 & 【
】 & 【  】 to select the desired variant of the letter, press 【 Enter 】 to confirm.
Menu function introduction
| Name | Introduction |
| "Length" | Set the label length; The default is auto; Specify length range: 20mm-200mm; |
| "Char size" | Set character size; |
| "Char width" | Set character width; |
| "Bold" | Set character bold or not; |
| "Italic" | Set character italic or not; |
| "Frame" | Add frame to the edited content; |
| "Orientation" | Set the horizontal and vertical of the label; |
| "Cut" | "Cut", "None", "Solid line"three label cutting ways can be selected; |
| "Chain printing" | On or off chain printing mode; |
| "Lead edge" | Set lead edge; |
Flag label
You can make a flag label and paste it directly onto the cable. It is recommended to use a strong adhesive and non-liminated label tape.
Note:
Chain printing mode is invalid when flag label.
Press【 Flag/Wrap 】, Select《 Flag 》 then you can set 《 Length 》,《 Diameter 》, 《Type》.
- Press【Enter】Enter the settings interface.
- After select《 Length 》press【 1-0 】 number keys set the length of the flag label.
- Press【
![]() 】select《 Diameter 》, press【 1-0 】the number key sets the diameter of the cable wrapped by the flag label.
】select《 Diameter 》, press【 1-0 】the number key sets the diameter of the cable wrapped by the flag label. - Press【
![]() 】select《 Type 》 Press【
】select《 Type 》 Press【 ![]() 】【
】【 ![]() 】select label type.
】select label type.

 】select《 Diameter 》, press【 1-0 】the number key sets the diameter of the cable wrapped by the flag label.
 】【
】【  】select label type.
Note:
- Press 【 Add 】 can create multiple flag labels.
- The edited flag label can be changed by press the [flag/wrap] key.
- Flag label is not allowed to add barcodes.
- 《 Length 》 value range: 10mm - 200mm.
- 《 Diameter 》 value range: 2mm - 90mm.
Wrap label
You can make a flag label and paste it directly onto the cable. The text is printed on the label in a rotated way. It is recommended to use wrap label tape.
Note:
Chain printing mode is invalid when wrap label.
Press 【 Flag/Wrap 】, Select 《 Wrap 》 then you can set 《 Diameter 》, 《 Inverse 》, 《Repeat》.
- Press【 Enter 】 Enter the settings interface.
- Select 《 Diameter 》 press 【 1-0 】 the number key sets the diameter of the cable wrapped by the wrap label.
- Press 【
![]() 】 set 《 Inverse 》
】 set 《 Inverse 》

- Press【
![]() 】set 《 Repeat 》
】set 《 Repeat 》

 】 set 《 Inverse 》
 】set 《 Repeat 》
Note:
- Diameter value range: 3-90mm.
- How much of the input character in the wrap label is related to the width of the label tape.
- Press 【 Add 】 can create multiple wrap labels.
- The edited wrap label can be changed by press the [flag/wrap] key.
- Wrap labels are not allowed to specify label length.
- Wrap labels are not allowed to set horizontal and Vertical.
- Wrap label are not allowed to add barcodes.
Common Key Combination
【Shift】 + 【  】 】 | Move the cursor to the previous label or an edit area with the same label. | Cursor Move up |
【Shift】 + 【  】 】 | Move the cursor to the next label or an edit area with the same label. | Cursor Move down |
【Shift】 + 【  】 】 | Move the cursor to the beginning of the current label. | Home |
【Shift】 + 【  】 】 | Move the cursor to the end of the current label. | End |
| 【Shift】 + 【 0-9 】 | Enter the corresponding punctuation in the upper right corner of the number key. | Punctuation |
| 【Shift】 + 【 L 】 | Read current label tape information. | Information |
| 【Shift】 + 【 O 】 | Print position, temperature, Turn off, and information advanced settings. | Advanced Setting |
【Shift】 + 【  】 】 | Open, Save, Delete file. | File |
Note
- If you want to get more information, Please visit: www.supvan.com.cn.
Precautions

![burn hazard]()
![shock hazard]()
Please use a single power outlet, do not use multiple outlets that have been plugged into multiple devices, as this may cause fire or electric shock.![burn hazard]()
![shock hazard]()
Please do not let metal or liquid enter the equipment, otherwise it will cause fire or electric shock and damage internal parts, resulting in equipment damage.- Please do not use AC power beyond 100-240V.
![burn hazard]() Unauthorized disassembly o r modification of this label printer is strictly prohibited, which may result in fire or contact caused by high voltage components.
Unauthorized disassembly o r modification of this label printer is strictly prohibited, which may result in fire or contact caused by high voltage components.- Please keep the label printer away from flammable solvents such as alcohol and gasoline, and keep away from fire sources.
- When cleaning the printer, use a sewed wet gauze and do not use organic flammable solvents.
- Please use the label printer in a clean place, do not use it on carpet or felt, otherwise a lot of dust will easily cause short circuit.
- This printer contains a cutter. Please use it carefully to prevent scratches. n During use or storage, if you notice odor, heat, discoloration, deformation or any abnormal situation, immediately disconnect the power adapter, remove the battery, and stop using the device. n Do not use batteries that are deformed or leak.
![shock hazard]() Do not get wet with the device/power adapter/power outlet/battery. Do not plug or unplug the power plug with wet hands to prevent electric shock.
Do not get wet with the device/power adapter/power outlet/battery. Do not plug or unplug the power plug with wet hands to prevent electric shock.- Do not use sharp objects such as tweezers or metal pens when replacing batteries.
- Do not throw the battery into a fire or high temperature.


 Attention
- Please use the original supvan label to ensure the print quality and damage the equipment.
- If the printer caused by the use of nonoriginal label tape is damaged, we will not be responsible for the warranty.
![]()
Please do not touch the print head with your hands. If the printer is finished, it may cause skin burns if touched.- When the printer is not in use for a long time, please unplug the power cable and take out the battery inside the printer to prevent the battery from leaking and damaging the device.
- Please do not press the device, do not force the keyboard with force or gravity.
- Keep away from electromagnetic interference sources that generate magnetic fields.
- When using the printer, please do not block the label outlet, so as to the label to be out smoothly.
- When using the printer, do not force the label tape out of the outlet. Please take it out after the label is cut, otherwise it will affect the print quality or damage your printer.
- This printer is very precise, please use it in a flat place to prevent it from falling and damage, and to prevent impact vibration.
- This printer and label tape should be stored at room temperature, dry, ventilated, and out of direct sunlight.
- When foreign matter enters the inside of the printer, stop using it immediately to prevent damage to the device.
- Before installing a new label tape, please tighten the ribbon to rewind the ribbon to pre-tighten the ribbon.
- When opening the "back cover", do not let any objects touch the inside of the printer.
- When using the printer, if you notice odor or abnormal noise, please turn off the label machine immediately, unplug it, and contact your dealer.
- Different speeds when printing with dry batteries or adapters.

Special Attention
- If the printer outlet is found to be stuck or the cutter can not cut off label, Please clean the outside of the full cutting blade with a cotton swab soaked to ensure that the subsequent label is properly cut and removed.

- This printer is available in 2 power modes, power adapter, 6-cell dry battery, suitable for various places.
- For more information, please visit our website of supvan: www.supvan.com.cn.

Documents / Resources
References
Download manual
Here you can download full pdf version of manual, it may contain additional safety instructions, warranty information, FCC rules, etc.
Advertisement


Need help?
Do you have a question about the LP5120M and is the answer not in the manual?
Questions and answers