Advertisement
- 1 Contents
- 2 Specification
- 3 Power Supply
- 4 Insert a Tape Cassette
- 5 LCD Display
- 6 Keyboard
- 7 Functional Keys
- 8 Combination Keys
- 9 Input Euro-Latin Letters ÂÄ...
- 10 Create General Labels
- 11 Create Flag/Wrap Labels
- 12 Create Template Labels
- 13 Troubleshooting
- 14 SAFETY INSTRUCTIONS
- 15 Documents / Resources
Contents
Label Printer  | Hard Case* | ||
Li-polymer Battery** | |||
Label Tape | User Manual | Power Adaptor | |
*and** are optional.
Specification
| Printing Method | Thermal Transfer |
| Resolution | 200dpi |
| Label Width | 6mm / 9mm / 12mm |
| Printing Speed | 20mm/s |
| File storage | Up to 64 files |
| Max. Height of Letter | 9 mm |
| Fonts | 8 fonts |
| Max. Labels No. | Up to 50 labels in 1 file |
| Keyboard | ABC layout |
| Display | LCD, Back-lit, 2-line info display |
| Printable Content | English letters, Numbers, Bar Codes, QR Codes, Symbols |
| Operating Environment | Temperature: 10°C~35°C; RH: 20%~80%RH |
| Power | AC 9V 2.5A |
| Measurement | 222×120×66(mm) |
Power Supply

When using six new AA alkaline batteries or Li-polymer batteries, make sure the poles are pointing in the correct directions.
To remove the batteries, reverse the installation procedure.
Insert a Tape Cassette
Open the back cover

Tighten the label, then insert the label cassette in position which marked in printer

Close the back cover

To insert a label cassette, follow the step above.
To remove the label cassette, reverse the installation procedure.
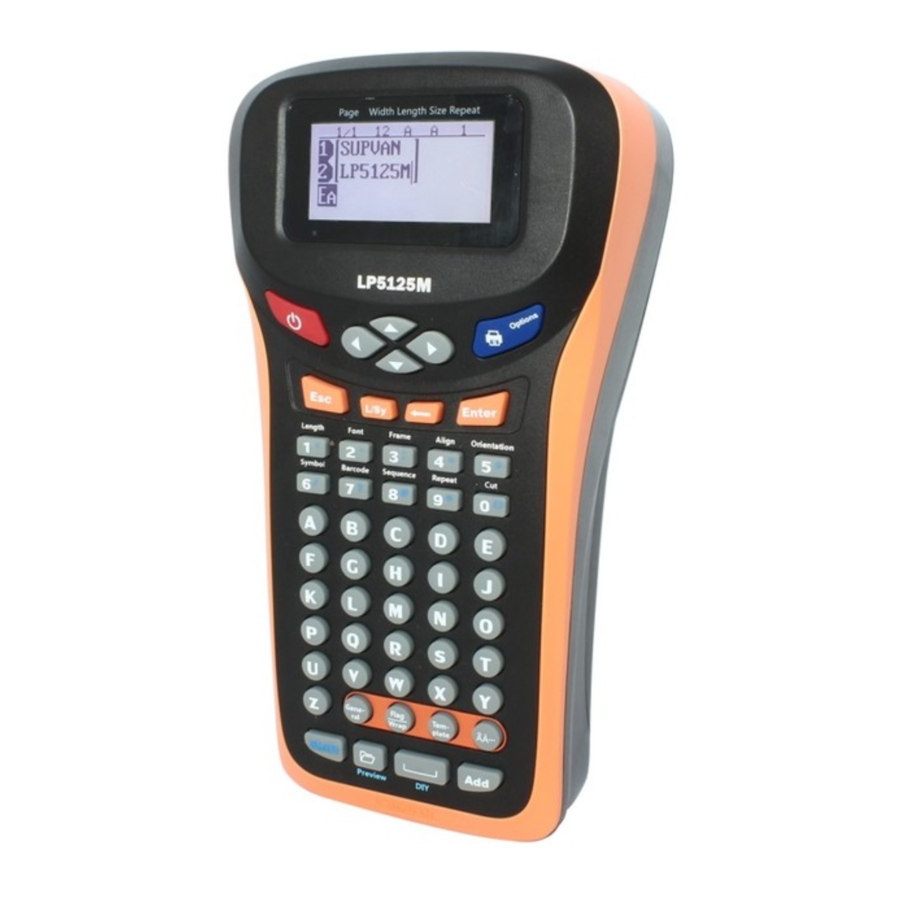
LCD Display

| No. | Item | Introduction |
| 1 | Page | Current Label/All Labels; Editing Area/All Editing Area in One Label |
| 2 | Width | Label Width(6mm, 9mm, 12mm) |
| 3 | Length | Current label's length, "A" stands for automatic |
| 4 | Size | Current line's character size, "A" stands for automatic |
| 5 | Repeat | Repeat times of current label |
| 6 | Editing Interface | 2-line display, each line up to 12 characters |
| 7 | Preview | 【Shift】+【File】 to turn on or off |
| 8 | Input Method | Current input method |
| 9 | Line Number | Line number in current label |
Keyboard

| No. | Key | Introduction |
| 1 |  | Turn on/off the printer |
| 2 | L/Sy | Short press: EA (uppercase), Ea (lowercase), Sy (Symbol) Long press: change system language (English/Español/français/Italiano/Magyar/Nederlands/No rsk/Polski/Português/Slovenčina/suomi/Svenska/Türkçe/č eština/Dansk/Deutsch/русский/) |
| 3 | Esc | Stop printing process/exit current setting or operation & return to the previous level of menu or edit interface. |
| 4 | Number 1-0 | Short press: Number 1-0 Long press: Get into function menu |
| 5 | General | Create general label |
| 6 | Shift | Shift key |
| 7 | File | New/Save/Open/Delete file |
| 8 | Flag/Wrap | Create flag/wrap label |
| 9 | Space | Space |
| 10 | Template | Insert label template |
| 11 | Add | Create new label |
| 12 |  | Change variant of the Latin letter |
| 13 | Enter | Enter/Create new line |
| 14 |  | Backspace |
| 15 | Print Options | Short press: print directly Long press: copy print; range print; cursor print; tempo print |
| 16 |  | Move the cursor |
Functional Keys
Long press 1-0 to realize the functional keys
| Number | Functional Keys | Second-level Directory |
| 1 | Length | Length; Margin; Char space; Lines space |
| 2 | Font | Font; Size; Width; Bold; Italic |
| 3 | Frame | Frame; Underline; 690Underline |
| 4 | Align | Center; Left; Right; Justify |
| 5 | Orientation | Horizontal; Vertical; Rotate; Mirror |
| 6 | Symbol | Unit; Number; Mathematics; Bracket; Punctuation; Arrow; Superscript; Subscript; Russian; Pinyin; Latin; Tabulate; Hiragana; Katakana; Safety; Electrical; Communicate; Prohibited; Transport; Office; Geometry; Animal; Insect; People; Food; Sports; Creativity; Daily Use |
| 7 | Barcode | Bar Code (CODE39, I-2/5, CODE128, EAN128, EAN13, EAN-8, UPC-A, UPC- E, CODABAR); QR Code |
| 8 | Sequence | 0-999; 000-999; A-Z; a-z |
| 9 | Repeat | Range: 1-99 |
| 0 | Cut | Cut; Solid line; None |
Combination Keys
| Combination Key | Introduction |
| 【Shift】+【Print】 | Copy Print; Range Print; Cursor Print; Tempo Print |
【Shift】+【 】 】 | Move the cursor to previous label or same label's different area |
【Shift】+【 】 】 | Move the cursor to next label or same label's different area |
【Shift】+【 】 】 | Move the cursor to current label's beginning |
【Shift】+【 】 】 | Move the cursor to current label's end |
【Shift】+【 】 】 | Delete all/current label/current line |
| 【Shift】+【0-9 】 | Insert punctuations |
| 【Shift】+【 C 】 | Copy current line (not include sequence or barcode) |
| 【Shift】+【 V 】 | Paste the copy information |
| 【Shift】+【 W】 | Adjust contrast ratio of LCD |
| 【Shift】+【 S 】 | Adjust brightness of LCD |
| 【Shift】+【File】 | Preview the label outline |
| 【Shift】+【Space】 | DIY:create custom form |
| 【Shift】+【 M 】 | Turn on/off LCD back-lit |
Input Euro-Latin Letters ÂÄ...
The key "ÂÄ..." is used to input variant form of the Latin letters in different language inputting.

Input the English letter and press "ÂÄ..." key
- If the letter does not have any variant form, then there will be no action
- If the letter has variant forms, then the letter will be into selected mode, continue to press key "ÂÄ..." or press "
![]() " & "
" & " ![]() " to select the desired variant of the letter, press "Enter" to confirm.
" to select the desired variant of the letter, press "Enter" to confirm.
Create General Labels
Turn on the printer and input the content, such as SUPVAN.

Press Enter to create a new line and input the content, such as LP5125M.

To create a new label, press "Add" and it will automatically turn. Then input the content, such as LABEL2.


Create Flag/Wrap Labels
To create a flag label, press "Flag/Wrap", show the left screen, select "Flag" to enter flag label editing mode

Set the parameter of length, diameter and type of flag label as per your need.

| Length | Label's length, can be automatic or specify (10-200mm) | ||||||
| Diameter | Tube's diameter, can be automatic or specify (2-90mm) Perimeter=π*Diameter | ||||||
| Type | AA:AA; AA:BB | ||||||

When making flag labels, please use Non Laminated or Strong Adhesive Label Tapes only.
To create a wrap label, press "Flag/Wrap", show the left screen, select "Wrap" to enter wrap label editing mode

Set the parameter of diameter, choose inverse and repeat as per your need

| Diameter | Tube's diameter, can be automatic or specify (3-90mm) |
| Inverse | Turn on/off inverse |
| Repeat | Repeat can only work for single line label. Repeat result: 6mm: 2 lines; 9mm: 3 lines; 12mm: 4 lines |

When making wrap labels, please use Wrap Label Tapes only.
Create Template Labels
To create a template label, press "Template", then choose the template style you want.

| Panel | 4 different preinstall panel templates |
| Table | 11 different preinstall table templates |
| Decorate Frame | 86 different preinstall decorate frame templates |

Troubleshooting
| Common problems | Fault cause | Handling methods | |
| 1 | Turning on without LCD lighting up |
|
|
| 2 | Turning on failure with Li-polymer battery |
|
|
| 3 | Turning on failure with AA alkaline batteries |
|
|
| 4 | LCD screen blurred |
|
|
| 5 | Interface display "Install label" after consumable installation |
|
|
| 6 | Label jam |
|
|
| 7 | Abnormal sound when printing |
|
|
| 8 | Unclear print |
|
|
| 9 | Printer worked without content printed |
|
|
| 10 | Print content incomplete |
|
|
| 11 | Uncuttable |
|
|
| 12 | Interface display "Printing..." without printer working |
|
|
| 13 | No detection after consumable depletion |
|
|
| 14 | Interface display "Label run out, Replace new" |
|
|
| 15 | Label involved in rubber roller |
|
|
| 16 | Ribbon rewind shaft not work |
|
|
| 17 | Automatically stop without printing content |
|
|
SAFETY INSTRUCTIONS

- Do not touch the AC adapter and printer during a thunder storm.
- Do not damage, or place heavy objects on the power cord or plug. Always hold the AC adapter when disconnecting from the power outlet.
- Do not use sharp objects to change the batteries.
- Do not touch metal parts around the print head immediately after printing.
- Do not touch the cutter blade.
- Do not let any metal or liquid get into the printer. This may damage the internal parts of printer or even cause fire or electric shock.
- Do not use a battery other than that specified. Do not use combinations of old and new batteries or combinations of different types, different charging levels, different manufacturers or different models.
Precautions
- Please use a single power socket. Do not use any multiple socket inserted with multiple devices, this may cause a fire or electric shock.
- Do not use any power plug with wet hand in case of any electric shock.
- Do not use any AC power which is not within 100-240V.
- Do not disassemble or modify the printer without any authorization. This may lead to fire or electric shock.
- Please keep the printer away from alcohol, gasoline and other flammable solvents as well as any ignition source to prevent any deflagration and fire.
- Depending on the location, material, and environmental conditions, the label may unpeel or become irremovable, or the color of the label may change or be transferred to other objects. Before applying the label, check the environmental conditions and the material.
- Do not place the printer/batteries/AC adapter in direct sunlight or rain, near heaters or other hot appliances, in any location exposed to extremely high or low temperatures or high humidity, or in dusty locations.
- Do not try to print if the label cassette is empty; it may damage the print head.
- Do not pull the tape while printing or feeding; it will damage the tape and the printer.
- Any data saved in memory may be lost due to failure or repair of the printer, or if the battery expires.
Documents / Resources
References
Download manual
Here you can download full pdf version of manual, it may contain additional safety instructions, warranty information, FCC rules, etc.
Advertisement


Need help?
Do you have a question about the LP 5125M and is the answer not in the manual?
Questions and answers