Pelonis PFS45A5BBB - Stand Fan Manual
- Owner's manual (12 pages) ,
- Owner's manual (21 pages)
Advertisement
INSTALLATION INSTRUCTIONS
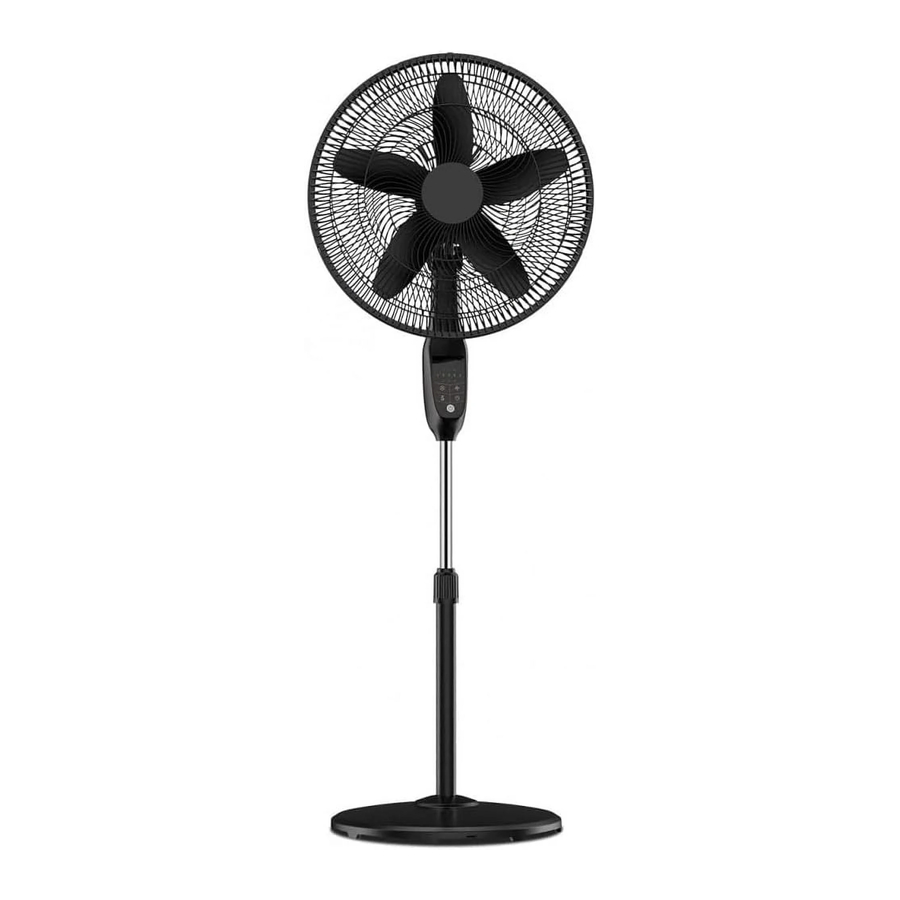
Name of components

Front and Rear Guard Installation

OPERATING INSTRUCTION
- Remote Controller
![]()
"![]() " ON/OFF KEY
" ON/OFF KEY
The key is for switching on the fan. The fan will be started. Press the key again, it will be switched off.
"![]() " TIMER KEY
" TIMER KEY
When the TIMER key is touched repeatedly, the time to be set for air delivery increased step by step. For instance, if the fan operation is required to be set for 7 hours, this key must be touched repeatedly so that the pilot lamps for 1, 2 and 4 hours lighten together.
It means that the set time is 1+ 2+ 4 = 7 hours. The time setting indicated by the pilot lamp will decrease gradually by a unit of 1 hour. Don't press the TIMER key when the fan is required to operate continuously. At the moment all pilot lamps don't light.
"![]() " SPEED KEY
" SPEED KEY
When the fan runs at normal mode or ECO mode, press the "speed" repeatedly to choose 5 different speeds; When it runs under natural or sleep mode, press the "speed" repeatedly to choose 3 different speed.
"![]() " MODE KEY
" MODE KEY
Press The M to select mode. The sequence is normal, natural sleep and ECO. when this M being touched repeatedly or continuously The light can indicate mode state It can also be controlled by remote control type changes in the sequence from NORMAL-NATURAL-SLEEP-ECO-NORMAL wind when this key being touched repeatedly or kept in. - Oscillation Control
To make the fan oscillate, press the clutch knob located on the top of the motor housing. To get the directional airflow, pull the clutch knob up to its initial position. - Tilt Adjustment
To adjust the air flow upward or downward, push the grilles lightly to the desired direction. - Height Adjustment
The height of the fan can be adjusted by loosening the height adjustment ring, carefully raising or lowering the fan and firmly re-tightening the height adjustment ring.

NOTE:
Use manganese or alkaline batteries of type "AAA". Do not use rechargeable batteries.
- BATTERY WARNING AS BELOW
Do not dispose of batteries in fire, batteries may explode or leak.
Do not mix old and new batteries.
Do not mix alkaline, standard (carbon-zinc) or rechargeable (nickel-cadmium) batteries.
Pay attention to poles (+ and -) of the batteries.
![]()

CONTROL PANEL

| NO. | Description |
| 1 | Timing display lamp |
| 2 | Air speed indicator |
| 3 | Natural mode indicator |
| 4 | ECO indicator |
| 5 | Mode |
| 6 | ECO mode |
| 7 | Sleep mode indicator |
| 8 | Air speed |
| 9 | Timing |
| 10 | ON/OFF |
"![]() " TIME KEY
" TIME KEY
When the TIMER key is touched repeatedly, the time to be set for air delivery increased step by step. For instance, if the fan operation is required to be set for 7 hours, this key must be touched repeatedly so that the pilot lamps for 1, 2and 4 hours lighten together. It means that the set time is 1+ 2+ 4= 7 hours. The time setting indicated by the pilot lamp will decrease gradually by a unit of 1 hour. Don't press the TIMER key when the fan is required to operate continuously. At the moment all pilot lamps don't light.
"![]() " MODE KEY
" MODE KEY
Press The M to select mode. The sequence is normal, natural, sleep and ECO. when this M being touched repeatedly or continuously. The light can indicate mode state. It can also be controlled by remote control.
| Time (H) | lamps |
| 1 | 1h |
| 2 | 2h |
| 3 | 1h/2h |
| 4 | 4h |
| 5 | 1h/4h |
| 6 | 2h/4h |
| 7 | 1h/2h/4h |
"![]() " SPEED KEY
" SPEED KEY
When the fan runs at normal mode or ECO mode, press the "speed" repeatedly to choose 5 different speeds; When it runs under natural or sleep mode press the "speed" repeatedly to choose 3 different speed.
"![]() " ON/OFF KEY
" ON/OFF KEY
The key is for switching on the fan. The fan will be started. Press the key again, it will be switched off.
"![]() " ECO KEY
" ECO KEY
Press this key to turn on ECO function or turn off it.

INSTRUCTIONS FOR USE
Instructions for operation of bod

MAINTENANCE INSTRUCTION
The fan requires little maintenance. Do not try to fix it by yourself. Refer it to qualified service personnel if service is needed.
- Before cleaning and assembling, fan must be unplugged.
- To ensure adequate air circulation to the motor, keep vents at the rear of the motor free of dust. Do not disassemble the fan to remove dust.
- Please wipe the exterior parts with a soft cloth soaking a mild detergent.
- Do not use any abrasive detergent or solvents to avoid scratching the surface. Do not use any of the following as a cleaner: gasoline, thinner.
- Do not allow water or any other liquid into the motor housing or interior parts.
CLEANING
- Be sure to unplug from the electrical supply source before cleaning.
- Plastic parts should be cleaned with a soft cloth moisten with mild soap. Thoroughly remove soap film with dry cloth.
USER SERVICING INSTRUCTIONS
- Grasp plug and remove from the receptacle or other outlet device. Do not unplug by pulling on cord.
- Open fuse cover. Slide open fuse access cover on top of attachment plug towards blades.
![]()
- Remove fuse carefully. Insert the tip of your tool into fuse slot (close with the terminal), then prize the fuse gradually and slowly, but not overexert. If you feel tight, you can try it at several times and prize the fuse little by little. When one side of the fuse has been prized, then you can get the fuse out entirely.
- Risk of fire. Replace fuse only with 2.5 Amp, 125 Volt fuse.
- Close fuse cover. Slide closed the fuse access cover on top of attachment plug.
- Risk of fire. Do not replace attachment plug. Contains a safety device (fuse) that should not be removed. Discard product if the attachment plug is damaged.

Notice:
- When you replace the fuse, please don't operate suddenly or overexert, or else the product will be damage or cause accident.
- When you feel it hard to be operated, please make sure you have got the right way.
IMPORTANT SAFETY INSTRUCTIONS

Read Rules for Safe Operation and Instructions Carefully.

- This appliance has a polarized plug (one blade is wider than the other). To reduce the risk of electric shock, this plug is intended to fit in a polarized outlet only one way. If the plug does not fit fully in the outlet, reverse the plug. If it still does not fit, contact a qualified electrician. Do not attempt to defeat this safety feature.
![]()
To reduce the risk of fire or electric shock, do not use this fan with any solid-state speed control device.- This product employs overload protection (fuse). A blown fuse indicates an overload or short-circuit situation. If the fuse blows, unplug the product from the outlet. Replace the fuse as per the user servicing instructions (follow product marking for proper fuse rating) and check the product. If the replacement fuse blows, a short-circuit may be present and the product should be discarded or returned to an authorized service facility for examination and/or repair.
- "Do not operate any fan with a damaged cord or plug. Discard fan or return to an authorized service facility for examination and/or repair."
- "Do not run cord under carpeting. Do not cover cord with throw rugs, runners, or similar coverings. Do not route cord under furniture or appliances. Arrange cord away from traffic area and where it will not be tripped over."
- Do not leave the fan running unattended.
- Keep electrical appliances out of reach from children or infirm persons. Do not let them use the appliances without supervision.
- If the supply cord is damaged, it must be replaced by manufacturer or its service agent or a similarly qualified person in order to avoid a hazard.
- This appliance is not intended for use by persons (including children) with reduced physical, sensory or mental capabilities, or lack of experience and knowledge, unless they have been given supervision or instruction concerning use of the appliance by a person responsible for their safety. Children should be supervised to ensure that they do not play with the appliance.
- When the fan was assembled, the rotor blade guard shall not be taken off anymore.
- Prior cleaning unplug the fan.
- The rotor guard shall not be dissembled/opened to clean the rotor blades.
- Wipe the fan enclosure and rotor blade guard with a slightly damp cloth.
RULES FOR SAFE OPERATION
- Never insert fingers, pencils, or any other object through the grille when fan is running.
- Disconnect fan when moving from one location to another.
- Be sure fan is on a stable surface when operating to avoid overturning.
- DO NOT use fan in window, rain may create electrical hazard.
- Household use only.
Documents / ResourcesDownload manual
Here you can download full pdf version of manual, it may contain additional safety instructions, warranty information, FCC rules, etc.
Advertisement


Need help?
Do you have a question about the PFS45A5BBB and is the answer not in the manual?
Questions and answers