Table of Contents
Advertisement
Quick Links
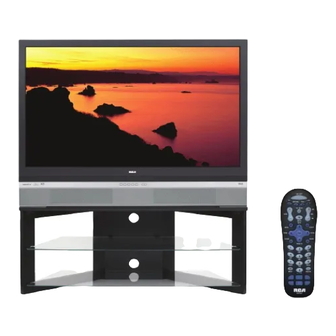
Changing Entertainment. Again.
Find Inside:
Connections
•
.................
Remote
•
..........................
Features
•
........................
Menus
•
............................
FAQs
•
...............................
Troubleshooting
•
Warranty
•
......................
HDTV User's Guide
page 9
page 21
page 31
page 39
page 51
.........
page 52
page 58
rca.com/television
Advertisement
Table of Contents

Related Manuals for RCA M50WH92S


Summary of Contents for RCA M50WH92S
- Page 1 Changing Entertainment. Again. Find Inside: Connections • ....page 9 Remote • ......page 21 Features • ......page 31 Menus • ......page 39 FAQs • ....... page 51 Troubleshooting • ..page 52 Warranty • ...... page 58 rca.com/television...
-
Page 2: Important Information
Product registration Please fill out the product registration card (packed separately) and return it immediately. For U.S. customers: Your RCA Consumer Electronics product may also be registered at www.rca.com/television. Returning the card allows us to contact you if needed. Product Information Keep your sales receipt to obtain warranty parts and service and for proof of purchase. -
Page 3: Aspect Ratio
Introduction Thank You for Choosing rCa Congratulations on purchasing this RCA High Definition Television (HDTV) featuring Texas Instruments Digital Light Processing® technology–a true viewing experience. Your purchase decision represents an investment in a new generation of technology–DLP® and HDTV. Even though this is a technologically advanced HDTV, it is the most user-friendly of its kind–with... -
Page 4: Introduction
Introduction Other Key Features of Owning an rCa HDTV RCA HDTV has been designed with features that will enhance your TV viewing experience, and features that provide flexibility to build on the digital revolution that is taking place. A summary of your TV’s most unique features follows. -
Page 5: Table Of Contents
Table of Contents Introduction Thank You For Owning an rCa HDTV ................4 Other Key Features of Owning an RCA HDTV ............4 Lamp Replacement ..................... 4 Chapter 1: Connections & Setup Things to Consider Before You Connect ................. 7 Protect Against Power Surges .................. - Page 6 Table of Contents Chapter 3: Using the TV’s Features about the Channel Banner ..................... 31 Digital or analog TV Channels ..................32 Direct Tuning to a Channel ..................32 Getting a Program Description ................32 Parental Controls ......................33 Lock/Unlock TV ......................33 How V-Chip Works for the USA and Canada ............
-
Page 7: Chapter 1: Connections & Setup
Chapter 1: Connections & Setup Things to Consider Before You Connect Protect against Power Surges • Connect all components before you plug any of their power cords into the wall outlet or power strip. NEVER plug your TV into an outlet that is controlled by a wall switch. •... -
Page 8: Get The Picture
By entering where you live, this mapping program tells you what local analog and digital stations are available using a certain antenna. Once you determine what type of antenna you need, go to rca.com. •... -
Page 9: Choose Your Connection
Connections & Setup Choose Your Connection There are several ways to connect your HDTV, depending on the components you want to connect and the quality of the signal you want to achieve. The HDMI and component jacks are considered excellent; S-Video is very good; composite jacks are good, while connecting components to the Antenna or Cable input is fair. -
Page 10: Y Pb Pr (Component Video) Connection
Connections & Setup Y Pb Pr (Component Video) Connection INPUT 2 INPUT 3 INPUT 4 COMPONENT/COMPOSITE COMPOSITE ANTENNA/CABLE INPUT FIXED/VARIABLE Y/VIDEO VIDEO AUDIO OUTPUT Note: This back panel graphic is for representation only. Your back DIGITAL AUDIO OUTPUT HDMI 1 INPUT HDMI 2 INPUT For Factory use only panel might be different. S-VIDEO INPUT 1 COMPONENT/COMPOSITE... -
Page 11: Audio/Video Connection
Connections & Setup audio/Video Connection Note: This back panel graphic is for representation INPUT 3 INPUT 1 INPUT 4 COMPONENT/COMPOSITE COMPONENT/COMPOSITE COMPOSITE only. Your back panel might ANTENNA /CABLE INPUT be different. Y/VIDEO FIXED/VARIABLE Y/VIDEO VIDEO AUDIO OUTPUT DIGITAL AUDIO OUTPUT HDMI 1 INPUT HDMI 2 INPUT For Factory use only S-VIDEO INPUT 2 COMPOSITE... -
Page 12: Hdmi Connection
Connections & Setup HDMI Connection INPUT 2 INPUT 3 INPUT 1 COMPONENT/COMPOSITE COMPOSITE COMPONENT/COMPOSITE COMPOSITE COMPOSITE COMPOSITE COMPOSITE COMPOSITE COMPOSITE ANTENNA /CABLE INPUT Y/VIDEO VIDEO FIXED/VARIABLE Y/VIDEO DIGITAL AUDIO OUTPUT HDMI 1 INPUT HDMI 2 INPUT For Factory use only S-VIDEO S-VIDEO Note: This back panel graphic is... - Page 13 Connections & Setup Connecting the Device High-Definition Multimedia Interface (HDMI) is an uncompressed digital interface that carries both video and audio data by way of an integrated mini-plug cable. Since HDMI is based on Digital Visual Interface (DVI), the jack on the back of your TV is also HDMI cable compatible with devices that have a DVI jack.
-
Page 14: Advanced Audio Connection Information
Connections & Setup advanced audio Connection Information With the audio versatility of your HDTV, you can choose various connection options depending on the type and quality of sound that you want. From good to best sound, choose one of the options or refer to the user’s manual of each device that you are connecting to get the best results. -
Page 15: Setting Up Your Tv
Connections & Setup Setting Up Your TV • Plug in the TV. Note: When you first plug your TV into an outlet, the Power indicator on the front panel will light and blink for approximately 30 seconds and then go off during the initialization of the TV. -
Page 16: Set The Menu Language
Connections & Setup Set the Menu Language Main Menu Setup Options Assisted Setup Menu Language Go Back English Press the right arrow button, then press OK to select English and continue to Highlight with the 5and 6 arrows. Select with the OK button. Continue Setup the next step. -
Page 17: What To Expect
Connections & Setup What To Expect Watching TV If you have both analog and digital cable channels these will be put into the same channel list. To tell the difference between these channels, press the INFO button and look in the channel banner for these things: a subchannel, the format, an A or D (analog or digital) icon and resolution the TV is receiving. -
Page 18: Explanation Of Jacks
Connections & Setup Explanation of Jacks The diagrams below illustrate jacks found on the back of the TV. When connecting cables, be sure to connect corresponding outputs and inputs (video input into video output, right audio input into right audio output, etc.). INPUT 1 INPUT 2 INPUT 3... - Page 19 Connections & Setup FIXED/VARIABLE AUDIO OUTPUTS FIXED/VARIABLE AUDIO OUTPUT • L and R Provides fixed/variable sound for use with an audio amplifier. HDMI 1 and 2 INPUTS High-Definition Multimedia Interface/Digital Visual Interface Provides an uncompressed digital interface that carries both video HDMI 1 INPUT HDMI 2 INPUT and audio data by way of an integrated mini-plug cable.
-
Page 20: The Front/Side Of Your Tv
Connections & Setup The Front/Side of Your TV Side Input Jacks The TV has side input jacks for convenience in connecting a camcorder, digital camera, or video game system. Please note the illustration below is just an example of how these jacks might appear. -
Page 21: Chapter 2: Using The Remote Control
? ! + - D E F turns on the TV and tunes to the correct Video Input Channel for RCA devices. This button A B C lights when you press a valid button in DVD mode (see Modes of Operation on page 24 for... -
Page 22: Using The Remote Control
(such as a cable box, satellite receiver, VCR, DVD, or audio receiver) that you’ve programmed for RCA devices. This button lights when you press a valid button in SAT•AUX mode (see Modes of Operation on page 24 for more details). -
Page 23: Programming The Remote To Operate Other Devices
DVD players, cable boxes, satellite receivers and other devices. In addition to being GO BACK programmed to operate your television, it’s already programmed to operate some RCA devices. A second and third RCA TV can be programmed to any device button, except the TV button. MUTE INFO... -
Page 24: Using Automatic Code Search
Using the Remote Control Using Manual Code Search Note: Before using manual code search, you must use Direct Entry first. This lets the remote know which type of device to begin searching codes. Then proceed with the following steps. 1. Turn on the device you want to control. 2. -
Page 25: Volume Punchthrough Feature
Using the Remote Control Volume Punchthrough Feature You may find this feature helpful if you’ve connected your devices to an audio system, and you want to use the TV’s remote control to operate the volume for a device that is connected to the audio system. -
Page 26: Using The Input Button
878 879 .............530 531 514 464 463 UNITED CABLE ............461 RCA ..717 726 772 781 795 827 845 866 867 870 871 HAMLIN ............461 480 481 482 UNIVERSAL ........468 469 470 471 502 524 ............ 872 875 878 879 449 895 HITACHI ................463... - Page 27 RADIO SHACK .... 668 699 706 750 786 868 874 876 ILO ................959 TREDEX ................ 941 RCA ....661 667 703 723 750 795 844 873 874 876 INFINITY ..............417 UNITED ................ 449 REALISTIC ....661 667 669 673 678 689 697 699 INSIGNIA ..........
-
Page 28: Vcr Codes
SONY ..............657 659 PROSCAN ........636 637 650 653 651 652 HI-Q ................248 ULTIMATE TV ............653 659 RCA .... [636] 649 [637] 622 658 653 650 651 652 098 INFINITY ..............288 ZENITH ................656 REALISTIC .............. 567 603 INSIGNIA ..............245 SAMSUNG ......... - Page 29 ..245 268 342 354 361 363 248 251 254 274 292 300 337 RADIX ................245 RANDEX ...............245 RCA ..[225] 245 [308] 309 311 312 313 314 315 316 335 .............354 369 228 278 292 332 REALISTIC ..225 226 227 245 268 354 361 363 248 251 ............254 274 292 300 337...
- Page 30 This page left intentionally blank.
-
Page 31: Chapter 3: Using The Tv's Features
Chapter 3: Using the TV’s Features Program Title/Acquiring Channel 12:30 AM 00:30 12:39 PM 6-1 DNLJ Cable Input English 16x9 Normal 1080i HDTV MPAA - Not Rated 12:00 PM - 1:00 PM about the Channel Banner The Channel Banner appears when you press the INFO button on the remote. If an icon in the channel banner is grayed out (dim), the feature is not available. -
Page 32: Digital Or Analog Tv Channels
Using the TV’s Features Digital or analog TV Channels A single off-air antenna can pick up both analog and digital channels. Digital channels can be made up of primary channels and subchannels. Note: Subchannels (sometimes called minor channels) are channels associated with the primary channel (sometimes called the major channel). -
Page 33: Parental Controls
Using the TV’s Features Parental Controls Main Menu Channel Setup Go Back The Parental Controls menu lets you adjust the TV’s blocking features, like V-Chip, which can block programs: The Parental Controls menu allows you to program your TV so that Lock TV •USA V-Chip Channel Search... -
Page 34: Usa V-Chip Tv Ratings
Using the TV’s Features USa V-Chip TV ratings Main Menu Parental Controls USA V-Chip The V-Chip TV rating limits are set with this screen. The USA V-Chip TV Rating lets you decide which TV programs can and Go Back The TV must be locked for the rating limits to be enforced. V-Chip TV Rating cannot be viewed. -
Page 35: Blocking Specific Content Themes
Using the TV’s Features Blocking Specific Content Themes Content Themes You can block programs based on their content. When you block a Sexually explicit dialogue content theme for a particular rating, you automatically block that content theme for higher rated programs as well. Adult language For example, if you do not want your child to watch programs that have Sexual situations... -
Page 36: Blocking Movie Ratings
Using the TV’s Features Blocking Movie ratings If you only want your child to watch movies that have a PG rating and lower (in other words, movies rated PG and G), then you could automatically block out all other movies with higher ratings. -
Page 37: Channel Lists
Using the TV’s Features Front Button Block Main Menu Channel Setup Parental Controls Selecting this option lets you block (disable) or unblock (enable) the TV’s Go Back Front Buttons Blocked USA V-Chip front buttons. The remote still tunes to any channel. Front Panel Block can: Front Buttons Unblocked Canada V-Chip V-Chip Unrated... -
Page 38: Auto Tuning Feature
Front Input Not Connected Startup Channel VCR2 RCA SAT2 each device connected to your TV. When you set auto tuning, you’re Diagnostic Info Not Connected Not Connected... -
Page 39: Chapter 4: Using The Tv's Menu System
In addition, Front Input Not Connected Startup Channel VCR2 RCA SAT2 Diagnostic Info a menu path appears at the top of the screen to let you know where you are Not Connected Not Connected Input 2 in the menu system. -
Page 40: Choice Lists
Using the TV’s Menu System Sliders Balance Sliders are used to select a specific point of a control that has continuous levels. To make adjustments: 1. Highlight the slider for the feature you want to adjust. 2. Press the up or down arrow button to adjust the indicator on a vertical slider. -
Page 41: Picture Menu
Using the TV’s Menu System Picture Menu Main Menu Go Back The Picture menu has screens for optimizing the picture for each of the TV’s input: Picture Menu The Picture Menu contains menus to configure video settings: Picture Preset •Picture Preset Mode Audio Menu •Picture Settings Mode, Picture Settings, Screen Format, Advanced Picture, and Screen Adjust... -
Page 42: Screen Format
Using the TV’s Menu System Screen Format Main Menu4Picture Quality Use this screen or the FORMAT Go Back Normal button on the remote to change The Screen Format feature allows you to change how the image is displayed 16x9 how the picture is displayed for: Picture Preset Mode Antenna Input - 4x3. -
Page 43: Screen Adjust Menu
Using the TV’s Menu System Contrast Enhance Makes the picture appear brighter by deepening the black parts of the picture. This also helps to maintain a more consistent black level from one scene to the next. The options are On and Off. Film 3:2 Pulldown Automatically detects video sources that were originally recorded on film and converted to a different format. -
Page 44: Audio Menu
Using the TV’s Menu System Audio Menu Main Menu Go Back The Audio menu has screens for setting the audio features and for tweaking the sound: Picture Menu The Audio menu lets you adjust audio output. To access the Audio menu, press •Sound Preset Mode Audio Menu •Sound Logic... - Page 45 Using the TV’s Menu System Mono This should only be used when the stereo signal is weak. Main Menu Audio Advanced Audio Cable Input Go Back Select a default for analog sources and inputs: Stereo Splits the incoming stereo audio signal into left and right Sound Expansion Mono Stereo...
-
Page 46: Channel Setup Menu
Using the TV’s Menu System • Variable Level, Speakers On Turns the TV’s front speakers On Main Menu Advanced Audio and allows variable output from the TV’s FIXED/VARIABLE AUDIO Select the default for the Fixed/Variable Output: Go Back Variable Output, Speakers On Sound Expansion Variable Output, Speakers Off OUTPUT jacks. -
Page 47: Advanced Settings
Using the TV’s Menu System Advanced Settings Main Menu Channel Setup The Advanced Settings menu has screens that let you Go Back The Advanced Settings menu lets you set up channel and input features, and get set up channel/input features and get more information: Lock TV •Auto Tuning Channel Search... -
Page 48: Digital Captions
Using the TV’s Menu System Analog Captions Main Menu Setup Options Closed Captioning Go Back You can select a closed caption mode, which is the mode, or source, used for If a digital-TV program has “analog captions” but no"digital captions," Caption Display then the analog caption mode you select is used. -
Page 49: Time Menu
Using the TV’s Menu System Background Opacity allows you to change the see-through background options: Solid, Transparent, Translucent, and Flashing. Caption Opacity allows you to change the see-through caption options: Solid, Transparent, Translucent, and Flashing. Time Menu Main Menu Setup Options Time Menu The current time is 3:58 PM. -
Page 50: Advanced Options
Multiple TV Setup This features allows you to control three different RCA TVs. This is helpful if you have two or three RCA TVs near each other, and they also have this menu option, but you want to control them independent of each other. Program a second RCA TV to one of the device buttons (SAT•AUX or DVD) using the TV2 code 162. -
Page 51: Chapter 5: Other Information
Other Information Chapter 5: Frequently asked Questions (FaQs) Why does my TV take so long to turn on? Quick Startup is a power-saving feature in your TV. Select either enable or disable, which ever option is best for you. Enabling Quick Startup allows you to turn on the TV faster than if disabled. Keep in mind, if you disable Quick Startup it adds approximately 30 seconds to your TV’s turn on time. -
Page 52: Other Information
Other Information Troubleshooting Most problems you encounter with your TV can be corrected by consulting the following troubleshooting list. TV Problems TV won’t turn on • Press the TV button or ON/OFF button while remote is in TV mode and there’s a source of power to the outlet or outlet strip. •... -
Page 53: Blank Screen
Other Information If you’ve connected a device to your A/V receiver, such as a DVD player or satellite receiver, you may experience a slight delay • between the audio heard and the video seen. This occurs because the digital audio is sent directly to the speakers while the video must be processed inside the TV before it is displayed. -
Page 54: Noisy Stereo Reception
Other Information noisy stereo reception • May be a weak station. Use Audio menu to choose Mono sound. no picture, no sound but TV is on • The channel might be blank — change channels. • If you’re watching your VCR and it’s connected with coaxial cable to the CABLE/ANTENNA jack, tune the TV to channel 3 or 4 (whichever channel is selected on the 3/4 switch on the back of your VCR). - Page 55 Keep your TV unplugged for about 5 minutes. Then plug the TV back in, turn on the TV, and see if the problem is fixed. If the problem remains, then please visit www.rca.com/television for updated FAQs or contact RCA Customer Support at the support number provided in your Warranty under How To Get Service.
-
Page 56: Lamp Replacement Information
Other Information Lamp replacement Information replacing the Lamp Unit Your TV’s source of light comes from a lamp – similar to lamps used in film or front projectors. Although this lamp is long- lasting, it may need to be replaced eventually. When to replace the lamp You probably need a new lamp if there’s no picture, but you still can hear the audio and the power light on the front of the TV does the following: blinks 5 times, pauses, blinks 5 times again. -
Page 57: Hdtv Specifications
Other Information HDTV Specifications Tuning Capability Channel Tuning ................NTSC/ATSC/64 QAM/256 QAM Digital Cable Compatibility ............QAM, HDMI/DVI, Component Video 3:2 Pull Down ................Yes 16 x 9 / 4 x 3 Format Control (Screen) ........Yes Adaptive Video Noise Reduction ..........Yes Adjustable Color Temperature ...........Yes Adjustable Picture Control ............Yes Auto Color Control ..............Yes Comb Filter ................Digital Frame Comb (3D Y/C) -
Page 58: Limited Warranty
Please complete and mail the Product Registration Card packed with your TV or register on-line at www.rca.com/television. It will make it easier to contact you should it ever be necessary. The return of the card is not required for warranty coverage. - Page 59 Other Information Limitation of Warranty: • THE WARRANTY STATED ABOVE IS THE ONLY WARRANTY APPLICABLE TO THIS PRODUCT. NO VERBAL OR WRITTEN INFORMATION GIVEN BY TTE TECHNOLOGY, INC., ITS AGENTS OR EMPLOYEES SHALL CREATE A GUARANTY OR IN ANY WAY INCREASE OR MODIFY THE SCOPE OF THIS WARRANTY. •...
-
Page 60: Care And Cleaning
Other Information Care and Cleaning CAUTION: Turn OFF your TV before cleaning. You can clean the TV as required, using a soft lint-free cloth. Be sure to occasionally dust the ventilation slots in the cabinet to help assure adequate ventilation. The TV’s screen may be cleaned with a soft, lint-free cloth as well. - Page 61 This page left intentionally blank.
- Page 62 This page left intentionally blank.
- Page 63 This page left intentionally blank.
- Page 64 TTE Technology, Inc. 101 West 103rd Street Indianapolis, IN 46290 ©2007 TTE Technology, Inc. RCA and associated marks are trademarks of THOMSON S.A. used under license to TTE Corporation. Printed in USA Part number 72-T199727-540...
Need help?
Do you have a question about the M50WH92S and is the answer not in the manual?
Questions and answers