Medela BabyWeigh - Scale Manual
- Instructions manual (24 pages) ,
- Quick start instructions (2 pages)
Advertisement
- 1 Important Safeguards
- 2 Use and Storage Conditions
- 3 Power Requirements
- 4 Explanation of Terminology
- 5 Baby Tray Attachment & Removal
- 6 Part Identification
- 7 Operator Interface
- 8 Scale Setup
- 9 Instructions for Weighing
- 10 Calibration Procedure
- 11 Scale Settings Adjustment
- 12 Troubleshooting
- 13 BWII Data Output Format
- 14 Replacement Parts
- 15 Technical Specifications
- 16 Documents / Resources
Important Safeguards
When using electrical products, especially when children are present, basic safety precautions should always be followed.
 Please read all instructions before using this product.
Keep these instructions for future reference.
Warnings identify all instructions that are important for safety. Failure to observe these instructions can lead to personal injury or damage to the product. The following symbols and signal words show the significance of the warnings:

Can lead to serious injury or death.

Can lead to minor injury.
NOTICE
Can lead to material damage (not related to personal injury).

Useful or important information that is not related to safety.
- To reduce the risk of electric shock or product damage, never insert or remove the AC adapter with wet hands.
- Do not under any circumstances dismantle or alter the device, as this could result in electric shock or injury as well as adversely affect the precision of measurements.
- To prevent fire hazard, use only a correctly wired (120V AC) outlet, and do not use a multiple outlet extension cable.
- Always take the utmost care when placing a baby in the baby tray. Ensure that there is no risk of the equipment tipping over.
- Ensure the baby is lying down in the tray with minimal movement. Excessive movement could result in a fall, potentially causing serious injury.
- The baby tray is not designed to accommodate individuals weighing more than 20 kg (44 lbs).
- Infants must not be left unattended on the baby tray.
- Do not sit on the edge of the scale, jump on it, or bounce on the baby basket, as any resultant fall or slip may cause serious injury.
- When connecting the BabyWeigh™ II to a computer, ensure that the computer conforms to IEC60950.
- To help prevent the spread of infections, always clean the equipment in-between different patient use. Clean the tray and the housing as required with Cavicide® or commercially available disinfectant.
- Ensure the equipment is placed on a level and stable surface. If the equipment is used when the scale is unstable because not all feet are on the surface, there may be a risk of stumbling or inaccurate measurement.
- Only use the adapter supplied with this equipment (PN 9207053 /101034772). Do not insert or remove the plug by the cable.
- When changing batteries, ensure that the new batteries are inserted with the correct polarity, + and -. If the polarity is incorrect, then the batteries may leak and damage the equipment.
- When carrying the equipment, unplug the AC adapter from the wall and hold the main body firmly, using handles provided.
- To avoid any risk of injury or malfunction, keep your fingers and other objects away from the space between the inner-plate and the scale.
- Never jump on the scale, there may be a risk of stumbling and malfunction of the equipment.
NOTICE
This is a precision manufactured and accurately calibrated product. Please observe the following instructions.
- Do not dismantle the scale housing. The baby tray may be removed by following the instructions in "Baby Tray Attachment & Removal" section.
- When not in use for a long time, unplug the AC adapter from the wall socket.
- Remove the batteries before storing the equipment for long periods of time.
- Do not wipe the equipment with corrosive chemicals (benzine, cleaner, etc.). Use a neutral detergent to clean the equipment. Do not spill water or chemical liquid on or in the unit. The baby tray should be cleaned using Cavicide® or commercially available disinfectant. Do not wash any part of the scale other than the basket with water.
- Avoid subjecting the equipment to excessive shocks or vibrations.
- If an unauthorized person attempts to disassemble or repair any part of the unit, the warranty will become invalid. If the unit malfunctions, please consult your Medela sales consultant or customer service toll-free at 1-800-435-8316.
Please observe the following instructions for accurate measurement.
- Measurement may not be possible on a surface that is strongly vibrating. In such cases transfer the equipment to a stable surface with little or no vibration.
- If the scale is moved, and the new location has a temperature difference of more than 20°C (36°F) please allow at least 2 hours before using.
- While taking measurements, do not use mobile phones, microwave therapy equipment or other types of transmitters near the scale as they may cause interference and margin errors.
- Avoid scale placement near heating/cooling vents, heating appliances, areas of high airflow or direct sunlight.
- When disposing of this unit, please do so in accordance with local standards for industrial waste.
SAVE THESE INSTRUCTIONS
Accurately measuring infant milk intake during breastfeeding is important in the management of hospitalized infants, as well as in addressing breastfeeding concerns with healthy infants at home.
In the hospital, knowledge of milk intake improves clinical diagnosis of feeding problems while providing essential information for precise supplementation of infants at risk for under or over consumption1,2,3. In the home, knowledge of milk intake ensures feeding adequacy and enhances maternal satisfaction4,5.
Clinical indices of milk intake during breastfeeding, such as duration of sucking, audible swallowing, and presence of maternal milk ejection, are not accurate replacements for the evidence based practice of test weighing before and after feeding. Using test weights may also increase maternal satisfaction when compared to using clinical indices to ensure adequate feeding5.
Use and Storage Conditions
Usage Conditions
Temperature Range for Use:
+5 ºC to +35 ºC
(+41 ºF to +95 ºF)
Relative Humidity: 30% - 80% (non-condensing)
Storage Conditions
Temperature Range of Environment:
-10 ºC to +50 ºC
(+14 ºF to +122 ºF)
Range of Relative Humidity: 1 0% - 90% (non-condensing)
To avoid malfunctions, avoid storing the equipment where there is direct sunlight, significant temperature changes, the risk of dampness, a large amount of dust, in the vicinity of fires, or where there is the risk of receiving vibrations or shocks. When in storage do not put anything on the tray.
Power Requirements
AC Adapter
| Model | BWII |
| Input Voltage | 100 – 240 VAC 50-60 Hz/200 mA |
| Output Voltage | 9 VDC ± 0.45 VDC |
| Rated Current | 800 mA |
| Consumption Current | 38 mA |
| Power Consumption | 0.35 W max |
Batteries
| Model | Batteries (AA x 4) |
| Consumption Current | 20 mA |
| Power Consumption | 0.12 W max |
Explanation of Terminology
- Capacity (Maximum Capacity): This shows the maximum weight that can be measured by the scale.
- Increment (Minimum Graduation): This shows the interval of the numeric value change on the digital display.
- Tare: The towel, blanket, etc., used when measuring the infant weight is called "tare". Measuring the infant weight after subtracting the weight of the blanket is called "tare weighing."
- Pre-feed: Before feed or prior to feed.
- Post-feed: After feed or following feed.
Baby Tray Attachment & Removal
Attachment
The baby tray is not attached to the main unit when unpacked.
- Pull the lever out.

- Align the far edge of the tray with the stickered line.


- Slide the tray over the platform until it stops and you hear a "click."

![]()
- Make sure the tray is firmly secured and then fix it to the platform by pushing in the lever until you hear a "click.".


Removal
The baby tray can be removed and washed.
- Pull out the lever

- While gently pushing down the lever, slide out the tray in the displayed direction.

- Remove the tray once its far edge is aligned with the stickered line.


- Once the tray is removed, take care not to insert a finger or drop anything into the exposed opening.
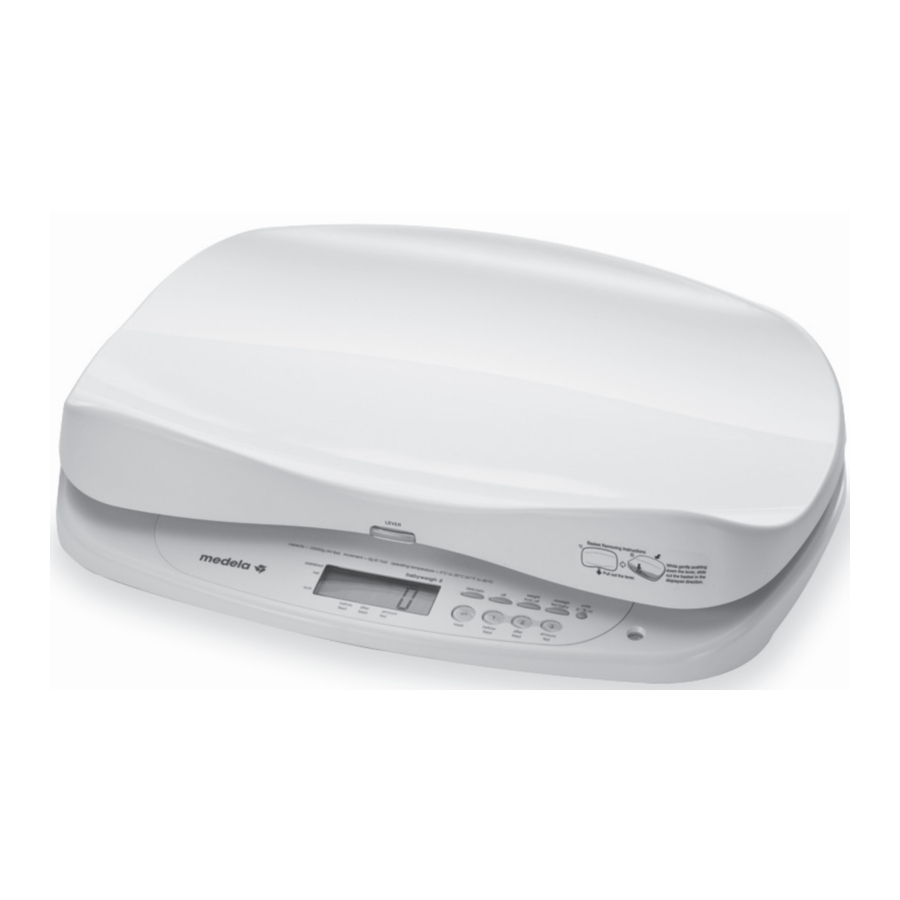
Part Identification

Operator Interface
Display panel

- The pointers ( the
![]() mark ) indicate active items.
mark ) indicate active items. - The backlight is on only when the AC adapter is used.
Display panel descriptions:
| Stabilized | The weight measurement has settled. |
| Net | A tare weight is subtracted from current weight. |
| Lock | Holding the stabilized weight. |
| Before feed | Before feed weight displayed. |
| After feed | After feed weight displayed. |
| Amount fed | Weight of amount fed displayed. |
Operation keys

* In gram only version (PN 0407023) of scale this button is disabled.
Operation key functions
tare/zero | Tare/zero | Sets the tare weight to zero. |
off | Off | Turns off the scale. |
weight lock off | Weight lock off | Turns off weight lock mode until weight is removed from scale. Weight lock automatically turns on again when scale displays zero. |
reweigh fed baby | Reweigh fed baby | Redo post-feed weight. Clears post feed weight and amount fed allowing entry of new post feed weight and milk intake calculation. |
units g / lb. oz  | Units g/lb-oz | Switches between grams and pounds ounces. *In gram only version (PN 0407023) of scale this button is disabled. |
 | Reset | Turns on scale. Releases weight lock and sets display to zero (Stored weights remain in memory). |
 | Before feed | Stores before feed weight in memory 1. Displays before-feed weight once it has been stored. |
 | After feed | Stores after feed weight in memory 2. Displays after-feed weight once it has been stored. |
 | Amount fed | Stores amount fed weight in memory 3. Displays the calculated feed amount once the post-feed weight has been stored. |
Symbols and their meaning
 | Type B (applied part) |
 | Class II Equipment |
 | Direct Current |
 | Output |
| | Refer to the attached Important Safeguards. |
Scale Setup
Power supply/battery
- Turn the scale upside-down, and turn the finger screw on the battery cover counterclockwise (as indicated) to release the screw.

- Lift off the battery cover.


- When the batteries start to run low, "Lo" appears on display panel as a warning. All (4 AA) batteries should be immediately replaced with new ones.
Rechargeable batteries are NOT recommended.
- A set of standard batteries should last about one year (assuming four readings a day).
Using the AC adapter

Content appearance may vary from pictures.
- Insert the AC adapter jack into the AC adapter inlet on the right side of the main unit.
- Plug the AC adapter into the power outlet.
- This equipment must be used with the included AC adapter or 4 AA batteries.
How to set up
Use the scale on a firm, flat and stable location.
- Do not position scale anywhere that is subject to direct sunlight, near heating equipment, or directly in the path of an air conditioner outlet, or other source of high airflow.
- Do not use scale anywhere that is subject to significant temperature change.
- Do not position scale anywhere that is either damp or subject to high humidity.
- After positioning the scale and before use, pick up the baby tray from both sides to confirm that the tray is secure, and not easily removed.
- Ensure that the tray locking lever is pushed in.
Level gauge check
- Place the scale on a flat surface to ensure accurate measurement.

Level gauge - view from above

- Turn the four adjusters such that the air bubble in the level guide is positioned in the center of the circle. Confirm that all four adjusters are in contact with the surface.


Instructions for Weighing
Considerations to follow prior to test-weighing
- Diaper should not be changed between the "before" and "after" weights.
- Baby should wear the same clothing for "before" and "after" weights.
- Use a bib, but do NOT include it in "before" and "after" weights.
- To improve accuracy, bundle active infants and verify that all blankets, clothing, and extremities are inside the basket and not touching the side of the scale.
- Record weights in grams only.*
* Grams is closely equivalent to milliliters (mL) or cubic centimeters (cc). Meier PP, et al. A New Scale for in-Home Test-Weighing for Mothers of Preterm and High Risk Infants. Journal of Human Lactation, 1994;10(3); 163-168.
BabyWeigh™ II Operation Overview
Once you have setup the scale ("Scale Setup" section) operation is easy. Here is an overview.
- Perform before-feed weight.
The store weight in memory press the![]() button
button - Perform after-feed weigh.
The store weight in memory press the![]() button
button - Calculate amount fed.
To calculate press![]() button.
button.
 button
 button
 button.
Setup
- Attach the tray and level the scale prior to weighing.
- Press the
![]() button and wait until a '0' appears in the display. If using a blanket or pad on the scale, press
button and wait until a '0' appears in the display. If using a blanket or pad on the scale, press ![]() button to zero out the excess weight. Net
button to zero out the excess weight. Net ![]() will be indicated.
will be indicated.
 button to zero out the excess weight. Net
 Before-feed Weight (pre-weight)
- Place baby on the scale, holding one hand just above baby. Wait until the display indicates lock
![]() (Beep sound). The value that appears is the pre-weight.
(Beep sound). The value that appears is the pre-weight.
")
- Press the
![]() button to store the pre-weight.
button to store the pre-weight. - Remove baby from the scale, place baby in a safe location and then record pre-weight.
")
 button to store the pre-weight.
Feed baby. Leave scale on during feeding.
After-feed Weight (post-weight)
- Ensure the display has reset to '0'. If it has not, press the
![]() button to zero out the display.
button to zero out the display.
- If the scale has powered off, press the
![]() button and wait until a '0' appears in the display. The pre-weight is saved in memory, even if the scale is powered off.
button and wait until a '0' appears in the display. The pre-weight is saved in memory, even if the scale is powered off.
 - Step 1")
- Place baby on the scale, holding one hand just above baby. Wait until the display indicates lock
![]() (Beep sound). The value that appears is the postweight.
(Beep sound). The value that appears is the postweight. - Press the
![]() button to store the post-weight.
button to store the post-weight. - Remove the baby from the scale and place baby in a safe location.
 - Step 2")
- Press
![]() button to display the calculated breast milk intake. Press buttons
button to display the calculated breast milk intake. Press buttons ![]() or
or ![]() to recall the pre-weight or post-weight respectively.
to recall the pre-weight or post-weight respectively. - Record the post-weight and the calculated amount fed.
- Press the
![]() button to turn off the scale. The last set of weights will remain in memory.
button to turn off the scale. The last set of weights will remain in memory.
 - Step 1")
 button to store the post-weight.
 - Step 2")
 button to display the calculated breast milk intake. Press buttons
  or
or  to recall the pre-weight or post-weight respectively.
 button to turn off the scale. The last set of weights will remain in memory.
Additional Considerations
- Press the
![]() button at any time to reset the scale. This will not delete weights in memory.
button at any time to reset the scale. This will not delete weights in memory. - If it should become necessary to reweigh the after-feed reweigh weight after it has been saved, press the
![]() button.
button.
The![]() button clears the current post-weight on the memory button
button clears the current post-weight on the memory button ![]() to prepare the scale for a new post-weight.
to prepare the scale for a new post-weight.
 button.
 button clears the current post-weight on the memory button
  to prepare the scale for a new post-weight.
Considerations for weighing infant with Leads
- If possible, disconnect leads and or tubings from monitor and place on top of bundled infant.

- Suspend monitoring/alarm during test weight procedure.
- Prior to feeding the baby reconnect leads if disconnected.

Accurate test weights for preterm infants with leads attached can be achieved by properly training NICU personnel and following an evidence based protocol. Refer to the following publication for more information:
Haase B, Barreira J, Murphy PK, Mueller M, Rhodes J. The development of an accurate test weighing technique for preterm and high-risk hospitalized infants. Breastfeed Med. 2009 Sep; 4(3):151-6.
Calibration Procedure
- This procedure should be performed in the same geographic area as the measurements for infant weights.
Procedure requires two certified 10 kg Class F test weights.
- Press
![]() button while the scale is off.
button while the scale is off. - Press
![]() button while the display is flashing all segments --> Display shows "Func 1".
button while the display is flashing all segments --> Display shows "Func 1".
![]()
- Press
![]() button --> Display shows "Func 2".
button --> Display shows "Func 2".
![]()
- Press
![]() button --> Display shows "9.XXX" (For example, 9.802 will be displayed).
button --> Display shows "9.XXX" (For example, 9.802 will be displayed).
![]()
![]()
- The gravity setting will update automatically upon completing the calibration procedure.
- Press
![]() button again --> Display shows "20 0--" and "g". Wait for display to show "20 2--".
button again --> Display shows "20 0--" and "g". Wait for display to show "20 2--".
![]()
- Place two 10 kg weights on the platform after the display shows "20 2--".
![]()
- Wait for the display to show "stabilized" mark (circle in the top of left corner), then Press the
![]() button to complete calibration.
button to complete calibration.
![]()
- Wait for display to show "func 1" then remove the 20 kg weight.
![]()
- Press
![]() button to turn off the scale.
button to turn off the scale.
 button while the display is flashing all segments --> Display shows "Func 1".
 button --> Display shows "Func 2".


 button to turn off the scale.
- If the following error messages are displayed, "Er0065" or "Er0066", re-calibration must be performed.
- Do not leave the calibration weights on the scale for prolonged periods of time (more than a few minutes).
Scale Settings Adjustment
To adjust settings for Display Hold Time and Auto Power Off Time complete the following steps:
Display Hold Time
Enter the setting menu by pressing the ![]() key. (Beep sound)
key. (Beep sound)

Press  button while the screen is flashing (Beep sound). The LCD screen will show SEt.

Depending on which setting you wish to adjust follow next steps under instructions for each setting.
The "Display Hold Time" setting holds the display for a specified length of time. This setting determines how long the weight displays after the baby has been removed from the scale. It also controls the length of time the weight is displayed when recalling pre-feed, post-feed and amount fed values.
- Press
![]() key. (Beep sound)
key. (Beep sound)
The hold time is shown (the default is 10 seconds), and the value is changed by pressing this key.
* The hold times that can be set are 5 seconds, 10 seconds, 20 seconds or 30 seconds.
- To save the hold time setting,
Press![]() again. (Beep sound)
again. (Beep sound)
![]()
 key. (Beep sound)

Auto Power Off Time
The "Auto Power Off Time" setting automatically turns off the power when the scale is unused for the specified length of time. To enter the settings menu.
- Press
![]() key. (Beep sound)
key. (Beep sound)
The auto power off time is shown (the default is none), and changed by pressing this key.
* The auto power off times that can be set are 15 minutes, 30 minutes, 45 minutes, 60 minutes, or -- (None). --(None) means that the auto power off function is deactivated.

- To save the Auto Power Off Time setting, Press
![]() again. (Beep sound)
again. (Beep sound)
![]()
 key. (Beep sound)
 again. (Beep sound)
Troubleshooting
If you are concerned that the scale may not be functioning correctly please check the following points before requesting repairs.
| Problem | Check Points |
| Scale will not 'Power On.' |
|
| 'Lo' is displayed. |
|
| ------------- is shown during measurement. |
|
BWII Data Output Format
Explanation for RS-232C-compliant output.
Specifications
| Communication standard | EIA RS-232C |
| Communication method | Asynchronous |
| Signal speed | 9,600bps |
| Data bit length | 8bit |
| Parity | None |
| Stop bit | 1bit |
| Terminator | CR + LF |
| Flow control | None |
NOTE 1 Commas (,) are used to separate data.
NOTE 2 Terminator (end of data) is CR (ASCII code: 0DH), LF (ASCII code: 0AH).
Signal line name and connection method
| Terminal no. | Signal name |
| 1 | |
| 2 | TXD |
| 3 | |
| 4 | |
| 5 | GND |
| 6 | |
| 7 | |
| 8 | |
| 9 |
Connection example
Please be sure to use a straight cable when the equipment is connected to an external computer.

Transmission data is output immediately after measurement regardless of the receiving device status. The receiving device must always be ready to receive data before any measurements are taken.
Grams (g) mode
When the display locks on a weight.
| Item | Header | Output data (ASCII code) | Details |
| Control data | {0 | Fixed at 16 | |
| Control data | ~0 | Fixed at 1 | |
| Model No. | MO | "xxxxxx" | 6 byte fixed length ("BWII") |
| Body weight | Wg | xxxxx | 3~5 bytes variable length (unit: g) |
Ex.) {0,16,~0,1,MO,"BWII",Wg, 5260
When the Before Feed key  is pressed to store weight.
| Item | Header | Output data (ASCII code) | Details |
| Before Feeding | Rg | xxxxx | 3~5 bytes variable length (unit: g) |
Ex.) Rg, 5260
When the After Feeding key  is pressed to store weight.
| Item | Header | Output data (ASCII code) | Details |
| Before Feeding | Rg | xxxxx | 3~5 bytes variable length (unit: g) |
| After Feeding | Pg | xxxxx | 3~5 bytes variable length (unit: g) |
| Amount Fed | Gg | xxxxxx | 1~6 bytes variable length (unit: g) |
Ex.) Rg, 5260,Pg, 5366,Gg, 106
lb-oz mode
When the display locks on a weight.
| Item | Header | Output data (ASCII code) | Details |
| Control data | {0 | Fixed at 16 | |
| Control data | ~0 | Fixed at 1 | |
| Model No. | MO | "xxxxxx" | 6 byte fixed length ("BWII") |
| Body weight | Wo | xx.xx.x | 5~7 bytes variable length (unit: lb.oz) |
Ex.) {0,16,~0,1,MO,"BWII",Wo, 11.14.2
When the Before Feeding key  is pressed to store weight.
| Item | Header | Output data (ASCII code) | Details |
| Before Feeding | Ro | xx.xx.x | 5~7 bytes variable length (unit: lb.oz) |
Ex.) Ro, 11.14.2
When the After Feeding key  is pressed to store weight.
| Item | Header | Output data (ASCII code) | Details |
| Before Feeding | Ro | xx.xx.x | 5~7 bytes variable length (unit: lb.oz) |
| After Feeding | Po | xx.xx.x | 5~7 bytes variable length (unit: lb.oz) |
| Amount Fed | Go | xxx.xx.x | 5~8 bytes variable length (unit: lb.oz) |
Ex.) Ro, 11.14.2, Po, 12.2.1, Go, 0.3.9
NOTE 1 Commas (,) are used to separate data.
NOTE 2 Terminator (end of data) is CR (ASCII code: 0DH), LF (ASCII code: 0AH).
Replacement Parts
Parts
| Item | Part No. |
| Power Adapter | 9207053/101034772 |
| Baby Tray Assembly | 8097012/101033916 |
| Battery Cover | 8107232/101035675 |
| Adjusting Foot | 101035674 |
| Instruction Manual (PDF Only) | 1908156/101030228 |
Accessories (not included)
| Item | Part No. |
| Soft Case | 3007357/101029343 |
Technical Specifications
| Model | BabyWeigh™ II |
| Protection against electrical shock | On AC adapter: Class II |
| On battery: Internally powered equipment | |
| Capacity | 44 lb (20000 g) |
| D (division) | 0.1 oz (0-44 lb) 2 g (0-20000 g) (2 gram accuracy) |
| Display panel | Backlit LCD (Backlight is on only when the AC adapter is used) |
| External Interface | RS-232C (D-sub 9-pin female connector), unidirectional output |
| Regular voltage | DC 6 V (using the batteries) DC 9 V (using the AC adapter) |
| Power consumption | 0.12 W or less (using the batteries) 0.35 W or less (using the AC adapter) |
| Consumption current | 20 mA (using the batteries) 38 mA (using the AC adapter) |
| Operating temperature | 41 ºF to 95 ºF (5 ºC to 35 ºC) |
| Storage temperature | 14 ºF to 122 ºF (-10 ºC to 50 ºC) |
| Overall dimensions | D16.1xW23.6xH6.2in (D409xW600xH157mm) |
| Main unit mass | Approx. 10.1 lb (4.6 kg) |
| Main material | ABS resin |
| Made in | Japan |
This product meets the following requirements.
Safety Standard: IEC60601-1:1988,+A1:1991+A2:1995
EMC Standard: IEC60601-1-2:2001,+A1:2004
Documents / ResourcesDownload manual
Here you can download full pdf version of manual, it may contain additional safety instructions, warranty information, FCC rules, etc.
Advertisement


Need help?
Do you have a question about the BabyWeigh and is the answer not in the manual?
Questions and answers