August DVB400 - HD Receiver and Media Player Manual
- User manual (13 pages) ,
- Setup manual (14 pages) ,
- Setup manual (14 pages)
Advertisement
Introduction
You may already be familiar with using similar products but please take the time to read these instructions carefully. They are designed to familiarise you with the product's many features and to ensure that you get the very best from your purchase.
Safety
Please read the Safety Instructions before using this product to ensure your safety and the safety of others.
Customer Service
If you need help, please contact our Customer Service:
Telephone. +44 (0) 845 250 0586
Email: service@augustint.com
Quick Start Guide
- It is suggested that you use a roof top aerial when searching for TV channels for the first time.
- Connect the device with a Monitor. We advise that you do this with the provided HDMI Cable if possible, as this should provide a high quality of TV. However, there is a Scart Port on the Box if required. After this, connect the device to Mains Power and use the power button on the remote to switch the device one.
- When switching the device on for the first time, the message 'Boot' will appear on the Device, whilst the Installation Guide will load on the screen. Follow the on-screen instructions to select the appropriate OSD Language and Country, then press <OK>. The auto Channel Scan will then start. (Rest of text already there can be used)
- If you have done the first time installation before, and would like to search for Digital Free view channels again, or if you have moved to a different region and need to search channels again, press <MENU>, move to the "Channel Search" menu, select Auto Search and press <OK> to start the search. Once the search has finished, press <
![]() > or <
> or < ![]() > to select channels. Press <TV/RADIO> to switch between Freeview TV and Radio channels.
> to select channels. Press <TV/RADIO> to switch between Freeview TV and Radio channels. - To play music, photos, movies or PVR from a USB memory stick, insert the memory stick into the USB port, press <MENU>, move to Media Player menu, select "Music", "Photo", "Video" or "PVR", press <OK> to view the file list. Select a file and press to Play.
- Please note that the signal strength in some areas may not be sufficient to support TV reception using a portable aerial. The distance from the closest transmitter and other factors such as surrounding buildings, the walls of your house, weather and electromagnetic interference caused by power and telecommunication infrastructure may affect signal strength. Changing location may improve signal reception and a rooftop aerial designed for digital TV can be used to achieve the best possible reception.
- For any further queries, please telephoneAugust International Ltd helpline +44 (O) 845 250 0586 or email service@augustint.com
Box Contents

Part Names and Functions
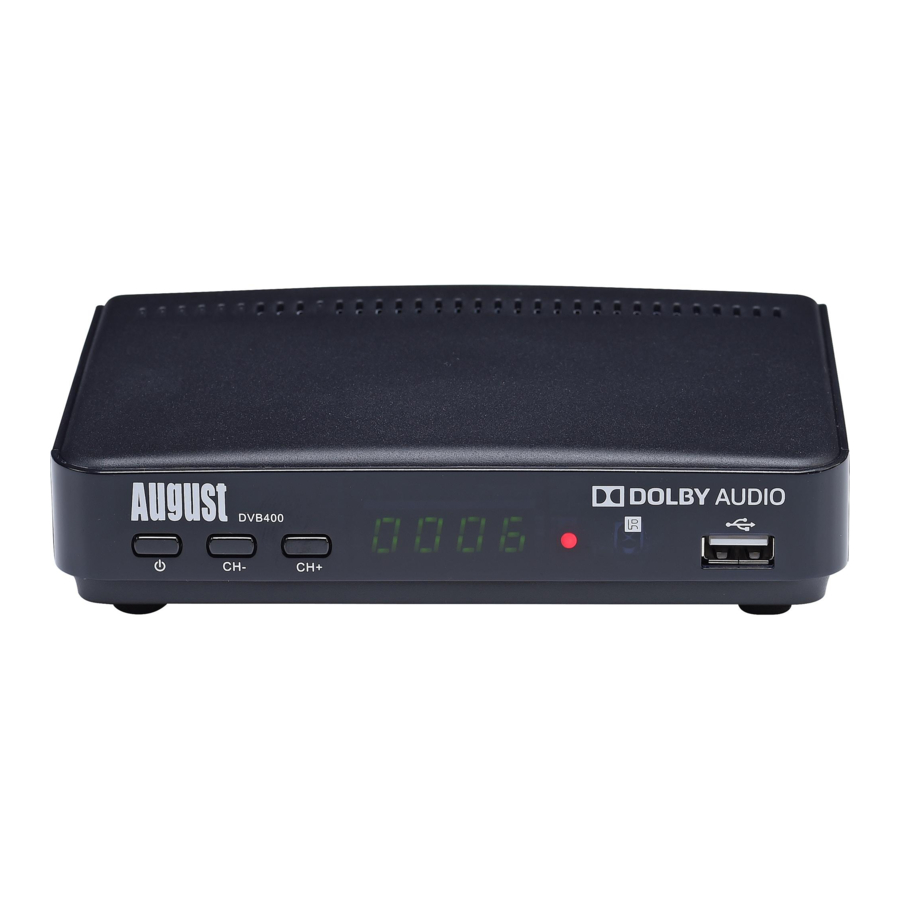
Front

- Power
- Previous Channel
- Next Channel
- USB Port
Back

- SCART
- HDMI Port
- Coaxial Audio Out
- Antenna Out (Loop Through)
- Antenna In
Remote Control
Remote Button Functions

- Mute / Unmute Sound
- Power
- Favourite Channel List
- Subtitle
- Information
- Teletext (not available in UK)
- Numbers
- Channel Recall
- PVR List
- Main Menu
- Exit
- Up
- Down
- Left
- Right
- Confirm
- Electronic Program Guide
- Go To Function
- Page Down
- Page Up
- Channel Up
- Channel Down
- Volume Up
- Volume Down
- Rewind
- Forward
- Previous Track
- Next Track
- Play
- Stop
- Pause
- Audio Language
- Record
- Timeshift
- TV / Radio
- Repeat
- Zoom In
- Aspect Ratio
- Resolution
- Schedule
Use of the Remote Control
Please remove the PVC packaging before using the remote control for the first time.
- Do not expose the remote control to direct sunlight or very strong/bright light.
- Do not drop or step on the remote control or subject it to shocks.
- Keep the remote control away from extreme hot or humid environments.
- Keep the remote control away from water.
Operating range

- The IR sensor on the remote control should aim directly to the sensor on the front of the device. It may not be possible to operate the device if there are obstacles between it and the remote sensor.
- Use the remote control no further than 8 meters away from the sensor.
- The receiving angle range should be ± 30º
Replacing the Batteries
If the remote control does not function or if the operating range becomes reduced, replace the old battery with a new one.

Pull out the battery holder and remove the old battery.

Insert the new battery into the battery holder with the + side facing upwards.

Push back the holder.
*Note:
- Please ensure proper disposal of used batteries.
- To prevent leakage of fluid from the lithium battery, remove the battery when not using the remote control for a long period of time. If the battery leaks fluid, carefully wipe it out of the battery case, then change to a new lithium battery.
Connection

Operation
Initial Installation
After you first switch-on your device, an Installation Guide is displayed that allows you to set your location preferences and search for channels.

Press < > or <
 >to navigate up or down. Press <
 > or <
 > to change the options. After setting the OSD Language and Country, press <OK> to start the search. Press <EXIT> to enter the main menu.
After the search has finished, you can start watching any channels which have been found. Press <TV/RADIO> to switch between Freeview TV and Radio channels. If no channels are found, it will return to the Installation Guide. You can try a different location or use a rooftop aerial.
Channel Information
Press<INFO> in TV display mode to show Now and Next for the current station.

Press <INFO> again to show detailed information.

Channel List
Press <OK> in TV display mode to show the channel list. Press or to switch between the TV and Radio channel list. Press or to select the desired channel and press <OK> to confirm. Press <EXIT> to close the list.

Recall
Press <RECALL> in TV display mode to change back to the last channel you watched.
Record
Plug a USB memory stick into the USB socket, then press <REC > to record the channel you are watching. Whilst recording a timer will show in the top left corner of the screen.

To stop recording, press  . Then press <OK> to confirm or <EXIT> to keep recording.

Time Shift
To enable Time Shift, press < TIMESHIFT> whilst watching TV, the program will pause. Press again to resume, to rewind and to fast forward. Press to exit Time Shift and return to the live broadcast.

Schedule
Press <TIMER > in TV display mode to enter the Schedule. This function supports scheduled viewing or scheduled recording of Programs. You can choose to record at the same time daily, weekly or schedule a one off recording.

Schedule Event
To add an event, press RED button, the Event Add window will pop up.

Press or to select an item, press or to change the settings. Then press <OK> to confirm or press to exit.
Edit Event
To edit an existing event, press or to select the event and press GREEN button.
Delete Event
To delete an existing event, press or to select the event and press BLUE button. Then press <OK> to confirm or press <EXIT> to cancel.
Press <EXIT> to exit Schedule.
Note: Press the <List> button on the remote control to view a list of recordings.
Main Menu
Press <MENU> to enter the main menu, press <EXIT> to exit the menu.

In the main menu, press or to select between the Channel, Display, Channel Search, Time, Settings, System or Media Player submenus. Press<OK> to enter a submenu or press <EXIT> to exit the main menu. In a submenu, press or to select an item, then press <OK> or press or to change the settings. Press <EXIT> to save the settings and go back to the previous menu.
Channel
The Channel menu allows you to manage channels, access the Electronic Program Guide (EPG), sort channels in different orders and enable or disable Local Channel Numbers (LCN). Here are four items in the Channels submenu, Channel Manager, EPG, son and LCN.

Channel Manager
After selecting Channel Manager press <OK> then type in the password to continue. The default password is 000000.

To move a channel, press or to highlight the channel and RED button to select it, the  icon will display next to the channel name. Then press or to move the channel to the desired position and press <OK> to confirm.
To skip or unskip a channel, press or to highlight the channel then press GREEN button. Skipped channels are not found whilst browsing up and down channels and are indicated by the  icon.
icon.
To lock or unlock a channel, press or to highlight the channel then press YELLOW button, you will be prompted to input your password. Locked channels are indicated by the  icon.
icon.
To delete a channel, press or to highlight the channel then press BLUE button. Press <OK> to confirm or press to cancel.
To add a channel to your favorites list, press or to highlight the channel then press <FAV>. Select a category from the list and press <OK> to confirm. Press <EXIT> to close the window. Favourite channels are indicated by the  icon.
icon.

To rename a channel, press or to highlight the channel then press To use the onscreen keyboard, press , , or to select a character then press <OK> to confirm.

EPG
The EPG (Electronic Program Guide) is a schedule of programs due to be broadcast in the next 7 days. Please note that not all channels offer listing information.

| or | Browse |
| or | Schedule info. |
| Red or Green | Page Down or Up |
| Yellow | Scroll through program description |
To schedule recording or viewing, select the program you would like to watch or record and press <OK>. This opens the ScheduleEvent window. Pressing <INFO> whilst in the EPG opens the Schedule window where you can view a list of scheduled events.
Sort
Sort can be used to automatically reorder your channels by LCN (logical channel number), ONID (Original Network 11)), Service Name and Service ID. Press or to select an option.
LCN
Press or to enable or disable Logical Channel Number.
Display
The Display menu allows you to change aspect ratio, HDMI output resolution and TV format.

Aspect Ratio
Press or to select between Auto, 4:3, 16:9 aspect ratios.
HDMI Output
Press or to select between 576i, 576p, 720p, 10800 and 1080p (50Hz) resolution.
TV Format
Press or to select between PAL and NTSC TV formats.
Channel Search
The Channel Search menu allows you to search for channels and change channel search settings.

Auto Search
Select Auto Search and press <OK> to start searching for channels, the selected countries settings will be used.
If no channels are found, the Installation Guide window will be displayed. Press <EXIT> during the search to stop searching. Press <MENU> during the search to skip the current frequency.

Manual Search
Manual Search is used to search for channels on a specific frequency.

Press or to select the desired Frequency and press <OK> to start searching. The selected countries settings will be used.
Country
Press or to select the countries broadcast settings to use in auto search or manual search.
Aerial Power
The device can output SV power from the coaxial aerial socket, press or to select Aerial Power ON if your external aerial takes 5V input via its coaxial plug.
Standby Loop Through
The device can provide a loop-through for a second receiver when it is in standby mode. Press or to enable or disable this function.
Time
The Time menu allows you to change the system time.

Time Offset
Press or to select between manual and automatic Time Offset.
Time Zone
Press or to select a time zone to use for manual time offsetting.
Auto Sleep
Press or to set the Sleep Timer from 1 to 12 Hour or select Off to disable this function.
Power On/Off
Press or to Enable Power On or Off and program a wake up and sleep time. Enter desired time in appropriate fields.
Settings
The Settings menu allows you to change language settings for the OSD,Subtitle and Audio. and select the Digital Audio output mode.

Press or to select an item and press or to change the language. Whilst watching TV you can press <AUDIO> or <SUB-T> to access language settings for the audio and subtitles.
To enable the subtitles for all channels, adjust the subtitle language in Language menu to a desired language.
Digital Audio
The device provides a Digital Audio Out via coaxial cable. Press or to select between PCM, RAW HDMI ON, RAW HDMI OFF and OFF.
System
The System menu allows you to change parental control age and password settings, restore the device to factory default, view system information, update the software and Digital Audio.

Parental Control Age
Enter your password to access the Parental Control Age settings then use or to select between off, or to specify an age group between 04 and 18.

Set Password
Enter your current password using the number buttons on the remote control then enter your new password twice. The default password is 000000.

After entering your new password a pop up message will appear. Press<EXIT> to close the pop up message and return to the password menu.

Factory Reset
Press <OK> then enter your password and press <OK> to reset the device to factory default settings or press <EXIT> to return to the system menu.

Once the default settings have been restored, the Installation Guide will appear.
Information
Press<OK> to display information on the device model, current software and hardware version.

Software Update
This function is for manufacturers use only.
Media Player
Media Player allows you to play music, photos, video and PVR files from a USB memory device. The supported formats can be found in chapter Specifications.

Media Player (Playback)
In Media player menu Press or select Media Player item, Press <OK> to enter media player options and press or to select Music, Photo, Video, PVR items.and press <OK> to select player files.
")
Music Player

| or | Select a folder or file |
| <OK> | Open folder or play a file |
| <RECALL> | Go back to previous folder |
| <REPEAT> | Set repeat mode |
| <GOTO> | Jump to a specific track position |
| <EXIT> | Exit music player mode |
Photo Player

| or | Select a folder or preview a file |
| <OK> | Open folder or display a file in full screen |
| <RECALL> | Go back to previous folder |
| | Start the slide show |
| <REPEAT> | Set repeat mode |
| <EXIT> | Exit the slide show or photo player mode |
| <Blue> | Switch to grid view |
| <Green> or <Yellow> | Rotate Image |
Video Player

| or | Select a folder or file |
| <OK> | Open folder or preview a file |
| <RECALL> | Go back to previous folder |
| | Play/Resume |
 | Pause |
 | Rewind |
 | Fast forward |
 | Next |
 | Previous |
| <Red> | Enter or exit full screen |
| <REPEAT> | Set repeat mode |
| <GOTO> | Jump to a specific track position |
| <EXIT> | Exit the movie player mode |
PVR Player

| or | Select a folder or file |
| <OK> | Open folder or preview a file |
| <RECALL> | Go back to previous folder |
| | Play / Resume |
| | Pause |
| | Rewind |
| | Fast forward |
| | Next |
| | Previous |
| <Red> | Enter or exit full screen |
| <REPEAT> | Set repeat mode |
| <GOTO> | Jump to a specific track position |
| <EXIT> | Exit the movie player mode |
| <Green> | Rename a file |
| <Yellow> | Delete a file |
Photo Settings
Press or to select Photo Settings and press or <OK> to Set Photo Settings options.

Slide Time
The duration each picture is displayed for in a slide show. It can be set to between 1 and 8 seconds.
Slide Mode
Switch slide show mode between sequential and random.
Aspect Ratio
This is used to control the aspect ratio of pictures in a slide show. There are two options, Original and Screen Fit.
Press <EXIT> to return to the main menu.
Video Settings
Press or to select Video Settings and press or <OK> to set Video Settings options.

Subtitle Specific
[Small]: Displays the subtitle as small mode.
[Normal]: Displays the subtitle as normal mode.
[Big]: Displays the subtitle as big mode.
Subtitle BG
[White]: Displays the subtitle in white background.
[Transparent]: Displays the subtitle in transparent background.
[Grey]: Displays the subtitle in grey background.
[Yellowgreen]: Displays the subtitle in yellowgreen background
Subtitle Font Color
[Red]: Displays Subtitle in red font.
[Blue]: Displays Subtitle in blue font.
[Green]: Displays Subtitle in green font.
Press <EXIT> to return to the main menu.
PVR Settings
Press or to select PVR Settings and press or <ok> to enter PVR Settings.

Users can select the record device and format the USB memory stick in PVR Configure.
Record Device
Users can select which disk is used for record and time shift and set the Timeshift Space in Record Device. Press or to select an item and press or to change the settings.

Format
Format allows you to format a USB memory device in either FAT32 or NTFS.
Press or to highlight File System then press or to select between FAT 32 and NTFS. Press or to highlight Format and press <OK>.
Then press <OK> to begin formatting or press <EXIT> to return to the Format menu.

Specifications
| DVB-T/T2 Video Decoder | MPEG1/2/4 H.264 |
| DVB-T/T2 Audio Decoder | MP3 WAV AAC |
| DVB-T/T2 Band | 6, 7, 8 MHz |
| DVB-T/T2 Frequency | VHF: 177.5-227.5 MHz UHF: 474-858 MHz |
| Video Output | HDMI, SCART |
| USB Port | USB 2.0 host (5V) |
| Power Input | AC 220-240V 50/60Hz |
| Power consumption | < 6 W |
| Dimensions | 150 x 110 x 40 mm |
| Net Weight | 250g |
Media Formats
| Music | mp3, ac3, aac, wav, wma, ogg |
| Photo | jpg, jpeg, bmp, png |
| Movie | avi, mp4, flv, dat, ts, tp, 3gp, mov, trp, mpg, mpeg, mkv, vob |
Format USB
- Insert the USB into the Box
- Open up the Menu, and scroll along to 'Media Player'
- Under 'Media Player, ' scroll down to 'PVR Settings'
- Under 'PVR Settings, ' select 'Format'
- Under 'Format, ' switch the format of the USB from 'FAT32' to 'NTFS'
Troubleshooting
Problems listed below do not necessarily signify a fault with the unit. Please check this list before requesting repairs.
| Problems | Possible Causes and Solutions |
No Power | Plug the power cord into the outlet tightly and turn on the device. |
No image | Check Che connection to the monitor. Check the video output, TV format in Display menu. |
No sound | Cancel Mute. Press MUTE button. Increase volume. Press VOL+ button Check the connection to the target audio device. Restore the factory default, then try again. |
Picture freezing, and/or sound distorting | Signal too weak, please check the aerial. Try to use a proper rooftop aerial or an amplified aerial. |
No signal | Signal too weak, please check the aerial. Try to use a proper roof top aerial or an amplified aerial. |
Remote control does not work | Change the batteries. Operate within normal range. (max 8 meters, 30 a ) The sensor is pointed to by bright light |
Snowstorm | Motors/Trains/High Voltage Lines and Neon Lights may affect the signal. |
No recording | No USB memory is connected. No free space on the storage. |
| 'Boot' message appears on the Box, but there is no Installation Guide on the screen | Ensure that you have the correct Input selected on your TV. If possible, please use the provided HDMI Cable and have HDMI Input selected on the TV. Use an alternative HDMI Cable or Scart Cable/lnput if necessary. |

This operation instruction is only intended for reference. No further notice is available to any modification of all information contained therein. Due to continuing improvements, the features and design are subject to change without notice.

No user service able components are fitted inside this Receiver. Do not attempt any repairs, as this will invalidate the warranty. Any repairs must be carried out by either the manufacturer or their nominated service centre. Parts inside this set are subject to high voltage.
Safety Instructions
Storage and Use
 | Keep this machine away from hot or cold places. Working temperature of this device is 0ºC - 50ºC, storage temperatures |  | Keep the Receiver away from water or damp environment. |
 | Never expose the Receiver to moisture, dust |  | Avoid dropping or exposing to impacts. |
 | Never put this machine in containers that are unstable as this may cause damage. |  | Never extrude or chafe this machine with sharp objects. |
Maintenance
Please unplug all connection wires before cleaning this machine.
 | Please wipe this machine and buttons with a soft cloth. Only clean the screen with professional LCD TV screen cleanser. |  | Never wipe this machine with an abrasive cloth, detergent powder, alcohol and benzene etc. various propellants or cleaning products. |
Operation Precautions
For the sake of safety, when you do not intend to use the Receiver, please switch off the power button.
Please ensure the DVB400 is located so that it has adequate ventilation.
 Special Notice
Never try to repair this machine by yourself. In case of any fault or failure, please turn off the Receiver at once, and notify our company or the corresponding dealer. The Receiver is made up of many precision electronic components. Any disassembly or modification may lead to further damage.
Documents / ResourcesDownload manual
Here you can download full pdf version of manual, it may contain additional safety instructions, warranty information, FCC rules, etc.
Download August DVB400 - HD Receiver and Media Player Manual
Advertisement


Need help?
Do you have a question about the DVB400 and is the answer not in the manual?
Questions and answers