Table of Contents
Advertisement
Advertisement
Table of Contents
Troubleshooting

Related Manuals for August DVB415


Summary of Contents for August DVB415
- Page 1 DVB415 Freeview HD Receiver and Media Player Récepteur de TV DVB-T2 et Lecteur Media August International Ltd DVB-T2 Empfänger und Media Player United Kingdom Telephone:+44 (0) 845 250 0586 DVB-T2 Ricevitore TV e Media Player www.augustint.com Receptor de TV DVB-T2 y Lector Media...
-
Page 2: Quick Start Guide
Connect the device with a monitor via HDMI or SCART. Connect the device to the mains power, press the Power button on the remote to switch on the device. Thank you for purchasing this August Receiver. You may already be familiar with using similar products but please take the time to read these When turning on the device for the first time, “Installation Guide”... -
Page 3: Safety Instructions
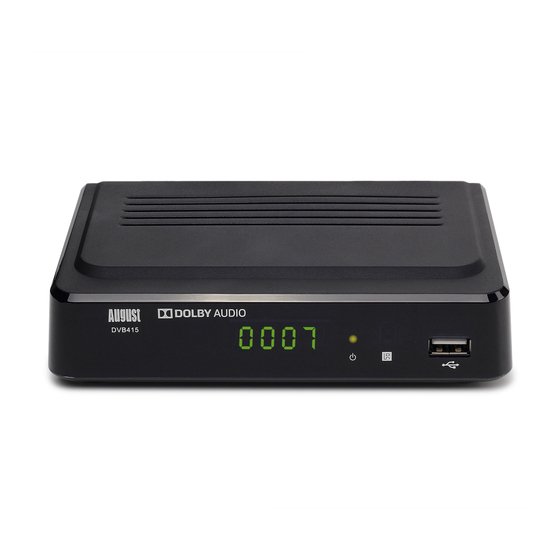
1. Safety Instructions Storage and Use Keep this Keep the Contents machine away Receiver away from hot or from water or cold places. Working damp temperature of environment. this device is 0゚C ~ 50゚C, storage 1. Safety Instructions temperature is -10゚C ~ 60゚C. - Page 4 3. Part Names and Functions Operation Precautions 3.1 Front For the sake of safety, when you do not intend to use the Receiver, please switch off the power button. Special Notice Never try to repair this machine by yourself. In case of any fault or failure, please turn off the Receiver at once, and notify our company or the corresponding dealer.
- Page 5 3.3 Remote Control Mute/unmute the sound 3.3.1 Remote Button Functions Power Favourite channel list Subtitle Information Teletext (not available in UK) Numbers Change back to the previous channel Channel List Enter the main menu Exit Down Left Right Confirm Electronic Program Guide SWAP Page down Page up...
- Page 6 3.3.2 Use of the Remote Control 4. Connection Please remove the PVC packaging before using the remote control for the first time. 1. Do not expose the remote control to direct sunlight or very strong/bright light. 2. Do not drop or step on the remote control or subject it to shocks. 3.
- Page 7 ▲> ▼> and <◄> or <►> buttons, then 5. Unit Operation Press < and < to select the desired channel, then press <OK> to confirm. Press highlight “Search” and press <OK>. 5.1 Initial Installation <EXIT> to close the list. After you first switch-on your device, a Welcome screen is displayed that allows you to set your preferences and search for channels.
- Page 8 5.7 Schedule <◄ > or < ►> to change the settings. Use Press <RED> to rename the file. A pop up Press <TIMER > in TV mode to enter the the number keys and <◄ > or < ►>to set screen will allow editing of the name.
- Page 9 5.8.1.2.1 Rename 5.8.1.3.1 Play List Continue pressing <EXIT> to return to <OK>. Press <EXIT> to exit the slide show Press <RED> to play all music in the Play normal TV viewing. Highlight a file and press <RED> to rename and return to the preview screen. List.
- Page 10 5.8.1.4.6 Setup Edit Channel menu item and press <OK> a pop up window saying “Are you sure to To set up the photo slide show options, save?” will ask to confirm the changes. or <▼> press “2”. Highlight Slide Show Time to Highlight “Yes”...
- Page 11 Press <EXIT> to return to the channel list up window saying “Are you sure to save?” channels. Highlight “Yes” and press <OK> and press <EXIT> again to return to the will ask to confirm the changes. Highlight to delete all channels, or “No” and press Program options.
- Page 12 or press <OK> for a drop down menu to the level and press <OK> to select, or When searching by Frequency, highlight choose the aspect mode from, Auto / <EXIT> to cancel changing the value. The Frequency and enter the frequency in 4:3PS / 4:3LB / 16:9 and press <OK>...
- Page 13 5.8.4.5 Timer Setting To lock the menu system, highlight Menu To enable time shift, highlight the Timer Setting allows the user to edit up to Lock and press <◄> or <►> to select Off / “Timeshift” option and press <◄> or eight timed viewing and recording events.
- Page 14 The device can provide a loop-through of valid square and press <OK> to place a disc. signal for a second receiver when it is in The DVB415 will then take it’s turn to place standby mode. Press <◄> or <►> to enable or disable this function.
- Page 15 6. Specifications 7. Troubleshooting Problems listed below do not necessarily signify a fault with the unit. Please check this list before requesting repairs. D-Type, IEC-169-2, Female RF Input Connector X1 RF Output Connector X1 D-Type , IEC -169-2, Male (Loopthrough) Problems Possible Causes and Solutions Frequency Range...
- Page 16 8. Warranty This product is guaranteed for twelve months from the date of the original purchase. In the unlikely event of any defect arising due to faulty materials or workmanship, the unit will be either replaced or repaired free of charge (where possible) during this period. An alternative product will be offered in case the product is no longer available or repairable.
Need help?
Do you have a question about the DVB415 and is the answer not in the manual?
Questions and answers