Advertisement
POWERED SPEAKERS REAR PANELS

Connections

Instruction of Using Wireless Mic:
- Insert battery into wireless microphone when you are ready to use
- For best sound, use the microphone in the case so it does not interfere with radios
- When the microphone is switched to ON, is working
- The microphone enters standby mode when it is switched to MUTE
- To power down the microphone switch the button to OFF
- The best pickup distance from mouth to microphone is between 1-2 cm
INTRODUCTION
Your product is backed by a 90dayslimited warranty. Please register your product by using the included form at the end of this manual.

- AII operating instructions should be read before using this equipment.
- To reduce the risk of electrical shock, do not open the unit.
there are NO USER OR SERVICABLE PARTS INSIDE CONTROL ELEMENTS (POWERED SPEAKERS)
CONTROL ELEMENTS (POWERED SPEAKERS)
- MIC/GUITAR/LINE LEVEL INPUT JACK-This jack is used for a Microphone /Guitar and line level in puts. Connect CD players or Tape Decks to LINE inputs. LINE level musical instruments with stereo outputs such as Rhythm Machines, Keyboards or Samplers should also be connected to LINE inputs.
- MIC/GUITAR LINE LEVEL XLR INPUT JACK-This jack is used for Microphone /Guitar 1 and line level inputs. Connect CD players or Tape Decks to LINE inputs. Line level musical Instruments with stereo outputs such Rhythm Machines or Samplers should to the LINE inputs. Do not connect mixers to this input, use the B: RCA In- put (3 or 4) only!
- BALANCED RCA LINE INPUT-This connection is designed to accept a balanced line input signal from a mixer or other line level device with a balanced output jack. Use a balanced cable when the signal cable length exceeds 4 feet, this will reduce excessive signal loss. Be sure to connect only line level input devices such as mixers and tape machines to this jack.
- BALANCED XLR LINE INPUT-This connection is designed to accept a balanced line input signal from a mixer or other line level device with a balanced output jack. Use a balanced cable when the signal cable length exceeds 15 feet, this will reduce excessive signal loss. Be sure to connect only line level input devices such as mixers and tape machines to this jack.
- LINEOUTPUT JACK-This Jack is used to send the incoming line level signal to line Input on another mixer or power amplifier.
- MICROPHONE/GUITAR LINE LEVEL INPUT LEVEL- This knob Is used to regulate the output signal of the microphone /guitar or CD player/tape deck that is connected to the Mic/guitar line Level jack (1&2)
- MIC LINE LEVEL INPUT JACK-This Jack is used for a Microphone and line level input. Connect CD players or Tape Decks to LINE inputs. Line level musical instruments with stereo outputs such as Rhythm Machines, Keyboards or Samplers should also be connected to Line Inputs.
- OUTPUT VOLUME-this knob is used to regulate the output signal being sent to other line level input jacks such as a mixer or power amp 5.
- MP3 CONTROL-This knob is used to regulate to amount MP3 applied to the output signal.
- 5-BAND GRAPHIC EQ
The 5-band channel graphic equalizer allows you to adjust the frequency response of the L and R Channel bus signal, providing a maximum of +12dB of cut and boost for each frequency band from the flat position - POWER LED-This L.E.D will be lit when you switch on the power.
- The clip light is on, when sound distortion.
- On/Off switch-Press to turn the device on/off.
- AC Input-Use it to plug the supplied power cord.
- MP3 PLAYER
- SPEAKON
This connection is for connecting one 8 ohms passive speaker with minimum 150 Watts RMS power. - LIGHT SWITCH-Press to turn the light on/off
MP3 player Controls

Remark:
Explanation Of recording function for SBX-1530:
- Hold down the "RECORD" key for a few seconds, then person can start to record when inserting USB or TF card.
- Hold down the "RECORD" key for a few seconds again to finish recording.

Connect a Bluetooth Device on SBX-1535
- Tum the speaker on. On the speaker, press "MODE" until you see"NO-b"on the LED screen on the speaker.
- Tum on the power of the connecting device (computer/cell phone) you want to pair the speaker with. Tum on the Bluetooth function on the connecting device. Following the device instruction on how to pair a Bluetooth device. If asked for an input passkey, input the number "0000" or "1234." (This is the default passkey for the majority of Bluetooth devices) Range for Bluetooth device is around 30 Feet (10m) in optimal conditions
"FM" RADIO OPERATION

- Press input to select FM Radio.
- Push Play/Pause button once on the unit or the remote to scan for radio stations in your area.
- Scanning will complete in about 20-30 seconds. After this scanning the radio will automatically preset station in your area into the radio. There is no need to do this again unless you take this unit to a new area. Then just follow the set-up instruction again to scan for your new area
- Press fast forward or fast backwards on the unit or the remote to change stations.
Specifications subject to change without notice for improvement
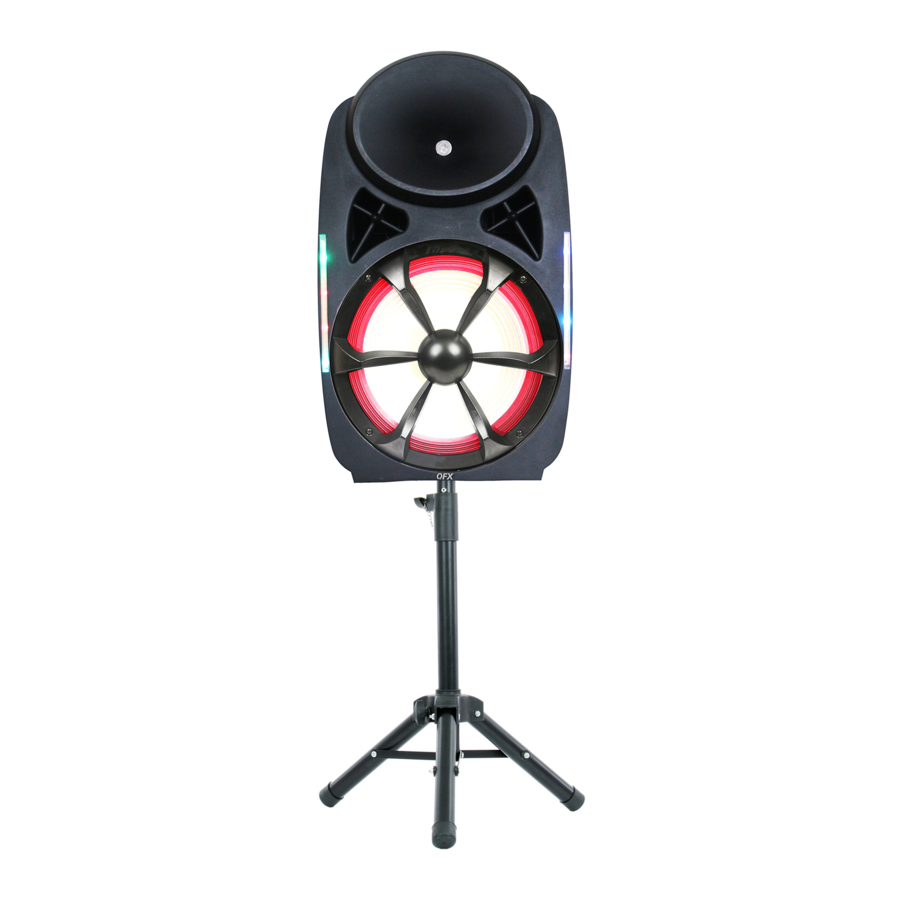
SPEAKER STANDS

MOUNTING TOP VIEW
SBX-1535 UNDERSIDE

- LOCKING PIN
You can lock the stand in its socket by inserting the LOCKING PIN after you have mounted the stand securely. - SPEAKER RIGGING mounting hardware should be used to hang the speaker where appropriate.
- STACKING
You can also stack the PB SERIES speakers by placing the RUBBER FEET into the STACKING GROOVES. - STAND MOUNTING
Insert a stand into the STAND MOUNTING SOCKET
SPECIFICATIONS

SBX-1535 ( 21.5Kgs/47.441bs )
| Woofer magnet weight | 60oz |
| Woofer voice coil | 3' /75mm |
| Woofer impedance | 8/4 Ohms |
| Woofer RMS wattage | 180 watts |
| Woofer peak wattage | 300 watts |
| Compression driver magnet weight | 23oz |
| Compression driver diaphragm size | 1.75"/44mm |
| Compression driver RMS wattage | 40 Watts |
| Compression driver peak wattage | 150 Watts |
| Crossover specification | 3 KHz, 12dB/Oct |
| Nominal horn dispersion | 30" x 60" |
| Sensitivity | 98 dB/1m/1w |
| Frequency response | 50-20KHz |
| Type of amplifier | Mono-Power Amp+MP3 |
| Total RMS wattage | 300 Watts |
| Total peak wattage | 800 watts |
| Stand mount hole | 35 mm |
Safety Information
PLEASE READ BEFORE USING APPLIANCE IMPORTANT WARNING AND SAFETY INSTRUCTIONS!


This product satisfies FCC regulations when shielded cables and connectors are used to connect the unit to other equipment. To prevent electromagnetic interference with electric appliances such as radios and televisions. use shielded cables and connectors for connections.
The exclamation point within an equilateral triangle is intended to alert the user to the presence Of important operating and in the literature accompanying the ap-
The lightening flash with arrowhead symbol. within an equilateral triangle. is intended to alert tho user to the presence of uninsulated •dangerous voltage• within tho product's enclosure that may be of sufficient magnitude to constitute a risk Of electric shock to persons.
READ INSTRUCTIONS: All the safety and operating instructions should be read before the product is operated.
RETAIN INSTRUCTIONS: The safety and operating instructions should be retained for future reference.
HEED WARNINGS: All warnings On the product and in the operating instructions should be adhered to.
FOLLOW INSTRUCTIONS: All operating and use instructions should be followed.
CLEANING: The product should be cleaned only with a polishing cloth or a son dry cloth. dean with furniture wax, benzine. insecticides Or other volatile liquids since they may corrode the cabinet.
ATTACHMENTS: Do not use attachments not recommended by the product manufacturer as they may cause hazards.
WATER AND MOISTURE: Do not use this product near water. for example. near a bathtub. wash bowl. kitchen sink. Or laundry tub; in a wet basement: Or near a swimming pool; and the like.
ACCESSORIES: DO not place this product on an unstable cart. stand. tripod. bracket. or table. The product may fall. causing serious injury to a child or adult. and serious damage to the product. Use only with a cart. stand. tripod. bracket. Or table reccommended by the manufacturer. Or sold wit' the product. Any of product should follow manufacturers and should use an writing accessory reccommended by the manufacturer.
CART: A product and cart combination should be moved -healthcare. Quick stops. excessive force. and uneven surfaces may cause the product and cart combination to Overturn. See Figure A.

VENTILATION: Slots and openings in cabinet are provided ventilation and to ensure reliable operation Of the product and to protect it from overheating. and openings must not be blocked or covered. The openings should never be blocked by placing the product on a bed. sofa. rug. or other similar surface. This product should not be placed in a installation such as a or rack unless proper ventilation is provided or the manufacturers have been adhered
POWER SOURCES: This product should be operated only from the type of power source indicated on the marking label If you are not sure of the type of power supply to your home. consult your product dealer or local power company.
LOCATION: Tho appliance should be installed in a stable location.
NON-USE PERIODS: The power cord Of the appliance should be unplugged from the outlet when left unused for a long period Of time.
GROUNDING OR POLARIZATION:
- If this product is equipped with a polarized alternating current line plug (a plug having one blade wider than the Other). it will ft into the outlet only one way. This is a safety feature. If you are unable to insert the plug fully into the outlet. try reversing the plug. If the plug should still fail to fit. contact your electrician to replace your obsolete outlet. Do not defeat the safety purpose of the polarized plug.
- If this product is equipped with a three-wire grounding typo plug. a plug having a third (grounding) pin. it will only fit into a grounding typo power outlet. This is a safety feature. If you are unable to insert the plug into the Outlet. contact your electrician to replace your Obsolete outlet. DO not defeat the safety purpose Of the grounding typo plug.
POWER-CORD PROTECTION: Power-supply cords Should be routed So that they are not likely to be walked on or pinched by items placed upon or against them. paying particular attention to cords at plugs. convenience receptacles, and the point where they exit from the product.
OUTDOOR ANTENNA GROUNDING: If an Outside antenna or cable System is connected to the product. be Sure the antenna Or cable System is grounded so as to provide some protection against voltage Surges and built-up static charges. Article 810 Ofthe National Electrical Code. ANSI/NFPA 70. provides information with regard to proper grounding Of the mast and supporting Structure. grounding Of the load-in wire to an antenna discharge unit, size Of grounding conductors. Of antenna-discharge unit. connection to grounding electrodes. and requirements for the electrode. See Figure B.

LIGHTNING: For added protection for this product during a lightening storm. or when it is left unattended and unused for long periods Of time. unplug it from the wan outlet and disconnect antenna or cable system. This will prevent damage to tho product due to lightening and power-line surges.
POWER LINES: An Outside antenna system should not be kitted in the vicinity of Overhead lines Or Other electric light or power circuits. Or where it can fall Into such power lines Or circuits. installing an Outside antenna system. extreme caro should be taken to keep from touching such power lines Or circuits as contact with thorn might be fatal.
OVERLOADING: DO not overload wall Outlets extension cords or integral convenience receptacles as this can resulting risk Of fire or electric shock.
OBJECT AND LIQUID ENTRY: Never push objects of any kind into this product through openings as they may touch dangerous voltage points or short-out parts that could resulting a fire or electric shock. Never spill liquid of any kind on the product.
SERVICING: Do not attempt to service this product yourself as opening or removing covers may expose you to dangerous voltage or other hazards. Refer all servicing to qualified service personnel.
DAMAGE REQUIRING SERVICE: Unplug this product from tho wall refer servicing to qualified service personnel under the following conditions:
- When the power-supply cord Or plug is damaged.
- If liquid has been spilled. Or Objects have fallen into the product.
- If the product has been exposed to rain or water. normally by following the operating instructions. improper adjustment of other controls may result in damage and will often require extensive work by a qualified technician to restore tho product to its normal operation.
- If the product has been dropped or damaged in any way.
- When the product exhibits a distinct change in performance. this indicates a need for service.
REPLACEMENT PARTS: When replacement parts are required. be sure the service technician has used replacement parts specified by tho manufacturer have the same characteristics as the original part. unauthorized substitutions may result in fro. electric shock. or other hazards.
SAFETY CHECK: Upon completion Of any service Or repairs to this product. ask the service technician to perform safety checks to determine that the product is in proper operating condition.
WALL OR CEILING MOUNTING: Tho product should not be mounted to a wall or ceiling.
HEAT: The product should be situated away from heat sources such as radiators. heat registers. stoves. or other products (including amplifiers) that produce heat.
Documents / ResourcesDownload manual
Here you can download full pdf version of manual, it may contain additional safety instructions, warranty information, FCC rules, etc.
Advertisement


Need help?
Do you have a question about the SBX Series and is the answer not in the manual?
Questions and answers