Advertisement
Available languages
Available languages
Advertisement
Table of Contents

Summary of Contents for QFX PBX-100
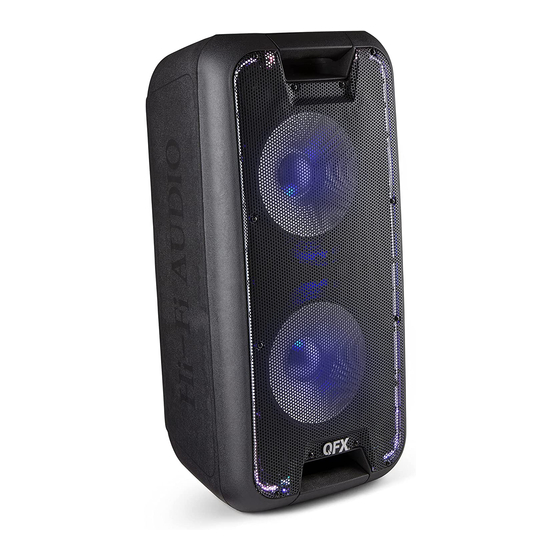
- Page 1 USER MANUAL MANUAL DE USUARIO PROFESSIONAL BATTERY TROLLEY SPEAKER ALTAVOZ PROFESIONAL CON BARRAS Y BATERÍAS PBX-100 Please read this user manual carefully before system connection Lea atentamente este manual del usuario antes de la conexión del sistema Size:100x140mm...
-
Page 2: Important Safety Measures
THANK YOU FOR PURCHASING OUR SPEAKER. PLEASE READ THE MANUAL CAREFULLY BEFORE OPERATING. IMPORTANT SAFETY MEASURES Before using this machine, please read all the safety and oper- ating instructions. Please adhere to all the instructions herein, and save this information in a safe place for future use. 1. - Page 3 FEATURES ●Bluetooth ● Plays Mp3 files stored in SD card USB drive external audio device ●FM radio ●Guitar input ● Remote control ●Microphone inputs ●5 Band graphic equalizer ● Built-in 12V/7A rechargeable battery ●Microphone priority on/off switch ●Super dynamic sound speaker CONNECTING 1.
-
Page 4: Battery And Charging
BATTERY & CHARGING 1. The units takes approximately 8 hours to fully charge. It will automatically begin charging once the power cord is connected. 2. If the battery power is low may caused sound distortion or stop play, pls charging the battery ontime. 3. -
Page 5: Control Panel
CONTROL PANEL ⑭ ④ ⑤ ⑮ ⑥ ⑯ ⑦ ⑧ ⑰ ⑨ ⑩ ⑱ ⑪ ⑫ ⑬ ③ ① ②... -
Page 6: Control Panel Function
CONTROL PANEL FUNCTION ① POWER ON/OFF SWITCH ② LED LIGHT ON/OFF SWITCH ③ POWER INPUT ④ VOLUME: MASTER VOLUME ADJUST ⑤ BASS: BASS ADJUST ⑥ MIC. ECHO: ECHO ADJUST ⑦ MIC BASS: MICROPHONE BASS VOLUME ADJUST ⑧ MIC TREBLE: MICROPHONE TREBLE VOLUME ADJUST ⑨... -
Page 7: Medidas Importantes De Seguridad
GRACIAS POR COMPRAR NUESTRO ALTAVOZ. POR FAVOR, LEA CUIDADOSAMENTE EL MANUAL ANTES DE OPERAR. MEDIDAS IMPORTANTES DE SEGURIDAD Antes de utilizar esta máquina, lea todas las instrucciones de seguridad y funcionamiento. Siga todas las instrucciones de este manual y guarde este manual en un lugar seguro para el uso futuro. - Page 8 CARACTERISTICAS * Bluetooth * Reproducir los archivos MP3 almacenados en la tarjeta SD / unidad USB / dispositivo de audio externo. * Radio FM * Guitarra de entrada * Control remoto * Entradas de micrófono * Ecualizador gráfico de 5 bandas * Batería recargable incorporada de 12V / 7A * Interruptor de encendido / apagado de prioridad del micrófono * Altavoz súper dinámico de sonido...
-
Page 9: Control Remoto
BATERIA Y CARGAR 1. Las unidades tardan aproximadamente 8 horas en cargarse completamente. Se iniciará automáticamente la carga una vez que el cable de alimentación esté conectado. 2. El nivel bajo de batería puede resultar en un sonido distorsionado, para un mejor rendimiento acústico, por favor observe el nivel de carga de la batería. -
Page 10: Panel De Control
PANEL DE CONTROL ⑭ ④ ⑤ ⑮ ⑥ ⑯ ⑦ ⑧ ⑰ ⑨ ⑩ ⑱ ⑪ ⑫ ⑬ ③ ① ②... - Page 11 FUNCIÓN DEL PANEL DE CONTROL ① INTERRUPTOR DE ALIMENTACIÓN ② INTERRUPTOR DE ENCENDIDO / APAGADO DE LUZ DEL LED ③ ENTRADA DE ENERGÍA ④ VOLUMEN: AJUSTE DE VOLUMEN PRINCIPAL ⑤ BAJOS: AJUSTE DE BAJOS ⑥ MIC. ECO: AJUSTE DE ECO ⑦...


Need help?
Do you have a question about the PBX-100 and is the answer not in the manual?
Questions and answers
How to replace the battery
The documents do not provide step-by-step instructions for replacing the battery in a QFX PBX-100. However, they confirm that the replacement battery is a 12V 7Ah sealed lead-acid (SLA) battery. To replace it, generally follow these steps:
1. Turn off and unplug the speaker.
2. Open the battery compartment (usually accessible via screws on the back or bottom).
3. Disconnect the old battery by removing the terminal connections.
4. Remove the old battery carefully.
5. Connect the new 12V 7Ah SLA battery, matching the polarity (red to positive, black to negative).
6. Secure the battery in place and close the compartment.
7. Charge the new battery fully before use.
If unsure, refer to the product manual or contact the manufacturer.
This answer is automatically generated