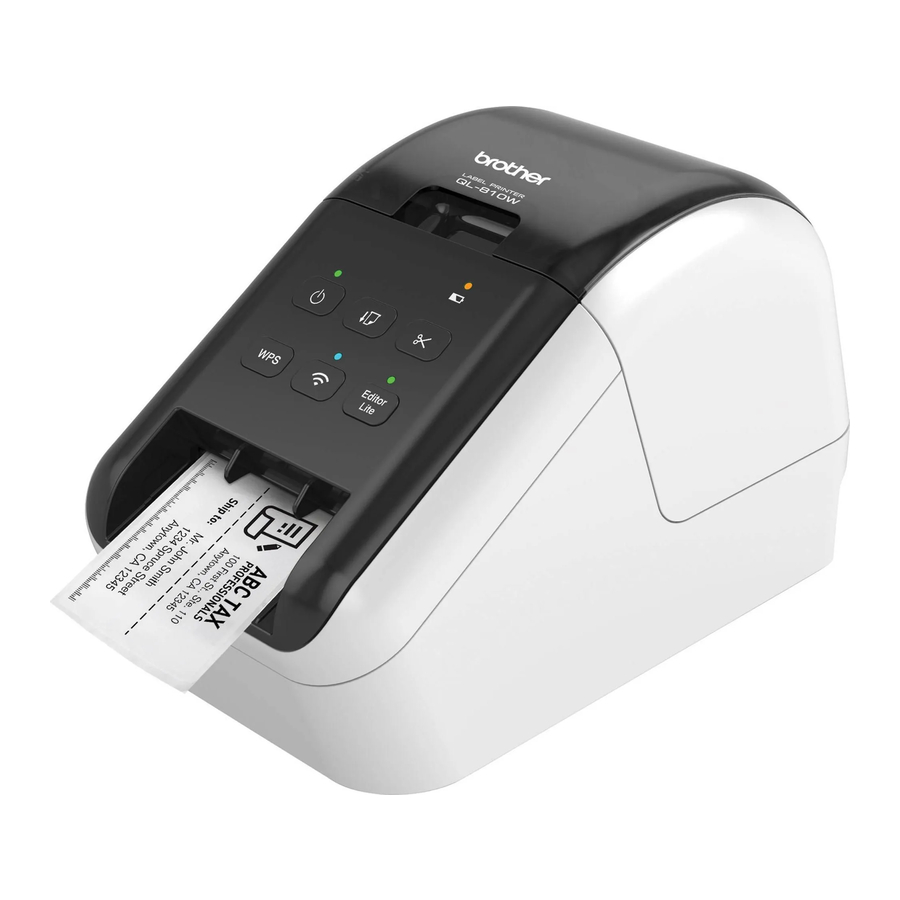
Brother QL-810W, QL-820NWB - Label Printer Manual
- User manual (213 pages) ,
- Quick setup manual (10 pages) ,
- Installation manual (5 pages)
Advertisement
- 1 Available Applications
- 2 Unpacking the Label Printer
- 3 Parts Description
- 4 Loading the DK Roll
- 5 Connecting the AC Adapter
- 6 Using the Optional Battery Unit
- 7 Installing the Coin Cell Battery
- 8 Turning Power On/Off
- 9 Setting LCD Language
- 10 LED Indicators
- 11 Printing Using a Computer (P-touch Editor)
- 12 Printing Using a Computer (P-touch Editor Lite for QL-810W only)
- 13 Printing Using a Mobile Device
- 14 Main Specifications
- 15 Troubleshooting
- 16 Software Development Kit
- 17 Documents / Resources
Available Applications
For Use with Computers
| Applications | Features | Computer | Connection | Reference |
P-touch Editor | Label creation software for computers. This application comes with built-in drawing tools that allow you to print a wide variety of custom labels in complex layouts with text of different fonts and styles, frames, imported images, barcodes, etc. The P-touch Editor application and printer drivers must be installed. (install.brother) For more information, see Installing the Software and Printer Drivers to a Computer. | Windows® / Mac | Wi-Fi / USB /Wired Network (QL-820NWB only) / Bluetooth (QL-820NWB only) | See section Printing Using a Computer (P-touch Editor) in this guide. |
| P-touch Editor Lite (QL-810W only) | Label creation software for computers. With P-touch Editor Lite, there is no need to install an application or printer drivers. Simply connect a USB Cable to the Label Printer. This application allows you to create and print simple labels with text, frames, and images. | Windows® | USB | See section Printing Using a Computer (P-touch Editor Lite for QL-810W only) in this guide. |
For Use with Mobile Devices
| Applications | Features | Mobile Device | Connection | Reference |
Brother iPrint&Label | This application allows you to create and print labels using templates on a smartphone, tablet or other mobile device directly to your Label Printer. | Apple iPhone / iPad / iPod touch or Android™ device | Wireless Direct / Wi-Fi | See section Printing Using a Mobile Device in this guide. |
Mobile Transfer Express | This application allows you to use a mobile device to download databases and label data, created on a computer with P-touch Editor and saved to a cloud service, and send them to your Label Printer. |
Unpacking the Label Printer
Check that the package contains the following items before using the Label Printer. If any item is missing or damaged, contact your Brother dealer.
 NOTE
NOTE
The Brother QL-810W/820NWB includes the following two starter rolls:
- One starter roll of DK Die-cut Standard Address Labels (100 labels)
- One starter roll of DK Continuous Length Black/Red on White Tape (2.4 in. × 16.4 ft. (6.1 × 500 cm))
- For more information about using the Cleaning Sheet, see the User's Guide.
Parts Description
Front
QL-810W

QL-820NWB

Rear
QL-810W

QL-820NWB

Loading the DK Roll
- Make sure that the Label Printer is turned Off.
Hold the Label Printer by the front, and firmly lift the DK Roll Compartment Cover to open it.
Remove the Protective Sheet from the Label Output Slot.
![]()
![]()
- Do not throw away the Protective Sheet.
- When the Label Printer is not in use, lift the DK Roll Compartment Cover and remove any DK Rolls from inside the Label Printer. Then insert the Protective Sheet into the Label Output Slot to maintain good printing quality.
- After removing the Protective Sheet, place the DK Roll into the Roll Spool Guide.
- Make sure that the Roll Spool Arm is inserted firmly in the Roll Spool Guide.
- Make sure the Stabilizer (1) slides into the notch of the Label Printer.
![]()
NOTE- If using P-touch Editor, select the DK Roll size in [Paper Type] (Windows)/[Print Media] (Mac) drop-down list.
- Thread the DK Roll through the Label Printer.

- Align the edge of the DK Roll with the upright edge of the Label Output Slot.
- Insert the first label into the slot inside the compartment.
- Push the label through the Label Output Slot until the end reaches the mark, as shown.
- Close the DK Roll Compartment Cover.
When you press the Power (![]() ) Button to turn the Label Printer On, the end of the DK Roll aligns automatically.
) Button to turn the Label Printer On, the end of the DK Roll aligns automatically.
![]()


 ) Button to turn the Label Printer On, the end of the DK Roll aligns automatically.

- Do not leave any printed labels in the Label Printer. Doing so will cause the labels to jam.
- When not in use, close the DK Roll Compartment Cover to prevent dust and debris from accumulating in the Label Printer.
NOTE
Press the Cutter Button for one second to feed the tape automatically (QL-820NWB only).
Connecting the AC Adapter
Connect the AC Adapter to the Label Printer and to the AC Power Cord. Then, plug the AC Power Cord into a grounded AC power outlet.
The PA-BU-001 (optional Battery Unit) can also be used.

Using the Optional Battery Unit
(Rechargeable Li-ion Battery included)
Charging the Optional Battery Unit (PA-BU-001)
NOTE
- Before use, you must charge the Battery Unit.
- To fully charge the Battery Unit, charge for approximately 2.5 hours.
- Make sure the Battery Unit is installed in the Label Printer.
- Use the AC Adapter and AC Power Cord to connect the Label Printer to an AC power outlet.
For QL-810W, the Battery (![]() ) LED lights in orange during charging, and it turns off when the Battery Unit is fully charged.
) LED lights in orange during charging, and it turns off when the Battery Unit is fully charged.
For QL-820NWB, the Battery Power is shown on the LCD.
NOTE
If the Battery Unit is not fully charged and you use the Label Printer to print, feed, or perform another operation, the Battery Unit temporarily stops charging, and continues automatically after the operation is completed.
Discontinue charging the Battery Unit
To stop charging the Battery Unit, disconnect the AC Adapter.
Notes on Using the Battery Unit
- Before use, fully charge the Battery Unit. Do not use it until it is fully charged.
- Charge the Battery Unit in environments between 50°F and 95°F (10°C and 35°C), otherwise the Battery Unit will not charge. If the charging stops because the environment temperature is too low or too high, place the Label Printer in environment between 50°F and 95°F (10°C and 35°C) and try charging again.
- If the Label Printer is used to print, feed, or perform another operation when both the battery is installed and the AC Adapter is connected, the charging may stop even if the battery is not fully charged. When the operation to the printer stops, the battery continue to charge.
Battery Unit Characteristics
To ensure the highest performance and longest life from the Battery Unit:
- Do not use or store the Battery Unit in a location exposed to extreme high or low temperatures as it may discharge more quickly. This may happen when using a Battery Unit with a high charge (90% charged or more) in a location exposed to high temperatures.
- Remove the Battery Unit when storing the Label Printer for a long period of time.
- Store a Battery Unit with a less than 50% charge in a cool dry place out of direct sunlight.
- Recharge the Battery Unit every six months if it is stored for a long period of time.
- If you touch a part of the Label Printer while the Battery Unit is charging, that part of the Label Printer may feel warm. This is normal, and the Label Printer may be used safely; however, if the Label Printer becomes extremely hot, discontinue use and allow to cool.
Installing the Coin Cell Battery
(QL-820NWB only)
A coin cell battery is used as a backup power supply to maintain the settings for the internal clock. The Label Printer has a preinstalled coin cell battery. Please note that battery power will be consumed even if the Label Printer is not in use.

- Make sure that the Label Printer is turned Off. Hold the Label Printer by the front, and firmly lift the DK Roll Compartment Cover to open it.
- Remove the insulation seal on the coin cell battery.
- Using a coin or similar object, slowly turn the coin cell battery cover in the direction of the arrow on the battery cover until it stops, and then remove the coin cell battery cover.
Do not turn the coin cell battery cover past the unlock position, or you may damage it.
![]()
- Replace the coin cell battery. Be sure to insert the new battery with the + and - sides facing the correct direction. Using a coin or similar object, slowly turn the coin cell battery cover in the opposite direction of the arrow on the battery cover until it locks into place.
![]()


- Remove the battery if you do not intend to use the Label Printer for an extended period of time.
- Dispose of the battery at an appropriate collection point, not in the general waste stream. Be sure to observe all applicable federal, state, and local regulations.
- When storing or discarding a battery, wrap it with cellophane tape to prevent it from short-circuiting.
![]()
- Cellophane tape
- Coin Cell Battery
- We recommend replacing the battery every two years.
- If the clock resets while you are powering the Label Printer using the AC Power Cord, it is time to replace the battery. We recommend using a battery from Hitachi, Maxell, or FDK.

Turning Power On/Off
On: Press the Power (![]() ) Button to turn the Label Printer On. The Status LED turns green.
) Button to turn the Label Printer On. The Status LED turns green.
Off: Press and hold the Power (![]() ) Button again to turn the Label Printer Off.
) Button again to turn the Label Printer Off.
When turning the Label Printer Off, do not remove the battery or disconnect the AC Adapter until the orange Status LED turns Off.
Setting LCD Language
(QL-820NWB only)
- Press the Menu Button.
- Press the
![]() or
or ![]() Button to select the [Administration] menu, and then press the OK Button.
Button to select the [Administration] menu, and then press the OK Button. - Select [
![]() Language], scroll to select your language, and then press the OK Button.
Language], scroll to select your language, and then press the OK Button.
 or
or  Button to select the [Administration] menu, and then press the OK Button.
  Language], scroll to select your language, and then press the OK Button.
 LED Indicators
The indicators light and flash to indicate the Label Printer status.
QL-810W
| Status LED | Condition |
| Not lit | Power Off. |
| Steady green light | Power On. |
| Feeding mode / Printing mode / Cutting mode / Cleaning mode | |
| Flashing green light | If the green light flashes at 0.5 second intervals, one of the following has occurred:
|
| Steady orange light | The DK Roll Compartment Cover is open. Close the DK Roll Compartment Cover correctly. Label resetting mode is on or the Cutter Button was pressed while resetting. |
| Flashing orange light |
|
| Steady red light | Boot mode |
| Flashing red light | If the red light flashes at 1 second intervals, one of the following errors has occurred:
|
| If the red light flashes rapidly*, there is a system error. | |
If the red light flashes at one second off, rapidly* on, rapidly* off, rapidly* on, one of the following errors has occurred:
|
* "Rapidly" means 0.3 second intervals.
Wi-Fi LED
| Wi-Fi LED | Condition |
| Not lit | WLAN Off |
| Flashing blue light | If the blue light is on for 1 second, off for 2 seconds, WLAN is on, but not connected. |
| Steady blue light | WLAN is on and connected. |
Battery LED
| Battery LED | Condition |
| Flashing orange light |
|
| Steady orange light | The battery is charging. |
| Not lit | The battery is fully charged. |
QL-820NWB
| Status LED | Condition |
| Not lit | Power Off |
| Steady green light | Power On |
| Feeding mode / Printing mode / Cutting mode / Cleaning mode | |
| Flashing green light | If the green light flashes at 0.5 second intervals, one of the following has occurred:
|
| Steady orange light | The DK Roll Compartment Cover is open. Close the DK Roll Compartment Cover correctly. |
| Flashing orange light | If the orange light flashes at 0.5 second intervals: Cooling mode |
| Steady red light | Boot mode |
| Flashing red light | If the red light flashes at 1 second intervals, one of the following errors has occurred:
|
| If the red light flashes rapidly*, there is a system error. | |
If the red light flashes at one second off, rapidly* on, rapidly* off, rapidly* on, one of the following errors has occurred:
|
* "Rapidly" means 0.3 second intervals.
Printing Using a Computer (P-touch Editor)
Installing the Software and Printer Drivers to a Computer
To print from your Windows® computer or Mac, install the printer drivers, P-touch Editor, and other applications to your computer.
For Windows®:
Printer Driver, P-touch Editor, P-touch Address Book, P-touch Update Software, Printer Setting Tool, BRAdmin Light and BRAdmin Professional
For Mac:
Printer Driver, P-touch Editor, P-touch Update Software, Printer Setting Tool and Wireless Device Setup Wizard
QL-810W only: When printing with P-touch Editor, press and hold the P-touch Editor Lite Button until the green Editor Lite LED turns off.
- Visit our website (install.brother) and download the Software Installer for the latest software and manuals.
- Double-click the downloaded EXE file (for Windows®) or DMG file (for Mac), and follow the onscreen instructions to proceed with the installation.
NOTE
To connect the Label Printer to a computer using a wireless connection, we recommend the following:- Configure the wireless network settings while installing the software. You can change the settings later using the Printer Setting Tool.
- Install the software on a computer wirelessly connected to your network and configure the Label Printer using a USB Cable.
- Make a note of the SSID (network name) and password (network key) of the wireless network in advance. If you cannot find this information, ask your network administrator or wireless access point/router manufacturer.
- If your wireless access point/router supports WPS, you can use WPS (Wi-Fi Protected Setup) to quickly configure the wireless network settings.
- Close the dialog box when the installation is complete.
Connecting the Label Printer to a Computer
You can connect the Label Printer to a Windows® computer or Mac using a USB Cable, wireless LAN, or wired LAN.
Connecting Using USB
- Before connecting the USB Cable, make sure that the Label Printer is turned Off.
- Connect the USB Cable to the USB Port on the back of the Label Printer.
- Connect the USB Cable to the USB Port on the computer.
- Turn the Label Printer On.
Connecting Using Wi-Fi
QL-810W only
- Turn the Label Printer On.
- Press and hold the Wi-Fi (
![]() ) Button on your Label Printer for one second to turn the Wi-Fi function On. The Wi-Fi (
) Button on your Label Printer for one second to turn the Wi-Fi function On. The Wi-Fi (![]() ) LED starts flashing blue once every three seconds.
) LED starts flashing blue once every three seconds.
 ) Button on your Label Printer for one second to turn the Wi-Fi function On. The Wi-Fi (
QL-820NWB only
In order for the Label Printer and your network access point or router to communicate, you must first install the printer drivers and Printer Setting Tool.
- Press the Menu Button.
- Press the
![]() or
or ![]() Button to select the [WLAN] menu.
Button to select the [WLAN] menu. - Press the OK Button.
- Press the
![]() or
or ![]() Button to set [WLAN (On/Off)] to [On]. Wi-Fi communication is now available.
Button to set [WLAN (On/Off)] to [On]. Wi-Fi communication is now available.
 or
or  Button to select the [WLAN] menu.
Bluetooth Connection
(QL-820NWB only)
In order for the Label Printer and your Bluetooth-equipped computer or adapter to communicate, you must first pair the Label Printer with the computer or mobile device using the Bluetooth management software using your computer or mobile device.
- Press the Menu Button.
- Press the
![]() or
or ![]() Button to select the [Bluetooth] menu.
Button to select the [Bluetooth] menu. - Press the OK Button.
- Press the
![]() or
or ![]() Button to select [Bluetooth(On/Off)], then press OK Button. Press the
Button to select [Bluetooth(On/Off)], then press OK Button. Press the ![]() or
or ![]() Button to select [On], then press OK Button.
Button to select [On], then press OK Button. - Use your Bluetooth management software to discover the Label Printer. Bluetooth communication is now available.
Connecting Using a Wired LAN
(QL-820NWB only)
NOTE
To use a static IP address to connect your Label Printer to a wired LAN connection, install the printer drivers and Printer Setting Tool, and then specify the wired LAN connection settings.
For more information, see Installing the Software and Printer Drivers to a Computer section in this guide.
- Turn off the Label Printer before connecting the LAN cable.
- Connect the LAN cable to the LAN Port on the back of the Label Printer.
- Connect the LAN cable to an active LAN Port on the network.
- Turn the Label Printer On.
NOTE
The Label Printer's communication settings can be changed under [Communication Settings] in the Printer Setting Tool.
Printing Using a Computer (P-touch Editor Lite for QL-810W only)
- Turn the Label Printer On, then press and hold the P-touch Editor Lite Button until the green P-touch Editor Lite LED turns on.

NOTE
QL-810W only: P-touch Editor Lite is set as the default mode. - Connect the USB Cable to your computer.
![]()
NOTE- Unplug the USB Cable and confirm if the Label Printer is power on.
- If you are connecting the Label Printer using a USB Cable, it may not be detected correctly. If this happens, unplug the USB Cable, make sure the Label Printer is On, and then reconnect the USB Cable.
- After the USB Cable is connected, a dialog box appears on your computer monitor.
(The following screens may differ depending on your operating system, but the operating procedures are the same.)
![]()
NOTE- If you do not see the dialog box, it may be hidden behind an open software program window. Minimize all windows to view the dialog box.
- It will take longer than usual to start P-touch Editor Lite when connecting the Label Printer to your computer for the first time. If the software does not start automatically when you connect the Label Printer, you may launch it from My Computer. Start P-touch Editor Lite by double-clicking PTLITE10.EXE.


When using Windows Vista®
When connecting the device for the first time, perform the scan and then select the Always do this for software and games check box on the dialog box displayed when the scan completes. P-touch Editor Lite will start automatically the next time you connect the QL-810W.
- P-touch Editor Lite launches.
![]()
![]()
Do not turn off or disconnect the Label Printer while using P-touch Editor Lite.
When using Macintosh
P-touch Editor Lite is not available for Macintosh. The [QL-810W] icon is displayed when the Label Printer is connected to a Mac in the P-touch Editor Lite mode. Open [QL-810W] from the desktop, and then execute [Start Here Mac]. If P-touch Editor 5.1 and the Label Printer drivers are not installed, a message advising to install is displayed. Install them, and use P-touch Editor 5.1.

Printing Using a Mobile Device
Installing Applications for Use with Mobile Devices
Brother offers various applications for use with your Label Printer, including applications that allow you to print directly from your Apple iPhone, iPad, and iPod touch or Android™ smartphone or tablet, and applications that allow you to transfer data wirelessly, such as templates, symbols, and databases created using a computer, to your Label Printer. The following free Brother applications can be downloaded from the App Store or Google Play™:
- Brother iPrint&Label
- Mobile Transfer Express
Connecting the Label Printer to a Mobile Device
For QL-810W
Press and hold the Wi-Fi (![]() ) Button on the Label Printer for one second to turn the Wi-Fi function On. The Wi-Fi (
) Button on the Label Printer for one second to turn the Wi-Fi function On. The Wi-Fi (![]() ) LED starts flashing blue once every three seconds.
) LED starts flashing blue once every three seconds.
For QL-820NWB
Press the Menu and  Buttons to select the [WLAN] menu, and then press the OK Button.
Set [WLAN (On/Off)] to [On] to turn the Wi-Fi function On.
The Wi-Fi (![]() ) icon appears on the LCD.
) icon appears on the LCD.
Connecting using Wireless Direct
In the Wi-Fi settings screen of your mobile device, select the SSID of the Label Printer and enter the password.
Connecting using Infrastructure Mode
For iOS
- On your mobile device, tap [Settings].
- Tap [Wi-Fi].
- Select your Label Printer's SSID, and then enter your password.
- Launch the Brother iPrint&Label app.
- Tap [
![]() ] (Settings).
] (Settings). - Tap "Printer".
- Tap your Label Printer. If your label printer is not available in the SSID list, tap "Set Manually" to enter the printer's IP address and connect manually.
- Tap [Wi-Fi Network Setup].
- Tap your access point/router's SSID from the list, and then enter your password when prompted.
- Tap [Connect].
For Android
- Launch the Brother iPrint&Label app.
- On your mobile device, tap [
![]() ] (Settings).
] (Settings). - Tap "Printer".
- Tap your Label Printer. If your label printer is not available in the SSID list, tap "Set Manually" to enter the printer's IP address and connect manually.
- Tap [Wi-Fi Network Setup].
- Tap your access point/router's SSID from the list, and then enter your password when prompted.
- Tap [Connect].
NOTE
- The factory default SSID and password are as follows:
SSID: "DIRECT-*****_QL-810W" or "DIRECT-*****_QL-820NWB" where ***** is the last five digits of the product serial number.
(You can find the product serial number label in the DK Roll Compartment of the Label Printer.)
Password: "810*****" for QL-810W /"820*****" for QL-820NWB. ***** is the last five digits of the product serial number. - (QL-810W only) When your mobile device does not detect your printer, press the Power Button to turn off the Label Printer and then press and hold the Power Button and the WPS Button simultaneously until the Wi-Fi LED flashes.
- (QL-820NWB only) When your mobile device does not detect the Label Printer, confirm [WLAN(On/Off)] is [On] and [Network Mode] is [Direct Mode].
Printing from a Mobile Device
- Start the mobile printing application on your mobile device.
NOTE
Make sure that the Label Printer is connected to your mobile device.
See Connecting the Label Printer to a Mobile Device section in this guide. - Select a label template or design.
NOTE
You can also select a previously designed label or image and print it. - Tap [Print] in the application menu.
Main Specifications
Product specifications
| Items | Specifications |
| Printing method | Direct thermal printing via thermal head |
| Interface | USB / Wireless LAN (QL-810W/820NWB) / Wired LAN (QL-820NWB only) / Bluetooth (QL-820NWB only) |
| Size (W×H×D) | Approx. 4.9 in. (125.3 mm) x 5.7 in. (145 mm) x 9.2 in. (234 mm) |
| Weight | QL-810W: Approx.2.4lb (1.12 kg) (without DK Rolls) QL-820NWB: Approx. 2.6lb (1.16 kg) (without DK Rolls) |
Operating environment
| Items | Specifications |
| Operating temperature | 50°F to 95°F (10°C to 35°C) |
| Operating humidity | 20% to 80% (Maximum wet-bulb temperature 80.6°F (27°C)) |
Troubleshooting
| Problem | Solution |
| The Status LED is not lit. |
|
| The Label Printer does not print, or a printing error is received. |
|
| A data transmission error appears on the computer. |
|
| Labels are jammed in the cutter. |
|
| The label is not ejected correctly after printing. |
|
| Cutter error |
|
| After exiting P-touch Editor Lite, how do I restart the program while the Label Printer is still on? | There are three ways to restart:
|
 ) Button. The cutter moves back to the normal position and the Label Printer turns off automatically. After the Label Printer is Off, check the Label Output Slot and remove any jammed labels.
Software Development Kit
A Software Development Kit (SDK) is available for download from the Brother Developer Program Website (developerprogram.brother-usa.com) to download iOS, Android and Windows b-PAC SDK.
(The SDKs available are subject to change without notice.)
Documents / Resources
References
Download manual
Here you can download full pdf version of manual, it may contain additional safety instructions, warranty information, FCC rules, etc.
Advertisement


Need help?
Do you have a question about the QL-810W and is the answer not in the manual?
Questions and answers