Nubert nuGo! ONE - Bluetooth Speaker Manual
- Instructions for use manual (9 pages) ,
- Quick start manual (4 pages) ,
- Manual (13 pages)
Advertisement
Introduction
Technical changes reserved. You will find the newest instructions for use and more information about this product here:
https://www.nubert.net/...
Many thanks for your confidence in our product. To obtain fast information briefly, please read the quick start guide first.
The following instruction guide elucidates all functions, operating and connections explicitly, so that you could enjoy your new loudspeaker in its entirety.
Coldness, Sound and Dependability
When loudspeakers and other electric devices are brought from a cold into a warm room, it is possible that there will arise water condensation inside. In consequence of that, there exists danger of any defects or an electric shock. Furthermore, deep temperatures will have an impact on the flexibility of movable parts inside of the loudspeaker.
Therefore, wait at least 4 hours before turning on the device until it has taken room temperature. Your new Nubert loudspeaker will thank you with the superior sound quality you're expecting from Nubert rightly.
Preferred Position
There are passive membranes on both sides, on the front and on the back side. They undergird especially the bass tone significantly. For smoothly operation and preventing flow noises, we recommend a space to the next wall of approximately 5 centimetres (2 inches) at minimum. Well-spaced distance to walls or other obstacles makes sure that the sound will not be superelevated or muffled.
Accordingly, the best sound impression will be achieved central. Nevertheless, the nuGo! ONE has a very homogeny sound in a horizontally radiation angle up to 40 degrees.
Antenna
On the back side, the nuGo! ONE is equipped with a telescopic antenna. In many situations it will be sufficient to extend the antenna a bit like shown in the picture. Best radio reception will be achieved with full extended antenna and a vertically alignment.
Connections
To protect the connections on the back side from water and dust, keep the plastic cover always closed. Unloose the cover for connecting other devices or the charger.
 Notice:
- The plastic cover is clamped at the body with a safety bracket. Do not pull the cover strongly. Otherwise, it could be damaged.
- To ensure splash water protection of the device, the plastic cover must be closed tightly.

General operating instructions
Turning on and off
By pressing the  button the loudspeaker can be activated or turned off. Press this button for 1 second as minimum for turning off the nuGo! ONE.
Forced Shutdown
If the device will not react to any inputs, you could force a manual shutdown by pressing the button for more than 20 seconds.
Notice:
- The forced shutdown works in battery mode only. It will not work when the nuGo! ONE is connected to the main voltage by the power supply unit.
Volume
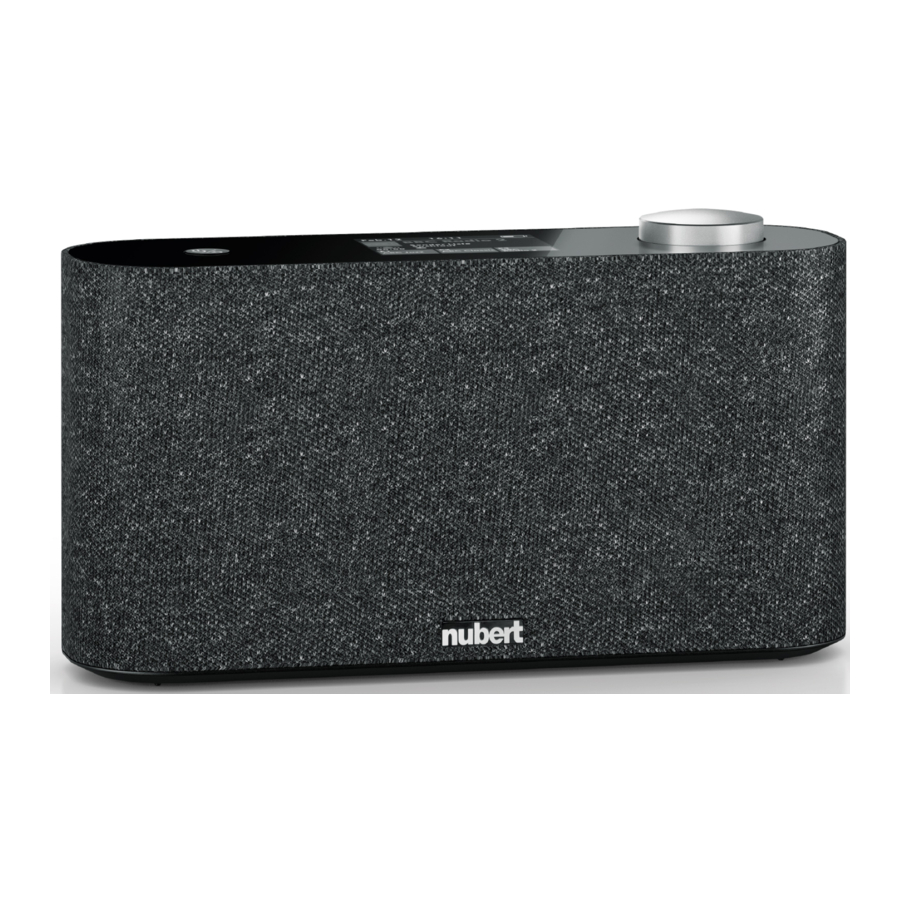
When the operating display works permanently, the loudness can be set by the rotary control knob.
Menu Navigation
Press and hold the rotary control for 3 seconds to switch into menu while the operating display works permanently. Navigate by rotating the knob. Press the knob to select a menu point. By pressing the button you came back to previous settings.

Analog Input (AUX)
By selecting Analog Input in the main menu, the nuGo! ONE will play the Audio signal coming from the 3,5 mm phono jack on the back side.
Bluetooth Input
Select bluetooth in the main menu to activate Bluetooth input. When pairing with another device firstly, the nuGo! ONE is looking for a suitable device automatically.
For pairing another device, press the rotary control knob two times successionally. The nuGo! ONE will uncouple the first connection and searches for new devices then.
Tip: For best sound quality, we recommend adjusting the source device at maximum volume and regulate the loudness with the nuGo! ONE directly.
DAB+ Digital Radio
When selecting DAB in the main menu, the nuGo! ONE will play the received radio signal in DAB+ operation.
Station scanning
By first commissioning of the nuGo! ONE, there must be started a station scanning.
For this purpose, press the rotary control shortly to start main menu. Choose the entry full scan and confirm with yes. The nuGo! ONE will compile a list of all available radio stations now and plays the first sender.
Choosing sender
To select a sender, press the rotary control once shortly. The station name is marked in orange.
- You could navigate to the sender list to show the sender list and choose a radio station. Confirm your choice by pressing the rotary control.
- Alternatively, there can be chosen another radio station by pressing the rotary control directly. The station name is marked in quotation marks: <BBC Radio 2>.
Saving favourites
To save radio stations in the favourite list, press the rotary control once shortly and navigate to the sender list. Rotate the knob to mark your desired radio station in orange and press the rotary control for 3 seconds. The radio station will be saved in the favourites. If there are all six memory locations in use, you could choose which memory location you want to overwrite.
Select favourites
Press the rotary control twice shortly to show the radio station favourite list.
Please note: The DAB+ receiver searches for new details permanently during operating, for e.g., the song title. If there won't be found some detailed sender information at the start of the DAB+ receiver, it could happen that the favourite list lost the affected radio station. Possibly the nuGo! ONE reacts sluggishly then. To afford this problem, we recommend starting a new station scan when the nuGo! ONE will be placed at a new location.
10 UKW / FM Radio
When selecting FM in the main menu, the nuGo! ONE will play the received radio signal in UKW / FM operation.
Setting frequency
Press the rotary control once shortly to start the edit mode. The frequency is marked orange now.
- By rotating the rotary control slowly, you could pre-set a frequency.
- When rotating the rotary control fast, the nuGo! ONE is searching for a radio station automatically and plays the next sender there will be found.
Saving favourites
Press the rotary control once shortly to activate the edit mode. Now the frequency is marked in orange. Press the rotary control knob for 3 seconds now to save the radio station in the favourite list memory spaces P1 to P6. If there are all six memory locations in use, you could choose which memory location you want to overwrite.
Recall favourites
Press the rotary control twice shortly seconds to switch into menu while the operating display works permanently. The display switches into the favourite list. Press the rotary knob to confirm the radio sender you want to play.
Settings
Choose the option setup in the main menu to start the setting menu.
There are the following submenu points:
- Date / Time
- Alarm clock
- Options for playing
- System options
- Info
Date / Time
Here you can set the date and time.
- Choose the option Auto to set date and time automatically with the radio signal. In FM/UKW mode, for this is a RDS radio signal necessary.
- Choose the option Manual to set date and time manually.
By pressing the rotary control, you can skip to the next value. By turning the rotary control, you can change this value.
Alarm clock
The configuration of the alarm clock works as follows:
By pressing the rotary control, you can skip to the next value. By turning the rotary control, you can change this value.
- Alarm clock is activated: alarm clock symbol is orange; alarm clock is inactive: alarm clock symbol is grey.
- Wake-up time (hours: minutes)
- As source for the wake-up signal, there can be chosen between radio signal (DAB+, FM/UKW) or a buzzer signal. There will be played the radio station you have been listened to recently.
- With Alarm Vol. there can be set the volume of the wake-up tone.
- Snooze alarm: When buzzer is selected as source for the wake-up tone, you can activate a snooze alarm. When snooze alarm is activated, the wake-up tone will be repeated 10 minutes after first deactivation.
Sound
In this section you can set the following defaults:
Mid-Hi
Allows raising or lowering the middle/treble range up to 4 dB.
Bass
Allows raising or lowering the bass range up to 4 dB.
Sound output local
Activates or deactivates sound output over the built-in speakers.
Spdif output over optical
Activates or deactivates signal output over the 3,5 mm phono jack at the back side of the device.
Please note: This device has a built-in loudness function. This allows to strengthen the bass tones at a low volume level to obtain a full-featured sound.
Advanced
In this section you can set the following defaults:
Display
Allows setting of the operating display which is shown permanently.
Normal
Display will be always on.
auto dim
Brightness of the display illumination will be reduced after 20 seconds. auto off
Brightness of the display illumination will be reduced after 20 seconds, and the display will be turned off after one minute.
clock
After 20 seconds, the time will be shown in the display.
Auto Sleep
The device will be switched off automatically after the time adjusted.
Language
Menu language can be set between English and German.
Factory default
Allows resetting the device to factory defaults. All settings and preferences plus the connected Bluetooth devices will be deleted. Just to be on the safe side this action must be confirmed twice.
Info
In the menu item Info, there will be shown some additional information about the manufacturer, the Bluetooth chip, and the installed firmware version.
Construction and technology
Splash water protection
The nuGo! ONE is certificated by the standard IPX5. This means, this device is protected by splash- and hose water, but not waterproof for diving under.
Notice:
- To ensure splash water protection by IPX5, the plastic cover for the connection plugs on the backside must be closed tightly.
Optical output
By using the 3,5 mm male phono jack there can be given out the source via optical S/PDIF signal.
Sound adjustments
In the submenu sound it is possible to adjust the range of treble, middle and bass tone depending on your personal preference. If radio reception may be low, we recommend strengthening the bass range up to 2 dB for a better music feeling. You could experiment gladly with those sound options to find your best audio experience.
Battery
To maximize the lifetime of the included battery, deep discharging should be avoided. Recharge the battery immediately when there is shown a low battery charge level in the display. If you would like to keep the nuGo! ONE in store for a longer time, we recommend charging the battery first.
Charging
The USB-C socket on the backside works as charging port. The charging socket can be provided with voltages of 5 V, 9 V or 12 V. The built-in charging electronic automatically accommodates the charging mode. We recommend using the included power supply unit.
Automatic switch off
This device has an automatically switch off to save battery energy. In Bluetooth mode, the nuGo! ONE will turn off after 60 minutes without signal by an external audio device.
In Radio mode, the automatic switch-off time can be set manually:
Navigate in the main menu to
- Setup
- Advanced
- Auto sleep
Documents / ResourcesDownload manual
Here you can download full pdf version of manual, it may contain additional safety instructions, warranty information, FCC rules, etc.
Advertisement


Need help?
Do you have a question about the nuGo! ONE and is the answer not in the manual?
Questions and answers